October 30, 2013

Flat Tanner Goes to Disney


Hello Sassy followers!!  Lori here from ScrappinMyStressAway with a layout from our recent trip to Disney.

Tanner's second grade class read the book Flat Stanley.  They each colored a Flat Me and sent them off on an adventure.  We took Flat Tanner to Disney with us!


I used this sketch from Let's Scrap to create my layout.

I used red, black and yellow cardstock with a piece of Mickey paper from my Disney stash.


I wrote on a tag about the adventures in the photos.  Flat Tanner rode the bus, ate breakfast with Lilo and Stitch, rode some rides and hid in the Mickey display.


For those of you Disney lovers like me, you know all about Hidden Mickeys.  Flat Tanner wanted to be a Hidden Flat Tanner :)

I added a bit of twine and some Mickey buttons I have had for a few years.


The washi tape anchored this button.


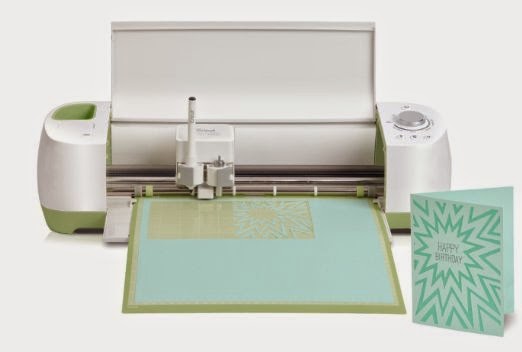
I used my Cameo to cut my title.

I had a lot of fun with Flat Tanner in Disney - probably more fun than Non-Flat Tanner did!!

Thanks for having me over today Sheila!!!

October 29, 2013

Clementine Cards

The New Pattern
Howdy - Adrienne, guest designer from Eagle Canyon Arts and tickled pink to be here today.  Thanks so much to Sheila for inviting me to participate!  It is so much fun to be on the Sassy Lady design team.

My last post, Darlin' Birthday Card, detailed one card from the Close To My Heart Clementine Workshop on the Go cardmaking project.  Here are two more cards from that project.  For the list of supplies needed, see the link to the post above.  

For "The New Pattern" Card
 

Sponge all edges of card and pieces with saddle ink, stamp across middle with Creme Brulee ink.
 

Cut burlap ribbon as pictured.
 

Cut "Forever Friends" zip strip to fit card, sponging edges with Saddle ink.
 

Since the inside of this card is dark, I added a light piece for a personal note or stamped sentiment. 

The next card is "Gallery".
 

Sponge all edges of card and pieces with saddle ink.
 

Stamp and cut out the medium flower.
 

Remember the recent post about steam ironing a piece of paper?  The finished product is below, to be incorporated in this card.
 

For an added bit of texture, I ran the largest piece through my Big Kick using the "Dots" folder. 
 

Stamp sentiment with Sorbet ink on small piece.
 

In order to fit the sentiment on the piece on TWO levels,
 

use a piece of paper or post-it to "mask" half of the stamp when applying it to the piece.
 

Finished piece:
 

Here are all the pieces, ready to be assembled, including the large flower stamp.
 

The finished card, with some "bling", was perfect for our nephew on his birthday.
 

Thanks for joining me on this project.  If you have any questions, drop me a note.  Many blessings, Adrienne

October 28, 2013

Christmas Cards And Mail Call Contest With Great Prizes


Don't you just love this beautiful Christmas Card? I am so excited as I used my new Anna Griffin Winter Wonderland Cartridge and it was so much fun. I didn't use the traditional colors that were in it's little instruction book instead I used the colors from my Close To My Heart Sparkle And Shine Paper Package, and it really made it look so pretty with the non traditional colors.


I used the Cricut Craft Room (CCR) to get all the layers down and this offered 9 ornaments per page color. 4 Pages cut and a little Crafters Companion Repositionable Adhesive spray and I was good to go in just a few minutes.


Now wasn't that easy? And don't you love that you have a chance to win one of two beautiful prizes just by mailing me a Christmas Card? Details below.


The inside of my card boasts a stamp that I used from the Frosted Workshop On The Go Card Kit and I just love it. Don't you love how the Ruby ink pad is the perfect match too? Easy Peasy with Close To My Heart Products.


I am so excited as with 2 paper packages I have made 20 cards and have enough to make another 20 cards and still have scraps! I don't know about you but that make good money sense to me! And look how beautiful they turned out!


I Challenge You to ENTER this contest and have the opportunity to win one of these great prizes! You could win the Seasons Tweetings Gift bag Kit or a set of 3 Collector Stamps that were only available in the month of September! Don't you just love Close To My Heart Stamps? Well all you have to do is mail me a Christmas Card!!! Mail it by November 15th and the winners will be announced Saturday morning November 30th. Just mail your entry to:
Sheila McShea - Mail Call
3005 Stonecreek Trace
Helena, AL 35080
Make sure your name and address is on the envelope. I will make a video showing off all the beautiful cards so be sure to also include your blog address so I can direct people to your blog! So hurry up and get those entries in. Enter as many cards as you want. There will be 2 winners.

Thank you for spending your time with me today. I hope you enjoyed today's post and will enter our little contest. Thank you for your sweet sweet words of encouragement. Your comment inspire me to continue sharing with you. Have a blessed week.

October 24, 2013

Thank You Lisa!


I want to say Thank You - Thank You to Lisa of Lisa's Craft Room for these wonderful notecards. Lisa watched a video I made a while back and made these just for me..... well it was at the time my Dad was so ill that I forgot to say thank you and really want to share how beautiful these cards are. Please watch the short video below for a better view.


Thank you again Lisa, this puts a smile on my face every time I look at them!

Some Of My Favorite Things


Hello! Leah from Paper Blossoms here to share today. I thought it would be fun to share some of my very favorite products that I use nearly every time I create something. I am in no way affiliated with any of these companies, I am just a happy customer :)
A paper trimmer that cuts straight and clean every time is high on any crafter's list and I was no exception. I've had a few trimmers through the years but they always started giving crooked, messy cuts. So after a lot of research I decided to buy the newest version of the Cutterpillar Pro V.3 I LOVE it. It has a self sharpening blade which the company guarantees for life, is a full 12x12 cutting surface, has a drawer that opens and latches shut that can hold 12x12 paper and has an LED light strip that is fabulous for lighting up most all of the paper you will cut. (Darker colored paper the light won't shine through) I have been thoroughly impressed with this trimmer and I love that it has no paper guard. The paper is pushed up against the ruler at the top, which is very easy to read and see, and the gear driven blade is gently held in toward the cutter as you slide it down the rail and there is no movement of the paper so you get a nice clean, straight cut. Within just a dozen initial cuts my blade got even sharper and has no problem cutting through very thin pattern paper to heavy cardstock. The price tag is a bit higher but with no blades to buy and a quality design I doubt I'll ever have to purchase a new trimmer again!

My most favorite liquid adhesive is the Scotch Quick Dry. I love how little you need to use to adhere anything from buttons to sequins and twine and it dries clear. It adheres paper to paper very well too, and if you are sparing in how much you apply once it's dry there aren't any wrinkles. I've never had anything fall apart using this adhesive and I also love that it is USA made.
 I love these reverse hold tweezers from Tweezer Bee. They are set at a great angle that makes picking up small items easy and they are nice and sharp too which comes in handy for holding small items in place. One of my favorite things to use these for is placing sequins. They work so well!
I use to have a small corner rounder that worked okay but would not go through thicker cardstock. So I finally got the Corner Chomper. I love it! It goes through super thick cardstock and I really love that it has a paper catch for all those little corners you bite off. SO much less mess on my floor now!
Finally I wanted to share what basic sewing machine I have. It's called the Janome Baby Lock and it's a wonderful, very basic machine. When I purchased it I asked very specifically if it would be okay to use with sewing on paper and they said yes, no problem. It of course also sews fabric beautifully and the inside of the bobin case is metal which is what I was looking for as I wore out my Janome Sew Mini due to the case being plastic. A groove got worn into it and it would no longer sew. This machine has several stitches to choose from and some are very pretty! I have used it quite a lot on both paper and fabric and love the ease of threading it and the light it has.

I hope you enjoyed my brief product review! Maybe you've been looking for one of these and if you use or decide to purchase one let me know how you like it! Have a blessed day :)

October 23, 2013

Flip-It Halloween

Hey everyone!
Candy here from Candy's Craft Corner! It's my turn to share today at the She's a Sassy Lady blog. Thanks for having me again today Sheila!
I just purchased this really cool framelit flip-it die set from the Stamps of Life. Such a super easy way to make a quick card.
I used stamps sets by The Stamps of Life and My Creative Time


Cut out the main card first. 

Then on to the layers. 


Centre pieces. 
Then start putting it together. 


Hope you enjoyed my super simple card today!
Thanks so much for stopping by,
Candy

October 21, 2013

FUN WIPER CARD FOR HALLOWEEN


Hi, everyone, this is Charlotte C.   Thank you, Sheila, for inviting me here again.  When I saw the wiper card done a while back I knew I wanted to make some Halloween cards for my grandchildren with it, and I did.  For purposes here, I’ll use the colors black and white, but, obviously, you can make whatever base and pop-up colors you want. 
SUPPLIES:
Two pieces of black card stock cut at 4 ¼ x 6 ¾ (for the base)
One piece of white card stock cut at  2 ¼ x 3  (this is your pop-up)
Designer paper for front cut at 4 x 4 ¾
Designer paper for side pull cut at 4 x ¾
Red Line Tacky Tape 


Score one end of each piece of black card stock at 5 and 5 ¾.  Fold the 5 inch valley and 5 ¾ mountain. 
 
On the white card stock, mark ½ inch on two sides of one corner, score and fold to create a flap.

At the 5 ¾” score line on only one piece of the black card stock, make a mark 1 ½ inches down from the top.
Add Tacky Tape to the edge of each piece of black card stock only where you scored, but don’t remove the protective liner yet.  (Can you see the tape along the edge?  I hope so.)
Add a small piece of Tacky Tape just to the flap you have created on the white card stock, line up the white card stock along that score line from the 1 ½” mark and adhere the flap.  The white card stock should be extending straight up and over the top of the black card stock.


Now remove the liner from one piece of black card stock line up the other piece (without the tape) and adhere.  Do the same on the opposite edge.  When it’s all stuck down and closed it will look like this:


 And like this when you pull it open:

Here’s two of the cards I made.  I colored the stamped images with Distress Markers; added Wink of Stella, Stickles and Glossy Accents.  Lots of Glossy Accents on the big pumpkin! Unfortunately, you really can't see all that in the photos.  I attached a panel on the back of the card with a Halloween greeting and our signatures

Thank you for stopping by, and have a great week – oh, and Happy Halloween!!