November 26, 2014

Enamel Dots - Kind Of

Hey everyone!
Hope you are all having a fabulous day!
It`s Candy here from Candy`s Craft Corner. It`s my turn to share today here at the She`s a Sassy Lady blog. Thanks so much Sheila for having me.
Just wanted to share my version of enamel dots today. I have seen enamel dots everywhere lately and they are so expensive. I`m sure you have all seen them as well. 
Since I have moved I don`t live near a Michaels anymore so I couldn`t purchase any of those mylar beads. So I was looking at videos on youtube and saw that someone just used there viva decor pens to make some. I had a lot of viva decor pens so I gave it a shot myself. They turned out pretty good. You just need to adhere the to your project with a little glue or glue dots.


Just a little word of warning. I put them in this container together and when I went back to them a few days later they were sticking together. So I would recommend putting each color in a seperate little container. Maybe those little bead boxes or such.
 Thanks so much for stopping by today!
Take care,
Candy

November 25, 2014

Just A Few Little Cards


Just thought I would share a few cards and a 30 second video.  Hope you are having a great day!


November 21, 2014

Christmas Wreath


Hi Everyone,

Lisa from Lisa's Craft Room here for another month, thank you Sheila :) I saw Angie at Chic n' Scratch make these adorable wreaths and thought that I would make one for my mom for Christmas. It's not the traditional Christmas colors but I wanted something different. So here it is. I think now everyone incorporates different colors for Christmas anyway :) As a matter of fact the patterned papers I used are from a stack called Valentine from Recollections. So, it would make the perfect Valentine wreath too.

You start off with a 10" wreath form, I got mine at Joann's, it's white. The strips are 12" x 1 1/2". I used 21 strips. I used my ATG gun as the adhesive and wrapped each one around the form, securing them together. Once I was done with that, I tied a ribbon to hang it. I cut notches out with scissors, I started off using my square punch, but it's a 1" so it was a tad small, but the scissors worked fine. I used blue cardstock from a pack called The Christmas cardstock matstack from DCWV and punched 3 scallops out with a 2 3/8" punch, and the same cardstock in white for the circles, punch size 1 3/4". The punches are from Stampin' Up. I stamped them with the letters JOY in Pink Passion, the letters and ink are also from Stampin' Up.

So there you have it, a cute fun wreath to hang up for the holiday season. I love this wreath, because you can make it easy and for any holiday.

Thank you for stopping by, your comments are very much appreciated. Thank you again Sheila for having me for another month.

November 20, 2014

Easy Little Sympathy Card


Good morning, this is a little sympathy card that I put together. I used my Explore for the base and for the crane. I did a print and cut with the crane as I didn't want to work with all the little pieces and was in a hurry to use the card. I had With Sympathy on the front and took it off because the letters didn't show up like I liked. So as you can see this was really a simple card.


I stamped the inside of the card with my Close To My Heart stamps, and it looked great.
I hope you enjoyed today's little post. Thank you for your sweet-sweet encouragement. Your comment continue to inspire me.

November 18, 2014

From Trash to Treasure!

Hello everyone.  It's Karon here from Karon's Krafty Korner for my monthly visit here at She's A Sassy Lady.  Thank you so much for letting me come visit and share with you, Sheila.

Today I have something a little different to share with you all. Grab a coffee and stay awhile.

Have you ever wondered what to do with those books you no longer want.


Well, I recently found this great tutorial on You tube to change a book into a holiday tree.

I just couldn't resist doing this and found the folding quite relaxing.  You need to have a book that has 150 pages or more.  Start off folding the pages.  Here's the first few folded.


The first 50 folded :-)


You keep going to at least 150, don't think you will get much more than that but you can try.  Just remove any excess pages and your done.


I then sprayed it with some Tim Holtz Bundled Sage Distress Ink.  Also some Perfect Pearls mist, Heirloom Gold and then I had to add some really fine Glitter glue, to give it a little more sparkle.


Next up, some luxury ribbon, and a lovely star.  The star was from Michaels, there were three and they are called Merry Mini's.  They are meant to be hanging ornaments but I cut off the small link and was able to use it for the top of my tree :-)


Then came the fun part, finishing it off.  I wanted to make it into a table decoration.  I took the lid from a 9" round Christmas gift box and used it as the stand.  I placed the tree on a little lid (just to raise it up a bit) from another small box.  


The tiny little gift boxes, were cut using my Silhouette Cameo and the box from Birds Cards, I sized them in Silhouette Design Studio, so that my finished boxes were 1.5" square, 0.75" square and even as small as 0.5" square. Then added some ribbon to make them look really Christmassy.


Father Christmas was just a little find at the Dollar Store, he is the perfect size for my little centre piece.


I so enjoyed making this and can see me making more, I might even make some for gifts.


And there you have it, from "trashy" novel to a Christmas treasure.  What do you think?


I think I will have to make another one, because I would like to see if I could add some miniature Christmas lights to one :-)

Thanks again.

Happy crafting.

November 17, 2014

Artbooking Paper Piecing in Design Space


Hi, it’s Charlotte C visiting with you today.  Thank you, Sheila, for an opportunity to present a quick post.

The idea of paper piecing is not new, nor is paper piercing my original idea, however, this image from the CTMH Artbooking cartridge was perfect to create an anniversary card for my younger son and his wife.  I started out in Design Space and sized the image on Page 72 (overlay) to 5 inches.  I then duplicated that and, using the contour feature, I deleted the outer frame and inner frame of that duplicate, which left me just the tree.  I then duplicated that tree image four more times.  I used one mat to cut all six pieces in different colors by using the attach feature in DS and placing my card stock accordingly.
I neglected to take a photo of the mat, but here’s a photo of my screen with different colored trees for reference.

I created a 5 x 5 ivory liner for behind the base front, stamped “Happy Anniversary” (a generic stamp I've had for ages) and used my computer to generate the text before adhering it.  I then began filling in the blanks with the different colors of leaves and the brown trunk.  This was quick to do.  I used a paper piercing tool to etch some veins in the leaves and covered all the leaves and the trunk with Wink of Stella clear.  The photo does not really show the detail of the veins.

I adhered all that to a narrow brown layer which I edged with clear Wink of Stella too, and put the whole thing together on ivory CS as an Easel Card.  I used the negative space of the trees to stencil some leaves on the bottom panel.  The metal embellishment is from Stampin Up (I’ve had it for ages too) and the "Love" stamp is from CTMH.

Hope you like it.   If you’re interested in the Artbooking cartridge, or other CTMH products, please visit my site at www.CharlotteC.ctmh.com.  Design team members, email me for your special savings on products.

 I want to wish everyone a very Happy and Blessed Thanksgiving. 

November 15, 2014

Using Scraps Can Make Great Cards


 Isn't this beautiful? I had 4 sheets of green paper left over from a project so I cut them into A2 size cards. I had 1 sheet of 12x12 paper with this pattern on it from My Minds Eye and fussy cut the little patterns to produce the front of these 8 thank you cards.


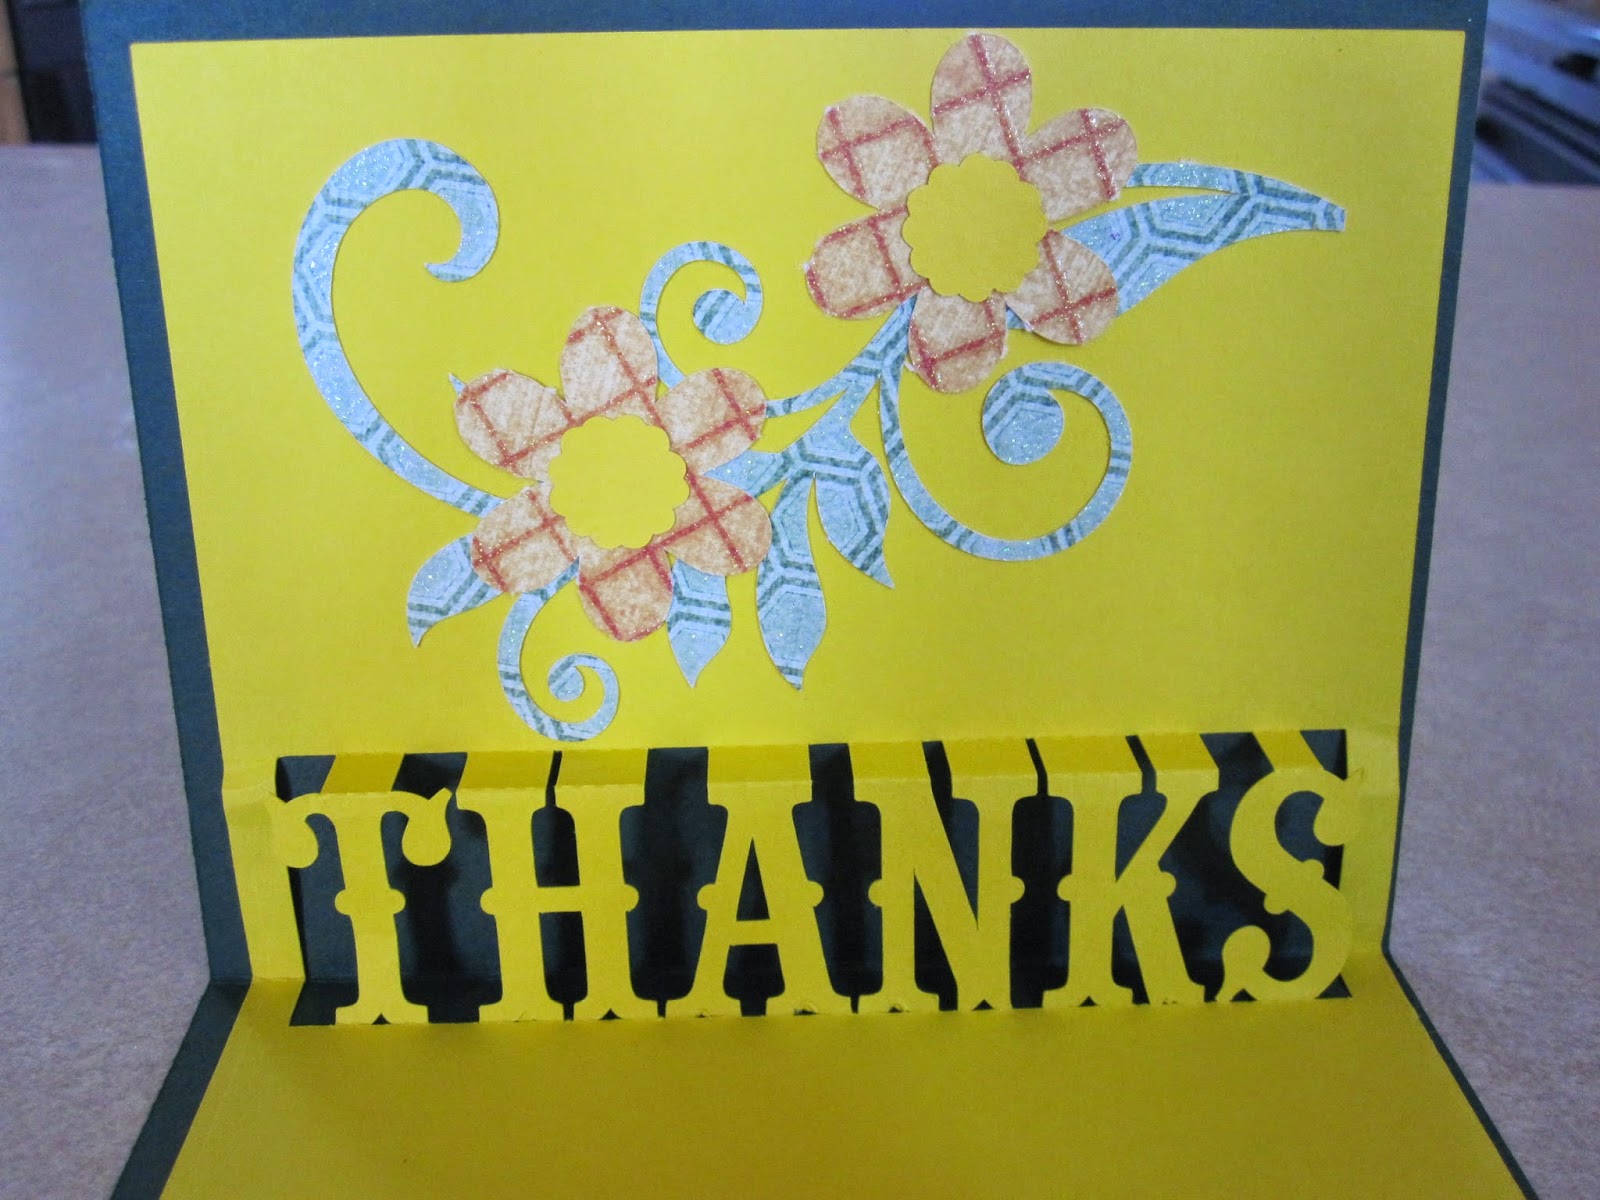
This is the inside of the card. Again I used left over paper from another project to make the pop up thanks on the inside. I had left over half sheet from the same stack and used them to cut the flowers.
This is a Silhouette file and cut great.


These are photos of the close up of each card.


I needed a bunch of tank you cards as my handsome hubby had major surgery and many people from church brought over meals for us, and I wanted to thank them with beautiful handmade cards.


 It's amazing what you can do with a sheet of pattern paper isn't it?


Here is another...


And another....

I made eight cards all together and hand to make even more.


I hope you like these cards I am sharing and you too use your scraps.


Thank you for joining me today. And, thank you for your sweet-sweet words of encouragement. Your comments continue to inspire me.

November 14, 2014

Thanksgiving Card

Happy November!!!! Can you feel the chill in the air? It's Danita from danitasdesigns.blogspot.com. This is my post for She's a Sassy Lady this month. I hope you enjoy it!

But first let us remember, Thanksgiving, is to give thanks to the Lord and proclaim his greatness!! Let the world know what he has brought you through! Have a Blessed Thanksgiving.

I made this card using my Craftwell eBrush for the background in the oval. You can learn more about this product here on their website. I'm still very new to using the eBrush, but I am having so much fun practicing! I can't wait to try different techniques with the eBrush!

Here's a close up few of the background. I used 4 different Copic markers to create this effect.

Here is a picture of the the card stock I colored with the eBrush . I started coloring at the top with the lighter marker and then gradually added the other colors until the entire paper was covered and blended.  I made sure to place the die so that I could get all 4 colors on the oval shape. I recommend that you go ahead and color a large area of card stock so you can use the leftover piece for another project later.

Products used:    Copic Markers 
                          Ebrush
                          Spellbinders Large Oval die
                          Anna Griffin Foundry Embossing folder
                          Colorbok Pearlescent Paper
                          Stampin Up Trust God Stamp
                          CTMH Treasures Stamp

Thanks for stopping by!

November 13, 2014

IT'S ALL GREEK TO ME!

Happy Thursday, everyone! Java Jen here from JAVA JEN CREATIONS to share some decorations and a recipe from our recent International Dinner we held at our church. Thank you, Sheila, for the opportunity! :-) Our church hosts this dinner every year to "celebrate" all the missionaries that we support throughout the year and this year I took Greece. We just do appetizer-size portions because everyone likes to sample from all the tables. I made a Garlicky Feta Dip that surprised me by being a total hit! We all just decorate our tables however we want so I kept it kind of simple by just having a few decos.
My sign before decorating it.....

A centerpiece that I made with images from the MY WORLD cartridge and the DESTINATIONS cartridge. 

Close-up of the luggage tag that I wrote GREECE on. 

Close-up of the centerpiece. 


Here is my table all ready to go!

I added some columns to my sign that were cut from the MY WORLD cartridge. 

Here is how I served the, now famous, Garlicky Feta Dip. When I say "garlicky", I mean it!! This bowl held a triple recipe and it had 10 cloves of garlic in it!! :-) 
Here is the recipe:
6 oz. feta cheese, crumbled
4 oz. cream cheese, softened
1/3 c. greek yogurt
2-3 cloves of garlic, minced
pinch of dried oregano
1 Tbsp. lemon juice
1 Roma tomato, diced
Chopped parsley and black pepper, to garnish

Combine feta, cream cheese, yogurt, garlic, oregano and lemon juice in mixing bowl and process until well blended. 
Scoop into serving dish or bowl and top with the diced tomato, parsley and pepper. 
Enjoy with pita bread or chips, crackers, pretzels or french bread! 

Thanks for stopping by today and be sure to check my blog in about 2 weeks because I'll be featuring lots of handmade Christmas gifts! 

JAVA JEN