July 30, 2015

Carissa Makes Her First Card For The Card Party And Wants To Teach You!


Good morning, I am so excited to share this great little card with you. My 10 year old granddaughter Carissa is making it and it is her 1st card ever!!! It is a cute little snail that we used plenty of stickles and a little of bling.


Wasn't that easy? Carissa was a little nervous but she knew what she was doing. I designed the card using Design Space. You can do it too, just pick your little critter, do a copy paste on the base only. Then you want to line up the base and click to top piece, move up till they overlap a little. Then all you do is weld. You can ad a score line in the middle if you want.


Carissa applied the stickles using her fingers to make sure it wasn't too thick but enough to catch your attention!


She stamped the inside using a stamps of life stamp and even found a little snail and added that to her card sentiment.


Well I hope you liked Carissa's Snail Card and send her lots of blog love. I know she will appreciate your kind words.

July 27, 2015

Love Forever

Hello Sassy People!

Kenya here to share another challenge inspiration with you! Today’s project was lifted by a lady who goes by Scrapalot Shelley! You can see her project here. The funny thing is, I found an old picture of my husband and I from many moons ago, I knew her project was going to be my inspiration for scrapping this photo.

The pattern paper is Echo Parks Yours Truly. The burlap pattern is from Prima’s Lyric collection. I love the combos of red, blacks and grays. I used the Rock Princess Cricut cartridge for the title and various cartridges for the hearts. I framed the photo with one of the hearts. I added a little Wink of Stella to the title and Viva Decor Pens (red) for texture to the hearts. 

After completing the layout, I felt the photo was lost and the title took over the layout. I decided to add the arrow (Going Places Cricut cartridge) to bring the focus back to the photo…hey it is supposed to be the star of a layout right?


I hope you enjoyed today’s project! Don't forget to stop by soon to see what SASL has to offer! Kenya~

July 22, 2015

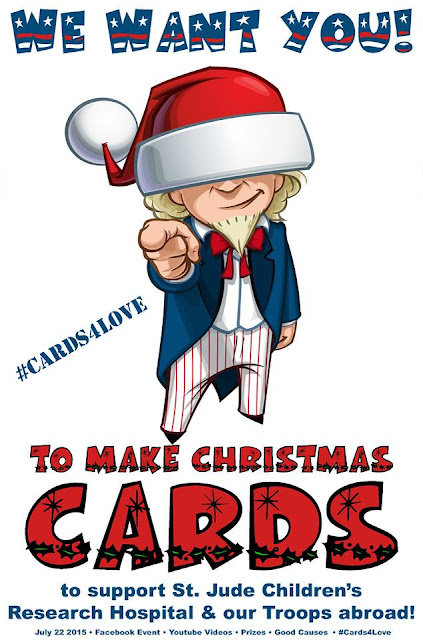
Christmas In July Special Send-A-Card-2-Care-Contest


I am so excited to share this Send-A-Card-To-Share Contest.  I am sending my cards to my favorite people; the children at St. Jude's. I am making these adorable snail cards this week that the children can give out to people they want to say thank you to. It is so easy to make cards in multiples with the new Cricut Explore. Why don't you give it a try, make our troops or some needy children happy and maybe even win a prize!!!
You are encouraged to make as many cards as you can for either our troops or the children at St. Jude's Children's Hospital. Each card you send will give you 1 entry in this contest.


Now wasn't that easy? I just love making cute little animal cards because everyone likes them and they are so easy to make. I keep all my parts together when I am sizing to insure they will all fit together. Just remember to put your base together and then flip, line up and then weld the base of the card together.


Here is a photo of the first three I put together and they are adorable. I was able to get 8 cards out of 4 sheets of 12x12 and 8 sheets of 8 1/2x11. I used scraps for the antennas, a google eye and a white gel pen to make them pop.


This is a close up of the card, as you can see the paper just shimmers with a copper color and of course you have to add a little bling to make it look really good!


This is the inside of the card. Then sentiment is from CTMH and just stamps so easy I love it. There is enough space on the inside to write a little note and sign their name.


Here is my first three and they are adorable. Now it's time for you to get your cards ready to make someone else happy. Click this link to learn how to make your cards. bit.ly/Cards4Love

Check all these websites and you tube channels for more card ideas:

George & Ken of Crafts By Two - www.CraftsByTwo.com/Blog
Melody of Melody Lane Designs - Youtube.com/MelodyLane
MayMay of MayMay Made It - www.youtube.com/maymaymadeit...
Lorrie of Lorrie’s Story - lorriesstory.com
Nanny Rose of Crafting on the Dollar - https://www.youtube.com/user/CraftingOnTheDollar
Ken Hess of Ken's Kreations - www.youtube.com/user/hesskr
Cindy of MiMi's Mixed Bag - www.youtube.com/channel/UCK0VRdBpYhWUmFkw02YMHjw
Lisa of L.J. Creations - www.youtube.com/channel/UCO_zad8-5Vfqu3Vb5JnwYPg
Miki of Minis By Mini- www.youtube.com/watch?v=XaTGog86ndA
Gabrielle of Papercrafting by G - www.papercraftingbyg.com
Tracey of Gift Basket Appeal - www.youtube.com/user/giftbasketappeal
Karin of Scrappy DIVA - www.youtube.com/user/homevidka
Jennifer of Jen’s Little Place - www.youtube.com/channel/UC2f_Yy603Keztxzm6RakDPA
Cindy of CLB Craft Creations - www.youtube.com/channel/UCZH2bXT8JNJFg2At0M_ZQFw
Kaylin of Krafty Kaylin - kraftykaylin.wordpress.com
Sheila of She's a Sassy Lady - https://www.youtube.com/channel/UCJ3g6-J4ZMTFx4FGoIXl2ow
Christopher of Create With Christopher - createwithchristopher.blogspot.com


Then mail you cards to:

Crafts By Two
Attn.: Christmas and Cards
640 N. Greece Road
P.O. Box 182
North Greece, NY 14515-9800
Thank you for joining us today at She's A Sassy Lady. I hope you enjoyed yourself. Thank you for your many sweet-sweet words, your comments continue to inspire me. Be sure to get your cards out in time ( August 31 ) and you might win!

July 21, 2015

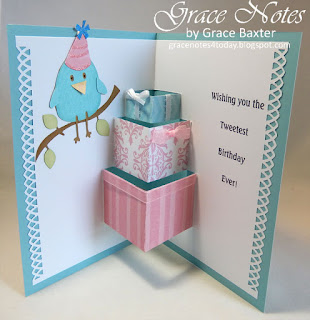
POP-UP GIFTS Birthday Card

Happy Birdie Day - With Pop-Up Gifts Inside

Hello, crafty friends! Grace Baxter here with a cheerful summertime birthday card.

Lately, I've been on a roll with pop-up cards. I love the theme of the birthday bird, with some impressive dimensional gifts inside for the recipient!


Happy birdie day card with pop-up gifts inside, by Grace Baxter of gracenotes4today.blogspot.com

If you would like more info on how I made this 5" x 7" card, I am currently sharing full details in the form of a PDF. While some of the card may be self-explanatory by the pictures, there is a lot to know. For full details, see below. 

As per my recent change in blogging strategies, I am now providing full PDF tutorials for my projects. These are more work for me but hepful to those who really want all the detailed info. To get the PDF, first become a follower. Then leave me a comment (under the post) requesting the PDF. Include your email address and I will send you the PDF tutorial of detailed instructions.
Note:  If you prefer your email addy to be private, just say "keep private" somewhere in your comment. I screen all comments before publishing them.


Pop-up Gifts Birthday Card, by Grace Baxter at gracenotes4today.blogspot.com

Have a great day!

For more projects and today's card PDF, please visit me at

July 20, 2015

CHANGING CUT MARKS TO SCORE LINE IN EXPLORE


Hi, everyone, it’s Charlotte C.  I cannot believe we’re midway through July already.  It’s such a busy time for everyone, and having my right arm in a sling for nearly a month (like Humpty Dumpty, I had a great fall) has been one major inconvenience.  My crafting has been rather limited, but my husband has been very helpful in adhering card stock to my mats and using the paper trimmer for me when necessary.  However, I did want to share something with all of you that changes those annoying cut tick marks in images – whether from SVGs or in the Cricut library – easily and quickly.  You will need the scoring tool in your Explore for this.
For this post I’m using an envelope from the Simple Cards cartridge.  I know several images on various cartridges still have the cut tick marks and they can be converted in the same manner.  


Once you bring your envelope onto your canvas, insert a score line, size it and place it directly over the tick marks.  It’s best to unlock the score line so you don’t make it wider or narrower as you adjust the size you need.  Here I duplicated the vertical score line for each side of the envelope.  Then do the same thing for the horizontal sides.  Your image will look like this.


Insert a rectangle and place it on your envelope.  


Use your shift key to highlight both the rectangle and the envelope.   Now click Weld and your envelope will look like this.   Don’t panic – we’ll get those score lines back in a second.


Highlight the envelope, click Arrange and send it to the back.  Voila, there are your score lines.


Final step is to click Attach so that your score lines and envelope become one.  Notice that over in the layers panel it now says attached set.


Thank you for stopping by today, and thank you, Sheila, for inviting me here again this month.   Happy summer, happy crafting.