January 29, 2016

Get Well Card


This is a very quick card. I made it from design space and all I did was feed in the number of cuts I wanted and it was a matter of 10 minutes and I had 8 cards cut out. I used 7 sheets of 12x12 paper and the machine even scored the cards for me. It doesn't get easier than that!


See how easy it is to put this card together. My stamp is from the Stamps of Life, and I used her stamps also. I believe the color was artichoke. So simple and it looks so good!


Here is a close up and you can see that I used foam tape behind the flower pod to give this card dimension. The paper had a little gold shimmering fleck in the center of every flower.

Here you can see the cards are all made and I even have 5 of them in the mail already to family members that are battling cancer, had a surgery or even a broken leg. They need the encouragement and a reminder to get well.

I hope you enjoyed today's post. Thank you for joining me today, and thank you for the encouraging words. Your comments continue to inspire me.

January 21, 2016

Dragon Lamp

I am so excited that Sheila has invited me back to be one of her guest designer's.  I hope you enjoy making this beautiful lamp.


So let's just get started putting this together.  I have definitely learned alot about uploading videos and that I definitely need to find another way to do my videos.   


We are getting closer... My grandson suggested I get a webcam.  I am thinking that might be better than what I am doing... if Sheila lets me come back again after this mess.  (I am sorry that my hands in the way so much)


I am sure you are totally confused now with now I am doing this.  I thought if I had some of the lamp put together before I started taping it would be faster, but it isn't.  My silly camera keeps shutting off, which is making me very nervous.


I hope you are still hanging in here with me... I am confusing myself, but I am hope you will get inspired to make one of these beautiful lamps yourself, it really isn't as hard as I am making it.


We really are getting close to be done, if this camera will just stay on.   I hope you weren't too discouraged my my videos... Mary at SVGCUTS.com has videos on all her amazing projects, but I wanted to try to show you that even if you aren't a professional you could make one, I am sorry my videos were so confusing.  But truly, they are not that difficult to do.  I definitely need a new way to make videos.  Going to look into the webcam.


Thank you again for hanging in there with me as I struggled with these videos and I hope that you did learn something from all my mistakes and that you are inspired to try something new.


  I am really pleased with how it turned out.  I made one for each of my kids, I attached a prayer that I pray for each them on the bottom of the lamp.   


January 19, 2016

Quick & Easy Valentine Card Using The Explore


Hello, I hope you are having a great day. Valentines Day is coming up and I am getting ready. Today I put together 4 cards. I started at 11 and finished by 2:30 and that included making 2 videos and choosing papers which is the hardest thing for me to do.


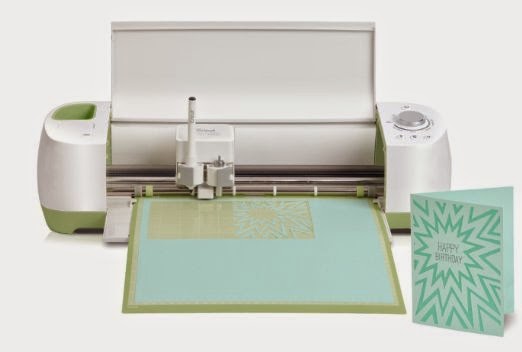
Don't you just love how easy it is to make a card with our Cricut Explore? You know just what it will look like with a few strokes.

This was just so easy a hardly get to tell you a story! But we did make a few decisions along the way & I hope you like them. After they were all done I decided I didn't like the vanilla paper and wished I'd used something a little darker or stuck with white. That is the good thing about watching a video before you make you can see the good and bad in every project.


Here are the 3 cards together and when I saw this photo is when I wished I had gone darker or white.


This is the close up of the front and the picture isn't clear, still getting used to the new camera. Well I hope you liked today's post and learned some good tricks and maybe how to alleviate an error along the way. Thank you for you sweet-sweet words. Your comments continue to inspire me.


January 18, 2016

Fuse Tool Cards


Hi everyone.  This is Charlotte C visiting with you today, thanks to Sheila, to tell you about my experience with the Fuse tool.   I so much wanted this tool when it became the rage a few months back and my husband kindly bought the whole kit for me for my birthday.  That was around August/September.  Here we are in January and I’m just getting to test out all that this tool is touted to do.  I did use some of it when it first arrived when I was finishing up a scrapbook – I made little sequin pockets and added them to my pages here and there, along with fusing some of the fusible embellishments that came with the kit. 
And what a kit it is.  
I put together a few cards to share with you.  Everything you see here was made using only what came in the kit, except for the pink polka-dot heart card.  For that I used sequins from my stash because I preferred the colors I had to what was in the kit on that particular card.   Following the guide that comes with the kit, I made my little sequin pocket first and fused it to the bottom of the window card, like so.


Then I folded that up and fused it to the back of the window and it's now the inside of my card.


Next I embellished the outside of the window cards and decorated some of the other card bases.  

 Here’s what I learned.  When it’s time to fuse the bottom part to the inside of the card, it takes a few strokes of the tool back and forth before everything seals.  I also preferred the narrow cut tip for applying embellishments to the card, and rather than wait for the tool to cool to change the tip, I used a plier, held the tip with it very gently and turned the tool till the tip released.  Then I could screw in what I wanted to use.  But note:  you have to wait a few minutes for the new tip to heat up before it works.   The base card is made of a special material that allows you to fuse to it.   I’m not crazy about how it feels.  Also, there’s a limited amount of embellishments in the kit that I myself will use on a card and I did use my Cricut (of course) to add a sentiment to the front of some, as you can see.


Of course you can take any size page protector and use the Fuse tool to create custom pockets, whether for photos or if you do Project Life pages.  And now the rage seems to be pocket letters.  Don’t get me started on that!  What challenges me is that whatever pocket I create for one side has to work on the reverse side, which means my photos have to be the same size and shape.  Plus, you have to create openings to be able to insert your photos and you have to create a seal so that what you insert into the pockets stays put.  If I ever get that down pat, I’ll come back here and tell you about it.

Hope your new year has gotten off to a great start and I thank you for being with us today.