April 30, 2010

Wonderful Wedding Gift Box- Set This As A Memorial

We are entering the wedding season and I was remembering my daughters' weddings and how important it was to give them something of their father and my hearts.  I realized I wanted something for my children to hold onto and remember how God worked in and throughout their entire lives. I wanted them to have those 'stones' that they could see and remember. I share this with you all today as it is a wonderful gift to give your child. Recently I was reminded of the boxes I did for my girls before they were married, now ten years ago when I saw Tammy at  Cuttlebug Challenge feature on Faith Booking. She will be doing this on the second Saturday each month... be sure to watch for it. How I wished I had known about faith books way back then.

A little Biblical history very condensed...
Before the Isreaelites entered the promise land they had to cross the  river Jordon. God instructed the leaders to place 12 stones in the water representing each of their tribes. After they obeyed the water stood in a heap and they crossed over with the arc of the covenant on dry land (find in Joshua 3). When they had crossed over to the promised land God instructed them to have one man from each tribe take a stone from the Jordan and to place it where they camped that night. Then in the morning they were to take that stone and place it on their shoulder to "serve as a sign among you. In the future, when your children ask you, 'What do these stones mean?'  Tell them that the flow of the Jordan was cut off before the ark of the covenant of the LORD. When it crossed the Jordan, the waters of the Jordan were cut off. These stones are to be a memorial to the people of Israel forever." (Joshua 4:6-7) Throughout the Bible we are continually reminded of God's greatness and of the everyday people that He puts in peoples lives to help, assist, teach, and mold us.
I want my children to remember how God worked in our lives, of His faithfulness. The times He held us through, the times we cried and laughed and loved. God's word says: "You must be very careful not to forget the things you have seen God do for you. Keep reminding yourselves, and tell your children and grandchildren as well. Deuteronomy 4:9.
The boxes I put together remind them of  God's never ending love, His faithfulness and helps them to remember to trust and turn to God for all their cares.
Above is Heather's box and below how it looked when we opened it. She leaves it in her living room so there is usually a few extra goodies in them that Heather is unaware of. I chuckled as the little ones had added a few important things of their own. Heather has a Christian day care and of course this does sit prominately in her home and many of the children have gone through this with her.
You are looking at the flower girls head piece. I want to add that they received this box at the last session of a 12 week class that our Pastor gives before he married them. Pastor Bob made them go through this entire box together.
I typed notes and Bible passages for them to remind them of what God says is love and our love for them.
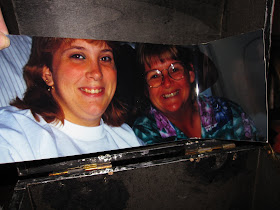
Birth photos of Husband and Wife. Our little Heather was a preemie, weighing in at 2lbs 14oz... so her baby photo was a memorial stone in itself. Her photo wasn't even taken until she was 5 weeks old.
Also little moments in our lives that were overwhelming at the time that we now look back at. This dresser is a prime example of one of those moments where my daughter didn't listen to her father. The drawer was broke so he told her to bring it down (her bedroom was upstairs) and he would fix it.... She a new teenager at the time brought the whole dresser down! We have laughed for years over this story and she learned to listen. 
The little crayon in the box is one of those times we prayed... seems our little one pushed a little yellow crayon all the way up her nose and had to be rushed to the emergency room. Mommy and Daddy were at work and did some quick manuevering to get to the hospital in Chicago traffic! This isn't the actual! But she didn't want to tell Pastor or her future hubby what it was!!! She is going to KILL me!
I love seeing little things that the children have stuck in...and there are new things they have added that we didn't place in the box.
This is the 12 page report we put it together after her missions trip to Australia. She spent the summer working with the Aborigines on a banana plantation while her Mom and Dad prayed and prayed!!! The little stinker would send me letter saying she knew she was going to die there... don't you just love teenagers!?!
This is a photo of Heather and her travel buddy Pam on the airplaine to Hong Kong on her second missions trip. Talk about an answer to prayer! My 2 pound baby went on 3 seperate missions trip to share the gosple. 
This was a copy of a portion of the letter explaining these memorial boxes that had a few momentoes of their past and lots of room to grow memories in their futures.
This is Jennifer's box, my eldest. She had a totally different style and the box just fit her and Sam perfectly. When I opened it I couldn't believe all the goodies they had placed in their box over the last 10 years....
I promise I will only share a few just like I only shared a couple of Heathers.... I love the little silver boxes.
This was crammed full of notes and even the tags from their kitty that has gone on to kitty heaven. And yes I do believe we will see our pet again just like I believe I will see family other loved ones.
This is just a little part of a note we placed into the box for Jen. a little too personal so show its entirety.
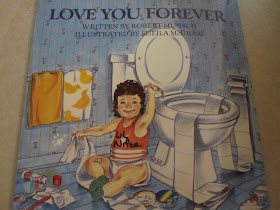
And I love this little book, all three of my children have one altered to their sex, hair color and personality... I changed the pages to fit them.
And this is Jen's little candle holder and candle is from Pensacola Christian College. She used this when she carried a candle to the alter and dedicated her life to helping others and the nursing field before our Lord. The next year was a disaster for Jen and she left school and entered the working world leaving her education behind. She met Sam, they fell in love and yet she never told him about wanting to become a nurse. That is until this box was opened in Pastor Bob's office. Jen told them with tears in her eyes as her heart was broken that she had not followed through with that promise she made. Sam insisted that she go back to college, she did and graduated with high honors. Today she is a wonderful nurse and doing what she loves.
Jen and I chuckled as we pulled the cassette tape out of one of Pastor Bob's sermons as it had been many years since we handled a cassette.
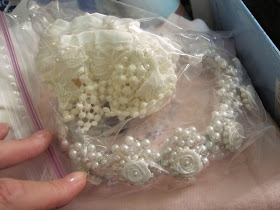
The headpiece from her wedding and the garter that my friend Judy made for her... Judy hand beaded it and said she said a prayer with every bead she placed on the garter.
See a reminded that she placed in the box.
And one of Sydney's first hats and outfits. The little silver boxes; one contains a lock of hair of Sydney and the other the first few teeth she lost! I really feel it is important for our children to know our hearts and how much we really love them. I believe God gives us our children not only to nuture them but so we have a better understanding of how much He loves us!

Remember God's word says: "You must be very careful not to forget the things you have seen God do for you. Keep reminding yourselves, and tell your children and grandchildren as well. Deuteronomy 4:9.

I hope you enjoyed todays post... I am not used to sharing such an intimate part of my family and of our hearts. Thank you for your sweet words of encouragement as they continually inspire me.
MyFreeCopyright.com Registered & Protected
signature

April 28, 2010

Flower Album


Hi my name is Beth, some of you may know me from the Cricut MB as thunderbirdlindy.  I want to start out by thanking Sheila for letting me guest design for her blog (I love being a Sassy Lady!).  It is such an honor, and I am very excited about it.  I hope I can live up to the creativity that is overflowing here.

The inspiration for this project came one day when I was looking thru dies on a webpage that had a lot of amazing dies, that were quite pricey.  I saw a petal album die that I decided to create my own using my Cricut, Gypsy, George cart, and Hannah Montanna cart.  I really like this album because it had one petal on every page for a total of six pages.  In order to get the petals of the album just right, I needed to get just the right heart shape.  Using my Gypsy, I looked thru all of the hearts available on the cartridges and decided that a heart on the Hannah Montana cart would be perfect.

I created a circle using George and sized it to apprx 5" then I added the heart from the HM cart at 2.52x2.43 on the left hand side of the circle and welded it.  From this I created the other 5 pages, using the group and copy feature available on the Gypsy. The first page had one heart on it, but the other pages had 2 hearts, one for the spine and one for the petal.

The above pic is only one page in my Gypsy.  It took 2 pages to get the whole album.  I offset the petal on each page so when I was done, I had an album with six petals.  I cut the base out of fed ex envelopes that I get used at work.  I only cut from fed ex material each page once.  For the cardstock I cut one page printed side up, and one page printed side down so I have a cut for the front and the back of each page.  I attached the cardstock to the fed ex album using zip dry glue(love this stuff.)  Front page to front page, back side to back side.  Below is the album before I emblished it. 

I wasn't happy with my choice of cardstock, so I recut and attached new cardstock over the album again.

I cut the emblishments for the pages using Song Bird and Picturesque.  I cut the petals by themselves and attached over the petals that were already there.I created circle frames by taking the original circle I created with George, copying it, placing it directly over the circle I copied from and making the second circle smaller on the Gypsy, this created frame that fit perfectly. I attached the frames, but left the top side open so when I get my garden pictures, I can slide them under the frame and emblishments on the page.


Here is the finished album.


I hope you enjoy this project, and as a special treat, the Gypsy file for this album will be available by going to my blog http://www.thunderbirdlindybydesign.blogspot.com/ under the cut file tab at the top.  You will only need George and Hannah Montana to cut the album out, and you can emblish it anyway you want.  If you have questions, let me know.

Beth

April 27, 2010

Slainte From McGonigals

A Gaelic Irish Blessing that my hubby and I pass along to you from our recent trip to Chicago. This page was so much fun to do and is done only with the Plantin cart. We are in a town called Barrington in the Northwest suburbs at  a new Irish Pub call McGonigals having a wonderful dinner with family and friends. Slainte' to you!
I used new paper I just got at Michaels's the In My Minds Eye Home paper stack, I love the texture and it cut like butter. The glitter pages did need to be cut 2 times. The gold tulle I picked up for less than $1 and this is the second project I have used it on this week and haven't even used half of it.
I backed the circle with the tulle, tacked down and then applied glue once I had a smooth fit.
I put together the little flowers and after the page was completed I used diamond sticles on the flower tips.
I hand cut the plume from the paper to use as an accent.
'Sláinte chuig na fir, agus go mairfidh na mná go deo.'
Health to the men, and may the women live forever!
Then I used pop dots to lift the plume for added dimension. Added the flowers.
And as you can see the heading faded into the background so I then used pearlized chalk to deepen the color.
Added a few beads from the bridal section that added the bling needed with the stickles. Added one of my had made butterflies from a few months back and 'viola  the page is done.
I hope you enjoyed today's project, it is a simple one that any of you can do!
MyFreeCopyright.com Registered & Protected
Thank you for your sweet words of encouragement. Your comments continue to inspire me.
signature

April 26, 2010

Mothers Day Gift Bag & Matching Card All From Plantin SchoolBook!

Good Morning Everyone! Sheila here and I am so excited that my friend Pam invited me to be a guest designer at TheBugBytes.com today.  I hope you love this project as much as I do. With Mothers day just around the corner I decided to make a gift bag and matching card. But I love the clear bag look thanks to Cher when she did her Easter bags for Tuesday Treats in February. Pam has asked me to design from Plantin Schoolbook and I challenged myself to use only that cart! As you can see the lines are simple, Plantin is a wonderful cart. I did the bag as is and used the scalloped edging for my corners to hide the adhesive and keep it sturdy.
After cutting I paid close attention to the score marks and scored the entire bag using my score pal.

I used the bone folder to provide nice clean edges as you can see.
I used the tacky red tape to adhere the side and bottom together.
I used a box on the inside to push the glued edge down to make sure it was secure.
I turned out great! And I almost left it plain as I used the gold glitter toulle inside instead of tissue paper and it looks beautiful as is, but I wanted more. So I used the scalloped edging.
I made sure the pieces were scored and had a clean edge. I then ran the pieces through the Zyron and placed on the bag.
Again I used the box in the inside to be able to apply pressure and a secure fit.
The gift! Isn't it beautiful? I placed it in a little gold box so all you see is gold when you look at the bag. Shhh, don't tell my mother, she loves jewelry.
I found this little charm and attatched that to the front of the bag.
Now lets make the card.... also clear. I loved using a trancparancy.
Very simple, again score fold and red tape for the envelope.
This is the white paper to write your note to your mother. I am running it through the Zyron in this photo as I want you to see how easy and clean it looks on the sheet.
Look at this isn't it great you don't see adhesive at all as the coverage is perfect and all over clear.
I used the scraps from the glitter paper for Mother (Plantin again welded together). Altogether a 6x12 sheet of glitter paper, scrap of white and 2 transparancy sheet and a flower is all I used. The file I will give you does have flowers and leaves to make your own but I ran into a time problem and used a beautiful prima on my bag.
Again I ran the word Mother through the Zyron so it would be even and look good and I wouldn't have to back.
Now isn't that pretty?
You can give like this... with the card on the outside.
I prefered the charm on the front and the card on the inside back.
Like this...
Now doesn't this make a lovely Mother's Day Gift? I hope you all enjoyed todays project. This is the file for the Clear Sassy Bag and the file for the Clear Card. Here is the  DS Clear Sassy Bag file and the Clear Card File.
MyFreeCopyright.com Registered & ProtectedThank you for your sweet words of encouragement. I cherish your comments and they inspire me.
signature