April 30, 2013

A Bouquet of Roses


Hi Everyone,

Sheila asked if anyone was willing to take on another day this month and I obliged. :) Thanks Sheila for having me. This is Lisa from Lisa's Craft Room.

OK, so I figured I would do a little tutorial on stamping the Roses. It is a three step process or if you like, you can just do the two steps. I'm sure most of you, if not all of you, know that but, I just wanted to show how I did my project.

You need to stamp lightest ink to darkest, with three colors. I don't have three of the same family in every color, so the Purple Rose and the Red Rose are only stamped twice, but they still look beautiful and the great thing about this stamp set is, if you don't align things just right, no one will know because the roses are so gorgeous, you can't even tell they were stamped a little off.

This is going to be a longer post and picture heavier than usual. Sorry for those who don't like that :( I myself love looking at blogs with lots of pictures :) OK, on with the show.

These are the colors I used, the inks are from Stampin' Up. Red Rose - Real Red and Riding Hood Red, Orange Rose - Summer Sun, Daffodil Delight and Only Orange, Pink Rose - Pink Pirouette, Pretty in Pink and Pink Passion, Purple Rose - Lavender Lace and Perfect Plum, Green Rose - Certainly Celery, Old Olive and Always Artichoke. Isn't crafting a wonderful thing? You can make anything any color you like :)


First I cut out all the die cuts using my Cuttlebug. (This set is called  The Sweet Life by Paper Trey Ink).


This is the first step. Getting ready to stamp.


This is the second step. Getting ready to stamp.


This is the third step. Getting ready to stamp.


Now for the leaves, that is done in two steps.
First step. Getting ready to stamp.

 Second step.
I ended up having two that were darker because I had the wrong stamp on my block
but, instead of doing them again, I just decided to use them.
Excuse my dirty mouse pad, that is the one that I use to stamp on. I like
stamping on a mouse pad because it works as a cushion and gives a
good impression.
 I used a Green Copic marker - G28 Ocean Green to color popscicle sticks.
I used a tape runner to adhere the leaves to the roses and hot glue to adhere
the roses to the sticks. I wrapped some green pipe cleaner around each stick.


I added them to this cute glass vase. I had dried babies breath from a silk rose and thought it would be pretty to add it to this
paper bouquet.


There you have it. A Bouquet of Roses. I hope you enjoyed my tutorial today. Thanks again Sheila. Thanks for stopping by and have a wonderful day.

April 29, 2013

Yummy Note Card Set


Hi!!  This is Lori from ScrappinMyStressAway and I am super excited to share this Yummy note card set today here and at CricutDiva!!


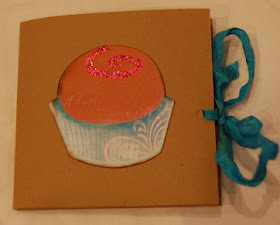
I made a set of 3x3 cards with truffles on them from the Cricut Imagine Yummy Cartridge.


I printed out the light pink distressed-look pattern on white cardstock to use as background paper for my cards.  I cut them to 2 7/8" squares and adhered them to my note card (3x6 folded in half).


I printed and cut out the three truffles and mini cake at 2" each.  I inked the edges in Vintage Photo ink, and added a little stickles to each piece and let dry.

Before I adhered the patterned paper to the card, I wrapped a piece of 3Girl Jam 1/3 the way up the paper.  I chose the blue to bring out the bit of blue in each card.

I got the We R Memory Keepers Envelope Punch - super cool new toy!!!  I wanted to make envelopes for my little note cards.

Making the envelopes were fun, once I watched a YubeVideo on how!!


I found this Enveolope Gum at Archivers to seal the envelopes.  I just painted the glue on and let it dry.  It just needs a little water to seal.


I made a little folder to keep the card set in - this makes a great gift idea!!


I started with a piece of Kraft cardstock and cut it to 8 1/2" x 6".  Placing the paper horizontally on my Score Board, I scored 2" up from the bottom to create the pocket.


I turned the paper to score the fold lines.  I scored at 4 1/8" and 4 3/8".

I used my ATG gun to adhere the center of the bottom flap (pocket) to the spine of the folder.

I punched a hole on each side of the pocket.  I ran a piece of 3Girl Jam ribbon across the inside of the folder and used a glue dot in the spine to hold the ribbon down. 


When you close the folder, simply tie a pretty bow.


What a Yummy Gift card set!  These are great for teachers, friends or even secret pals.  I included this set in an Easter Swap gift with another paper crafter!

Thanks Sheila for having me over today!!

April 27, 2013

Craft Birthday Gift

It is so exciting to have a grand daughter to have a love of crafting! So for her 10th birthday I put together this awesome gift for her so she can make cards when she wants to, not just when mommy lets her! My little Sydney loves making cards but doesn't have cool goodies to make them with and like all women my daughter doesn't want to let this child loose in her own.... let's face it we all have of favorite supplies and papers that we want to keep a close eye on. So join me today as I share Sydney's gift before it is wrapped with you.
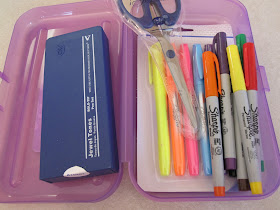
This is the little pencil box that is filled with all kinds of markers and accent pens as well as a good pair of CM scissors.
This is a peek inside the first drawer and as you can see it is filled to the brim with supplies. There are 2 glue gliders and 3 glue sticks, the pens, glitter glue and even stamps and a little tin box filled with embellishments.


Isn't this just an awesome gift? I just know Sydney will love love love it! As it is filled with goodies that she likes.
This is a photo of the second drawer and it is filled with paper and embellishments and stickers for her to use with her card making.
And the bottom drawer has packages of envelopes and cards, papers, and punches. I am sure she will love it.
This is what it looks like from the front and as you can see it is full of goodies.
And from the side. I know there will be more room when some of the wrapping of the packages comes off but this will be a great start for Sydney.
Well I hope you enjoyed today's post and who know maybe you know someone that you can do this for too.
Thanks for your sweet sweet words of encouragement. You comments inspire me to continue to share with you. Have a blessed week.

April 25, 2013

Pattern Paper Buttons


Hi! Leah from Paperblossoms here to share with you how you can make your own pattern paper buttons.  All the buttons in my card were made using this tutorial so let's get started!


First you'll need to cut your buttons out of pattern paper. You can use a die or your Cricut. I used my Cricut and the Artiste cartridge page 46 to cut my buttons at 3/4". You will also need some VersaMark ink, clear embossing powder and a heat gun. I tried using Ultra Thick embossing powder and really didn't like the results. It made the paper have a very yellowish tint after embossing and muddied the pattern of the paper, so I used Clear Detail embossing powder instead with much better results.


To get a more defined button hole especially when cutting them out with your Cricut, I used a 1/8" hole punch. Then you coat the top of each button in VersaMark ink by lightly pushing them into your ink pad.


Tweezers come in very handy for the next couple of steps. Now that your button is covered with ink you coat it well with your Clear Embossing powder and then heat set it. I then immediately poured more embossing powder over it while it was still hot as the powder will stick to itself and heat set it again giving it two coats. Then set aside to dry.


After you get them all embossed you have some fun buttons to use on a project! I chose to make a baby card and added some embroidery thread to each of them. Even though the pattern paper is fairly light weight, the addition of the embossing powder actually gives the buttons a bit of stiffness and I didn't find any trouble using the thinner paper. I hope you'll give it a try! Thanks so much for joining me today. :)

April 24, 2013

Happy Birthday

Hey everyone!
I am back after very long break from crafting. I lost my mojo somewhere along the way! Life kind of happens doesn't it. I am glad to be back and hopefully will be posting more regularly! I have missed it so much!

Today is my turn to share at the She's a Sassy Lady blog. Thanks for having me Sheila and for your understanding! 
I made a cute little birthday card for one of my son's friends.


 Thanks so much for stopping by today!
Take care,
Candy

April 22, 2013

You are Brave

Hi folks,

Ian, here from A Newbie Crafter, with a simple card for you featuring Gina K. Designs stamp set.  This card was a quick one that can be for anyone that is having a hard time or just needs a little encouragement.

For this card, I took a A2 size and cut a piece of black card stock at 4 1/8" by 5 1/4".  The next thing I did was cut a piece of red card stock at 4"x 5 1/8".  I added some faux stitching with a white gel pen and adhered the banner to the red card stock.  I then took pop dots and adhered the sentiment above the banner.


I think it turned out well!  I hope you all enjoy it!

Craft on,
Ian

April 20, 2013

Gypsy Made Simpe - Making Scrapbook Mats And Pages


Well good morning! Did you hear the news.... Provocraft is discontinuing the Gypsy! I can hardly believe it as I and everyone I know that has one LOVES IT! Well I have been reading the message board and have found that there are still many people that want to learn to use theirs better so we will keep going on with this series for as long as you want it.  The good news is they will continue to support the Gypsy and we can send ours in to get repaired if it breaks! Thank goodness!!!
This morning we are going to work on a scrapbook project so go grab a cup of coffee and turn you Gypsy on and let's get to work.


Now see how easy it is when you work on the larger mat? It enables you room to maneuver when you are working with large objects. I love that for scrapbook pages.


Wasn't this just too easy to put together? I love that your whole page is a mat and all you need to do is just drop in you photos and you don't even need to crop or mat them... just so easy.


The hard part for me is always picking out the papers. The base of this is from My Minds Eye while the blue foil paper is from DCWV. All the scraps from the hats are also from DCWV and I just love how my expression cuts that paper.... just like cutting butter.


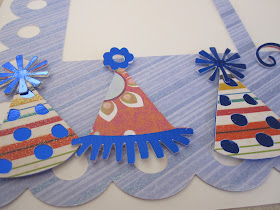
Don't you just love these little hats? And it was so easy to match up when I made the little tassels and trim out of the same paper as the heading.


Here is a closeup of the hats, they were just so easy to put together and will surely match and outfit worn at Aiden's birthday party.


Well I sure hope you liked today's post and can use the little tips I gave when you make your pages. Be sure to start creating and using your Gypsy to the fullest. And if there is something that you would like to know how to due just hit the contact button above and send me your request. If there is something you would like me to share just mail it to me at: Sheila McShea, 3005 Stonecreek Trace, Helena, AL 35080.
Thank you for your sweet sweet words of encouragement. Your comments inspire me to continue sharing with you. Have a blessed week.

April 19, 2013

Roses


Hello My Crafty Friends,

Lisa from Lisa's Craft Room here sharing my project for this month for She's A Sassy Lady. :)

I ordered a couple of stamp sets from Paper Trey Ink and was so excited that they came in just in time for my post. I used The Sweet Life stamp set for my card. It's roses and what gorgeous roses they are. It's a three step stamp, you use three colors in the same family. I chose blue since this card is a Mother's Day card for my mother and her favorite color is blue. I also ordered the dies so that I wouldn't have to cut them out, that made it so much easier. Oh my, I can see these roses in every color, just beautiful.

The inks I used are Bashful Blue, Tempting Turquoise and Not Quite Navy, all from Stampin' Up. For the leaves, I used Crumb Cake and Chocolate instead of greens to get a different look. Isn't it just so pretty?
The sentiment is from My Pink Stamper's stamp set called Happiest Moments. I cut out a piece of paper to add as a border. On the bottom layer, I used a punch from Stampin' Up and adhered it under the border.

Thank you Sheila for having me again and Thank you all for stopping by to visit. Enjoy the rest of the week, I think Spring has finally arrived. It's still a little chilly but the sun is shining, so that is a great thing.

April 17, 2013

Using My Stash!

This is what my craft desk looks like today!
It is a mess, and I am blessed!

Hi, this is Carolyn from
I am blessed for many reasons, and having a full and messy craft room is one of my blessings!
I have gathered a lot of crafting stash over the years.  You see only a tiny portion of what I have stashed away in my cluttered room.  Today's post is about using some of my stash to create cards for other folks!
Take this drawer for example.  These are frames that I have collected and never used.  I decided to create a few cards with a frame on each.
Two cards using frames, pieces of patterned paper, and bits of ribbon
These cards were made from a frame that I divided in the middle, fussy cut out the frame, and glued the frame edges to a card front.
Two more cards using frames and my stash!
This is a stack of cards that I made using my stash.
I plan to donate these to Operation Write Home.
A while back, I took a couple of weeks and stamped hundreds of sentiments on white and ivory  cardstock.  I put the sentiments into small plastic bags and sorted them according to category.  I have 3 boxes of sentiments like the one you see above.  The colored label attached to the top of the box shows the categories and how I have colored each category to make it easier to use the correct sentiment.  This was a time consuming project, but it has been worth every day that I spent stamping!  Now, I can quickly create cards from my stash and add the perfect sentiments!
Click here for more information and photos   

When I see sales flyers and internet offers from crafting stores, I am tempted to use the coupons or take advantage of the many fabulous offers.  Then I go to my craft room, look around, and realized there is nothing I need to buy (well, maybe some glue!)!  I have decided it is time to reduce my stash!  
Seriously reduce my stash!
I think it will take me a while!!!
Have a wonderful Wednesday!!