Materials Needed:
-Card Stock
-Foam Pop Dots
-Paper Cutter, Gypsy or Cricut
-Two Pennies
-Glue Dots
You can do this with any number of card sizes. However, I like to do 5 x 7 cards because you have more room to spin! I started with a number of papers that I had printed from my Imagine from the Best Friends cartridge and also a few sheets of thicker card stock (not shown) and some bright pink from my Bazzil card stock.
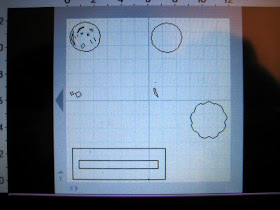
On my Gypsy I made a rectangle at 6 3/4 inch long and about 2 1/2 inches high. I then copied and pasted that rectangle and shrank it to be 0.55 inches high and 6 3/4 inch long and placed in the middle of the larger rectangle. This middle rectangle will hold the spinning contraption. Again, this slot can be modified depending on your materials. If you don't have a Gypsy you can use a paper cutter. I will cut this out twice in order to make the part that holds the spinner very sturdy. I also chose a round object (Smiley from the new Smiley Cards) for the image that will spin. This is very important if you want a well functioning spinner card. Having said this you can use other objects that are irregular - but they don't seem to rotate as well. I also chose a plain flower image that was equal on all sides and will cut this out twice to mount the smiley face to - again thicker will make the card function better. Once I had my pieces cut I adhered the double pieces together.
I pieced together the Smiley face and added pop dots on the smiley.
Next, I took two pennies and a large .5 inch FOAM pop dot and sandwiched the pop dot between the two pennies. Don't use the sticky pop dots that are clear. the foam will glide around the track - the sticky ones will not.
I then stuck the smiley onto the flower and stuck both to the sandwich with glue dots.
The penny was then slipped into the rectangle slot. I then added foam pop dots all around the outside edge of the spinning contraption. This is really important because this has to be popped off the page otherwise your spinner will get stuck.
After adhering my papers to my card base and adding the word "Ahhhhh" I stuck on the spinner part.
I then worked up the sentiment for the inside and had my finished card!
Thanks for checking out my tutorial! I hope you will make your own! For more fun projects head on over to my blog MelissaMade.
Enjoy!


Melissa,
ReplyDeleteThis is so cute. Thanks for sharing how you made it.
That lil face fits this card so cute
Stacy
Adorable card!! I'm anxious to try this - it would be a fun card for a child's birthday! Thanks for the tutorial!
ReplyDeleteMelissa my head has been in a SPIN since I saw this ADORABLE - AWESOME - FUN card. It is just too cute! The tutorial is great and the card, well let me tell you I got out my Gypsy woman and have already designed one with your great directions. Thanks for joining us and sharing your talent with us.
ReplyDeleteLook at this card it is so much fun, I just love it! TFS
ReplyDeleteWhat an adorable project. Love that little face:)
ReplyDeletethat is so cute, of course I immediately thought of making one for my aunt...
ReplyDeleteThis is adorable!!! Thanks for the tutorial!!
ReplyDeleteThis is such an adorable and fun card! Thank you for the easy to follow tutorial!
ReplyDeleteThis is so stinkin' cute. I love the spinner 'spin' on this! Great detailed instructions.
ReplyDeleteADORABLE!tfs!
ReplyDeleteso very cute and fun! tfs and for the tut :)
ReplyDeleteThank you for such a great tutorial! I actually think that I can do this now.
ReplyDeleteMelissa, soooo cute and a fun card!!!
ReplyDeleteLove this card is such a wonderful idea!
ReplyDelete