Here is the finished piece and then I'll break it down so you can see how everything came together:
I used lots of papers and embellishments from my June, July and August club kits from Club Ruby Designers . If you have not checked them out, you simply must! :-) Their monthly kits are so full of wonderful goodies that make creating projects so easy! In the August kit is a brand new product from Megan Elizabeth called Paper Layerz! Let me tell you, it is simply fantastic, especially when used with my trusty Gypsy! To find out all about Paper Layerz, click HERE!
before cutting
I chose exactly where I wanted my images to cut based on the color of the Paper Layerz squares.
after cutting
next sheet before cutting
after cutting
as designed on my Gypsy!
Some finished cuts - (some were from my kits papers and kraft paper)
There was actually a white gel pen in this month's kit so all the more reason to do what I love! :-)
The cookie sheet I used is 10.5"x15.5". I started with a smaller one but switched to a bigger one to be able to fit everything on. I forgot to take a pic of the bigger one.
Love this paper from the Club Ruby Designers June kit!
I found this perfect ribbon at Hobby Lobby!
Here are a couple of the fold-outs opened up. The one on the right is cut to 5.5"x12" and scored at 4" and 8" to make folding easier.
I added to the fold-out on the left but forgot to take pics before I put it all together.
I cut a slit for the ribbon to come through to hold this section up when it isn't open.
all attached
First unfolding of the top album
2nd unfolding
3rd unfolding
Close-up of one of my favorite embellishments - it's from From My Kitchen.
All the way open
Some close-ups:
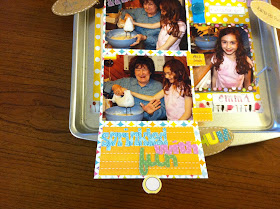
"Chum" is the name all the grandkids have for my mother-in-law!
Wow! It's done! I just love it!
Here it is all opened up.
If you have any questions as to specific sizes of the cricut cuts, just leave me a comment and I'll get back with you. I hope I've given you all enough detail so that you can make one of these for your own. When I get back home, I'll be adding some stickles and other embellishments. Thanks for stopping by today!!


This is adorable and such a wonderful way to share the cooking pictures. Love all the fold outs and details.
ReplyDeleteWhat a wonderful project! Perfect for the kitchen and what a wonderful memory to cherish for years to come. I love it! And shame on you, I am heading over to buy some of that paper!! Great tutorial and I love all the photos you were able to use. Thanks for sharing with us today.
ReplyDeleteDitto to everything Sheila and Suzanne said above -- and what a TREASURE for Chum! Thanks for the great tutorial!
ReplyDeleteJen, talk about a cute idea for the cook in the kitchen!!! I can even see putting several heavy magnets on the back and hanging it on the fridge to be handy!!! If your house is anything like mine and my family's, everyone heads to hang out in the kitchen!!!
ReplyDeleteGreat job and I love your idea!
How cute is this? What a clever idea and great kitchen wall hanging too. TFS
ReplyDeleteThis is such a cool idea. Love the accordion book you added.
ReplyDeleteWhat an adorable idea.. this definitely shows a lot of love. Love how they fold out. Super super cute.
ReplyDeleteWOW, what an awesome idea, it came out fantastic and what a nice decoration for the kitchen, not to mention memories. Love it.
ReplyDeleteWow Jen! The kits you used is very interesting, but what you did with it is FANTASTIC! How clever this entire project is!!!
ReplyDeleteEEEK...This is so super cute and so crafty clever. :)
ReplyDeleteWhat an amazing idea! Beautiful keepsake.
ReplyDelete