Hello again! This is Melody again from A Splash Here and There blog. Thank you Sheila for allowing me to share my projects with your blog readers once a month :). Today's project is a baby shower card I created for a friend who is due to have her fifth boy in a couple of months. This being her fifth child, in lieu of gifts, she had requested monetary donations to our kids' school (which she and her hubby matched) - I thought that was very cool!
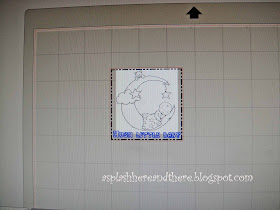
This project was designed using the Silhouette Studio and all cuts were done using my Cameo. The base of the card is called flourish frame single fold square card by Jamie Koay (Design ID #36826). I used a square insert in white (to go behind the "window" of the card base) and embossed that with the Plum Blossom CB folder. I sized a square to fit just inside the square in the middle of the card base and cut that in brown cardstock. I then used the internal offset from that brown square to create a top layer, and inserted a digi stamp image of a baby and the moon by Polly Craft called Moon Lullaby. I let the Silhouette Studio do the faux stitching on this top layer and wrote the sentiment "HUSH LITTLE BABY" in the Patchwork Letters font. Below is a screenshot of the top layer in the Silhouette Studio.
I used the internal offset feature to create a personalized sentiment for the inside of the card using the fonts Coneria Script Demo, Fontdinerdotcom Sparkly, and Happy Sans. I again let the Silhouette Studio do the faux stitching for me. Below are the pieces to the card after cutting with the Cameo.
I normally print more than one image to allow for any coloring
mistakes.
A close up of the embossed square and the top layer with the image.
I started assembling the card by attaching the embossed piece on the inside of the card, just behind the "window", using a Scotch liquid glue, then I attached a strip of sheer white ribbon down the left side of the front of the card and secured the ends of the ribbon on the inside of the card with Scotch tape.
Then it was time for me to color the image for the top layer and the front sentiment. I used Promarkers to achieve this task. After coloring I attached this top layer onto the brown piece to mat it (I used foam mounts for some dimension).
I originally wanted to have the top layers centered on the square of the card base but decided to attach them a little offset. I thought that was better.
To finish off the front I created the bow in the same sheer ribbon and attached a premade flower from a dollar pack I got from Michaels and some blue irock gems on the two corners.
I attached the inside sentiment too, making sure to cover the embossed layer and the tape holding the strip of ribbon.
Because the card is now very thick to fit in a regular envelope, I used the 3d cd box image by Jamie Cripps (Design ID #44960) to create a more roomy "envelope."
To finish off the envelope I added some blue stars which were actually leftovers from another project a last week.
There you have it :). Thanks again for stopping by and "see" you all again next month.


Beautiful card. More and more I think I need that Cameo.
ReplyDeleteWhat a great card. I love the detail and your coloring is just perfect! Look at that matching envelope... Love it! Thanks for sharing.
ReplyDeleteStunning card - love love the faux stitching and that bow is awesome! TFS
ReplyDeleteSo much thought went into both the card and the envelope. Beautiful jobs on both. I especially like the baby on the moon artwork - so sweet! Reminds me of a cross stitch pattern I did for a friend.
ReplyDeleteThanks for the sweet comments :)
ReplyDeleteSo cute. I love the emboss behine the frame. I am gonna have to try that! Great box too. TFS
ReplyDeleteWhat a fabulous idea to make a donation instead of gifts! While I do not use a Cameo, I certainly love your card! It is truly a beautiful work of art!
ReplyDelete