
Thank you Sheila for inviting me to Guest Design Today.
I made this versatile 12 drawer chest, it is for my 13 year old Grandaughter
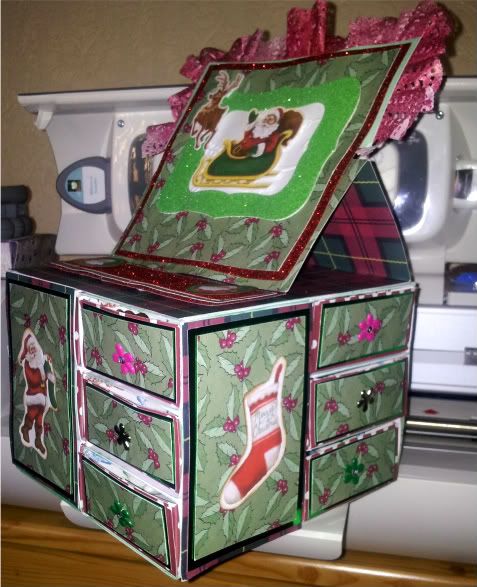
This is a great gift for any occasion, as the 3" drawers are so useful :)
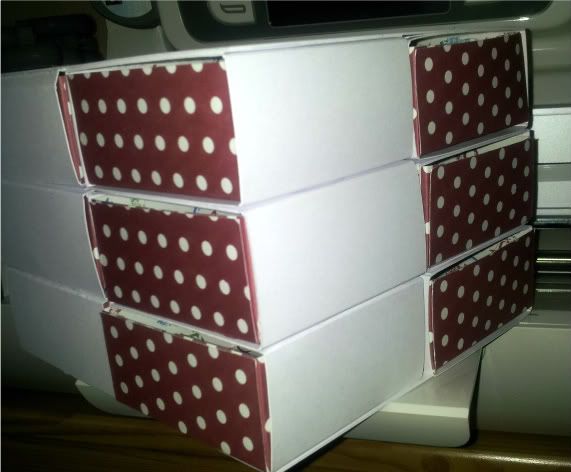
First you need 12 pieces of card stock sized at 5 3/4" x 5 3/4" for the drawers
Score at 1 3/8" around all 4 sides, snipping away pieces as shown below to make the tabs
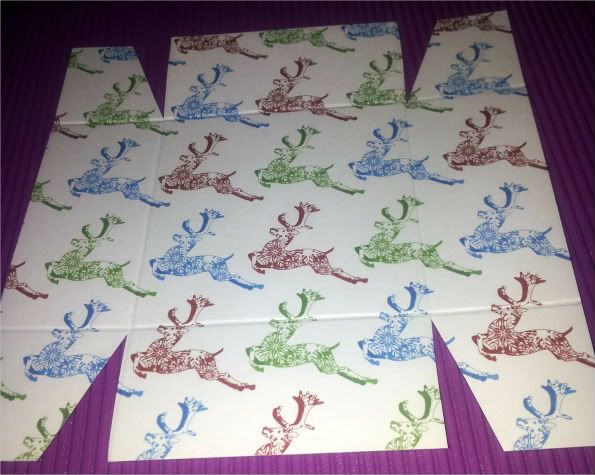
Fold all 4 tabs together to form your box.
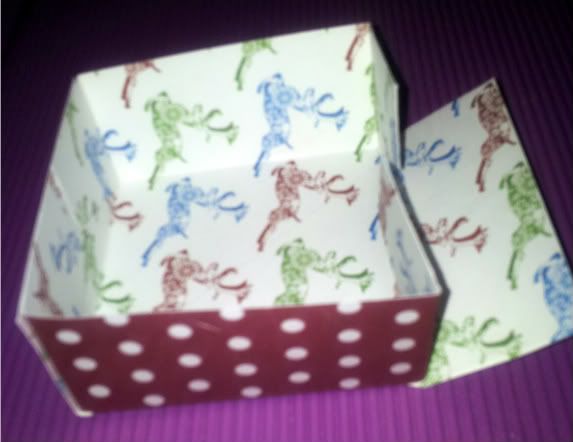
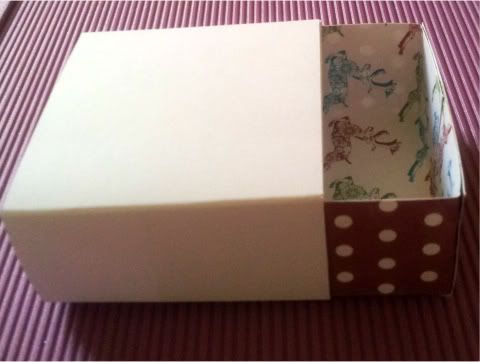
Next you need 12 pieces of card sized at 3"x12"
Scored at 3", 41/2", 7 1/2" & 9" This makes the wraps for the boxes to sit within.
To form the chest you need to stack 3 boxes on top of each other, placing the set of 3 at the far right of an 6"x6" base all round the 4 sides, add another piece of 6"x6" on top to make more secure.
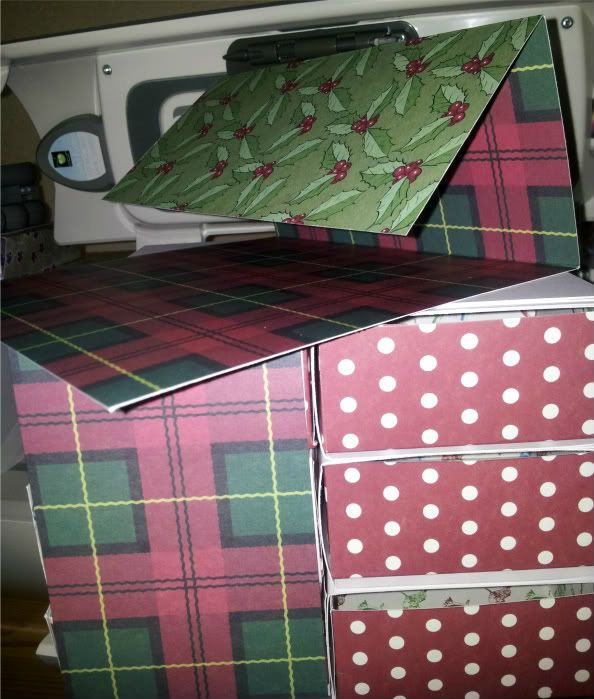
With patterned paper of your choice you next need to cut 4 pieces at 4 1/2" x 3" for the front panels and with the same patterned paper cut a separate piece at 6"x12" for the easel card, score at 6" and 9"
Next you need to cut some matting card stock for the front panels and drawers
you need 12 pieces cut at 2 1/4" x 1 1/4"
4 pieces cut at 4 1/4" x 2 3/4"

The next step is to add your patterned paper as a mat over the front panels and drawers, these need to be cut at 2 5/8" x 1 1/8" for the 12 drawers and 4 = 4" x 2 1/2" for the front panels
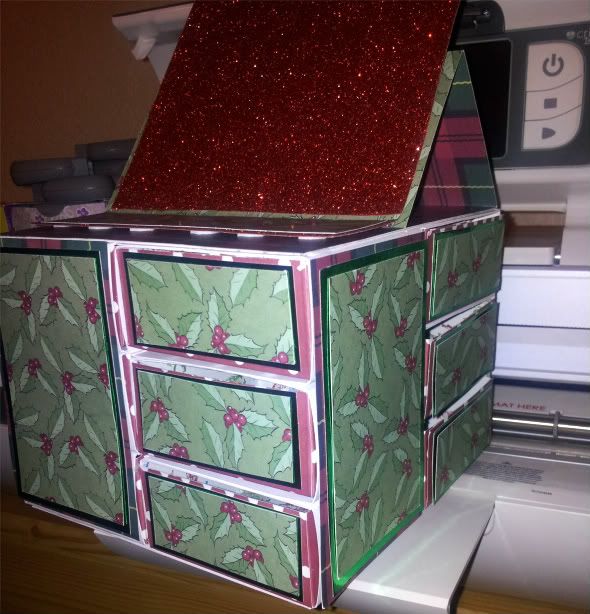
For the Easel card section
I also added red glitter card stock for the card front cut at 5 3/4" x 5 3/4" along with a strip to act as a stopper cut at 1 1/2" x 6"
Then added my patterned paper cut at 5 1/4" x 5 1/4"
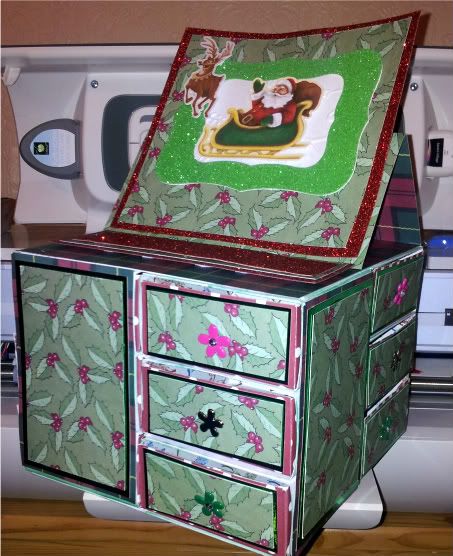
I use Santas Village for all my embellishments cut at 2 1/2" for the larger images
and 1" for the rounded Santa head's,
I also used some ink dyed doilies trimmed to form a folded fringe around the back of my Easel Card and added some brads for the drawer openings.
I think my eldest Grandaughter will love this for her trinkets :)
I hope you all like my project, sorry for the long post !!
Happy Crafting
Hugs
Adele
Okay, this is Amazing. It looks like a ton of work and it turned out great. Wonderful details as well. Thanks for sharing.
ReplyDeleteWOW! This is amazing! Thank you for the tutorial I can't wait to try it out:)
ReplyDeleteAdele what a stunning and amazing project. Wow!!! So cute and very functional. Keeping this post in my file to try later. You did a fantastic job on the tutorial. I am sure your granddaughter will love this gift so full of your love.
ReplyDeleteWhat a cool project.
ReplyDeleteAdele this is just amazing! Your grand daughter is going to love and cherish it! LOVE IT! Your tutorial is great too. Thanks for sharing this awesome project with us.
ReplyDeleteYour grand daughter will just love it... plenty of room for trinkets! 12 drawers full of them...maybe Santa can help with that...
ReplyDeleteGreat and useful project! TFS
Lovely project. It came out great.
ReplyDeleteRebecca
brrck@yahoo.com
This is a great project! Don't apologize for the length of your post - it's great having all the wonderful details! :-) Thanks so much for sharing!
ReplyDeleteWhat a fabulous project! Thank you for the detailed instructions!
ReplyDeleteCarolyn
http://cccscraproom.blogspot.com
Wow, absolutely amazing! Must have taken some time and patience, but definitely worth it, so pretty :-)
ReplyDeleteThis is absolutely beautiful. Your Grand Daughter will love this! You did a Awesome Job!
ReplyDeleteThis is so pretty!! Thanks for sharing it with us. Merry Christmas!
ReplyDelete