November 29, 2013

GORGEOUS CHRISTMAS Cards And Mail Call Winners!


Created by Regina Andari.


Be sure to watch the video for close ups of these beautiful cards and see what prize you won.


Created By Lisa Sylva of Lisa's Craft Room.


Close up of Lisa's Card.


Created by BethAnn Marczak.


Created by Lisa Davis.


Created By Katherine Carlozzi.


Created by Diane Balaam.


Created by Gwendolyn Giles.


Created by Charlotte Cosci.


Another Card created by Charlotte Cosci.


Mylene Wilcox created this beautiful card...


and this one...

And this 3rd card.... I should have had her come and help me with my cards!


Bridget Inman created these beautiful cards.... she too could have come and help me being so good with multiples.


Bridget also made this card....

And this one.....
And my favorite card!
I hope you all enjoyed these cards they are beautiful.... All the ladies won a gift as they all worked so hard and the cards were so beautiful. I got online and order the last 3 from CTMH and they will be mailed directly from them to you. Thank you ladies for your beautiful entries they brightened my days!
Have a blessed day!

November 28, 2013

Happy Thanksgiving!!

Happy Thanksgiving! Leah from Paper Blossoms joining you today :) Even if you don't celebrate this day as a holiday each day can be filled with thanksgiving. We all have so much to be thankful for!

 I thought I'd share a layout I recently did as these three little people are some of my biggest causes for thanks. Each child God blessed my husband and I with have their own amazing story and I am constantly amazed that I get the privilege to be their mom.

They, along with  my husband and the rest of my friends and family do make my heart so happy. I hope you have a day filled with thanksgiving! 

November 27, 2013

File Folder Retirement Card

Hey everyone!
Candy here from Candy's Craft Corner. It's my day to share at the She's a Sassy Lady Blog today. Thanks so much for having me Sheila!
One of the ladies from work retired on Nov 15. Our co-worker Sherien thought it would be a great idea to make a card out of one of our file folders that we hold patient records in. She said you should be able to do that Candy! We say that she is the brains and I am the brawn! She thinks up the ideas and I make them happen!
Anyway, my co-workers name is Ruth and she worked in our file room and handled these charts every day. Her favorite color is blue and she loves butterflies. Good place to start right?
So I went down to my craft room and started pulling things out. Trims and thickers and papers oh my!
Anyway this is what I came up with and I think it turned out pretty nice.
Enjoy!
This is a row of patient charts in our records department. 
Blank file folder. It's about 9 x 12 inches.
Inside of folder. I removed the fasteners. 
Each patient is given a unique number when they visit the hospital. I thought it would be great to use those numbers to put the date she retired down the side. Nov 15,2013
Lots of room for well wishes.
Stamps by Pink by Design 
Just so you can see the size of the card as this is a 12 inch ruler. 
Thanks so much for stopping by today
Take care,
Candy

November 25, 2013

Pumpkin Z- Fold Card

Hi everyone,
  Sandy here from A Working Mom's Joy and Scrapbook Blessings Club, I am so happy to bring you a short tutorial today. Thank you Sheila for letting me be a part of this awesome blog!

  I am one of those people that "Christmas" and Christmas crafts don't start for me until AFTER Thanksgiving, lol.  So, I am still in fall/harvest mode (even though there is snow on the ground and hubby is outside stringing up the lights). With that, I have a very easy card fold that with a touch of Fall to share with you all.

  So here we go... I made very easy pumpkin card very easy using the Cuttlebug, embossing folders and the Cricut E2.  Starting with a regular A2 card but you will fold the top flap in half and back, just as shown below. This will give you a "z-fold" card.
 Second, pick out you pattern paper for matting and a couple of pumpkin die cuts. They were cut at 1.50" using the Cricut E2 from the Gypsy Wanderings however there are over a hundred different pumpkin Cricut images to chose from.

Now adhere you mattes to your cardstock. These were cut at 5.25 x4" and 5.25 x2".

-Using the Cuttlebug and three different folder, emboss you pumpkins
-Brown ink (any would do) and a dauber need to ink the edges of your pumpkins
-Add pop up foam tape to the back of your die cuts

 When you adhere her die cuts to your card, you will only adhere to the left side top panel.

 To finish it off, you can add a sentiment ( I kept the outside blank, to add my sentiment to the card when I need to actually use it. That way this card can be for different fall occasions).  Using a stencil, I drew a couple of line leaves to fill the blank space.

Here it is open. To keep with the line leaves, I just did a simple handwritten line sentiment to the inside panel.

Once again, thank you Sheila for letting me share a very easy quick and fun card for you readers.

November 23, 2013

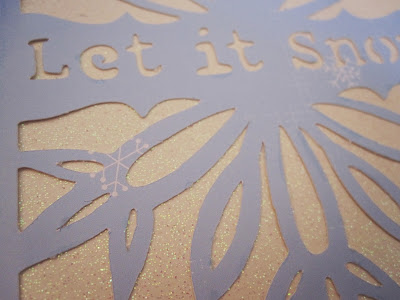
Let It Snow Christmas Card


Hello, today I am sharing a card that is from Simple Holiday cards. It looks so pretty and is so easy to make! Just cut it out at 5.5 inches and you have a perfect A2 card. I set mine 2 up on CCR and in no time at all I had 4 cards cut. I used the left over scraps to add color to the inside of the card.


See how easy it is to put these together! In less that a half and hour they were all put together. Now mind you it took about that long to cut them out.


Here is a close up of the front. Don't you love that sparkly glitter paper? It really adds to this card and makes it look special.

 
Here is a close up of the inside of the card. I sure am getting a lot of use from this stamp!
 

I hope you enjoyed today's post. Thank you for your sweet - sweet words of encouragement. You comments inspire me to continue sharing with you.

November 22, 2013

Merry Christmas! Gift Tag 2013

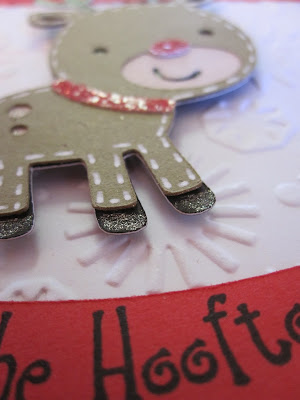
Hello Friends! Donna Lee here from StampinNScrapinWithDonnaLee.Thanks Sheila for allowing me to share today here at She's A Sassy Lady! Thanksgiving Day is almost here and shopping is soon to be started or I hope for many of you completed! Soon the gift wraping begins! I love to have some special gift tags to use on gifts. This year Pam from The BugBytes hosted the 2013 Christmas Tag Swap for some of the designers at She's A Sassy Lady and The BugBytes. Thanks Pam for all the hard work and the gorgeous tag and Christmas card too! I've made a short video showing you how easy the assembly was of my 2013 Christmas Tag. You can view it HERE. Let's get to the details! Tag - Art Philosophy 6" Merry Christmas - Wild Card 2.18" Reindeer - Gypsy Wanderings 3.25" (Hide Contour) Poinsettia's - Winter Woodland 1" 25 - A Childs Year 1.45" (Welded) You can see all of the wonderful and creative tags in this swap at my POST.
Thanks for coming by my StampinNScrapin studio! I hope you have a blessed and crafty day! Blessings, Donna Lee

November 20, 2013

Christmas Tag Swap

I know you are going to love today's post as it is all about Christmas tags. Join me as I share from our annual Christmas tag swap between The Bug Bytes and She's A Sassy Lady. Get ready for a treat and be sure to watch the video for greater detail.
 

Donna Lee of ottersin.blogpot.com

 
 Caroline's
 
 
Close Up of back.


Now weren't these tags beautiful? We had so much fun making these and I have to tell you I will not be putting them on packages.... just saving and cherishing them.
 
 
Charlotte Cosci's Tag.

 
Close up.

Pam's Tag

 
The Back
 
 
Jennifer Green's tag.

 
Close up.

 
 My Shaker tag.

 
Close up.
 
 
Evelyn's tag.


Felisa, The Scrappin Diva


Leslie of Scrapnlifeaway.blogspot.com
 
 
Amy's tag.
 
 
 Close up.
 

Taylor's tag. MayMayMadeIt.com


Lisa's tag.

 
Denine's tag.

 
 Lori Apgar's tag.

 
Close up.

 
Java Jen's tag.

 
Close up.
 
 
Abby's tag.
 
I hope you enjoyed today's post we sure enjoyed making them. Thank you for your sweet - sweet words of encouragement. Your comments inspire me to continue sharing with you.