Showing posts with label CCR. Show all posts

September 21, 2013

It's About To Get Wild Around Here


Good morning, here is an adorable little card made with Crocs Rule and the Close To My Heart Artiste cartridge that is great for a new baby card or even a friendship card. And it is so simple to make using the CCR or your Gypsy. Grab a cup of coffee and follow along.


Now wasn't that easy?  And you only need two cartridges for a fun little shape card.


Easy to make cards two up using just 1 12x12 sheet of paper for the base and scraps for the balance of the card.

 
Here is a close up of the little croc coming out of his egg. Notice I did ink the edges.
 
 
Finally a close up of our card. Thank you for stopping by today, I sure hope you enjoyed today's post.  Thank you for your sweet sweet words of encouragement. Your comments inspire me to continue sharing with you. Have a blessed week.

September 18, 2013

Travel Mini Album - Artbooking Cricut Collection

Happy Thursday! This is Donna Lee from http://stampinnscrapinwithdonnalee.wordpress.com/ and I am so thankful for Sheila to allow me to share a little part of a new Travel Mini Album that I'm making as a gift with all of you.

If you are new to my blog and this project you can view Part 1 at http://youtu.be/he8ReaLFr1Q

Part 2 is available at http://youtu.be/Z4hwvqJ3xvw

Part 3 is available at http://youtu.be/W_XMELB5n-s

The link to the Part 4 video is at http://youtu.be/u5L4tSLppZc.

The link to Part 5 is http://youtu.be/2vGM0MAleR8.

Today I am sharing Part 6 of the Travel Mini Album that I am making as a gift using the Artbooking Cricut Collection from Close To My Heart. This album is on page 38 and 39 of the Artbooking Manual. You can see that the manual suggest a minimum size of 8". I wanted it to be larger so I cut at 10" and I love the size!


Both of the layouts I am assembling today are tag layouts.


These are very simple but elegant! There is a video of these two tag layouts at http://youtu.be/LDf2WOskem4 . In the video I say this is part 5, but it's Part 6! It was early...

Again, thank you Sheila for allowing me to share today! I hope you'll stop by my Stampin N Scrapin Studio at http://stampinnscrapinwithdonnalee.wordpress.com/ to check out what we are Stampin and Scrapin. 

Have a blessed and creative day!

Donna Lee

September 7, 2013

Good Times Ahead Using Art Philosophy And CCR


Good Times Ahead!!! I just love this card but I have to tell you although I made it was designed by Aaron or at Booth 32.  She sent me this card and I liked it so much I bought the workshop that had all the little goodies in it to make. Sadly I have to report that you can no longer purchase this Workshop On The Go from Close To My Heart as they are a limited quantity item. I bought mine last year and then my Dad became very ill and was unable to use it.... Now I wish I bought more! So please if there is a limited quantity item that you are wanting order while quantities last. I hurried up and ordered my Christmas Card kit today!!!


Now wasn't that easy? I cut out all the little card set for my party and placed them in little baggies so each of the ladies will have this wonderful card to take home. I have to tell you I am really excited about this party as it is our first card marathon. Each lady is encouraged to bring at least 2 card sets of 8 card packets! I have actually made 4 cards! Fun-Fun-Fun!


Above is a photo of the finished card. I just love the look, don't you?

To learn more about Close To My Heart Cartridges just watch this short little video it will tell you about all three.


Isn't it amazing all the things you can do with these three cartridges, 700 images each! Just click HERE to order yours.


Here is the inside of the card and a close up of the front. Click on the photo to see a larger copy.

 
Well I hope you like today's post and come back and visit more often. We have 24 designers offering a new project daily and I share one every Saturday. We use all types of equipment and encourage you to put your creativity hat on and dig right in and ENJOY your self creating something of your own.
Thank you for your sweet sweet words of encouragement. Your comments inspire me to continue sharing with you. Have a blessed week.

May 18, 2013

Thank You Cards Designed On CCR Complete With File

 
Good Morning! It has been a while since I have been on and I have missed sharing with you. This week I am sharing a card that I made on the Cricut Craft Room... CCR. I actually had a little free time at work and designed this card at work. As I am still learning CCR I did find it harder to make than with my Gypsy. This is similar to a card I shared with you many time from my Gypsy and I found it harder to maneuver on CCR. But it worked and the card turned out great... I am sure it is a matter of just learning and playing with it more to hon in my skills.
 

This is what the first page looks like. As you can see I used a frame  and just hid the inside for the back of the card.


This is page 2. Remember you must have a duplicate frame for the top of the card if you are inserting plastic on the top of the card and this gives a nice finish to it. I have been using white as the base and then covering the top with colored paper and it helps keep the cost of paper to a minimum.

 
This is the third page and it is the inside of the card where you put the sentiments. I usually use some of my scrap paper for this as I have a ton of scrap paper in all different sizes.


Now wasn't that easy.... I know I got a little chatty but it has been so long since I have shared with you!  This card was really easy to put together
 

This is a close up of the front of the card... I embossed the plastic with the Divine Swirls folder and it just added so much shine to the card.... and you have to love that glitter!

 
Another close up of the card... I love it. And, you can see the writing on the inside but because of the embossing you can't read what it says.... just kind of makes you want to open it just to see that it says!

 
And of course the card isn't finished until I stamp the back! Love my little Sassy Lady Stamp!
 
 
Thank you for joining me today. Click HERE if you would like a CCR file of this card. And let's see what you put together.... if you would like to share your card with the followers of She's A Sassy Lady just mail your card to: Sheila McShea,
3005 Stonecreek Trace, Helena, AL 35080. Cards will not be returned.
Thanks again for joining us today and for your sweet sweet words of encouragement. Your comments inspire me to continue sharing with you.

February 9, 2013

I Finally Tried CCR And Boy Did I Have A Hard Time Cutting! My Fault!


Good morning, thought I would give the Cricut Craft Room (CCR) another chance and actually laid out and cut out 9 little Birthday Teddy Bears..... Boy did I make the blunders! I hope you take a little journey with me and be patient as I feel like I should be wearing a hard hat in this construction zone! Grab a cup of coffee & due join me.


This is the first little item that I did... 9 little bears at 3.75 each. Notice all layers sit one on top of the other. I have to admit that I even did the clothing with the 3 layers without realizing that you could look at one layer at a time. I felt like such a blonde. I growled at this the whole time thinking "this is ridiculous why am I looking at all the layers at once?" I never saw the little eyeball that you touch.... just like on my gypsy! I am showing the following photos just so you can see I finally figured that out.... would you believe aft I laid them all out and cut them all out! Can you stand it?


Here is the other page and again all layers stacked on each other... no wonder I thought CCR was so difficult to work with!


I took photos of these cuts so you could see that I did learn!


Notice you can separate just like on the Gypsy so that you can look at the mat and layout your different color sections.

I have to tell you I did like the big screen but I still love the convenience of my Gypsy. The following video is long but it goes over alot... and I kind of like one video instead of 2 parts. If the first part where I am trying to figure out how to cut bores you just move past it and go to the card part.


Now that was a lot of detail, wasn't it? These cards as simple as they are with one object on the front of the card did have a lot of little detail in it. So many little pieces and then with the stamping and glitter on the hats, the card do take a little time to put together.... Note my Wifi worked just fine for the next cut. I guess I just didn't wait long enough at the onset where it was telling me to check my mat.

Isn't this little bear just too cute? I love the glitter and the embossing on the background. Since I am going to mail this little card I did put the balloons on the inside of the card so they would fit in the envelope.

Look at the little shirt. Just too cute and I got my stamp at Stamps Of Life it is from the postage2stamp set.

In this photo you can see the cool effect of the embossing and see that it is a Wobble card. I learned that I should have place the Wobble a little higher for a more even shake to it.

Don't you just love the little party hat? Chunky glitter works wonders.


Here is the inside of the card and for this one I used My Craft Spot's Birthday Sentiments stamp and it is perfect for this.

Thank you for joining me today, I sure hope you enjoyed this post... I know it sure was a project for me but I did learn a lot.
Thank you for your encouraging words. You comments inspire me to continue sharing with you. Have a blessed day.

September 12, 2012

Easel Framed Card

Hi Crafters :)

Today I'm sharing my post here at Sheila's blog and at my blog

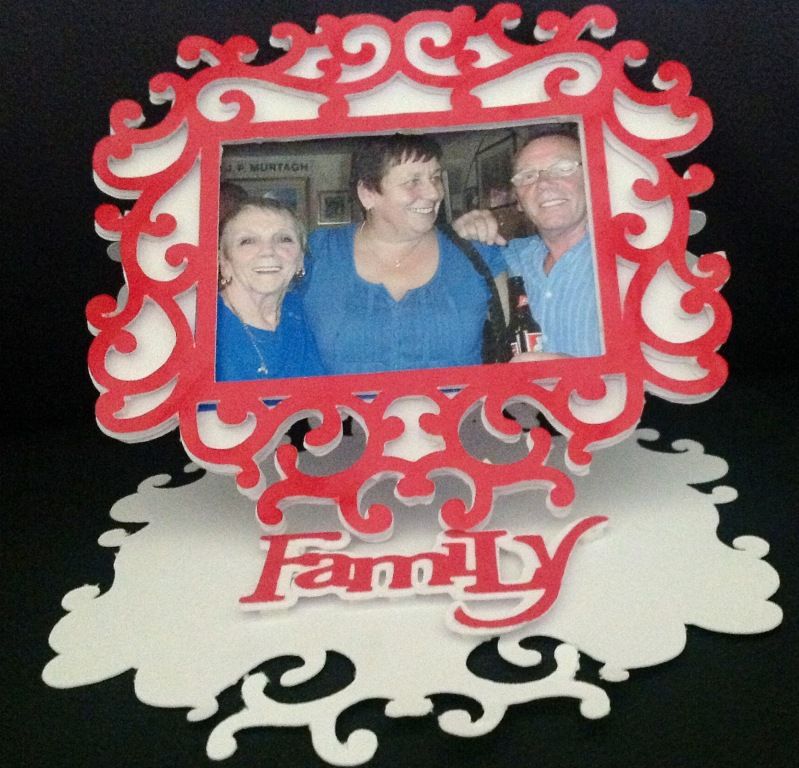
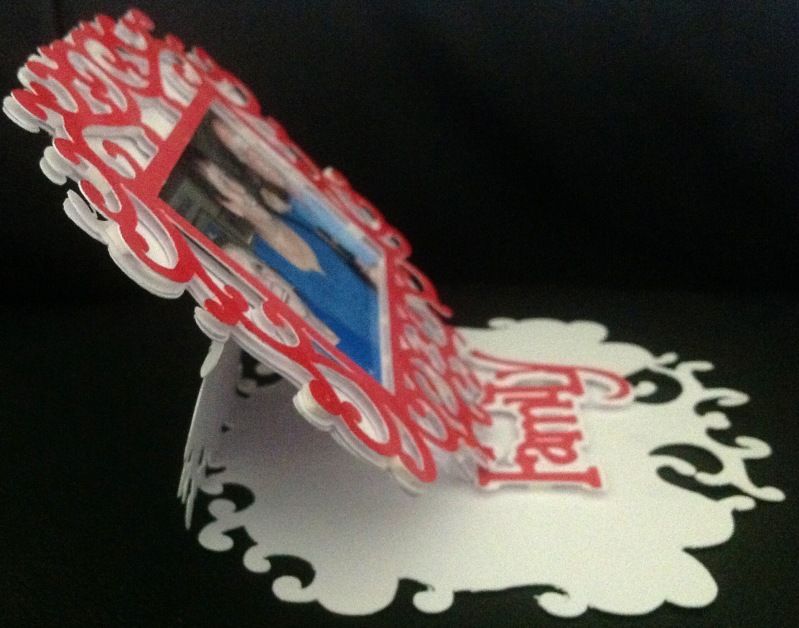
I just recently had a Family reunion in Brighton, my eldest brother came down from Scotland to join us, we had a blast as we hadn't seen him for years, so I wanted to make a special card for my Mum, it's an easel framed card I designed using Fancy Frames as my base, with the phrase from Gypsy Wanderings.


This card measures 5" x 5.5" , it holds a 3.5" x 2.5" sized photo.

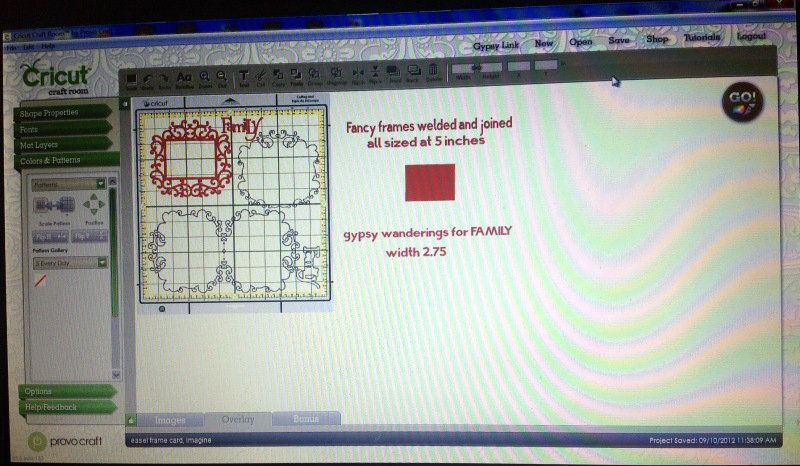
All the frame cuts were set at 5", 2 shadow cuts were flipped and welded together to form the base.
The "Family" phrase was cut at 2.75" wide, from GW

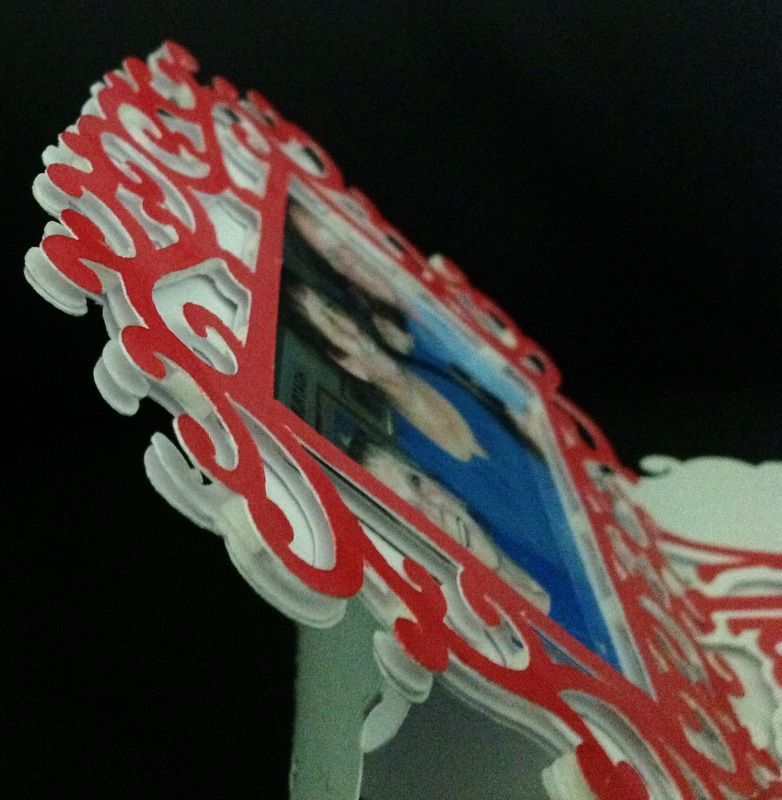
I used foam pads (pop dots) to adhere the frames together, then adhere my picture to the back of the opening, next I adhered the assembled frame and picture to my shadow frame, then glued the bottom half of the shadow cut to the folded card frame.


I also used foam pads on the phrase to give the dimension needed to be used as a stopper when the card was erect.


My Mum will love this card with her, my eldest brother and his wife :)

Because of my poorly eyesight right now, I used CCR to design in, though I have made the file available in the Gypsy format too, for those that want it, the files are below

Gypsy file can be downloaded HERE   (Expression mats used)

CCR file can be downloaded HERE  (Imagine mats used)

Thanks for popping by today and thanks Sheila for allowing me to share my DT project with you all :)

Happy Crafting

Hugs

Adele

August 8, 2012

50th Birthday Card

Hi crafty friends:)
Adele Here to share my DT project with you all!

Today I made a 50th Birthday card for my Brother-in-law
He is a massive Liverpool fan, so the colour choice was easy :)


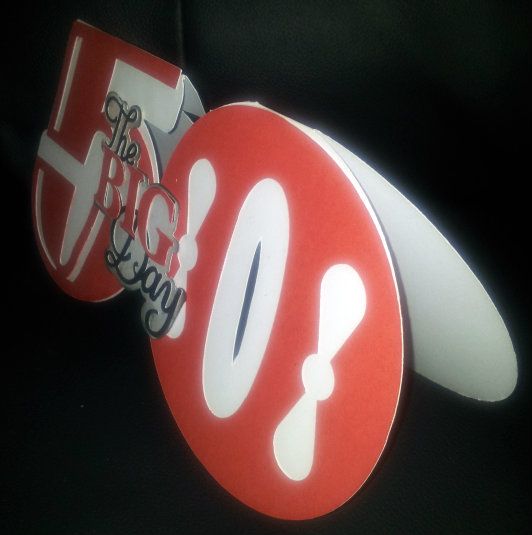
I used Out of Character for the "5" & the "O" and used Phrases for the "The Big Day"

The "50" card base was made using the shadow feature of the numbers, sized at 5", welded and flipped


This is a large card measuring 10.5" x 5", 
large cards are very popular at the moment :)

After folding my base card, I attached the "5" & "0" on the front, then layered the phrase and pop dotted it on the front, easy as that, quick but effective :)

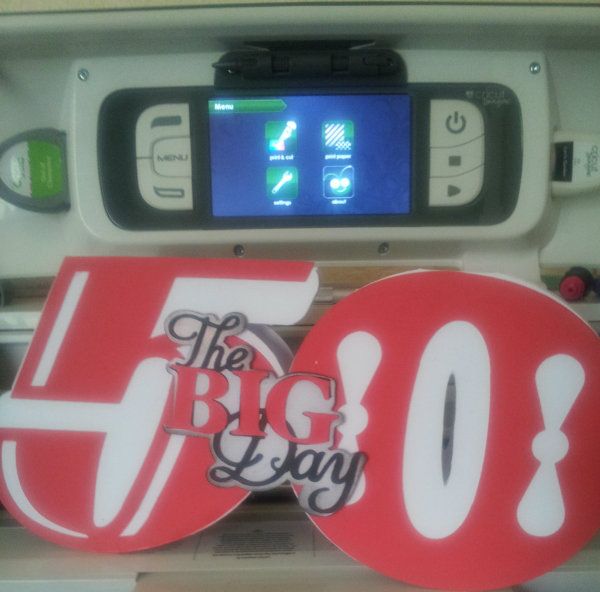
The picture below gives a perspective of the size in relation to the Imagine screen


If you would like the Gypsy file for this card, you can get it HERE
If you would like the CCR file, you can get it HERE

Thank you Sheila for having me again this month, I really enjoy being part of this wonderful DT :)

Happy Crafting

Hugs

Adele

July 27, 2012

Welcome Back Teacher Gift

Hi, all! This is Jeannie from Nonnas' Scraps and it is so nice to be with you today! Thanks, Sheila, for allowing me the guest spot once again.

Don't you think this summer has spend past? I have two short weeks of vacation left. And, I will be getting a few "Welcome Back" gifts for my grandson's teachers finished. Join me in this project.

I know of very few teachers who don't enjoy a gift card. And this holder will make the grade! 

Please note: this project was completed on the Zing with MTC software. It can, however, be accomplished using a Gypsy or CCR.

Cardstock:
Brown 6 x 12"
Black 6 x 6"
red 3 x 3"
green 2 x 2"
Font: LDT Teacher from Lettering Delights
Shapes used: rounded corner square, from from square and apple
White pen (I used Inkssentials)
Chomas Adustable Pen holder
Wood Grain embossing folder
Distress Ink: Antique Photo
Tape runner 1/4" wide
Pop dots
A gift card to insert in the back

First, I created the file in MTC. 
I Selected the rounded square from Basic Shapes. I then, sized it to 3.5" 
and duplicated for a total of 3

To create the the frame I started with one of the squares and generated an inset shadow:

I accepted my imaged.
To finish the "frame" I then joined the two together:

I opened the Font, LDT Teacher and typed the message. 
"Java great year!"

I then, opened an apple file that I had in my "stash" and sized it to 2".

I arranged all of my cuts on a 12" mat. I have the cuts assigned to different layers in the software...
you'll see that in a second! (BTW, the writing will be on the solid square in the upper right hand corner. 


This looks funny now, 
but that is because I will use the arrangement so I can cut with scraps of papers. 
And this is how the screen translates to my actual mat:


On to cutting! Or, rather the writing...
I loaded the white pen in the Amy Chomas holder. 
(For more information on using this pen holder in your Zing click here.)
From the software, I selected only the layer with the writing. 


 I set the software as shown:
Force 10-11
Offset: 0
WYSIWYG
I chose: Set Blade Origin

The laser light illuminates and it can be seen reflecting off of the paper.
Using the arrows, I moved it until I could see it approximately 1/8" from the upper and
right edges of the paper. 


I then told the software that I was finished. Within seconds, 
the white writing was on the black cardstock. 

I did not remove the mat from the machine at this point. 
Instead I changed the pen holder for the Red blade holder (and red blade). 
I returned to my software and reversed the layers selection:

Onto cutting! 

Force: 83
Cut one time
Offset: 0.35
WYSIWYG
When asked to set the origin, I chose "use last"
The cutting was so smooth!

To assemble:
Ink all parts
Emboss the frame with the wood grain folder.
Assemble the front of the holder first, in this order:
black board with writing
Brown frame
Apple
I ran 1/4" tape around the edge of 3 sides
 of the solid brown backing.  
I positioned the edge without tape at the top.
Finally, I pop dotted the apple to the front and inserted a gift card. 

Such a warm greeting for any returning teacher, don't you agree?
Thanks for stopping by...