Showing posts with label Happy Hauntings. Show all posts

October 1, 2012

Halloween Dangler


Happy October!!!  I am super excited to be here at She's A Sassy Lady today!!  This is Lori from ScrappinMyStressAway and I have this fun 3D Halloween card to share with you.  I saw a birthday card that was similar to this and just had to figure out how to create it!!  Since Halloween is my favorite holiday (not to mention today is October 1st) I just had to Halloween-ify it!


I started with a rectangle with a rectangle window from Gypsy Wandering.  I put two on my mat sized to 5.5 inches.  I welded them together.

  I copied and pasted another set on my mat because I needed three of these pieces to make my card.


I used some K and Company Halloween paper to cut the cards out.


I scored each card at 3.5 inches and creased the fold.


This is a view from the top of the three card pieces scored and folded.


I cut out these phrases from Happy Hauntings in black cardstock.


I adhered one phrase on each side of the card at the bottom.


From the Pumpkin Carving cartridge, I cut out two each of the witch, bats and haunted house out of lime green, purple and black cardstock.


I adhered the pieces together with twine in between.  I used stickles to create eyes for the bats and to color the moon.

I adhered the cards together one side at a time.


This card can also be used as a center piece!

I hope you have a wonderfully spooky Halloween month!!

October 26, 2011

Halloween Sign

Hi everyone, Beth from thunderbirdlindybydesign, today  I wanted to show you a quick Halloween sign I made.  I got the idea from a wooden sign I saw at Hobby Lobby.

You will need:
Ribbon
Circuit Expression
Cardstock(I used regular, glittered, and shimmer)
Happy Hauntings Cart
Oct 31
Heritage
George, or any cart with an oval
Glue
I also used my Gypsy, but after I got it done, I realized you did't need one.

I started with Heritage and cut the scroll sign at 11.39 high using glittered black cardstock.


I started with the oval from George at 7.24, using shimmery cardstock and placing the following cuts inside of the oval, I cut the house from Oct 31 at 3.39
The Bats from Happy Hauntings at .30
The moon from Oct 31 at 1.12.

In hindsight, I could have just cut the oval by itself, and then in black cardstock cut the House, Bats and Moon, and glued them on top of the shimmery instead of trying to place the cuts within the oval.  After I got it all together, I realized I made this harder than it needed to be.

Using Happy Hauntings, I cut both of the above pumpkins with their layers in various sizes.

The owl and it's layers is from Happy Hautings cut at 4.18.
Like I said, you really didn't need your Gypsy, I just started placing the items I wanted to cut on the screens and sized them to each previous layer.

Here is the completed project.
When I put the above pumpkin together with his layers, the whole time I kept thinking of the line from the movie Toy Story, when Mrs. Potato Head was packing Mr. Potato Head's butt, and said he needed his "Angry Eyes".  Boy this pumpkin sure has Angry Eyes.


I wished I would have cut the scary top layer in black instead of grey.  I am not liking this too much.


Thanks Sheila for having me as a guest designer today,  Beth.

October 9, 2011

A Bewitching Halloween

Hi crafty friends!  This is Jennifer (Simply Sassy Scrapper) from http://simplysassyscrapper.blogspot.com/!  I am so super excited to be a guest here on She's a Sassy Lady Blog and share with you a fun Halloween Layout!

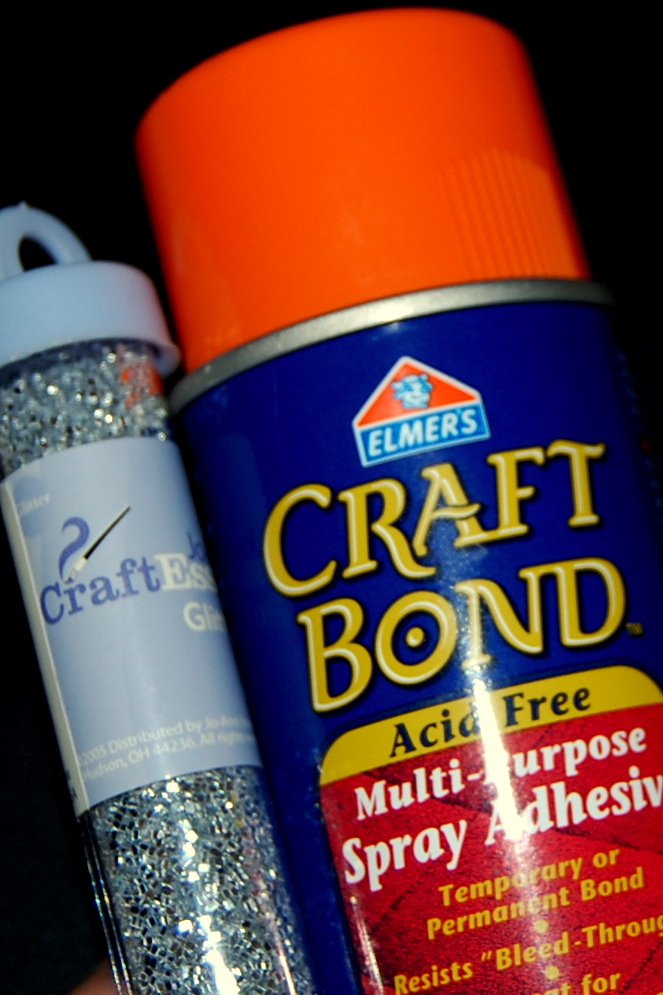
For this project I used 2 (12 x 12) sheets of black cardstock as the base.  I chose to use plain cardstock and add glitter throughout the sheets myself as I felt that the glitter papers I had were just too glittery for what I had envisioned.  So to add the glitter I simply lightly sprayed the cardstock with Elmers Craft Bond Spray Glue and added JoAnn's silver Craft Glitter/shimmer to it.

To create the Web Base/Background Embellishment I used the TC Chic & Scary cartridge at 8 inches each on white card stock. I then glued the Webs on the base cardstock at opposite sides.  I then added some cotton like product I had left over from making Santa's beard last Christmas that I had picked up at a craft expo to give the Web its "webbing".  To get the web to stick, again I lightly sprayed some more of the craft bond over the web cardstock and glued down the "webbing".  I then added a spider from the  TC Chic & Scary cartridge at 2 1/2 inches.  I gave the spider some red bling for eyes at placed on the web with a few small glue dots.
To give the bottom of ea. page a sort of foggy/eery look, I mixed together some paint to make grey and painted it on using crumpled up paper towel & added some silver spray glitter. 

I then placed the photo mattes down with papers from last years DCWV Midnight Spell Paper collection (base matte 4 1/2" x 6 1/2"/top matte 4 1/4" x 6 1/4"), (3 1/2 " x 3 1/2" base matte/top matte 3 1/4" x 3 1/4"),
(2 1/2 " x 2 1/2" base matte/top matte 2 1/4" x 2 1/4"). I also added some ribbon to a couple of mattes. 

Title Instructions:
The Title "A Bewitching Moment" is made from several carts. 

"A" is from the Blackletter cart (base letter/blackout&shift 2.23"w & 3"h; top letter layer shift only 1.97"w & 2.65"h). 
The "bewitching" is from the Happy Hauntings cart (base word/Phrase&Shift 7.96"w x 2.18h; top title layer Phrase only 7.85"w x 2.18"h).
The "Moment" is from the Gypsy Wanderings Cartridge (base word/Phrase&Shift 3.71"w x 1"h; top title layer Phrase only 3.66"w x 1.02"h)
**I did remove the S from moments manually with scissors to change the word to Moment. I used Stickles (icing) to trim the words of the title.

Other Page Embellishment Instructions:

Moon with Witch (used my G to weld) - George Fonts & Basic Shapes for Circle at 3.21"w x 3"h;
Happy Hauntings for the witch, use the shift key for the witch at 2.38"w x 1.82"h. added some black distressing ink around moon.
*Bats (layered with white base & red bling for eyes) - TC Chic & Scary cart; white base 1 1/2", black at 1 1/4". Also used pop dots in between layers to give it diminsion.
*Spooky Tree - Cut 2 Trees at 6" from the TC Chic and Scary cart.  I layered the 2 trees and folded the branches to give it diminsion and then I added some Diamond Dust on branches for some extra pizazz.
*Flowers were cut using the Flower Shop Cart (my G file for these didn't save so I apologize for not having the exact shape and diminsions), the flowers are 3 layers I believe the base began at 2 1/2", then 2", then 1 1/4".  I also added Diamond Dust on pedals to give the embellishments more pizzaz.
*Canvas Tickets and Scalloped Embellishment are from Little Yellow Bicycle Halloween Collection.

 Thank you so much for looking!!!  I appreciate everyones creative ideas that inspire me!!! Hope you have a fantastic day!!! Jennifer 

September 29, 2011

Sassy Witch Project...

Hey Ya'll,
Well, today is another Sassy Dude Project from Cricut Couple.  Sheila let me have an extra spot this month.  Now, over on our blog on the 22nd, we had some blog candy which is the adorable Wicked stamp set.  So... I figured I would use it here and show you how I made up my papers for this card.
So, to make this card, I used Happy Hauntings and Close To My Heart's Art Philosophy cartridge.  This is actually very simple to do.  I simply stretched the frame cut from Happy Hauntings so that it would fit on this card.  The card is 8 1/2" by 5 1/2".  Below are how the cuts look on the mat.  For this design, you will want to leave the paper on the mat for a bit.
 I simply used black and white card stock for this design.  It's probably not easy to see in the picture, but the black has the oval opening cut out and the white is the base layer.  The skulls for the corners are also on the bottom of the white side.
 For the black side, I used a metallic copper ink and a craft sponge.  I simply tapped the craft sponge on the in and then tapped it over the black frame until I was happy with it.  The same applies to the white frame.  I used a dark yellow, rust and lime green ink... tapping one color at a time until I was happy with it.  I then tapped black over the skulls.  For the next picture, you will probably have to blow it up to see the detail.  I do a lot of painting and I wanted to have this spider web in the background.
To create the spider web, I just took a very thin liner brush, dipped it in water to moisten it and then ran it across a black ink pad.  Then I just free handed the webs and the little spider.  You could do this with your markers if you are more comfortable, but I am more comfortable with a brush.
 I then used the sort of honeycomb stamp that came with the set and stamped the top right and bottom left corners.  I then used Cocoa ink on the witch.  When the witch is dry, I then took a black fine tipped marker and detailed a couple of extra places on the witch. You should be able to see that detail if you blow up the picture too.  I then used black ink on all edges of the white frame.
 When everything was dry, I put it all together.  I didn't think about the top layer oval, so when I put it together, I lost my little spider that I painted, but oh well.  Hee! Hee!  The Wicked Halloween is also from this adorable stamp set, inked in Cocoa after it was tapped with ink like the main background.  This is a tag shape from the CTMH cartridge.  I used 3D adhesive to stand up the layers and the skulls.
 I cut my background mats at 8 1/4" x 5 1/4".  I added the purple in the center.  It was cut 3" x 8".  I also stamped this cat (don't like cats) on a scrap white piece of card stock and cut my sentiment mat.  I used a rounded corner punch on the corners and inked everything in cocoa ink.  I really think this witch is pretty sassy, so it had to be used for this extra design day.  Besides, it's the Giveaway plus the font set!
Ok... So before I go, I would like to invite you back tomorrow as our new friend Shakey will be premiering her first guest design spot, right here, on She's a Sassy Lady!  If you want, you can go ahead and visit Shakey's Blog at The Crafty Pink Butterfly!  Thanks so much for visiting today.  We would love to know what you think of the card today and would really love it if you stopped by our blog for a visit at Cricut Couple!

August 25, 2011

Accordian Cards

Hey Ya'll,
The SASSY DUDE here, from Cricut Couple. Sheila has asked me to become a regular designer!  YAY!  Thanks so much Sheila!  Today is my first official regular designer day, so I thought I would share a tutorial on something that looks very complicated, but really isn't at all.  It seems that way at first, but once you have made a couple, it's super simple.  I hope you all give it a try because they are lots of fun!  It's Accordian Cards.

To start with, I am going to show you how to make the frames.  Both cards are going to be 6" x 6" in size.  That's the easiest to size to start with because of the square.  Once you get the hang of it, start playing with other sized cards based on what you normally work with. I normally work with half cards, so this was a lot of fun to try for this tutorial.
Here, you can see that I used my Gypsy to create the frames.  You don't have to do two of them, but this particular card was very simple for making a double mat on the window open to the folded background.
Basically, you will need a square and a label shape.  There are so many great ones on so many cartridges, so I will leave this up to your favorites.  For this one, I used a couple of squared designs from Damask Decor.  This first "Layer 1" on the Gypsy is the wrapped frame that holds in the folding.  You want to make this one inch larger than your base.  Since we are using a 6" x 6" card for the base, we need a 7 inch square.  I pulled a square from George and Basic Shapes, sized it to a height of 7.00 and centered it on the mat.  I then picked a label shape and added it in the center of the square.  For this one, just make sure that it is smaller than 5 1/2 inches square.
For this mat, I wanted to make more of a cover.  Basically, the decorative papers used in this particular card were from thinner paper, so I had to use a stronger card stock for the wrapped portion.  For this, add a 6" x 6" square.  Then add your label shape to the center. Note... keep this one a little larger than the first.  This layer will sit on top of the other and by doing so, you create a double mat.
For the next step, I am going to switch to the halloween design.  I hope this doesn't cause any confusion.  For the inside, you want a piece of paper that is 12" x 5 3/4".  Using a scoring board makes this process very simple.  If you don't own a scoring board, you will need to use a ruler and a bone folder.  It may be simpler for you to pencil mark your paper before scoring.  You want to score every half inch on one side of the paper.  Then flip over the paper and score again, starting a 1/4" and then every half inch after that.  This way you are starting the scores perfectly to the zig zag.
If the paper is scored correctly, this is what it should look like when scored.  The next thing is to fold it on the scoring lines.
This is what you have when finished.  Pretty cool, huh?
Take your " 7 inch " square that you cut earlier and put it on the scoring board.  Working from the outside in, score the side at 1/4" and then again at 1/2" on all four sides.  (I wanted another accent on this one, so I scored again at 1" but you don't have to do that.)  When you have completed scoring, cut the outer 1/2" corner on the scoring lines.  This will allow you to fold correctly.
Once you have scored everything, fold the 1/4" and 1/2" This preps the frame for the insert.
For the next part, you will need your insert, frame and your card base.  The card base is a 12" x 12" piece of card stock, cut in half to a 6" x 12" piece.  It is then folded in the center to create the 6" x 6" card.
Insert the folded part into the frame and using a little tacky glue, glue the corners.  Just so that the corners are prepared attaching.  Using a glue runner or ATG gun, spread adhesive on your card base.  Don't use liquid glue for this application.  It will really wrinkle the card base.
 Once you stick it all together, this is how it turns out.  Once you are done with this part, simply embellish however you want!  It's that easy.
 For the halloween card, I cut a witch from A Child's Year and a frame from Happy Haunting.  I used George and cut a couple of ovals.  I also cut the frame larger and smaller to create a window frame in the purple for this card.
 You can embellish with whatever to make it your own.  Just be careful to not go too overboard.  You don't want to cover up all that beautiful folding you did.  Hee! Hee!
 For the inside, I simply used more of the same label shapes and added a couple of bats.
 For this one, I cut a couple of ovals and stamped the Happy Birthday.  I cut some flowers with coordinating paper using Mother's Day Bouquet.
 You can see here that the frame for this one was made with white card stock.  The striped paper is added to the top.  This gives a nice double mat frame around the folding. I added some stickles and gems to finish it off.
 On the inside, I simply added the cuts that were left over from the front for the sentiment mats.  I also added a couple of the leftover flowers.
Well, I sure hope you enjoyed today's tutorial.  Another big Thank You to Sheila for having faith in me that I could play along with such a talented bunch of Sassy Ladies.  I would love to know what you think about this project, so please leave a comment!  That's what makes this all so much fun!
You are also welcome at either blog anytime!  Here is a link to My Blog - Cricut Couple.
I have cards for the most part, but there are some fun projects from guest designing for Sheila and you all!  I look forward to your visit!
Most Sincerely,
Bobby - The Sassy Dude!