Showing posts with label Gypsy Files. Show all posts

January 9, 2013

Hugs & Kisses

Hi Crafty Friends :)
Today I get to share my project with you here and at Adele's Creations

I decided to male a Valentine Card, my oldest Grandaughter asked for one, so here is what I came up with


I started with an oblong from CCR basic shapes sized at 9.264W x 4.625H
I added a rounded corner square to the inside right of the oblong sized at 3.889W
This created my aperture card base.

I then added a heart shape from the Created With Flourish cartridge sized at 4 .014W x 3.819H
This formed the base of my card


The top layered heart was proportionate to the base heart and the Happy Valentine's Day was from the  Phrases cart sized at 3.806W x 1.849H with proportionate layer

Here is the inside with a few rhinestones for embellishment (from my Secret Santa Sheila :))


The stamp I used for the Hugs & Kisses is from CTMH Artiste Word bubbles, using Barn Door distress ink
If you would like the file for this card you can get it from the links below

CCR link HERE 
Gypsy link HERE 
(You may need to change CCR basic to George or similar in the Gypsy file??)


Thank you Sheila for letting me share on your Blog, I look forward to next month :)

Happy Crafting everyone

Hugs

Adele

September 12, 2012

Easel Framed Card

Hi Crafters :)

Today I'm sharing my post here at Sheila's blog and at my blog

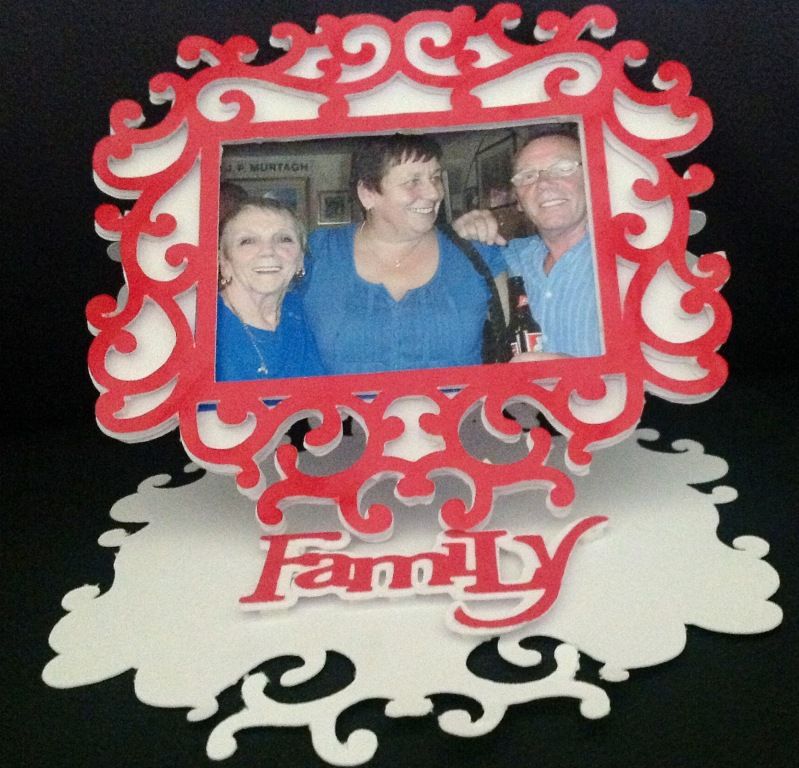
I just recently had a Family reunion in Brighton, my eldest brother came down from Scotland to join us, we had a blast as we hadn't seen him for years, so I wanted to make a special card for my Mum, it's an easel framed card I designed using Fancy Frames as my base, with the phrase from Gypsy Wanderings.


This card measures 5" x 5.5" , it holds a 3.5" x 2.5" sized photo.

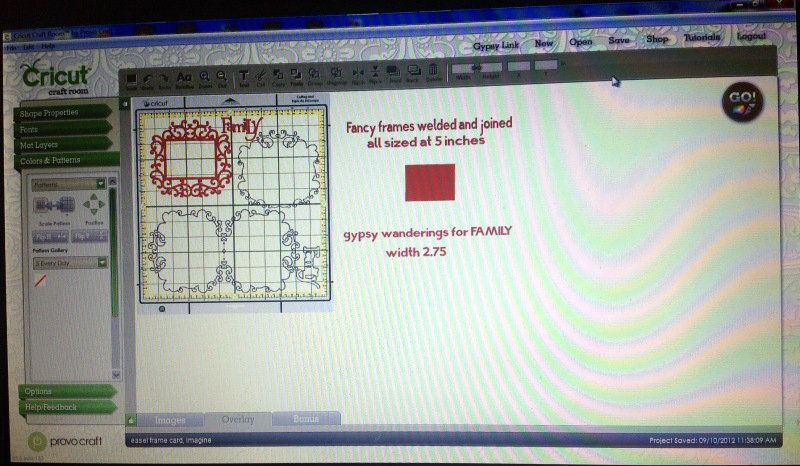
All the frame cuts were set at 5", 2 shadow cuts were flipped and welded together to form the base.
The "Family" phrase was cut at 2.75" wide, from GW

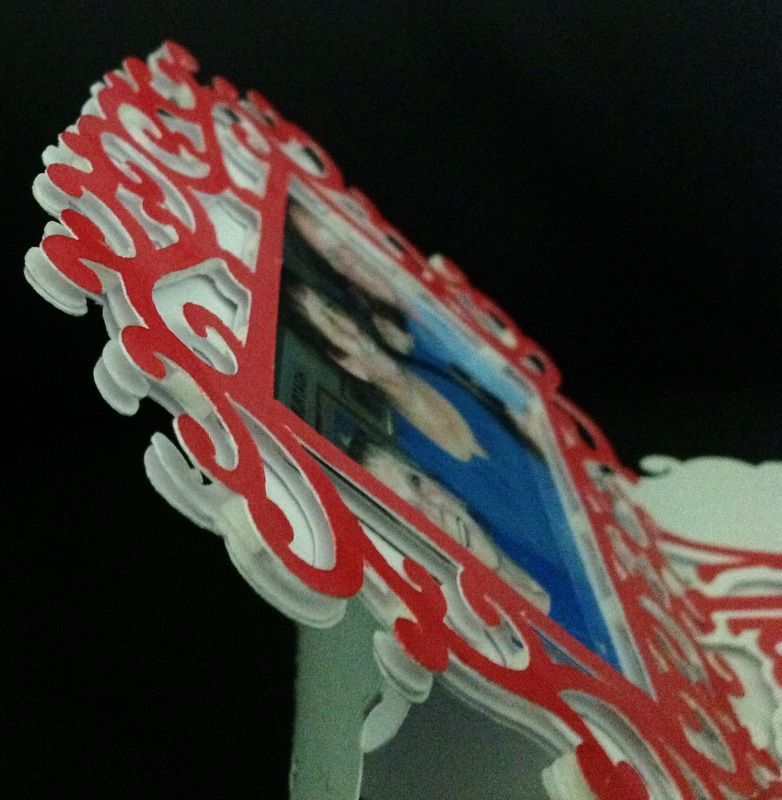
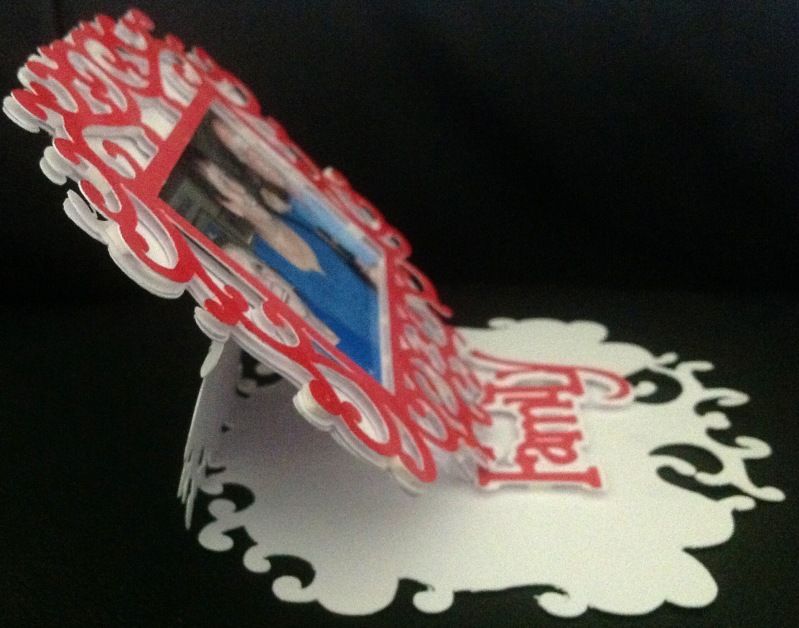
I used foam pads (pop dots) to adhere the frames together, then adhere my picture to the back of the opening, next I adhered the assembled frame and picture to my shadow frame, then glued the bottom half of the shadow cut to the folded card frame.


I also used foam pads on the phrase to give the dimension needed to be used as a stopper when the card was erect.


My Mum will love this card with her, my eldest brother and his wife :)

Because of my poorly eyesight right now, I used CCR to design in, though I have made the file available in the Gypsy format too, for those that want it, the files are below

Gypsy file can be downloaded HERE   (Expression mats used)

CCR file can be downloaded HERE  (Imagine mats used)

Thanks for popping by today and thanks Sheila for allowing me to share my DT project with you all :)

Happy Crafting

Hugs

Adele

August 8, 2012

50th Birthday Card

Hi crafty friends:)
Adele Here to share my DT project with you all!

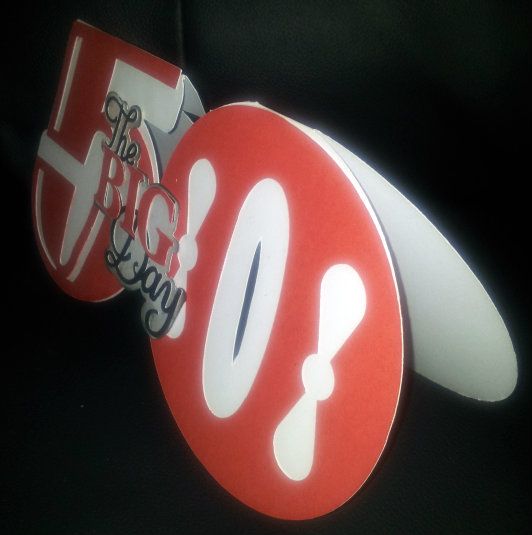
Today I made a 50th Birthday card for my Brother-in-law
He is a massive Liverpool fan, so the colour choice was easy :)


I used Out of Character for the "5" & the "O" and used Phrases for the "The Big Day"

The "50" card base was made using the shadow feature of the numbers, sized at 5", welded and flipped


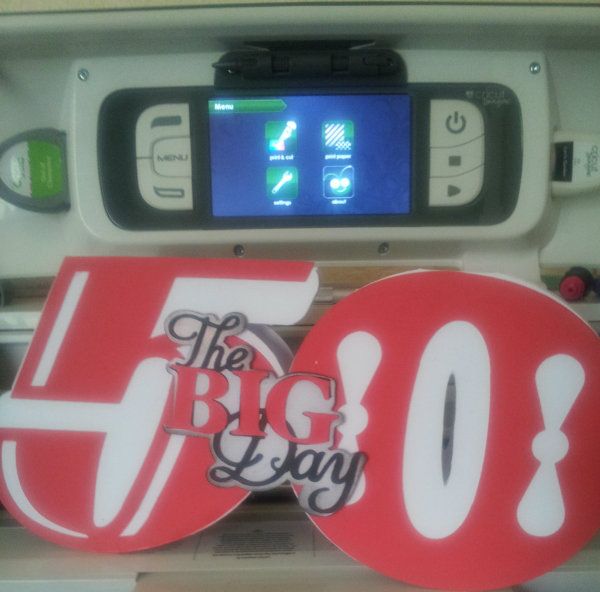
This is a large card measuring 10.5" x 5", 
large cards are very popular at the moment :)

After folding my base card, I attached the "5" & "0" on the front, then layered the phrase and pop dotted it on the front, easy as that, quick but effective :)

The picture below gives a perspective of the size in relation to the Imagine screen


If you would like the Gypsy file for this card, you can get it HERE
If you would like the CCR file, you can get it HERE

Thank you Sheila for having me again this month, I really enjoy being part of this wonderful DT :)

Happy Crafting

Hugs

Adele

April 15, 2012

Easel Drawer Box & Card


Hi Crafty Friends, Adele here
Today is my turn to guest design here at She's A Sassy Lady
Thanks Sheila :)

Today's project is an Easel Drawer Box, I made this design in CCR & on the Gypsy so for anyone that would like these files, I shall put them at the end of this post.
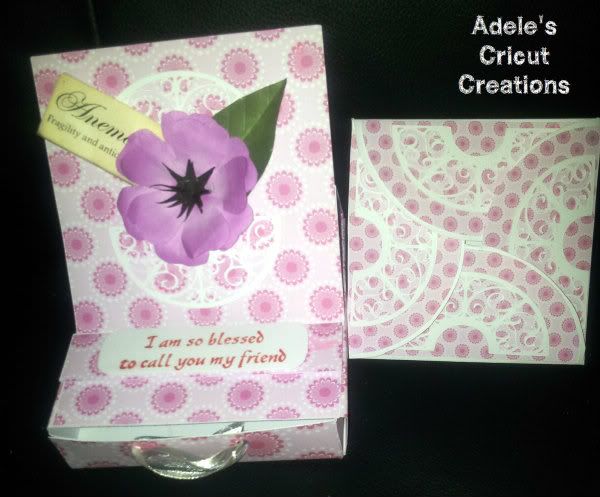
So, here is the Easel Drawer Box


This includes a 4x4 square folded card to fit inside the drawer.
You will need the following card stock

Drawer Box
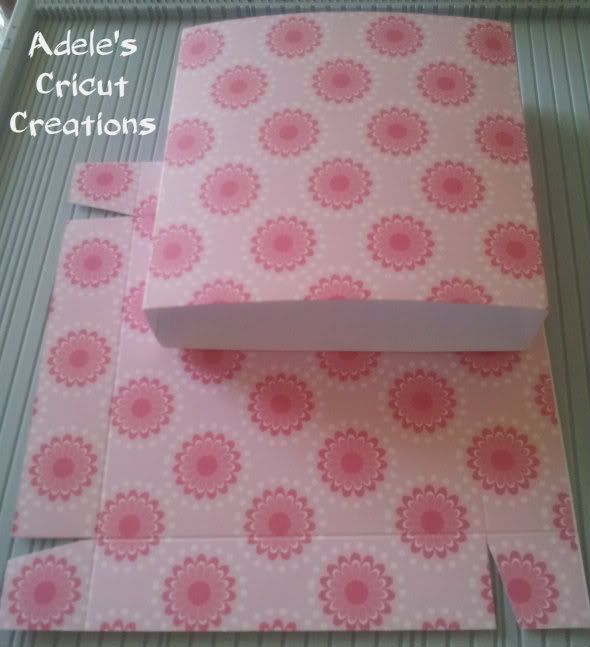
6.5" x 6.5"  for the drawer
4.5" x 12"  for the wrap of the drawer

Score the drawer 6.5" square card at 1" around all 4 sides, 
cut a small triangle into 4 edges to form the tabs, glue together.

Score the wrap 12" at the top, at the following marks on a score board
1.1/8", 5.5/8", 6.3/4", 11.2/8" 

(If using a Crafters Companion Ultimate, then use the "box base" side to score the following)

Score at 1", fold then push this fold to the right edge and score again at 4.5", fold and push this fold to the right edge and score again at 1", fold push to right edge and score at 4.5", fold, push to right edge and score at 1"
This forms the wrap for around your drawer base


Now on to the Easel Card, for this card you will need the following card stock


Easel Card

4.5" x 9" for the card, score at 2.25" & 4.5"
4.5" x4.5" for the front panel
4.5" x 1" for the stopper bar.

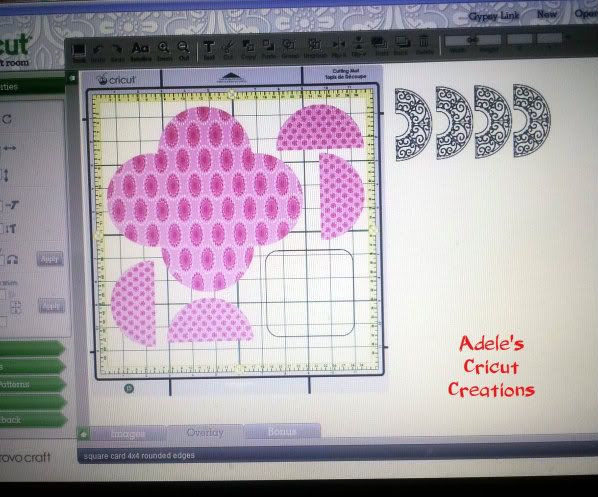
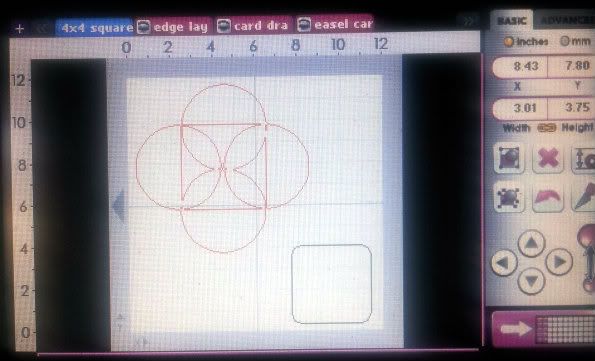
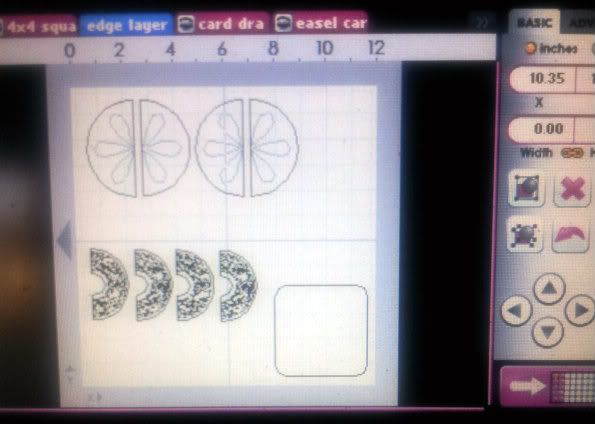
I used Gypsy Wanderings, Ornamental Iron, George & All wrapped up for decoration and the semi circle panel pieces ( using the hide contour feature on Gypsy wanderings grapefruit)


Here is the Gypsy view


This is how the 4" x 4" card should look after adding the semi circle panels and the Ornamental Iron decorate pieces to the underside of the card.


And this is how it should look when folded


Now, on to assembling the Easel Card to the drawer box
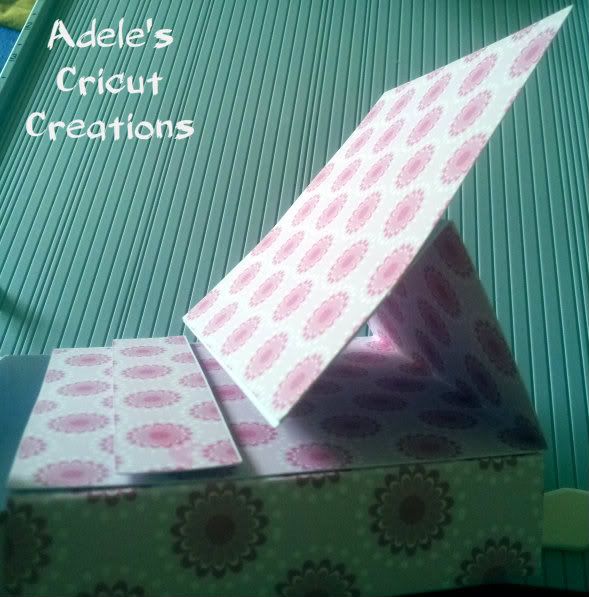
 With the 4.5" x 9" card attach it to the top of the drawer wrap and fold the easel part so you can attach the front easel panel, add the stopper bar too, as shown below.


Now it's ready to decorate :)


I have made several of these in various sizes, they are so handy for so many occasions, here is a few I have made recently, using Heartfelt Creation die's as well as my cricut.


Sorry for such a long post but I thought the detail would help others recreate these.
Here are the links to my files


Thank you so much for having me again Sheila.

I hope you enjoyed this project, I certainly had fun creating them :)

Happy Crafting

Hugs

February 23, 2012

Cat in the Window by Sassy Dude...

Hey Ya'll,
Sassy Dude here today from Cricut Couple.  I have something very different for you today.  When I thought up this design, it took a LONG time to lay it all out.  It took lots of practice, but when it was all done, I was so excited with the way it turned out.  To start, the base for this card is a half size (8 1/2 x 11 folded in half)  I used a lavender card stock for the base.
The next step is to print out a picture that will fit on the cover of the card.  This is a picture I found on Google.  You could use anything you want that creates a scene like you are looking out of a window.  At the bottom of this post, I will be sharing box files for you to download.  One is the picture and the other is the Gypsy file.  You will also need some white card stock.  I used textured white for this and inked it with Pansy Purple from CTMH.  You need to cut the following with a straight cutter.
1 piece at 3/4" x 8 1/4".
2 pieces at 1/2" x 8 1/4".
2 pieces at 1/2" x 5 1/4".
The window picture is 5" x 8".
Once all of the pieces are inked, this is what you will have.  You probably wont see it, but I inked the picture as well just to be safe.
Stick down the two side pieces first, then a 1/2" piece to the top and the 3/4" piece to the bottom.  Below is what it will look like.  You are basically creating the window frame and your mat at the same time.  I used ATG tape to do this.  You will have a 1/2" piece left.  Pop it with 3D adhesive.
When you add that piece, you will have what is shown below.  It looks like the ledge at the bottom of the window.
Once that is done, you can start assembling your window.  Below are the pieces that you will get from the Gypsy file.  I used Martha Stewart Elegant Cake Art, A Child's Year, Cake Basics, Flower Shoppe, Mother's Day Bouquet and Ribbons and Rosettes for this card.  Even if you don't have all of these carts, you can still download the file to your Gypsy or CCR and change out whatever shapes you don't have.  All of the sizes are in the file for you.  The drapes on the window are actually a tear drop type of shape.  When those cut, you will need either cut them in half like I did, or fold them in half.  If you use thinner paper, I would recommend folding them so that they are good and strong.
Above is how you layout the pieces.  Add 3D adhesive to all pieces.  When you have finished with that, flip over the bottom most row of the valance and add ribbon.  I used this beautiful white seam binding from My Craft Spot.  I simply ran a strip of ATG tape across the bottom of the scallop and then gathered the ribbon as I went along.  I then tied two bow ties to use for tie backs.
When you pop all the layers and add them, below is what you will get.  Also, when you cut the file, there are two cuts of the cat.  Glue one directly to the picture and then pop one and let the tail hang over the window ledge.  It makes the shadow of the cat really look good.
Then add your tie backs to your little drapes and the front of your card is done!  That was easy, right?  Well... sort of.  This was about 6 tries later.  Hee! Hee!
For the inside, you will just cut your mats with a straight cutter.  The bottom most mat is 5 1/4" x 8 1/4".  The second mat is 4 1/2" x 7 1/2".  The white sentiment mat is 3" x 6".  Again, everything is inked with the Pansy Purple Ink.
Once everything is together, I stamped my sentiment.  This is from a stamp set called Friends and Neighbors from My Craft Spot.
Add all of the little leaves from the Gypsy file.  I just used Scrappy Glue to attach them all.  That is my FAVORITE GLUE!!!
Then just add your flowers.  Just be careful not to cover up part of the words of your sentiment like I did.  Oops.  At least you can still read it, right?  Hee! Hee!  If you want a little more detail, you can ink all of the flowers and leaves as well.  For this card, I didn't think it was necessary.
Once it's all done and dry, simply hit it with a couple of strips of ATG and stick it inside your card.  When it's all done, below is what you have in all of it's layered glory!  The final thing is the banner in the front.  I used the Friends and Neighbor stamps again for the sentiment.  I inked the edges and then rolled the paper back and forth with a pen.  This made it look like it was just flying or something.  Love that!
Then, when you open the card, you have this beautiful flower arrangement surrounding your message.  Pretty Cool, Right?  I used Anna Griffin Papers for the patterns in this card and recollections solid lavender for the flowers and base.
It took many tries, but I really love the way this card turned out.  Now that I have the Gypsy file created, I will be making this card again and again!  I hope that you will try one too!  Now... Here are the files.
We sure hope you enjoyed today's project!  Thanks Sheila for letting me be Sassy today!  I would love to know what ya'll think about this, so please leave us a comment.  Thanks so much for sharing your time with us today!  BTW, if you want to see what the other things we have been up to, hop on over to Cricut Couple and check it out!

October 23, 2011

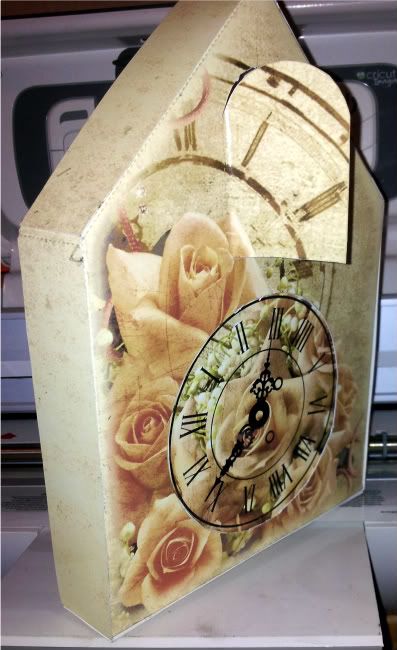
Cuckoo Clock Box

Hi fellow crafter's Adele  here 
Firstly I wish to thank Sheila for inviting me to be a guest designer here today.

 I wanted to share with you my Cuckoo Clock Box, this is a versatile box and can easily be converted for any occasion.


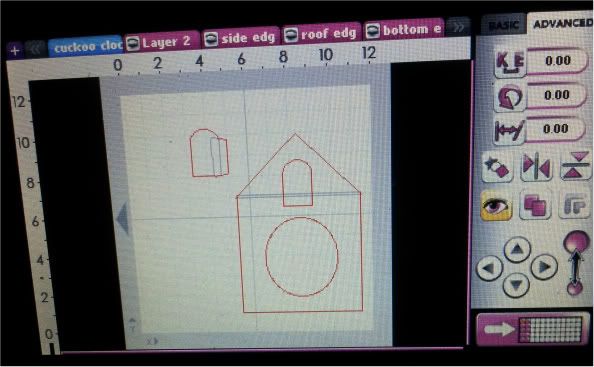
I first got all my shapes cut from my Gypsy


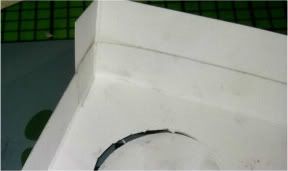
Score around the all sides of the shaped box on both front and back section at 1/4", 
 Cut a V into the corner sections where you would normally do for any box, also where the roof meets the sides, this will allow you to form the box shape, glue these tabs with strong adhesive.
Next attach the hinged window section


For the next part, you need to score the 2 side edges at 1/2" on both ends, attach to both sides of the box front on the outside, as shown below. 
Remember to only add adhesive to the lower edge.


You next need to score the larger of the two roof edges at 3/4" on one side and attach to the front of your box on the left hand side, the shorter roof edge piece goes on top of the right hand side and the covers the extended left hand side tab.
That leaves the bottom piece to be attached, all sides should be covered by the edges now, to complete the box lid.
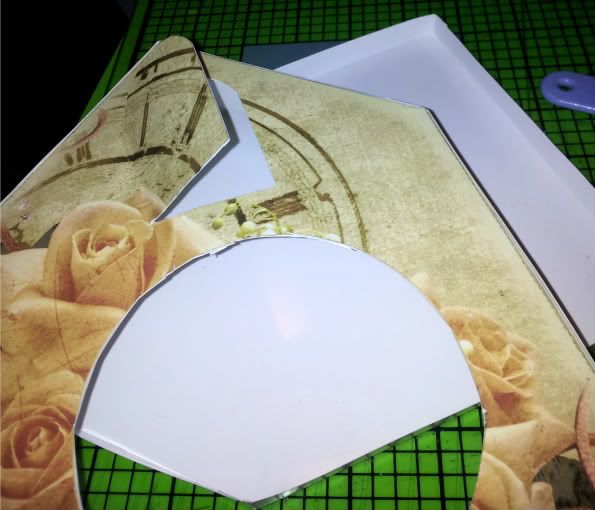
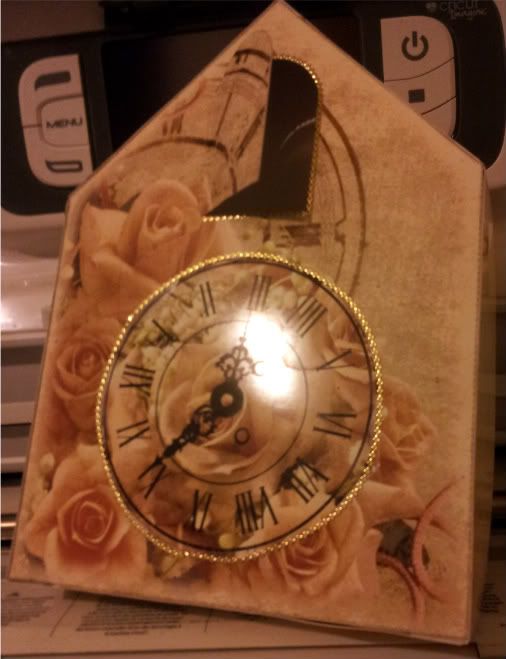
For your circular piece, this can be anything you want, I chose a clock face from the same paper range.
Note this is larger than the orifice to allow for sentiments and perhaps pop dots for dimension etc.
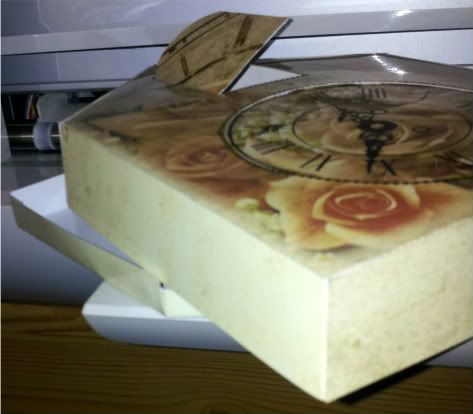
Your box lid should now look like picture below.

For the final touch, I added gold peel off's around the clock face and the hinged window.
Please excuse the poor picture quality.


Thank you again Sheila for allowing me to share my project with your viewers.

If you would like the Gypsy file for this Cuckoo Clock Box you can grab it HERE
Happy Crafting
Hugs
Adele

November 30, 2010

GabyCreates Ornament using Gypsy

My name is Gabriela Villaseñor or Gaby from GabyCreates.com
I am delighted for the opportunity to guest design for She’s A Sassy Lady.
I created this ornament using my Gypsy in an attempt to save money.   I saw these ornaments in a K&Company ornament package and I though I could recreated using my Gypsy.

You will need a Gypsy to weld the shapes found on the following cartridges: George and Basic Shapes for the rectangle (I later discovered that Gypsy Wanderings does have rectangles), Gypsy Wanderings for the circle like shape and Independence Day for the oval (street sign) shape like.


Tutorial: Gypsy
1- place a rectangle 3.75" h x 12.11" w using George and Basic Shapes
     on mat lined up at the edge (it will be outside of the E's mat cutting area, but that is what you want)
     make sure you un-click the Width/Height chain so that you can manipulate.
2- place somewhere else on the mat 9 of the #23 (on key pad) signs found on the Independence Day Cartridge at 1.5" h


    a) you can see that they are aligned on the Y axis
    b) click group
    c) under advanced tab click Kern and enter -0.05
    d) click weld
now you have them as a group
3- duplicate group by clicking the mirror button
4- flip design by clicking on the flip (up and down)


Above you can see copied or mirrored
Above you can see the design flipped
5- arrange your design my making sure the X axis match
    (I have them at -.56)
6- now weld the rectangle with the other design (strip of signs).

I hope I have not confused anybody yet?

To recap: 1-you need a rectangle 3.75h x 12.11w,
                2- the sign #23 9x from Independence Day grouped, -Kern -.05 and welded
                3- flipped and arranged on both sides lining up the center of the last signs at the ends of the rectangle.

On to the next step

7- using Gypsy Wanderings click on the Décor Tag Creative Feature Key and choose design #44 on the keypad.

8- For this step I used this design by stretching it (making sure the Width/Height chain was un-clicked) to 1.02w x 1"h   ~    see below
I placed ~eyeballing one each on the center/middle of each sign at the bottom, I continued by placing another one of the designs on top making sure that the X axis matched this is important so that the design lines up.
If this is too difficult to follow and you wish to make this ornament, just emailed me at scrapabookaholic at hotmail dot com or visit me at GabyCreates.com and I will attempt to send you the Gypsy file.

On to the fun part:
I decided to place two on a mat and cut
You have to score at center (lengthwise)
Score on each intersection
Fold (zigzag)
This is the reason you want that extra piece at the end.
You just cut on one side and leave on the other so you can glue together.
I moved on the the other side.
I finished by placing some glue on the center front and back,
inking with walnut Ranger Distress in and embellishing/decorating with gold glitter glue and an already glittery snowflake.  But the embellishing options are endless!

I know that these ornaments will look beautiful hanging on a Christmas tree.
I am planning on making many more and taking to my sister's house (her turn to host Christmas).
Thank you Sheila for the opportunity to Guest Design at She’s A Sassy Lady!