Showing posts with label My Craft Spot. Show all posts

October 1, 2015

Getting a jump on some Christmas cards!

Hi Everyone!  It's Sonya from Sonya's Paper Trail and I am sharing a Christmas card today.  This is a super easy card that can be made with scraps or in bulk--it's that easy!  Mine happens to use some very traditional paper by Echo Park's "Christmas Reflections" line of paper.  

Check it out:


I started with SU cardstock for my base. I then added a layer of kraft cardstock that I ran through my Cuttlebug using a striped embossing folder.  The stamped sentiment is by My Craft Spot from the "Mistletoe" stamp set.  I stamped it on a banner cut from the Silhouette Online Store that I sized for my stamp and card. I decided the kraft was blending in to my card too much, so I inked the edges for all of the kraft pieces, which provided just the right touch.

I hope you have a wonderful day!  


August 6, 2015

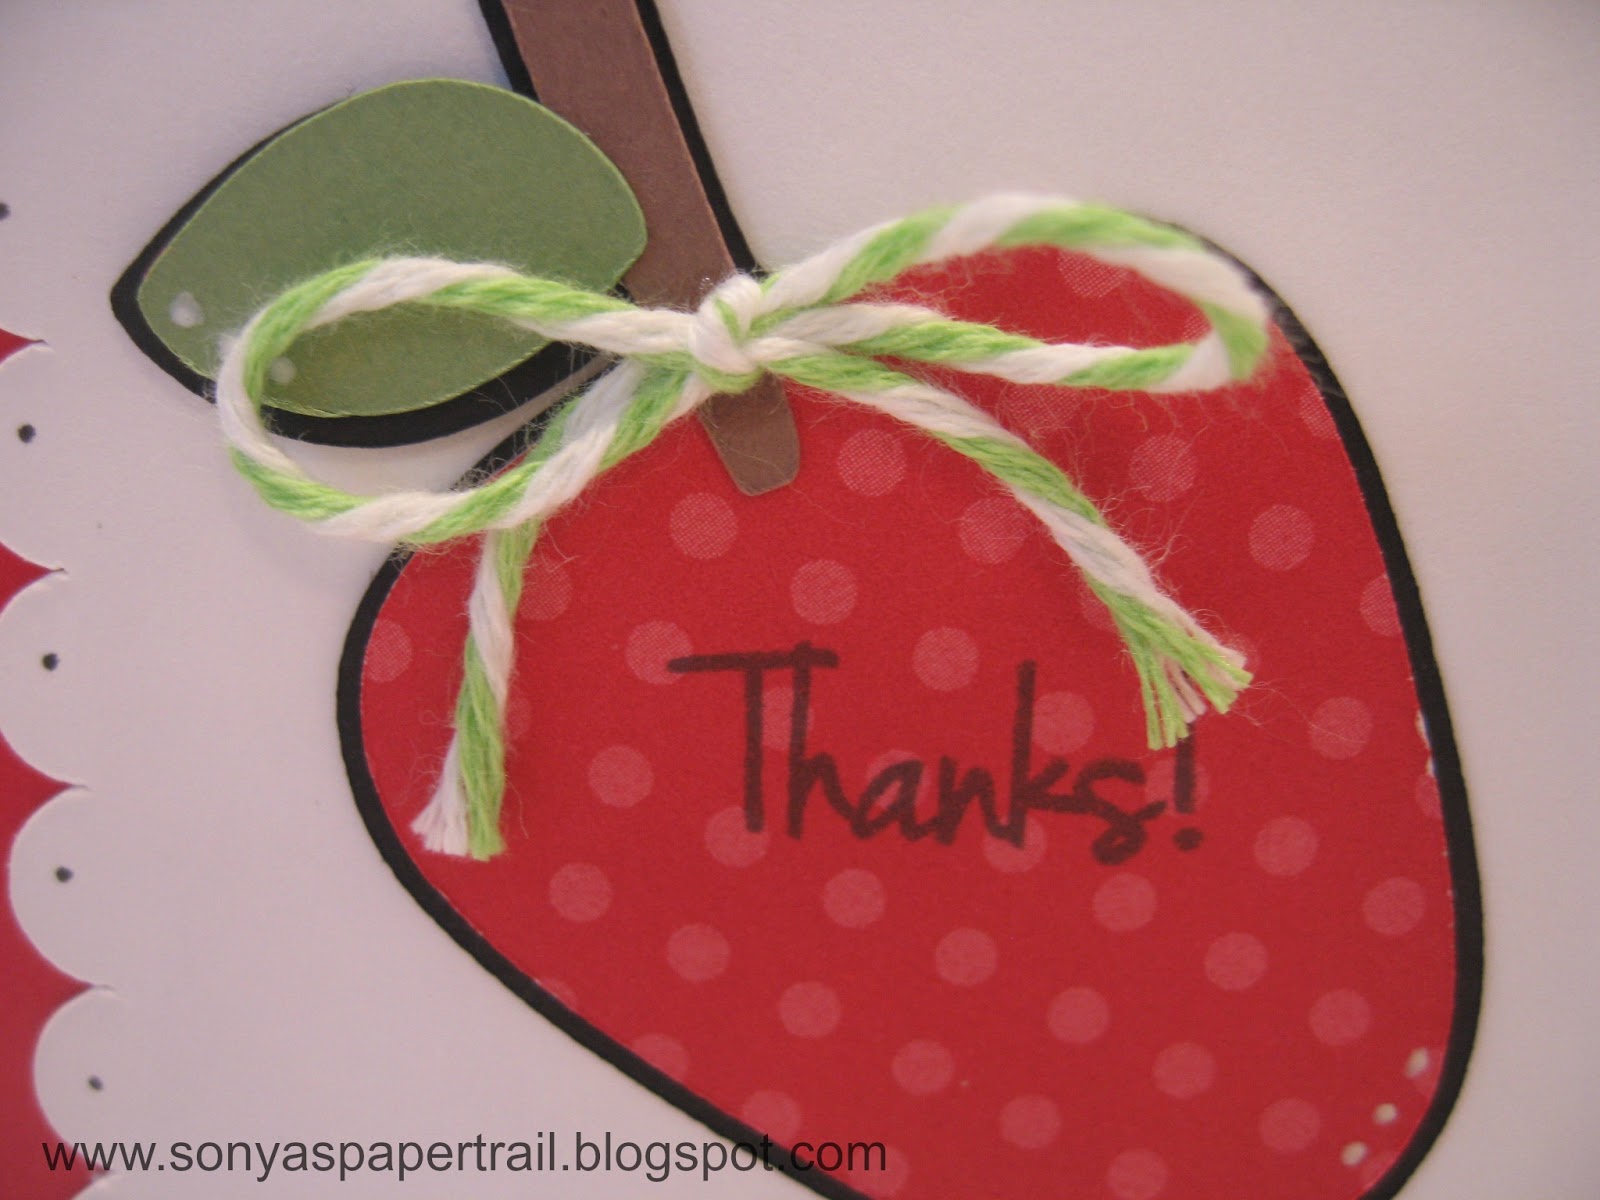
Set of Four Apple Thank You Cards

Hi everyone--it's Sonya from Sonya's Paper Trail.   Today is the first day of school for my son, so it seemed fitting that I share a "school" themed project today.  It seems far too early for school to be starting.  For some parts of the country/world, I know you have a few weeks left of your vacation; but for us, we're back to the routine of school today.

I have a good friend who is a middle school math teacher.  Her son and mine play sports together and we've become very good friends over the past year.  She has mentioned how she always likes to have thank you notes on hand, so I decided I'd give her a few cards to be able to use throughout the school year.

The cut file came from the Silhouette Online Store.  It included the background card, apple, stem, leaf and the tag.  The whole package!


I used some Stampin' UP! patterned paper that I've had around for a long time.  I love simple stripes and polka dots.  So very useful and versatile.


I used a different "thank you" stamp for each card.  Each image was a My Craft Spot stamp that I had in my stash.  I also had the baker's twine in my collection for a couple of years.  

Even though everything I used was on the older side, I'm positive my friend won't care one bit and will be thrilled to have some fun cards to use.  Do you know a teacher who might enjoy some cards?  It might be fun to surprise him/her with a matching set! 

I hope you have a wonderful day and have time to do something creative!


March 24, 2015

Floral Sympathy Card

Hey everyone...It's Sonya from Sonya's Paper Trail.  The project I am sharing today is inspired by a Pinterest find.  I didn't copy the card so much, as I took a few elements of the card I found and made them work for what I had on hand. 

 Check it out:


I liked the wide banner cut from the original card and I liked it paired with an oval.  When I put my oval over the banner, it just didn't look right, so I offset the banner to the left and really liked the result.  Here's a tip....I really, really like this layout and plan to use it a lot going forward.  I saved the banner and ovals as a .studio file to cut out with my Cameo going forward.  I started a new file folder of card layouts like this one, so that when I am in need of a quick card, I can go back to a "tried and true" layout that I know I like.  

For this card, the patterned papers are by Echo Park For the Record 2.  The stamps are by My Craft Spot, as is the jute twine.  I added three yellow pearls, to bring out the pretty yellow tones in the floral paper.  

I hope you have a fantastic day and are able to do something creative!! 
 
Cheers,
Sonya

April 3, 2014

Happy Christmas: April Christmas Card Inspiration

Hi everyone!  It's Sonya here today from Sonya's Paper Trail....is anyone making holiday cards all year long like I am?  This is my second year of spreading the holiday card making process out throughout the year and I enjoy it so much more than being flooded with card making at an already busy time of the year.  The card I have to share with you today is one of my favorites so far! 

Check it out:

Once again, this is a card design that could very easily be repeated over and over--and it uses up some scraps!  The paper I used is Echo Park Tis The Season.  It's become one of my favorite lines of holiday paper and I'm not wasting any scraps of it.

I had to show you the glitter "berries" I added to the grapevine wreath.  I simply added some dots of Stickles for some added shine.  

Materials used on this card:

Cardstock - SU
Patterned Paper - Echo Park
Remarkable Wreath Stamps - CTMH
Sentiment stamp - My Craft Spot "MistleToe"
Inks - SU
Other - Stickles
Die Cut Doily Shape - Silhouette Online Store

I hope you have a great day!  Thanks for joining us here at She's a Sassy Lady!


March 6, 2014

March Christmas Inspiration

Hi Everyone...it's Sonya here today from Sonya's Paper Trail and I'm so excited to be sharing another Christmas card with you today.  You might recall that I'm posting a monthly holiday card, in hopes of inspiring others to get a jump start on those cards this year.  

Check out the card I made this month:


What I love about this card is how easy it would be to mass produce this design!  You could easily cut a ton of ovals using a die cutter and set up an assembly line to knock out a bunch of these.  


I added a few gemstones to Dasher's antlers for a little bit of holiday bling.  I'm really loving olive green and this lovely, deep red with grey accents.  This is quickly becoming a "go to" color combination for me!


Materials used:

Cardstock: Stampin' UP!
Patterned Paper: Tis the Season by Echo Park
Stamps: Dasher by SU and sentiment by My Craft Spot
Inks: SU
Ribbon and Gems: Misc.

I hope you have a super day...and thanks to Sheila for having me on her team!

December 5, 2013

Just Chillin'

Hi Everyone!  It's Sonya from Sonya's Paper Trail and I'm so excited about the card I'm sharing with you all today.  It's a super cute "winter" card that uses some fun Cricut cuts mixed with an adorable snowman stamp.  Could it get any better--stamping and die cutting all at once?!   

Check it out:


To begin this card, I cut out the snowglobe image from Cricut Joys of the Season.  That's an older Cricut Cartridge, but it has a lot of great "basics" for the holiday season on it.  I omitted the layer that creates the snowflakes, and just used a sheet of snowflake paper instead--saved time and used some paper that matched my striped paper perfectly!  I cut my globe at 4 inches.  To keep it from getting lost in the print of the background paper, I did cut the shadow out, too.  It's a smaller shadow, though, so it didn't add too much to the height of the shape.  The small piece with the sentiment stamped on it is from Cricut Art Philosophy and is cut at one inch.


I thought you might like to see these stamped images a little closer.  The snowman is from Paper Trey Ink and is from Winter Friendship Jar Fillers.  The greeting is from My Craft Spot "Think Snow".  I used Copics to color the snowman and then used my Cutterbee Scissors to "fussy cut" him out.

Other supplies used:
Cardstock -- Stampin' UP!
Patterned Paper -- DCWV
Baker's Twine -- Stampin' UP!
Brad -- no clue, it's really old!
Stickles -- to accent the snowy bits.

I actually made six of these cards when I sat down to create this design.  It was easy once I had done the initial template.  I like to create cards in batches of six.  It usually works well with a sheet or two of patterned paper and it's just the right amount to build up your stash of cards without getting bored!  How many cards do you make at one time if you are creating in bulk?

I won't be back until January...so have a wonderful holiday season and a great start to the new year!

Hugs,
Sonya


September 5, 2013

Mini Card Set for a Teacher

 Hi Everyone...it's Sonya here today from Sonya's Paper Trail and I'm sharing a set of mini cards that I gave to my son's 4th grade teacher for her birthday.  I know that teachers write a lot of notes to parents, so these cards (and a gift card to her favorite coffee shop) seemed perfect for her special day!  Check them out:

The apple is cut at 2 1/4 inches and can be found on Cricut Locker Talk.

I used a white gel pen to add the white dots and tied a cute little bow on each stem using lime green baker's twine.

The white background shape is a shape I cut on my Cameo.  I thought it was a little plain, so I added some "doodling" with a black marker--perfect touch!

Each sentiment is by My Craft Spot, from the Tiny Tags Stamp set.

And this is the little box that I used to package these cards!  It's a cut found on page 21 of the Art Philosophy cartridge handbook and I cut it at 8 inches.  Six mini cards and envelopes fit perfectly in this little package.

Thanks for joining us today...have a super, creative day!

Hugs,
Sonya

June 6, 2013

A Sassy Birthday Card

Hi Everyone!  It's Sonya from Sonya's Paper Trail and I'm so excited to be a new design team member at She's A Sassy Lady.  Many thanks to Sheila and her team for having me be a part of the team, I'm thrilled to join in the fun!   I thought it would be appropriate to make a super "sassy" card for my first design team post.  This fun card features stamps from a variety of companies:

  
The main focus is on my super sassy Tess from the SU set "Tote-ally Tess".  

 
She's supposed to be holding stamps and markers and such, but I think that little glass of vino suits her very well.  The wine glass stamp is by Stampin' On The Edge.

When I use this stamp, I always use the paper piecing technique for her pants.  Simply stamp her pants on patterned paper, cut them out, then glue them on your main stamped image.  It adds so much fun to her attire!


There wasn't a lot of room for a sentiment on this card, so I filled a little white space with this birthday sentiment by My Craft Spot.

No card is complete without a very sassy message for the inside greeting!

Thanks for joining us today...have a super day!

March 12, 2012

Tags, Bags, Boxes & More - CD case!

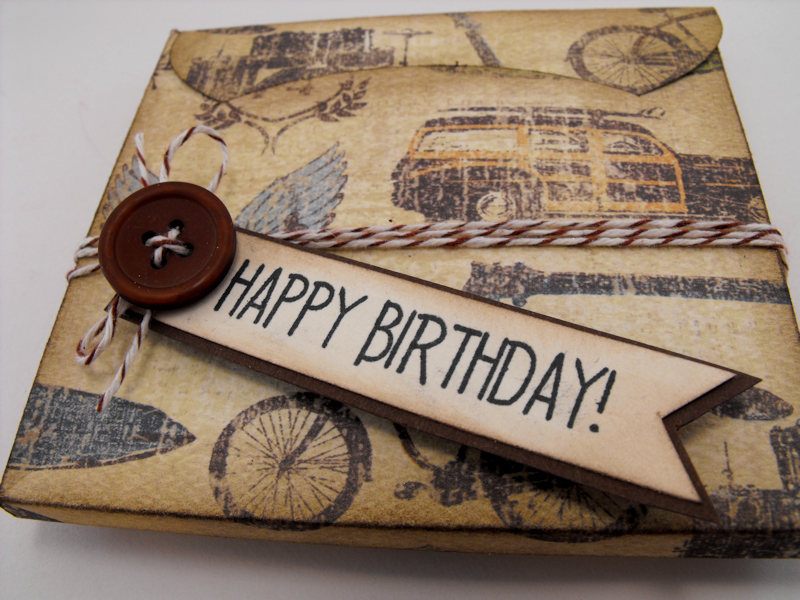
Hello my crafty friends!  This is Kimberly (My Craft Spot), and I am so happy that it is my turn to share a fun project and a couple of videos with you!  I have been having so much fun with the new TBBM2 cartridge!  I love that it cuts and scores!  Today's project is the CD case.  This one is cut just the right size to hold a gift card - maybe to a favorite music store!


I cut this CD box at 9 inches from the Tags, Bags, Boxes & More 2 cartridge.  (Scroll down for a video showing how to cut and score with this cartridge and your cricut.)


This is what it looks like when it is open:


I inked everything with Walnut Distress Ink.


The stamped sentiment is from the Inside & Out stamp set #2.  I hand cut the tag and then tied the tag and button on with Vintage Chocolate Bakers Twine.


Here is a video showing how to cut and score this CD case with the Cricut:


Hint:  Be very careful not to bump the carriage when you are switching between your cutting and scoring 'blades'.  Also, It doesn't matter which you do first, the most important part is that you push the "Load Mat" button so that you start at the exact same location for each 'cut'.

Here is a video showing a quick overview of the TBBM2 cartridge:


 Come join the fun at My Craft Spot!  More videos, projects and weekly challenges with prizes!


Happy crafting!

February 13, 2012

Make your own clear boxes and pillow boxes!

Hello, my crafty friends!  This is Kimberly (My Craft Spot) and I am so excited that it is my turn to share some fun projects with you!

Scroll down to the bottom for a video showing how I made these boxes!


I cut this box  and lid at at 6 inches from the Sweet Tooth Boxes cartridge and then inked the edges of the lid with brown ink from Studio G.  I tied Milk Chocolate crinkle ribbon around the box to hold the lid on.  The polka dot paper is from My Minds Eye.


The "I love you" stamp is from the Always & Forever stamp set.  I hand cut the tag and then tied the button on with Chocolate traditional bakers twine.


I have seen some of you emboss your clear acetate with cuttlebug embossing folders, so I thought I would give it a try.  I love how the embossing looks!


I cut the pillow box at 5.25 inches from the Wrap it Up cartridge. The red tape from Provo craft works best with the acetate.


The stamped sentiments are from the Build a Valentine and Always & Forever stamp sets.


I used my crop-a-dile to put eyelets in this hand cut tag, then threaded Posy Trendy Twine through and tied it around the pink polka dot sleeve.  The pink paper is from Pebbles.


Here is a video showing how to make these two treat boxes:


Come join the fun at My Craft Spot!  Weekly challenges with prizes and lots of fun projects and videos!

 Have a Happy Valentine's Day tomorrow!

January 26, 2012

Can't find the paper you like? Make your own!

Hey Ya'll,
Sassy Dude here from Cricut Couple!  Well, today is a very important day for a few different reasons.  For starters, today is my second day with projects using the adorable new Build a Valentine and Always and Forever stamps recently released by My Craft Spot.  It's also Sassy Tutorial Day on She's a Sassy Lady.  So... since the schedules crossed, I thought I would just lump it all together and share a simple thing that was lots of fun to create and that I am thrilled with the way it turned out.  I made my own background paper using the Build a Valentine stamps!
 This is the front of the card.  I made the background paper.  Very simple to do.  The trim is cut in black using the Cricut and the Martha Stewart Seasonal Cake Art Cartridge.  The floating hearts were punched using a Martha Stewart Heart Punch.  You could use your Cricut if you wanted to, but this was just very simple.
 I used Twine from My Craft Spot and ran it from the top of the mat to behind each of the floating hearts.  I added a little stickles to the edge of the hearts to make them stand out a little bit more.
 I stamped the sentiment on the inside and added an extra piece of trim to finish it off.
 This is the Build a Valentine set and the background paper.  I simply took a 12x12 piece of white card stock and stamped the heck out of it.  Hee! Hee!  I picked 4 colors of ink.  I used the solid heart stamp (larger) and stamped all over the page.  I then picked one of the conversation heart stamps for each colored heart.  I used black ink and then stamped over the hearts.  I didn't want them to be totally perfect, I wanted them to be off a little bit.  Perfectly imperfect.  Hee! Hee!
 Here is a closer shot so you can see how the paper turned out.  This was so much fun to do and I will certainly be doing more of this.
 For my second card, I had a lot of fun with this one too!  This is also from the Build a Valentine set.  I immediately had a frog in mind when I saw the "Looking for a Prince" stamp.  The frog and crown are from Paisley, The circles are from CTMH Art Philosophy and the thought bubble is from Phrases.
 I just popped all of the layers and added glossy accents to the eyes of the frog and on the hearts.
For the inside, I used three different stamps from the set to make the sentiment.  So simple!
Now, Kimberly over at My Craft Spot is giving one lucky follower their choice of one of stamp set.  You can choose Always and Forever, or Build a Valentine.  All you need to do is leave a comment and be a follower of Cricut Couple to qualify, so hop on over and leave us a comment.

Thanks so much to Sheila for letting me play today and Thanks to Kimberly for sharing these great stamps with the world and letting me talk about them on both blogs today.  We would love to know what you think of the projects today and we really appreciate you spending time with all of us today!  

December 12, 2011

"Crackled" Christmas card!

Hello my crafty friends!  This is Kimberly from My Craft Spot and I am so happy that it is my turn to share a card on Sheila's fun blog today!  You all know that I love Glossy Accents and the other day at the craft store I decided to pick up a bottle of Crackle Accents and give it a try.  Wow!  I love how it looks! (Keep scrolling down for a closeup picture of the crackled ornament.)


I cut the red card base at 5.12 inches from the Elegant Edges cartridge (cut 2).  The doily was cut at 4.76 inches and the green circle at 5.34 inches from the Paper Trimmings cartridge.  The ornament is also from the Paper Trimmings cartridge cut at 3.67 inches.


I cut a slightly larger background at 5.47 (brown) to mat the card.  To help it fold, I scored a fold line on the back of the card. 


The stamped sentiments came from my Merry Christmas and Jingle All The Way stamp sets.


Here is a closeup of the Crackle Accents on the cream part of the ornament.  I used crackle accents on the cream and then glossy accents on the red patterned paper.


To get the lightly glittered effect on the cream doily, I first inked the edges with a brown ink.  Then I used a small piece of sponge to brush a light coat of glossy accents all over the edges of the doily that would show.  (I didn't do the center since it would be covered by the green circle of patterned paper.)  I lightly sprinkled glitter all over the glossy accents.  This technique is great for stamped sentiments and patterned paper as you can see through the glitter.


I used the same glitter technique on the "Merriest Wishes" sentiment.


I also tried the Crackle Accents on a button.  The button on the right is what it looked like before and the button on the left has been 'crackled'.  Lots of fun possibilities!


Come join the fun over at My Craft Spot!  We have a Christmas Shape Card challenge going on right now with the Jingle All The Way stamp set for a prize!