Showing posts with label Fabulous Finds. Show all posts

August 14, 2014

Birthday Memory File

Happy Thursday!  Java Jen here from JAVA JEN CREATIONS and it's my turn to be a guest designer here today! Today I want to share a memory file that I made for a friend's 16th birthday about a year ago. (Life has been a little busy and crazy so I pulled this one out of my archives to share today!) :-)  I love Heidi Swapp's memory files so I created one to help my friend remember her special day! Here is a picture of the completed file and then I'll go into more detail.


I started with a plain, standard size file folder.


Next, I covered it with paper and stamped the corners with some decorative stamps in my stash.


I then began making some elements and embellishments for the cover and inside. I used several Cricut cartridges, including Fabulous Finds, Graphically Speaking, Art Philosophy and Tags, Bags, Boxes and More. I stamped them with stamps I had.

Next, I made a mini book to go inside for putting pictures. I, again, used stamps from my stash to decorate the pages. You will notice that all the edges are inked. I like how that really completes the look. I just used some paper scraps to make page-turning tabs.

Now for the fun part of putting it all together! I forgot to mention that I used Kraft paper to line the inside of the folder. The pockets on the right side are from 7 Gypsies and the tags in those pockets are from My Mind's Eye. 


More close-ups:
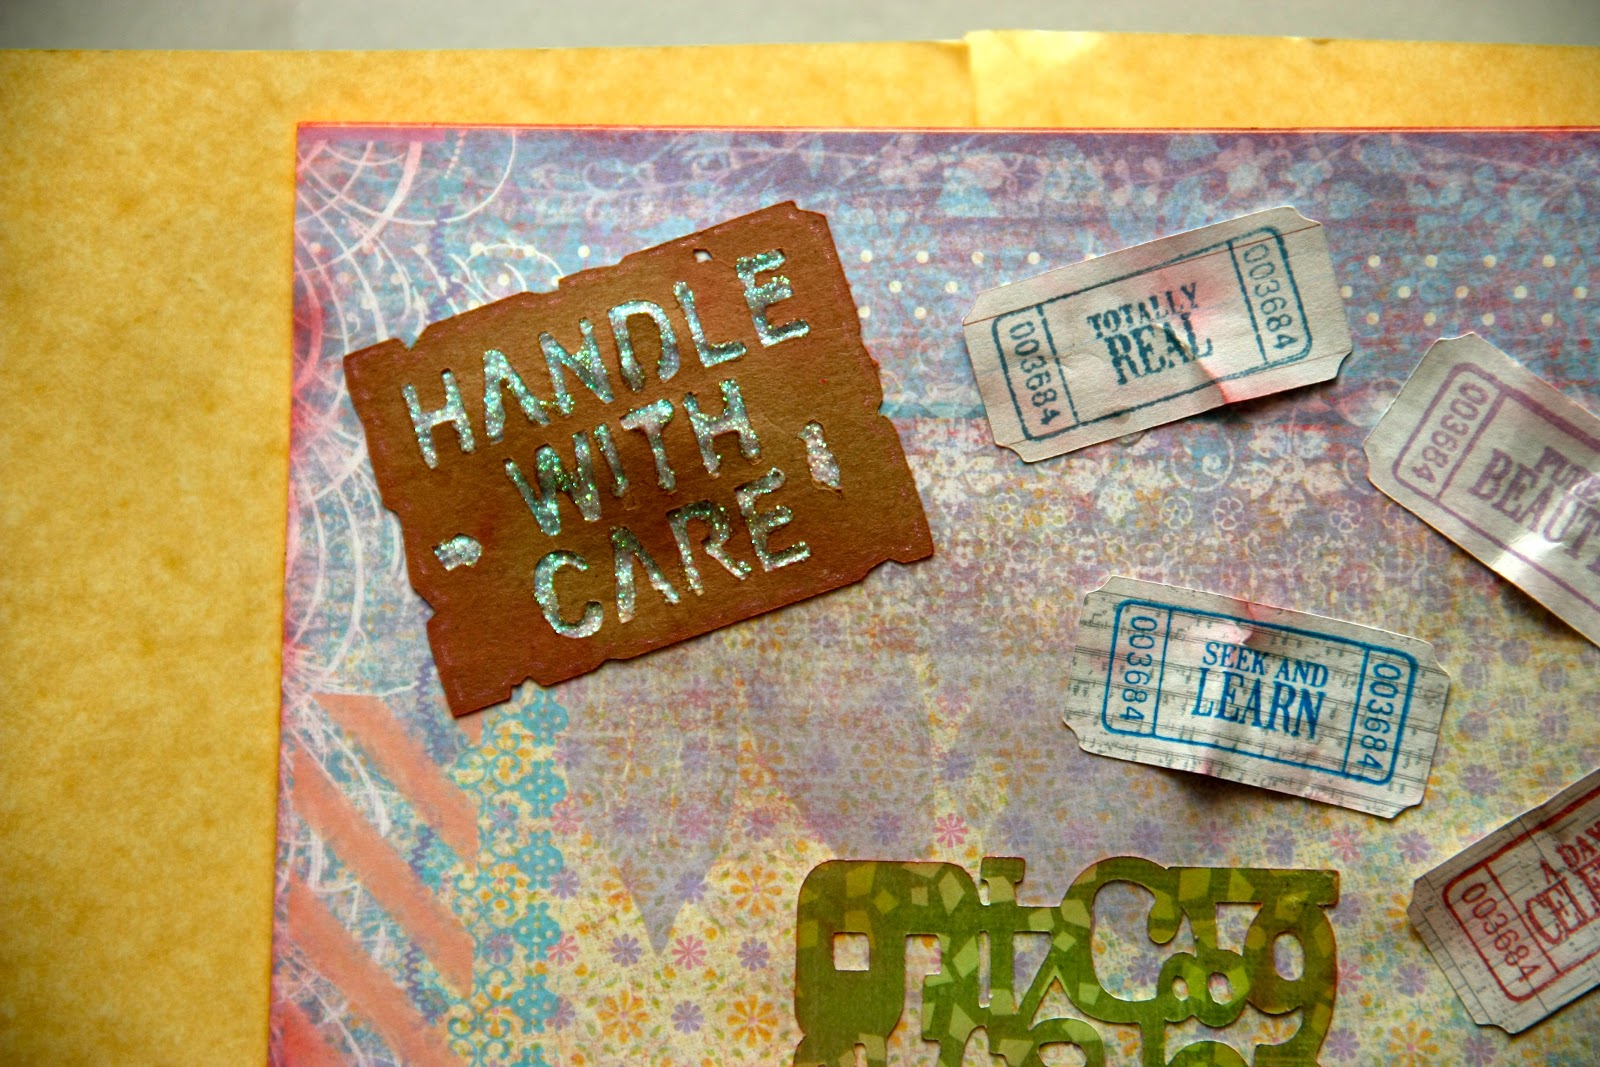
I used Liquid Glass from Close To My Heart to accent the letters.

I wrinkled up the tickets before adhering them to add some dimension.


Another look at the finished file:


Thanks for stopping by today! I hope this inspires you to make a Memory File of your own!


Java Jen


June 7, 2012

It All Started With a File Folder

Hello everyone!  This is Java Jen from Java Jen Creations - here to share a project that I am so excited about!! Thank you, Sheila, for another opportunity to share!

If you have tuned in lately to My Craft Channel , you have probably seen Heidi Swapp's Create to Remember shows! They are so full of great ideas and projects! She has a new product called Memory Files and they are simply decked-out file folders! :-)  I had so much fun embellishing my project and I am quite certain that I will probably be adding even more before I call it done! :-)

Here is what I started with:
A plain, standard-size file folder

THIS  is what I ended up with:
This has to be one of my favorite projects yet! :-) I will be giving it to my husband for Father's Day - that is, if I can wait that long! :-)

So, in a nutshell, here is how you put something like this together:

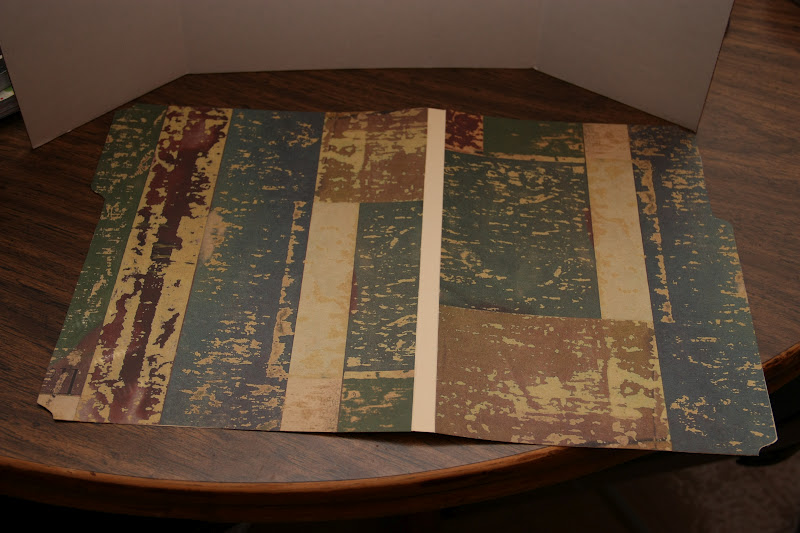
I used the DCWV Heirloom stack to cover my folder - front and back, as shown below:


Next I covered the middle seam with washi tape. (Just recently discovered this stuff and I LOVE it!)


Next, I decided to cut a hole in the cover of my folder like I saw on one of Heidi Swapp's videos so I could have a "peek-a-boo" window to the cover of the mini album inside. (There are so many fun details to this project!)
I used the Creative Memories Custom Cutting System to cut this hole.


Next, I placed my mini album, (that we'll get to shortly), in position so that the desired part of the cover would show through the hole I cut and used a craft knife to cut slits in the folder along side the album. I cut them a little longer than the album so that the mini album could fit through and be securely held inside the folder.

Not sure if you can see the slits here but that's what I'm trying to show you! :-)


Here is just the cover of the album tucked through the slits, ready for the pages to be added.
(NOTE: this pic shows the mini opening to the right but when I actually put everything together, it worked better for it to open to the left.)

Here is how it looks from the back.

The mini in this project is from the Cricut cartridge, Fabulous Finds. (This cartridge is packed with all kinds of tags, clips, hinges, mini albums and tons of other stuff!)
This picture above shows how I stamped the pages and inked the edges. The globe stamp is from a Tattered Angels set called Grand Scale. I used Tim Holtz's Vintage Photo distress ink for inking all the edges throughout this project. 
Here are a few pics of some completed pages:
I used a lot of CTMH stamps and products throughout this project and I will put them in list form at the end to, hopefully, make it easier for those who might want to purchase them from SHEILA or MYSELF.

I used twine to secure the pages in the book and tied it around to the outside. There will be a better pic on down a bit.

Here I used packing tape on each side of this tag to create a hinge so I could include some journaling and another small pic on the back. 

These corrugated letters are from Jillibean Soup and they were perfect for this project! I inked the edges and that really set them off!

This is a fantastic product from CTMH that I will tell you about right now, (instead of waiting til the end) :-)  These are called Flip Flap Memory Protectors and they are perfect to fit in my folder. One end has adhesive on it, allowing you to stack them and then be able to flip through them! They come in other sizes too! Super great idea!!

The completed inside! I just love looking at it!  The clipboard cut is from Fabulous Finds, as well. The "For The Record" tag is from My Mind's Eye's Life Stories.

A close-up of the window and mini clothesline. I attached the twine with CTMH's Liquid Glass - another fantastic product!

Close-up of the Liquid Glass. Oh, and the tags that are hanging are cut from the CTMH Art Philosophy Cricut cartridge and stamped with the Thoughtful Tidings stamp set. I wrinkled them up a bit to give them a distressed look.


Some close-ups:


Stamp inside back of mini album is from the CTMH "Made with Love" set.

The Flip Flap Memory Protectors up close.


I love how this album closure turned out - another great cut from Fabulous Finds!

Here is my finished project once again:


Now for the promised list of CTMH products:
Z4114 Flip Flap Memory Protectors
S1202 Thoughtful Tidings
D1507 Urban Alphabet
D1387 Made With Love
D1378 Notice the Details
D1363 Picture Perfect
Z679 Liquid Glass

CRICUT cuts:
mini album - Fabulous Finds
clipboard cut-out - Fabulous Finds
closure for mini - Fabulous Finds
hinges on mini - Fabulous Finds
"Handle With Care" - Printing Press


Thanks so much for stopping by today and remember to enjoy the everyday moments! 

March 10, 2011

Baby Shower Invitations / How to simplify a project with multiples

Hello everyone!!! I'm so thrilled, excited and honored to be a guest designer here at She's a Sassy Lady today!!  I've been a follower of this amazing blog for quite some time - so to be designing here is just so cool! :-)
Anyway, on to my project - I made baby shower invitations for our daughter last September so I thought I would revisit this for today since I have been out-of-state since March 2nd and I don't have access to my craft room!  She chose owls as her theme so we found an adorable one on Create a Critter. In this post, I will be showing you how to create multiples of images and layers so that you can assemble lots of cards more quickly.  We started out thinking that we would only need about 30 of these invites, but once we started preparing our guest list....... ummmm...... we found out that we were going to need about 100!! Yikes! (We have a big family and lots of friends!) Good thing I had my Gypsy to make this easy! Here we go!


Here are pics of the completed invites. We varied the background colors so they wouldn't all be the same. (My daughter's idea!)

These were some of the other color combos that we tried.

We ultimately decided on these colors.

This was how I laid out my paper when I was ready to cut. I had already figured how many of each sheet I would need so I simply needed to just load my mat each time and cut using my Gypsy. A little prep work made it so easy!!


These are pics of the inside. The "It's a Boy" and "You're invited to a baby shower" stamps are from a Martha Stewart set. The "registered at" stamp is from MFT Stamps. I cut the onesie from the New Arrival Cartridge to use for additional information that we needed to tell the guests.  I used the Cricut markers first, then I cut so it would be outlined. I really like how this looks!  I stamped "note" on the onesie as a heading for the additional info. (I only remember that this stamp is from a Stampendous set.)

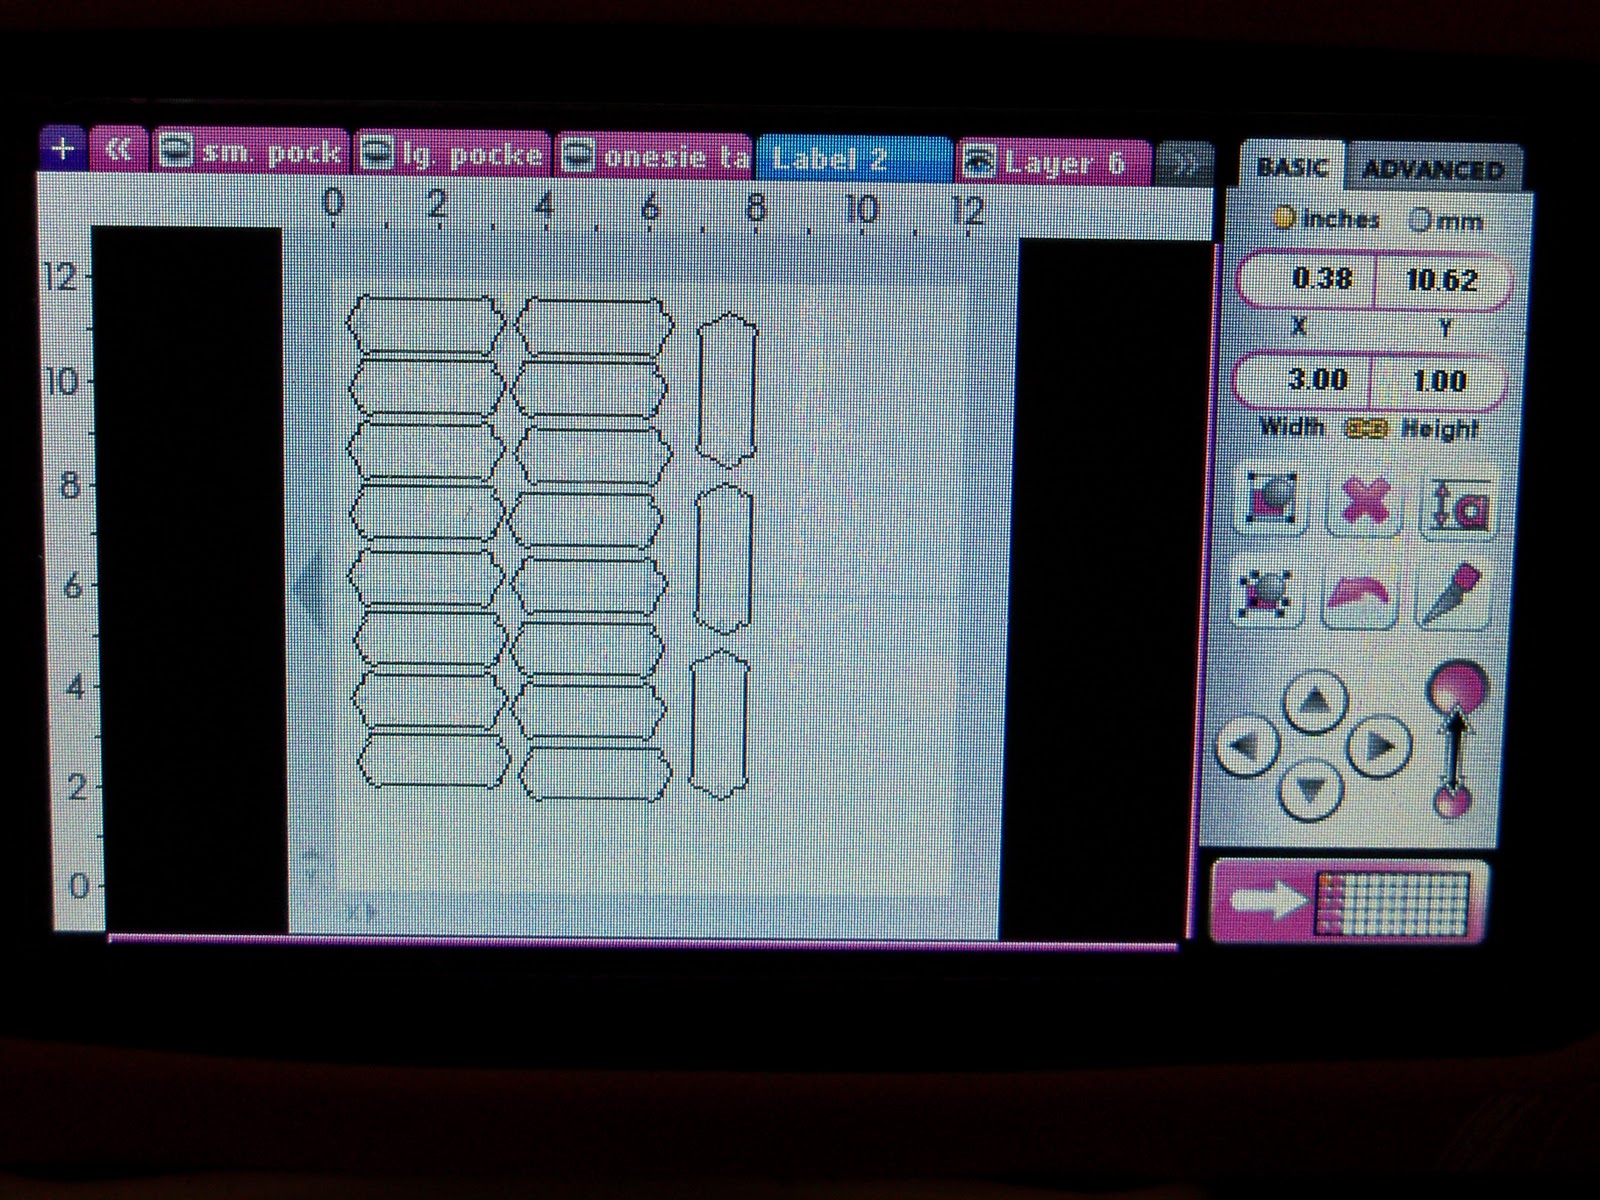
This is the label on the front of the card that says "Whoooo's having a Baby Shower?" I wrote "Whoooo's having a" and then stamped "Baby Shower".  Notice that I was able to make sure that I was cutting on an 8.5x11 size paper since that is the size of white cardstock that I had. This label is on Fabulous Finds. (I love that cartridge!)

Once again, I had white cardstock in 8.5x11, so I positioned the onesies to fit within that size. The Gypsy makes it so easy!

The pocket on the inside of the invite is just a piece of cardstock cut to size. Since I was making 100 of these, using my Gypsy made it way easier to do this instead of cutting them all individually. This pic is for the larger pocket - (I made 2 different card sizes.)  The pic below is for the smaller pocket.


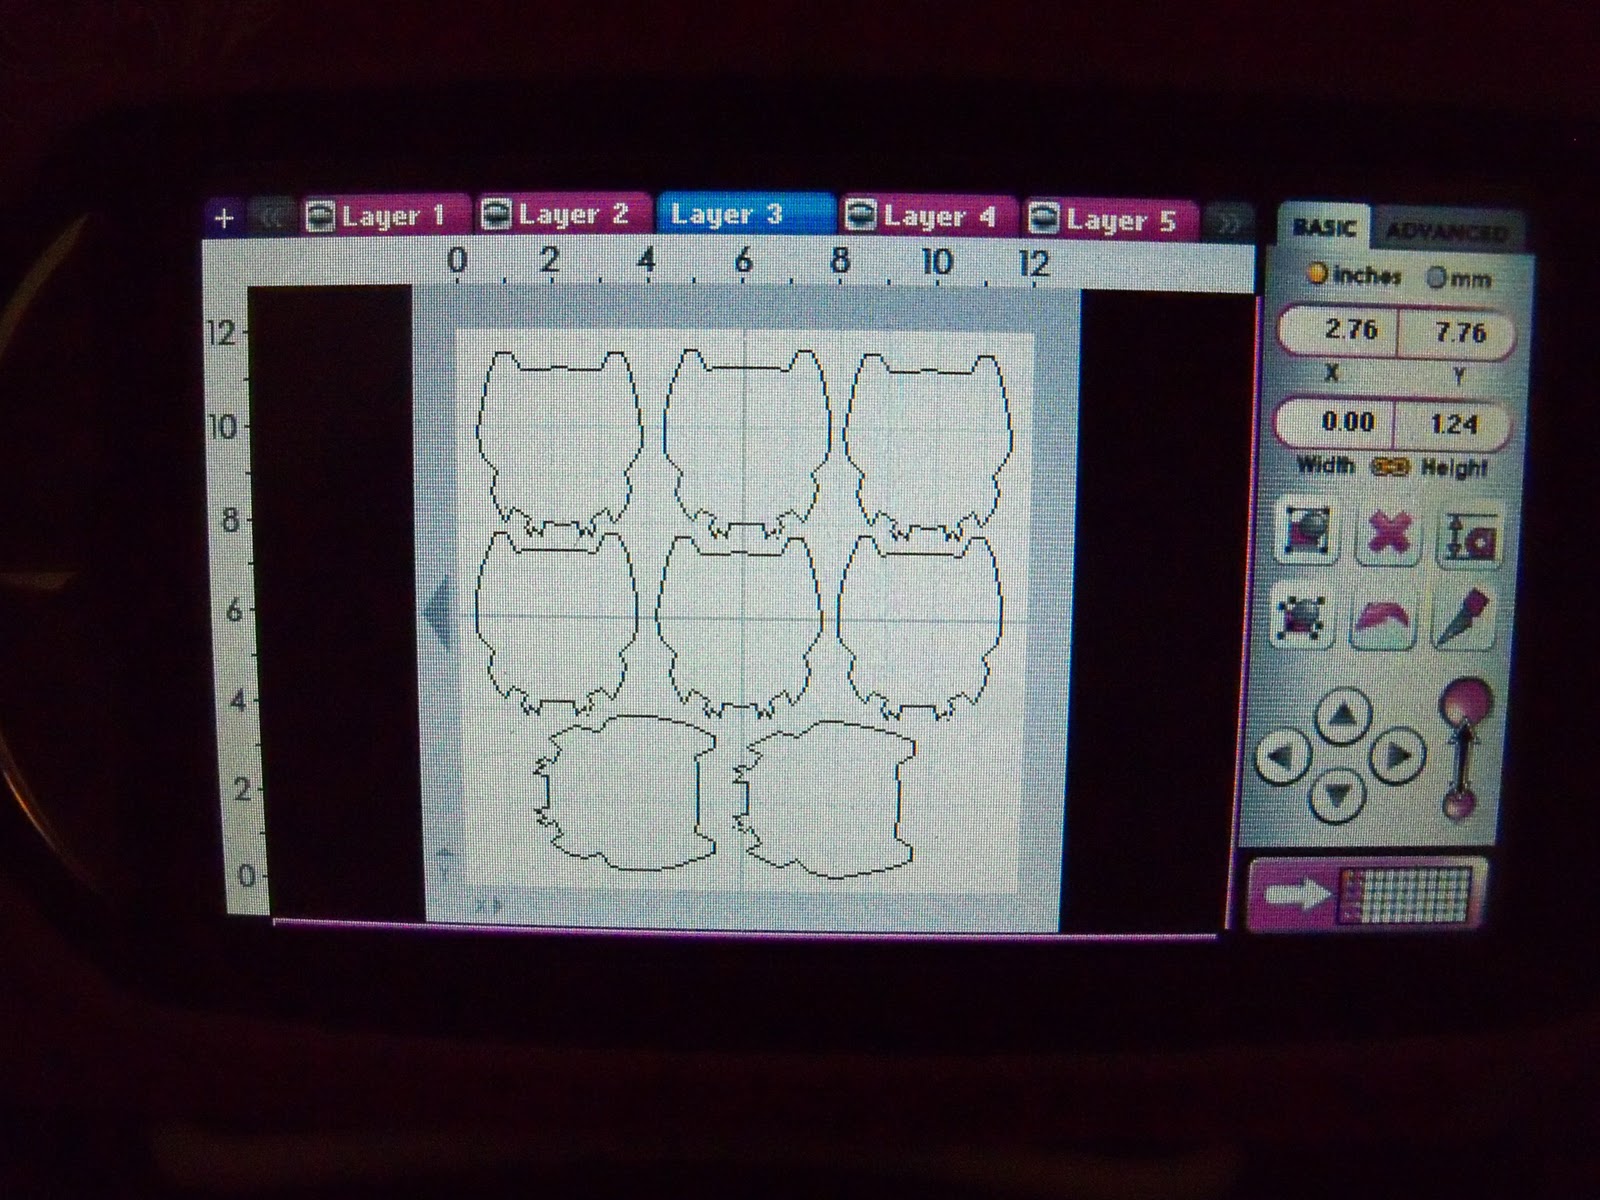
When I create a file that I am going to use to cut out multiples of layers, I always have one page that contains all the layers if possible.  That way, if I need to make just one more of something, I don't need to cut out whole pages of layers. I usually make this the first page of my file. 

These next few pics are showing how multiples of layers can be positioned on your paper to minimize waste.


Look at all those little feet and beaks! I was able to cut out 40 sets from one 12x12 piece of paper! 

Here they are all finished and ready to address and mail! Whew!! This was a fun project and I was able to do it without going crazy because of my Gypsy!  Thanks so much for stopping by today and I would love to hear your comments as well as questions, if you have any! Stop by my blog anytime to see some other projects that I have done - Java Jen Creations . I would love to hear from you!  Have a crafty day!!