Showing posts with label Cursive 101. Show all posts

May 7, 2011

Pink Stamper Challenge #7 - Make A Scrapbook Page


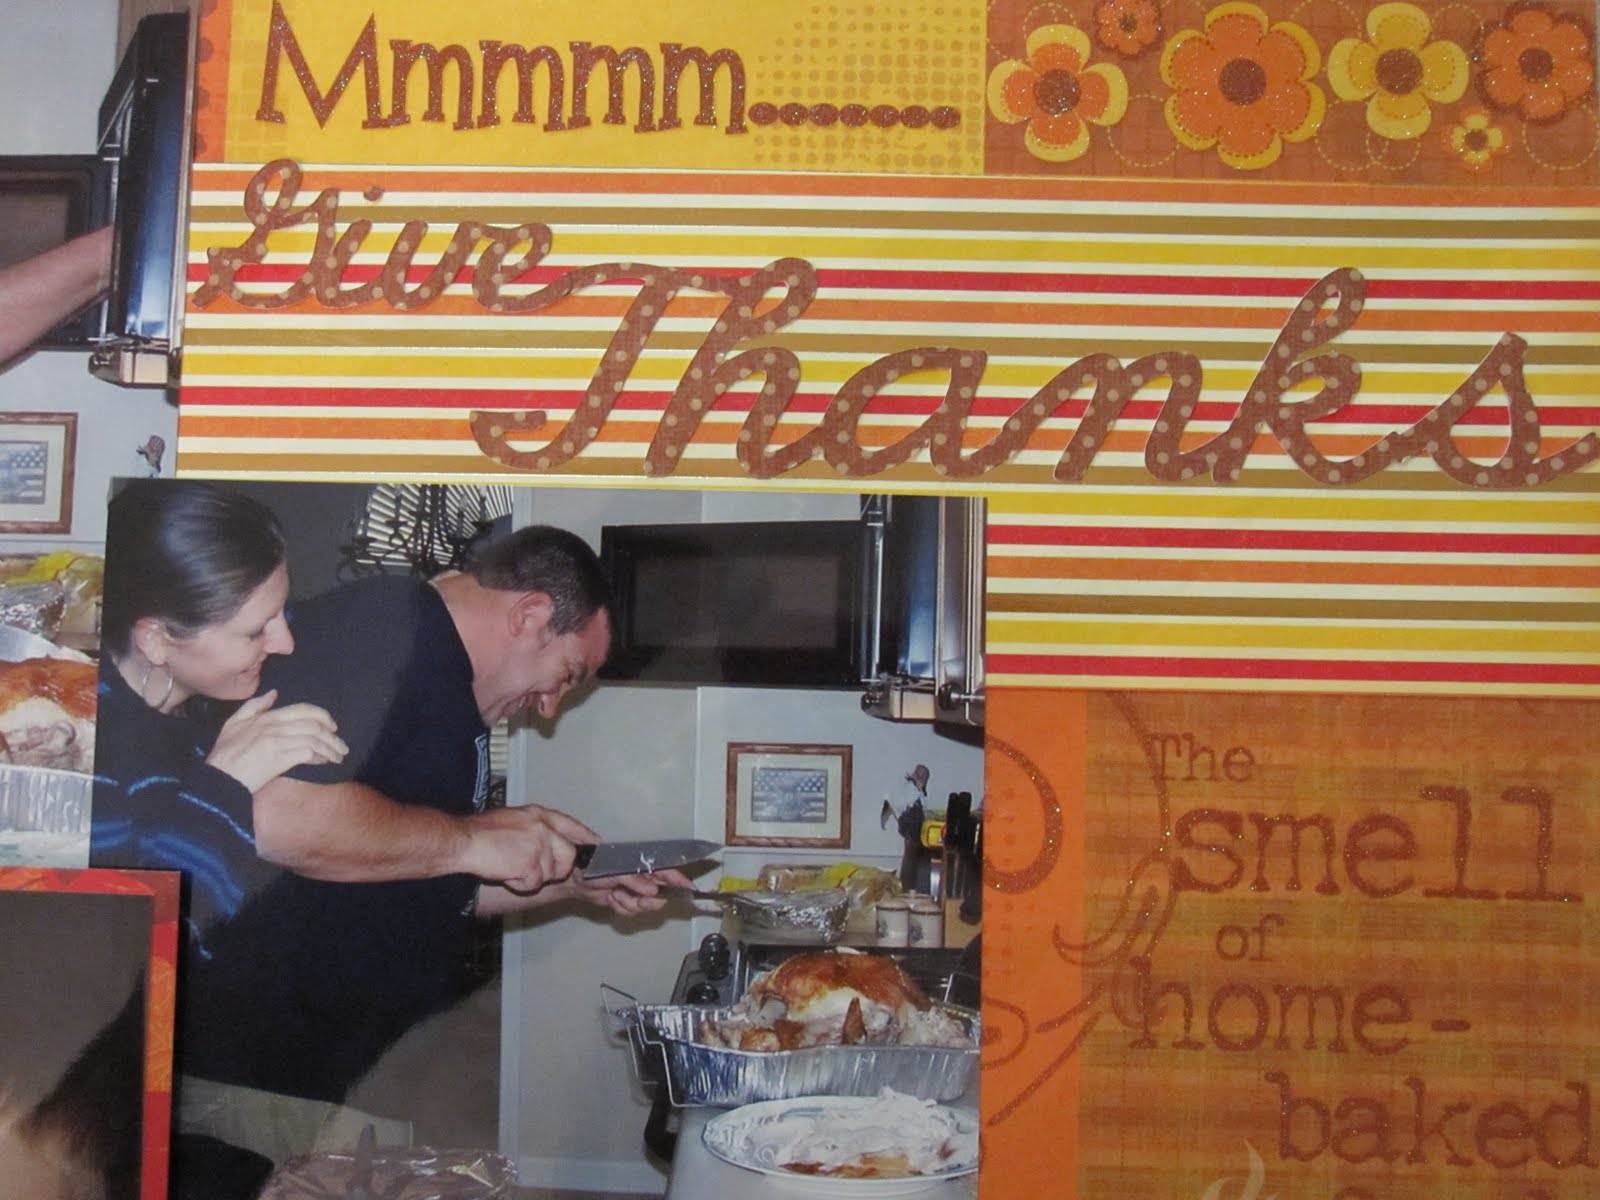
Well I just got home from work and dinner at my Son and his lovely wife Regina's house and thought I would jump in on the fun. I had this paper and photos picked out an took to the Dallas Stampede in March and never even opened my packet....  Well it turned out it is a good thing as I would have been frustrated as I forgot to bring paper for the heading... So I ran upstairs and went through my scraps and found an awesome piece leftover from last years father's day card!  All the papers are DCWV and work out great for a fast layout.

This is the right side for Thanksgiving and I think the best part of the holidays spending time with family just unwinding. Everyone wanted cake instead of pies so that is what we had along with a great time of fun and laughter.

Notice the left hand corner of this photo I matted the picture of Justin eating the drumstick and pop dotted it to give it emphasis.
See how it really stands out! Love it, I will try this more often.
The only cuts I made other than cropping the photos was for the heading and I used Cursive 101 and welded them together using my Gypsy.
It really felt odd doing this page as it was so - so easy to do with using this yummy paper. I hope you enjoyed this post and I have to admit even though I am doing a Thanksgiving page it felt great to participate in a challenge as I am always working! This will probably be my only challenge post but that is ok, I did what I could with the time I had.... who know maybe I can sneak another one in tomorrow even though it is Mother's day!
Thank you for your sweet sweet words of encouragement. Your comments continue to inspire me to share with you.
signature

June 18, 2010

So You Want to Scraplift And Don't Have The Right Materials - IMPROVISE! Plus Dad Goodie Bags

Well ladies this is my Fathers Day card to my handsome hubby! The world's best Dad and it is a direct scrap lift from Jeannie Phillips' blog A Place For My Cards. Jeannie makes some of the BESTEST cards and I am constantly checking out her site. Well I came across this and quickly designed it using a different size. I like sticking with my trusty A2 4.25x5.5" format. By following her instructions I was able to design the card in no time at all. But my problem is that I didn't have any manly 2 sided card stock to make this card out of and was too lazy to go to the store. So this is what I did... IMPROVISED.
I backed the card. See the card on the bottom after I had everything in place I just highlighted, copied and flipped the card so that it had a mirror image. This meant 2 cuts but I figure that was cheaper than the last time I walked in for paper and walked out 5 stacks heavier! LOL
After I had all my parts cut I did what Jeannie said and inked all the edges.
I did all the parts... even the best and the little world and its continents.
Trust me when I tell you I was sloppy with my inking working from the back so most of it stayed on the back. Notice the fold I inked that completely with brown and then tapped in a little black so it looked good when the inside was attached.
For the inside piece I scored just like the front of the card but then I cut the fold off so that the card would fold properly.
See how nicely the inside looks and that before I even put the little sheet on for the sentiment.
I attached the front of the card however I noticed after I completed the card I really strayed here as Jeannie used glue dots allowing her top to be lifted from the base... I do like the way hers looks better but I can live with this look. Don't you think it looks nice?
Then I put my Worlds best together and I love the way that inking looks on the continents.
Then I added the best.
And the sentiment area.
This is the card almost finished.... I can't believe I didn't take a photo after I put the Crystal Effects on it... as it makes the card... if I get the time I will change it out.
Now look at that above... see the difference with the Crystal Effects? Also look at how glittery my paper is. I love DCWV paper. Just click on the photo for a closer look.
Jeannie Phillips thanks for the inspiration and allowing me to share your original design with others. I hope all will take some time and go see your beautiful blogs: A Place For My Cards and another favorite place of mine Jeannie's Daily Bible Verse.

NOW FOR THE DAD GOODIE BAG
Ladies in our house I have a handsome hubby, handsome son, and 2 handsome son-in-laws, and on Fathers day we do not exchange gifts but we do pamper our husbands just like they paper us on mothers day. Us ladies will do all the cooking, all the cleaning and watching the children so they can relax and enjoy their day. So I thought I would make them a little treat to take home when their day is done.
Look at these yummy papers from DCWV The Guy stack. They are just perfect for this project.
Here is a photo of my screen. I have been using the 12x24 mat and squeezing everything on it so that I can share with our DS users and Gypsy users. See how simple the design is.
I thought I would share with you how I cut out some of my designs. I didn't want to waste an inch of this paper so I didn't pre-cut to fit the mat. Instead I used my 12x24 mat placing my 2 sheets of 12x12 next to each other on the mat. I deleted the objects I didn't want and cut. Then I open my page again. NOTE WHEN IT ASKS DO YOU WANT TO SAVE FILE - SAY NO! Then I again moved my objects I wanted to cut to the edge, deleted what I didn't want and then cut. In a matter of 15 minutes the cutting was done and I had  24 pieces to put together for 4 little gifts.
I put everything in order and assembled my pieces.
I taste tested one of the candy bars as I wouldn't want any of our me to get sick or anything... it was a huge sacrifice!
Then I put the candy bars in the little 4 inch wide bag from Hobby Lobby and attached the label! TOO CUTE!
Well I hope you like today's project, I actually had fun with this and I think the guys will love to have a little stash of candy to take home with them after their dinner and deserts. These little treats take little or no time to put together.
MyFreeCopyright.com Registered & Protected
I am always encouraged by your sweet - sweet words. Your comments inspire me to keep scrapping and sharing things with you.
signature

May 11, 2010

Ready To Ride

Hello, Sheila here from ShesASassyLady and I get the privledge of designing today on TheBugBytes! For the month of May we are presenting Home Decor and/or Home Accents in any form we would like.  I chose to do a page. I used the wonderful sketch from Liz Qualman, which is being presented as this weeks feature sketch on StuckOnYouSketches.
This is my little Grand daughter Sydney and she just got a new bike and all the gear. You have to love her, she couldn't keep  that helmet on straight for anything. I had to get a couple of close ups of our toothless wonder! As you can see the photos are precious.
Aren't these papers from Close To My Heart yummy? I think they are just perfect for this page.
Notice I started making the flowers just like my enabling friend Cindy from last week.... but I never got the tweezers, so you get Sheila's version! Which I might add is a lot simpler and takes less time.
First I crimped the flowers just like Cindy, then I just staggered them and used a jewel on the top.... they look different yet still so very pretty.... I of course used the leaves.
Then I took out one of my unfinished GW dragon flies made from transparancies and used a matching pink stamp on it. I used 2 coats because as you can see one coat was not sufficient. It was still too transparent.
I laid it aside to dry and then used a black marker for the antennas and purple rhinestones for the body....
I used these wonderful sponge stamps that I got from Mary at Scrapbooking Grandma's Crafts... I just opened them, and in just one project I am in love with them! They are so easy to use. Thanks again Mary! I had to do the purple on the body a couple of times to make it look darker.... and I did that after I put the beads.
To back some the page I took a sheet of matching paper as wide as the crimper and crimped it for added texture... I really like this little crimper! See below how it just adds that little extra texture the page needed.
I added the little Love charm and I also punched a scrap piece of pink paper just to draw the eye to Sydney's smaller photo. She is such a little diva that this if very unusual to catch her this sporty!
I few pink rhinestones add movement to the dragonfly.
Now isn't that pretty, and so easy to do.  I sure hope you enjoyed today's project and while looking about on the various blogs that you too challenge yourself and try to replecate the many beautiful things you see. Even if they are a little diffent like my flowers are from Cindy's, they still turned out beautiful, and so will yours! You don't learn unless you try, so stretch yourself this week and make something new.
MyFreeCopyright.com Registered & Protected
Thank you for your sweet words of encoragement, your comments continue to inspire me to continue creating and sharing with you.
signature

March 19, 2010

Mommy ~ My 3+1=Success MB Project

Don't you just love giraffes? I sure do, so of course I had to have a page within the zoo pages of my album for giraffes! This week the challenge on the MB was to do at least 3 cuts plus 1 welded item using our Gypsy. This is my project, I cut out the trees twice, two sets of leaves twice, the giraffe three times but only used 2 of them, and the word Mommy was welded and cut. This is such a fun page. My paper is DCWV, the Animal Crackers stack and it works great if you are scrapping zoo or children photos.
Rather than paint or color my baby Giraffe I chose to cut out the shapes my cricut made. I then placed the darker shade under him so he would look like the actual photo of the baby I had.
I used Zip Dry glue as I didn't want any chance of him pulling apart when I started chalking him or when my grandchildren started touching.
I then cut little pieces of yarn that I used on my lion for my March calendar and applied it again with the zip dry glue. I was generous with it but careful that the glue would not seep through.
After I finished I then took a very sharp scissors and trimmed his mane so it would be even.
While he was drying I put my trees together. Note my top leaves were not the same size as the tree leaf base as I wanted the bottom to show through ever so slightly just like we see different shades when a summer breeze blows... we kind of catch little glimmers of light.
I folded the upper leaves as shown below and then staggered them.  I glued them down securely being sure to wipe off any excess glue. I do get messy.
I glued the larger tree to the paper and used pop dots on the smaller one so it would give depth to the page.
I then chalked my little guy and used large pop dots for him and placed him on the page also. I trimmed my photos and placed Mommy on the page to finish it off.
I used a little chalk to highlight the items, and I stickled the large leaves on the trees to make them shimmer.
I love his little face.... just like any little baby!
Carts used: Stretch Your Imagination, Everyday Paper Dolls, and Cursive 101. Materials used; papers of your choice, glue, pop dots and stickles.
I sure hope you like my little project today! I know I had a lot of fun planning and putting it together. Click here for the Gypsy Page File for Sassy-Giraffe.
MyFreeCopyright.com Registered & Protected
Thank you for stopping by today. I thank you for your sweet words of encouragement, I am always inspired by them.