Showing posts with label Copics. Show all posts

December 3, 2015

Snowman Note of Thanks

Hey everyone, it's Sonya from Sonya's Paper Trail.  I had a request to make a few holiday/winter thank you cards and this seemed like the perfect day to share one of those creations! 

Check it out:


I used retired stamps from SP&Company called "Falling Snow" for the image  and "Just a Note" for the sentiment.  I colored the snowman with Copics and added a few Stickles for wintery accents on that fun snowman.  I paired some Echo Park snowflake paper along with an embossed sheet of white cardstock for the mat of this card.  

I want to thank Sheila for the opportunity to be a part of her blog the last couple of years.  This is my final post as a design team member and it has been a joy to work with Sheila and the other lovely designers.  I wish them all very well and a wonderful holiday season.  Many thanks!

Cheers!
Sonya


June 25, 2015

Father's Day Pegboard Card

Hey everyone...it's Sonya from Sonya's Paper Trail and today I'm sharing the card that I made for my husband for Father's Day.  My husband is one of those guys who can fix anything, which is probably a good thing since I tend to break a lot of things!  

Here's what I created for him:


The base of this card is from the Silhouette Online Store.  I decided that rather than cut out the tiny tools that went with the card cutfile, I would use my stamps to create the tools.  I used the "Totally Tool" stamp set by Stampin' UP! and colored those tools using my Copics.  I then fussy cut around each one, and adhered them to the pegboard with dimensional foam dots.  The lettering was in the original cut file, but rather than use paper (which I figured would tear), I used some vinyl and it worked like a charm.  Don't forget that vinyl sticks to paper and can make your life a lot easier, especially with scripty greetings!  Oh...and on the pegboard, I used a lot of chalk ink to make it look more realistic.


I hope you have a great day!

January 1, 2015

Cheers!

Hey everyone.....It's Sonya from Sonya's Paper Trail.  I'm super excited about this card as it checks a couple of things of my "goals for 2015" that I shared yesterday on my blog.  

Check it out:


My first goal is to use my Copic Markers more...and I used them to color this sweet image with that ginormous glass of bubbly (perfect for celebrating the new year, no?!).

I also am wanting to use my stamps that have, sadly, never seen ink.  While this is a new stamp to my collection, it sat a few weeks without ink.  It's called "Cheers" by My Favorite Things.

One of my other goals this year is to spend more time creating and less time shopping.  I started this last year and it worked really well for me.  For this card in particular, I found some Echo Park "Sweet Day" paper scraps and made them into this card. 

I used one fun, often forgotten, product on this card called Glossy Accents.  After I colored the glass of bubbly, I applied Glossy Accents all over the top of the glass to make it look nice and shiny--like real glass!  

Last year for each post I did at She's a Sassy Lady, I made a Christmas card. I had a lot of fun doing my cards throughout the year and will continue to do so and share on my personal blog near the 25th of each  month.  I'd love to hear what your goals are for 2015 for your papercrafting!

Cheers,
Sonya

September 4, 2014

September Holiday Card Share

Hey everyone....it's Sonya from Sonya's Paper Trail,and that means it is time for another version of a Christmas card.  The card I'm sharing today is pretty traditional, featuring some beautiful papers from the Echo Park Christmas This and That 6 by 6 paper pad.  


Check it out:


I used a lot of scraps for this card.  I keep my scraps of each 6 by 6 pad in a clear baggie tucked inside each separate pad.  That's an organizational method that has worked well for me and I find I actually use a lot of scraps up this way.  For this card, the oval shapes were cut using the Creative Memories oval cutting system.  I inked the edges of the white oval using Cateye Chalk Ink.  The basket was stamped on a scrap from that paper pad and then I cut it out using my Cutterbee scissors (love those!).  I stamped the basket filler and colored it with Copic Markers.  The basket stamps are by PTI and are from the "Vintage Picnic Basket" stamp sets.   The banner is a shape I cut using my Silhouette Cameo.  The sentiment is from SP&Company's "Oh Christmas Tree" stamp set.   And those tiny brads....they came from Stampin' UP!

Here's a close up so you can see that adorable basket.

Are you working on your holiday cards yet?  Do you make a variety or are all your cards the same?

Have a super day!


August 7, 2014

August Holiday Card Share...Snowmen in Shades of Blue

Hi Everyone....it's Sonya from Sonya's Paper Trail, and I'm happy to be sharing my monthly holiday card.  I've been making a different holiday greeting card each month to hopefully inspire you to get a jump start on making your Christmas cards.  It won't be long they will be on everyone's blogs!  

Are you ready for some snowmen?


So along with my goal of creating something monthly to be ready for the holidays, I've also been on a bit of a spending freeze.  Today's card is a wonderful reflection of what one can create from all sorts of things found in what we all probably have on hand!  The patterned paper is by DCWV from the Winter Basics 6 by 6 paper pad.  I used one entire sheet--the paper is two sided, so I simply flipped the leftover cut strip over and decided I liked the contrast of the stripes against the subtle plaid background.   The white and navy shapes were leftover from another project.  I probably cut them from Elegant Edges, but they were just sitting on top of my workspace (taking up valuable real estate!), so I stamped the snowmen from the Stampin' UP! set, The More the Merrier.  I colored them with my Copic markers and added a few Stickles.  The felt snowflake had the year 2006 on the bottom of the jar and I know I've had those snowflake brads for at least that long, too.  The supplies may be old, but I think the result is adorable!


Here's a close up of my coloring for you.  I didn't do much blending because my white base is really cheap paper and wasn't going to blend very well.  The sentiment is from SP&Company's "Snow Much Fun" set.

Thanks for stopping by today....make it a day filled with creativity!

June 17, 2014

Summer Reading - need a bookmark :-)

Hi everyone.  It's Karon here from Karon's Krafty Korner, to share my creation with you today.  Thanks so much Sheila for having me once again.

I decided that I need a few bookmarks this summer for some great reads that I want to get through.  I decided to have a play in Silhouette Design Studio and make a scalloped edge bookmark.

Here is the bookmark I made using all elements from the new Polkadoodles CD - Rose Budd Papercrafting Collection.


I thought I would share with you how I designed the bookmark in Silhouette Design Studio and how to add the scalloped edge.

Firstly, I am using a rounded rectangle that I have sized to 6" by 2.50".  Then make a little oval to the size that you would like your scallop to be.  I have made mine 0.5" wide and 0.75" high.  I then made five of them and grouped them together for easy manoeuvring.


Now you can move the set of ovals into place.  I have placed them so about 2/3rds of the oval are inside the line of the bottom of bookmark.  You must position them so that the natural curve is on the line, as below.


Now you want to select both the rectangle and the ovals, then right click and select Weld.


This is what your screen should now look like.


You can then resize your bookmark using the scale.  I made mine back to 6" by 2.5".

You could now resize this to what ever you wish.  Also If you want more scallops to the edge, you can play around with the size of the oval at the start, and the amount of them.  Hope that this has made sense.

Here is a close up of the image from the Rose Budd Papercrafting CD, this is Miss Millicent.


Her dress was digitally pieced together (may be another tutorial on the way, if you like) with papers from the CD and then highlighted with Copics.  Here are the Copics I used to colour her in.


Everything is from the CD, I layered up the little roses and Miss Millicent, but that is all.  After all it's meant to be a book mark and I didn't want it too thick, or else it would get squished :-)


I added a little ribbon to the top.  I did double sided printed, so that the back of the book mark was not white.  Also inked the edges of the layers to finish them off.

Thanks for stopping by.

Happy crafting.

June 5, 2014

June Holiday Card--sweet snowmen!

Hi Everyone....it's Sonya from Sonya's Paper Trail, so you know what that means......it's also time to share my monthly Christmas card!  And do I ever have a dose of cuteness for you today.  

Check it out:

I decided it was time to take a break from red, green and grey that I've enjoyed so much lately and went with non-traditional holiday colors this time.  I started this card by selecting my papers from Echo Park's Winter Wishes 6 by 6 paper pad.  I rounded just two of the corners for a cute effect using my corner rounder that was likely one of the first paper crafting purchases I ever made!  I then sprayed those patterned papers with glimmer mist, so they are nice and shimmery.  

The stamped image is by SP&Company and is called Snow Friends.  I colored it with my Copic markers and added some Stickles for the snowy bits.


I have a little obsession with Stickles....and it's lasted about 10 years.  I'm finally starting to use up bottles that I've had for ages, thank goodness none of them have dried up! This bottle was "distress" Stickles and they made a great accent to the snow.

How are you coming on your Christmas cards?  Anyone working all year long or do you wait for the Fall to begin creating?

Have a super creative day!

March 26, 2014

Easter Treat Bags

Hey everyone! 
It's Candy here from Candy's Craft Corner! It's my turn to share with you today. Thanks so much Sheila for having me!
I decided to make some treat bags for Easter this year to give to a few special people. 
These were so super easy to make!
Used stamps and dies from Jaded Blossom and also a stamp set by Pink by Design.


Cut out all the dies with my Big Shot

Color up the tongue on the egg and the little bunnies with my copics. These are Hershey Nuggets and we can't get them here in Canada. Thanks so much to my youtube friend Rashida for sending me some!
Attach the topper with my tiny attacher.
 Add some dimensionals to the back of the little egg and attach to topper.
Thanks so much for stopping by today!
Hope you enjoyed.
Take care,
Candy

January 2, 2014

Your kindness warms my heart...

Hi Everyone!  It's Sonya from Sonya's Paper Trail and I want to take a few minutes to share a couple of my 2014 craft goals with you.  My first and major goal for the year is to shop my own scrapbook room before I shop in stores.  I have a lot of beautiful supplies and I really hope to make a dent in the stacks of paper that I have collected over the years.  In my projects this year, you will see older products mixed in with more recent purchases.  I hope you will be inspired to look at your older supplies in a new light and join me in this goal.  

My second goal is one I'm repeating from 2013.  In 2013, I made and shared a new holiday greeting card each month.  I've mentioned this goal with Sheila and this year....I'm sharing my monthly holiday card right here with you.  So the first Thursday of each month, you will see a fresh Christmas card right here at She's a Sassy Lady.  I hope you'll be motivated to create your holiday cards along with me so that you're all set with a great supply of cards by the time December rolls around.  Just didn't want you to think I was crazy when July rolls around and I'm still sharing snowmen and jingle bells, LOL!   

Here's the first one I'm sharing with you this year:


This is such a simple card, but I think the image definitely is worthy of being the focal point of this sweet card.  The stamps are by SP&Company and the set is called "Snow Much Fun".  The papers are by DCWV, from the "Winter Basics" 6 by 6 inch paper pad.  I colored the image with Copics.  The sentiment is on a shape cut on the Silhouette Cameo.  The silver snowflake and brad are from my stash and have been around for a long time. 

Here's a close up for you of my coloring and this adorable image.  I used a lot of Stickles in the snow on this card--sure adds a nice little extra touch of bling!

What are your craft goals for this year?  

I hope you have a very Happy 2014!

Hugs,
Sonya


November 7, 2013

Merry and Bright!

Hi Everyone...it's Sonya from Sonya's Paper Trail today and I'm sharing a holiday greeting card today.  I have a lot of holiday cards yet to make so I'm making cards in "bulk".  When I make cards like this, I like to do them in multiples of six.  It's enough to quickly build up a supply, but not so many that I get tired of making that design.  Here's the card I would like to share with you all today:

Want in on a little secret?  

Everything on this card is really, really old!  The papers are from a DCWV stack from several years ago.  The papers were not meant to coordinate, but I love the striped paper against the polka dotted blue paper.  The stamped image was a RAK I received from a friend on the Cricut message board a couple of years ago.  I colored it with my Copic Markers and added some Stickles for the snowy effect.  The snowflake brad is also rather vintage!  And the little sentiment is from My Craft Spot.  I used my Cricut for the shape I stamped on, as well as the little tag.  The cartridges were Storybook and George and Basic Shapes.  

Here's a close up of my coloring for you.  Oh how I love snowmen!!

I hope I have inspired you to look at your crafty supplies to find some treasures that you may have been holding onto for awhile.  I know one of my goals in 2014 is going to be to use more of what is already in my craft room.  Want to join me in that challenge?!

Have a super day!

Hugs,
Sonya


January 23, 2013

Sitting Wonderful

Hey Everyone!!
It's Candy here from Candy's Craft Corner!
Hope you are all having a fabulous day!
It's my turn to share today at She's a Sassy Lady and I thought I would use one my new Greeting Farm stamps called Sitting Wonderful.
I colored her up with my copics
Outside sentiment-The Greeting Farm
Inside Sentiment-Scrappy Moms 


Thanks so much  for having me today Sheila! It's always a pleasure.
Take care,
Candy

November 28, 2012

Christmas Penguin

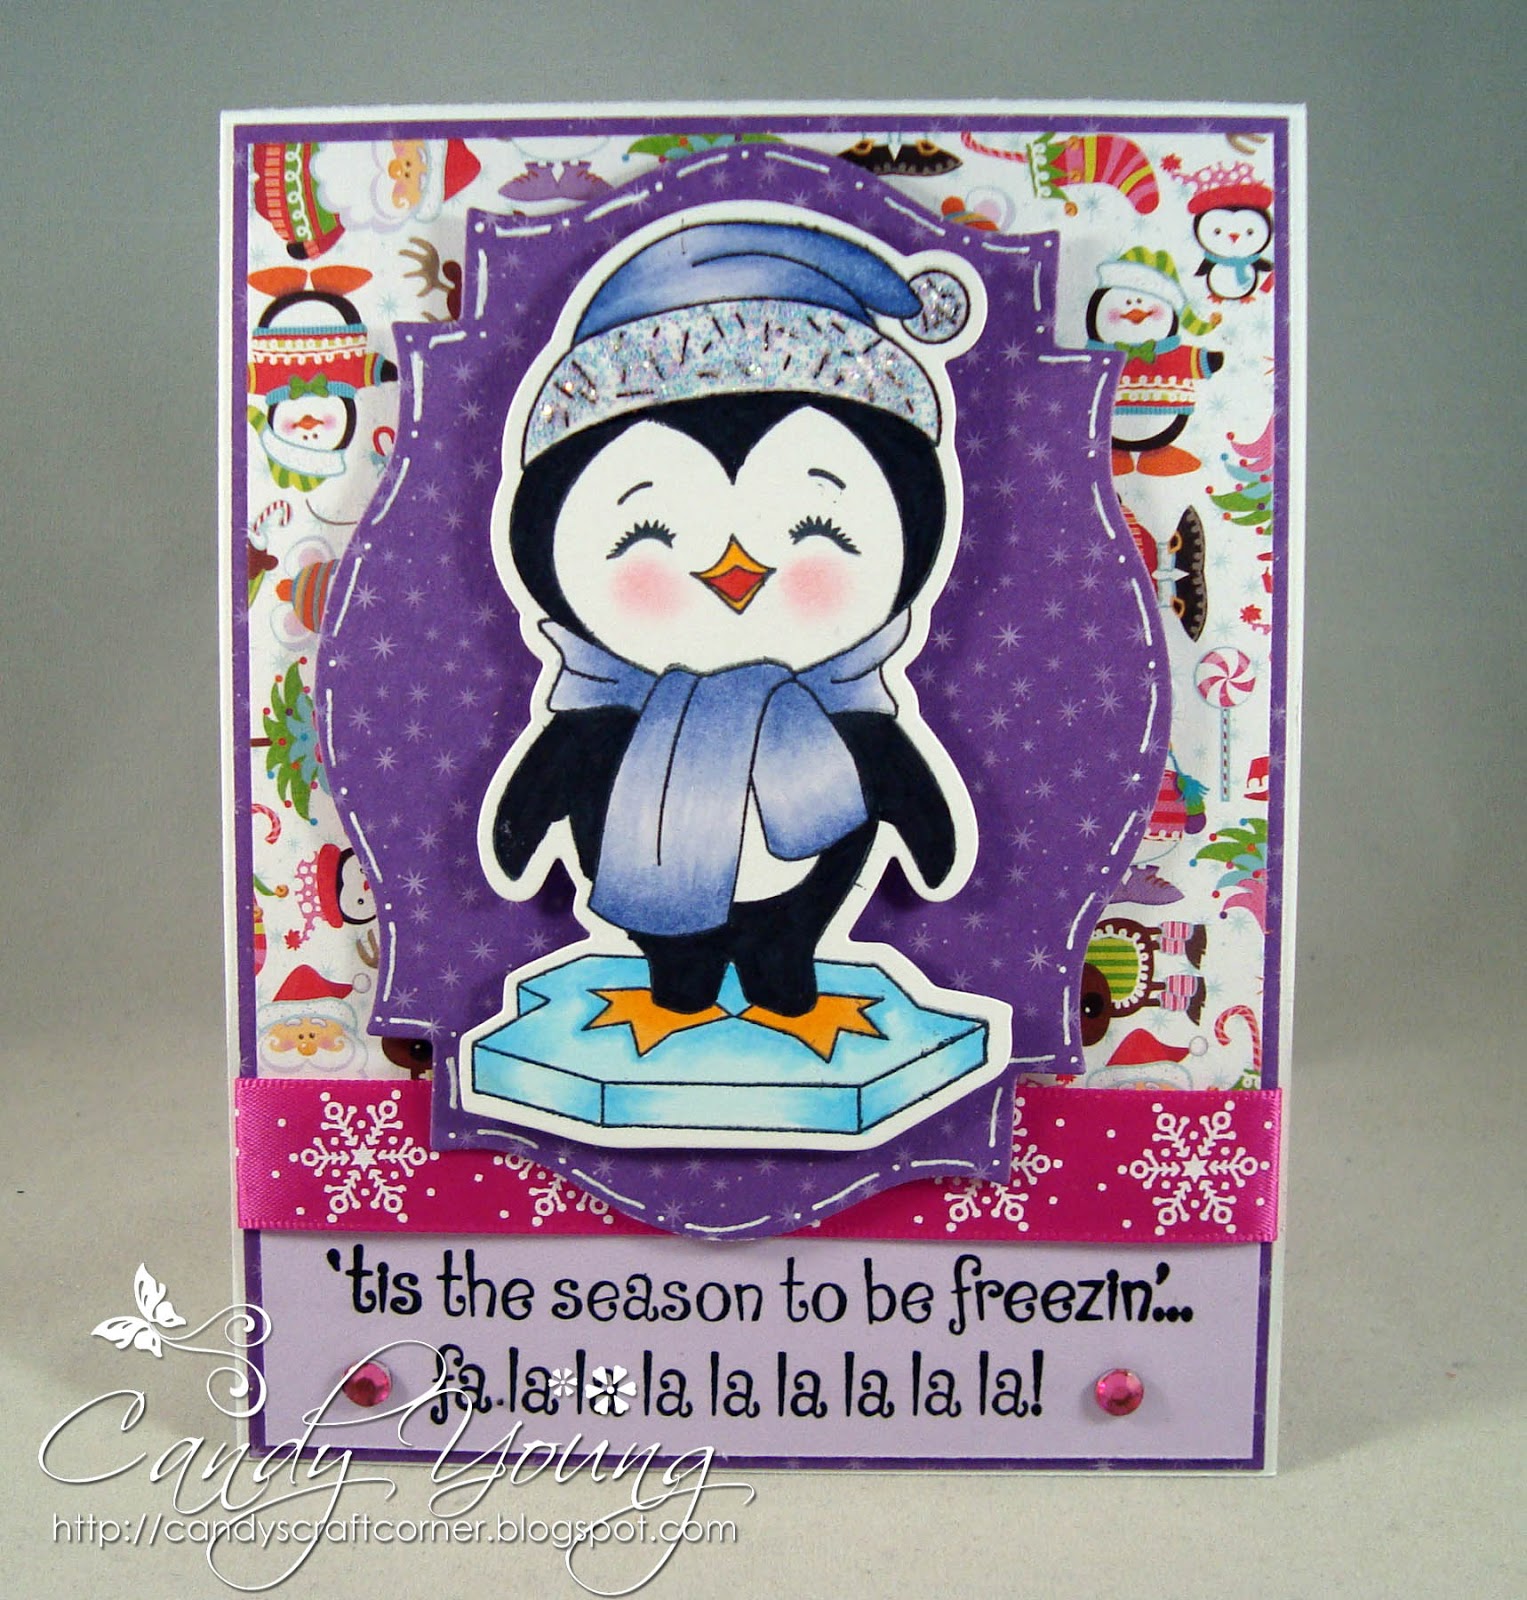
Hey guys! It's Candy from Candy's Craft Corner! It's my turn to share here at She's a Sassy Lady!
I have a Christmas card to share today! I can't believe Christmas is less than a month away! I am so behind on shopping and crafting!! This is another step towards getting ready! LOL!
I coloured up this little cutie from Peachy Keen with my copics. The outside sentiment is from Peachy Keen and the inside one is from My Creative Time. Patterned paper by Recollections.

Thanks so much for having me today Sheila and thanks to you for stopping by!
Take care,
Candy

July 25, 2012

Twilight Birthday

Hey everyone!
It's Candy here from Candy's Craft Corner! It's my turn to guest design here at She's a Sassy Lady. Thanks so much for having me Sheila!
I want to share with you all a card I made for my daughter's 17th birthday. She is a big Twilight fan, as am I. LOL!
I love the eyes on the wolf!
Recipe:
Standard A2 size card
Patterned paper- DCWV Immortal Love matstack
Jacob digi from Pixie Dust Studios
Sentiments from Pink by Design
Ribbon from stash
I have a little tip for you all. Although most of you may already know :)
I use black ink and clear embossing powder to emboss instead of black embossing powder. The black embossing powder makes such a mess. I also make sure to use my embossing buddy.(a little cloth bag filled with powder to remove the static from the paper so your embossing powder only sticks to the sentiment and not your paper) 
I colored up the Jacob digi with my copics. Love his muscles. LOL! Added a piece of sheer red ribbon behind him and popped him up on dimensionals.
I used another page from the Immortal Love matstack to decorate the inside. Love these sentiments  by Pink by Design.
I hope you enjoyed my card today! 
Thanks again Sheila for having me.
Take care,
Candy

May 18, 2012

Look At What Came In The Mail, A Copic Marker Journal From Candy!

Can you believe what came in the mail! It is GORGEOUS and Candy from Candy's Craft Corner made it just for me!!! I can't tell you how special she has made me feel! What an amazing gift and I just can't wait to start putting my colors in it. She told me you can carry it in your purse so when you go to the store you will have all your colors with you! This won't leave my new craft room. Now when guests come over they will get a little tour of my Craft room and my Copic Marker Journal!
All I can say is look how beautiful and Thank You - Thank You Candy. Now after you look this over I am sure you will all want to have one of these books. Candy has instructions on her blog at Candy's Craft Corner so be sure to rush over there and get those instructions. I am sure you will want to be a follower of her blog too, as she really makes some beautiful cards and projects.


Thought you might prefer to see a short video of this awesome book and a closer look at all the detail that she put into this book.
Look at the yummy papers she used too, aren't they awesome? She even has tabbed sections in the book this is one of them.
The pages on the inside are printed specifically for my copic notes, be it color families or favorites or blends... so handy, I love it.
A tabbed section just for hair and skin colors. I learned this from my class with Melissa and Kristy at Created From Color. What a great class, I learned so much in the basic class and can't wait till this fall because I am going to take the advanced class then.
Here is where I can stamp and then color in the hair and skin and keep notes for the exact combinations that I prefer. Isn't it nice?
Another section for color combos.... look at that paper, isn't it beautiful?
And here is where I will keep track of my favorite color combos.
Another tab.
And for the custom colors that I use.
And another close up of the front of my book. Don't you just love the colors? The pearls are such a perfect touch. I hope you enjoyed my book. Don't forget you can make one for yourself too. Just go over to Candy's blog Candy's Craft Corner for her directions and to check out all her other designs.
Thank you Candy!
I hope you enjoyed today's post. Thank you for your sweet sweet words of encouragement. Your comments inspire me to continue sharing with you. Have a blessed day.