Showing posts with label Boys Will Be Boys. Show all posts

May 9, 2013

Birthday Party Decorations


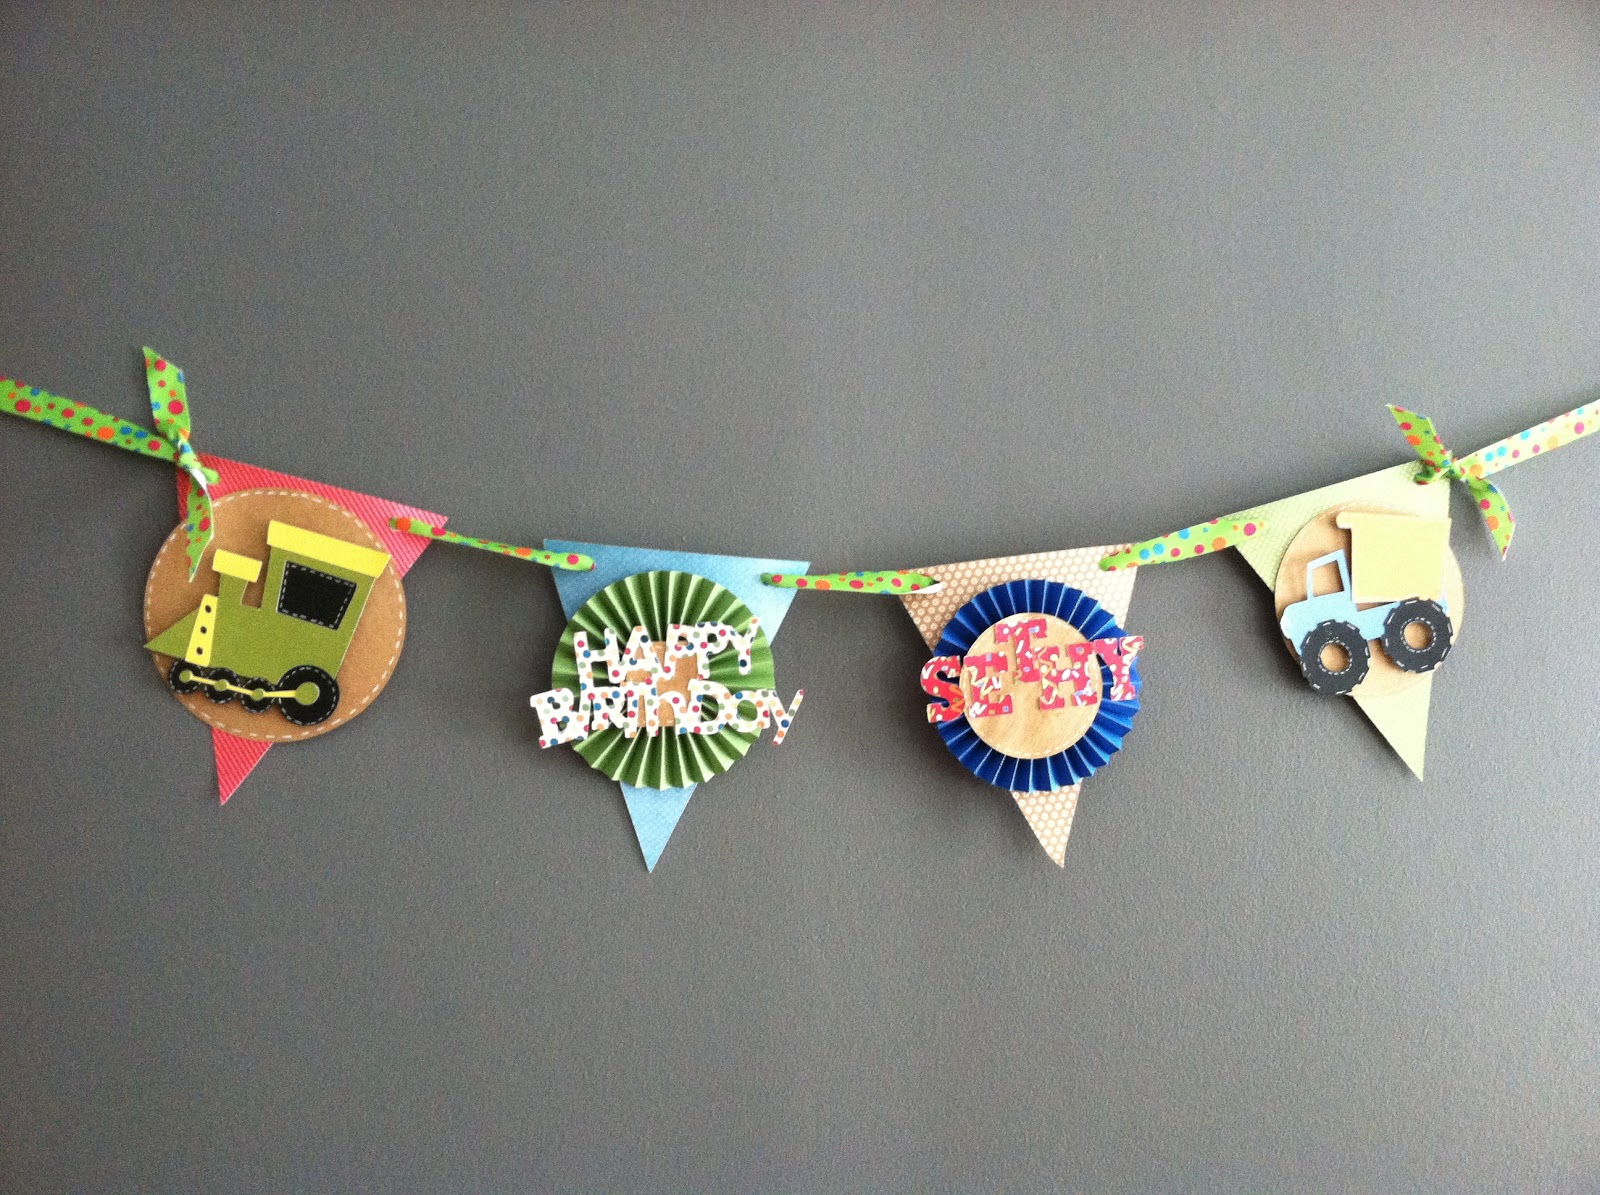
Happy Thursday, everyone! Java Jen here from JAVA JEN CREATIONS and it's my turn to share here and over at CRICUT IS CLOSE TO MY HEART! As you know, if you read my post from last week, our Sethy turned 2 so I just had to make a few decorations to add to his party!  I used the Art Philosophy, Boys Will Be Boys and Birthday Bash Cricut cartridges.

These are from Birthday Bash and are cut at 10.5".


The pennant shape is from Art Philosophy. The train and truck are from Boys Will Be Boys. I made the rosettes by hand using my scoreboard. 

Some close-ups.


I made mini flags to put on the cake.


Our daughter-in-law made an adorable race track cake that was a big hit!

Here is the birthday boy eating one of his favorite treats: Watermelon! :-)

Love him so much!!

Thanks for stopping by today!
Be sure to stop by CRICUT IS CLOSE TO MY HEART too, to see all the crafty goodness that goes on there!

July 9, 2012

Birthday Window Card - 3 Year Old


Hi, it's Sheila and today I get to share this adorable birthday card that I made for my little 3 year old Aiden! He loves trucks so I used the little dump truck from Boys Will Be Boys and went to town. The base of the card is a frame from the Art Philosophy cart from Close To My Heart, the Happy Birthday is from birthday Cakes and the 3 is from my favorite Mickey Font cart.


 The yummy paper is from DCWV Solids and Strips stack. I just love the shine the paper has. This card is a real winner with bright colors that were used on it along with the little truck.


See how easy it is to design and put this card together. Because the card has an age number and was so personalized for Aiden I only made one. I have to tell you I am not used to having all these scraps left over... enough to make another card!


This is a close up of the little truck, I have to tell you it was hard getting a good photo as the paper was so shiney kind of like a perfect sheet of aluminum foil.
I sure hope you liked today's little card. It sure was fun to make and I know my little Aiden will just love it. Thanks for your sweet sweet words of encouragement. Your comments inspire me to continue sharing with you. Have a blessed week.

August 27, 2011

Gypsy Made Simple - Happy Birthday Window Card

Good Morning. It's time for a window card. I just love window cards as they are so unique. You can't get them in the stores and people just love getting them so I think it is about time that you mastered them. They are so easy, just follow a few basic steps and you are good to go.


This first video will give you the basics of how to design your card. You need to always work with a frame, so choose a cart that has a few frames and pick one that you like. I used Elegant Edges for this one. After you have the base of your card completed you can pick ANY artwork that you want as long as you have that cartridge. Remember while watching the video do the steps and if you feel you don't understand something you can rewind or leave me a question and I will reply as soon as I can or you can write me at shesasassylady@gmail.com.

This second video shows how you put the window card together. You will love how fast and easy it is to make. Normally I do two cards of the same thing but since this had a the number 3 in it signifying his age I only did one.  My paper was Glitz from Sandy at the Softside of Sandi and the rest was from my scraps.

 Isn't this just too cute for a little 3 year old little boy that has a new puppy of his own?

Here is a little close up. I sure hope you enjoyed today's post and give window cards a try. I Challenge you to make a card this week ANY card and link it up so all can see what your wonderful design!
Here is the file for SassyLady 5x5 HB Window Card
Thanks for your sweet sweet words of encouragement. Your comments always continue to inspire me to keep sharing with you.

June 25, 2011

Gypsy Made Simple - Window Birthday Card

Good Day! I know you are going to LOVE - LOVE - LOVE this card and it is so easy that you will be making window cards in no time at all. Just turn your Gypsy on, grab a cup of coffee and let's get to work.
Today you will make any type of window card you want or need. I made this cute little card for my grand son Aiden who turns 2 in July. He is such a little cutie and loves cars and trucks, so this will be perfect for him.
This little video will take you step by step through the designing process on your Gypsy. Use any frame for the base of your card. I like Gypsy Wanderings as I am so familiar with it and the others I really need to search to find and the selection is pretty good. Remember people will be looking at the artwork and the way you decorated rather than the base of the card.
These are the yummy colors I used from DCWV the Primary color stack. I alos used left over glitter paper from the Shadow Box I made and that worked out great.
Look at this cut.... one piece and it came off the mat just beautifully. I love DCWV it cuts like butter.

Well I got everything cut and then went on an inked the little hub caps and then Glossy Accented the window so it would look real. I also inked around the edges of the base of the card so that the inside would look nice.
See how easy it is to make one of these cards! I just love the look and you just don't see anything like these window cards in the store. I sure hope you like today's project. I challenge you to make a window card of your own, for any occassion and then link it up to my blog for everyone to see how beautiful it turned out.

Click HERE for a copy of today's file and all you need to do is change out the number for the age of the little boy you are gifting to. Or, if you prefer keep the base and change out your artwork too, to fit your special person. Thank you for joining us today and for your sweet sweet words of encouragement. Your comments continue to inspire me to share with you.
signature