Showing posts with label Lettering Delights. Show all posts

December 14, 2012

Happy holidays! This is Jeannie from Nonnas Scraps and I am so excited to be with you again!
If your life is like mine right now, your time is limited! I still have cards to get out and I want a few that I can keep -- just in case. I love the idea of using simples shapes, and this card just works with those!


White circles: 4" (two), 3" (one), 2.25" (one)
a hat ( I used Lettering Delights Christmas Photo Props)
a carrot shape (from Lettering Delights Christmas Photo Props)
7-8" ribbon
6" twine
Permanent black marker
Assorted glues
Scotch Transparent Tape
Distress Ink: Antique Photo
Red and Silver Stickles Glue


  • Cut the circles from white cardstock. Ink three one of each size (3 total) with Antique Photo ink. 


  • Crease the un-inked circle (4") 1/2 from edge:


  • Add glue at the folded line one the smaller section of the circle. Glue to second 4" circle (inked side out). This forms the card base. Open and set aside. 


  • Add 6" of twine to the back of the 3" circle with tape. Add pop dots. 


  • With the card base open and the right side up, add the prepared 3" circle as pictured:


  • Add the carrot shape to the 2. 25" circle as shown:


  • With the black marker, add eyes and "coal" mouth....


  • Fold the ribbon in half. Knot approximately 1" from the folded edge. 

  • Tape to the back of the 2.25" circle with the knot outside of the circle circumference. 


  • Pop dot the smallest circle to the stack:


  • Add the hat shape and embellish!


  • I added a sentiment in a snowflake shape to the inside that says "Warm holiday wishes!" You could use this as a holiday thank you with "Snow many thanks!" 
I hope to see you again soon, maybe on my blog! The warmest holiday wishes to you and yours! 


June 8, 2012

Just a Note.....

Wow! It is hard to believe that June is finally here! I love teaching, but I love summer break as well! Time to play means time with friends; thank you Sassy Lady for allowing me to play with you on your Blog! 

Because it is soon to be summer, the need for bright, happy summer colors was imperative! 
Sending "Just a Note" to someone this summer could just brighten their day. And can make one, too!


Design House Digitals Paper : Cherry Limade
My Thoughts Exactly Stamps: Just a Note "Big Thoughts"
Kaleidoscope Creator Software (KK3)
Assorted glue
ribbon
  • I started with a picture from my photo library of all things, "Peeps". (It was colorful and made me smile!) Using the KK3 software I selected the "Feathers" add on and brought in the photo. 

  • In the image above, the center section shows my photo and the feathers template. the preview pane to the right shows the kaleidoscope. Beneath it is the color I chose for the background. 
  • I selected File: Save: Kaleidoscope and set the size to 3" square. (You can change this to any size you need!)
  • Set up your cuts for the Card Map according to your desired method. I use Make the Cut Software. 
  • Here are suggestions for various software/ cutting machines:
    • Make the Cut: Use the texture feature and fill the shapes from the card. For the kaleidoscope: Import : pixel trace: set threshold to 255. 
    • Cricut machines: Print paper from home printer in 6" squares. Use Cricut Craft Room or your Gypsy to replicate the shapes of the card. Cut from paper squares. 
    • Manually cut shapes from paper. 
  • Assemble card and stamp. Lace ribbon through holes. 
Would you like to use my kaleidoscope, too? You can download the summerfun.PNG file by clicking here. 
This design is a free gift from me to you. Please give me credit if you use it and do not use it for resale. Thank you for respecting this! 

Thanks for sharing a few moments of your soon to be summer with me! 

May 11, 2012

Use a Dictionary for the Details!

Hi all! I hope you are having a wonderful day. This is Jeannie from NonnasScraps.
I am so excited to be the guest designer today! I just love this place and I hope you do, too!

Father's Day is just around the corner. I don't know about you, but I think finding "guy" sentiments or stamps is tough! So, I have resorted to another source, the dictionary!
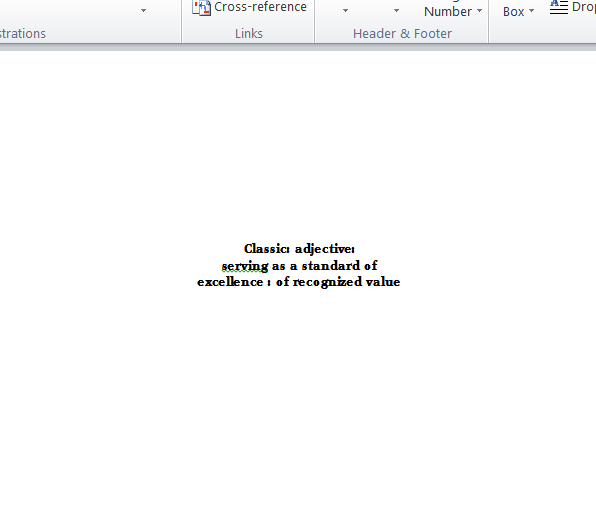
This card just screamed, "Classic!" to me (that describes my husband to a T!) 
Here's what I found in Merriam Webster's on-line dictionary:

a : serving as a standard of excellence : 
of recognized value<classic literary works>

b : traditionalenduring <classic designs>

c : characterized by simple tailored lines 

in fashion year after year <a classic suit>

Woo hoo! Letter A is perfect! So, off to print using my home computer. 


  • I first opened Microsoft Word 2010. (A similar word processing or graphic program can be used.)
  • I then set my page margins :
    • Select Page Layout: Margins


Select "Custom" margin; set values to "3"


  • In the Word Document, I typed my text. (see the specifics for this card below) and set the justification to centered. I also chose the color for my text at this time.
  • Select Insert: Shapes

  • I wanted to print on a circle, sized 3 x 3", so I selected a circle and adjusted the size.

  • I then sent the Word Document to the my home printer. (Hint: Note which is the "leading edge" or the one that exits the printer first. This edge will go into the printer first in a later step.)
  • I gathered the shape to be printed upon, the printed sentiment sheet and either temporary glue stick or blue painter's tape ( Don't know why I got the glue stick--- I really prefer tape.)


  • I adhered the cut to to the paper, using the printed shape as a guide. I made sure that the "leading edge" was securely adhered to the paper.

  • I returned to my Word document and deleted the MS Word shape, so that all I  print is the sentiment.
  • I then sent the document a second time to the printer. Hint: Be sure you know which side will be printed and send the leading edge into the printer first.)
  • Voila! I had a perfect sentiment printed in the perfect place!

  • Specific ingredients for my card:
    • Mojo Monday Sketch 235 April 2, 2012, Sketch by Teresa Kline
    • Lettering Delights digital papers: Generations and Heritage
    • Font: Traveling Typewriter
    • Google search for antique car silhouette image (converted in MTC software)

This is a great way to print to any cut, making use of all of the TTF that are available from so many sources!

Thanks for stopping by!