Showing posts with label Give Away. Show all posts

July 19, 2010

Here Kitty Kitty - Weekly Card Kit Giveaway

I have had so many request for a kitty that I figured I better make one.... you see I am not a cat lover, but I do like to play with little kitties! So this week we have this cutie as our weekly card kit giveaway. All you need to do is leave a comment and you might have this little guy on his way to your mail box in just a week.
I started out with a box from George and the kitty. I made the kitty just under 4.25 high with the shadow feature and then grouped it to the box so that the actual front of the card is a 5.5x4.25 to fit the A2 card. Before I went any further I highlighted just the kitty shadow and made all my other layers. I first hit the ungroup so all these piece wouldn't move when I went to do something and then I grouped just the kitty and the box. then I grouped and welded those 2 pieces together, copied it. Then I moved by arrows the new group until they were exactly right on top of each other. I tapped the mirrored image side to side button and then slowly moved the second kitty over until the two boxes almost seperated. I made sure the screen was large enough to see and welded the two together.
See how they look. After I made the set I duplicated it as I wanted to cut 2 sets of cards in 1 cut. Success! All I did then is choose the papers place them on the mat and viola done.
After the bases were cut I scored with my scorepal.
Seperated the pieces to make sure they were all there and fit and got an idea of how it would look.
I decided the top layer would look better if I inked it so I used 2 shades on the kitty. One going into the edges with a color just a tad darker than the paper and then a dark brown for the edges. I love the way he turned out..... this is my second attempt I had to cut the top layer twice as I inked the front accidently on the first attempt.
I also inked the edges of the white cardstock.
The go wild just kind of sat there and I wanted it more brilliant yet I didn't want the glitter look that the stickles would offer.
So I used Glossy Accents on the lettering.
I think that looks better now.
Here is a close up the little kitty, Isn't he cute?
Well I sure hope you enjoyed this little project. Do leave a comment for a chance to get this cute little card kit mailed directly to your home. All you need to do is make a comment by Sunday 8PM on 7/25/10 and watch for the announcement on Monday morning by 6AM on 7/26/10. It's that easy! Everyone is a winner at Shes A Sassy Lady this is your Sassy Kitty Gypsy File and your Sassy Kitty DS File.
MyFreeCopyright.com Registered & Protected
So be sure to leave a comment and make sure I know how to reach you. I am always encouraged by your sweet - sweet words, they inspire me to keep scrapping and sharing things with you.
signature

July 12, 2010

I Just Love Puppy Dogs, Don't You? ENTER TO WIN!

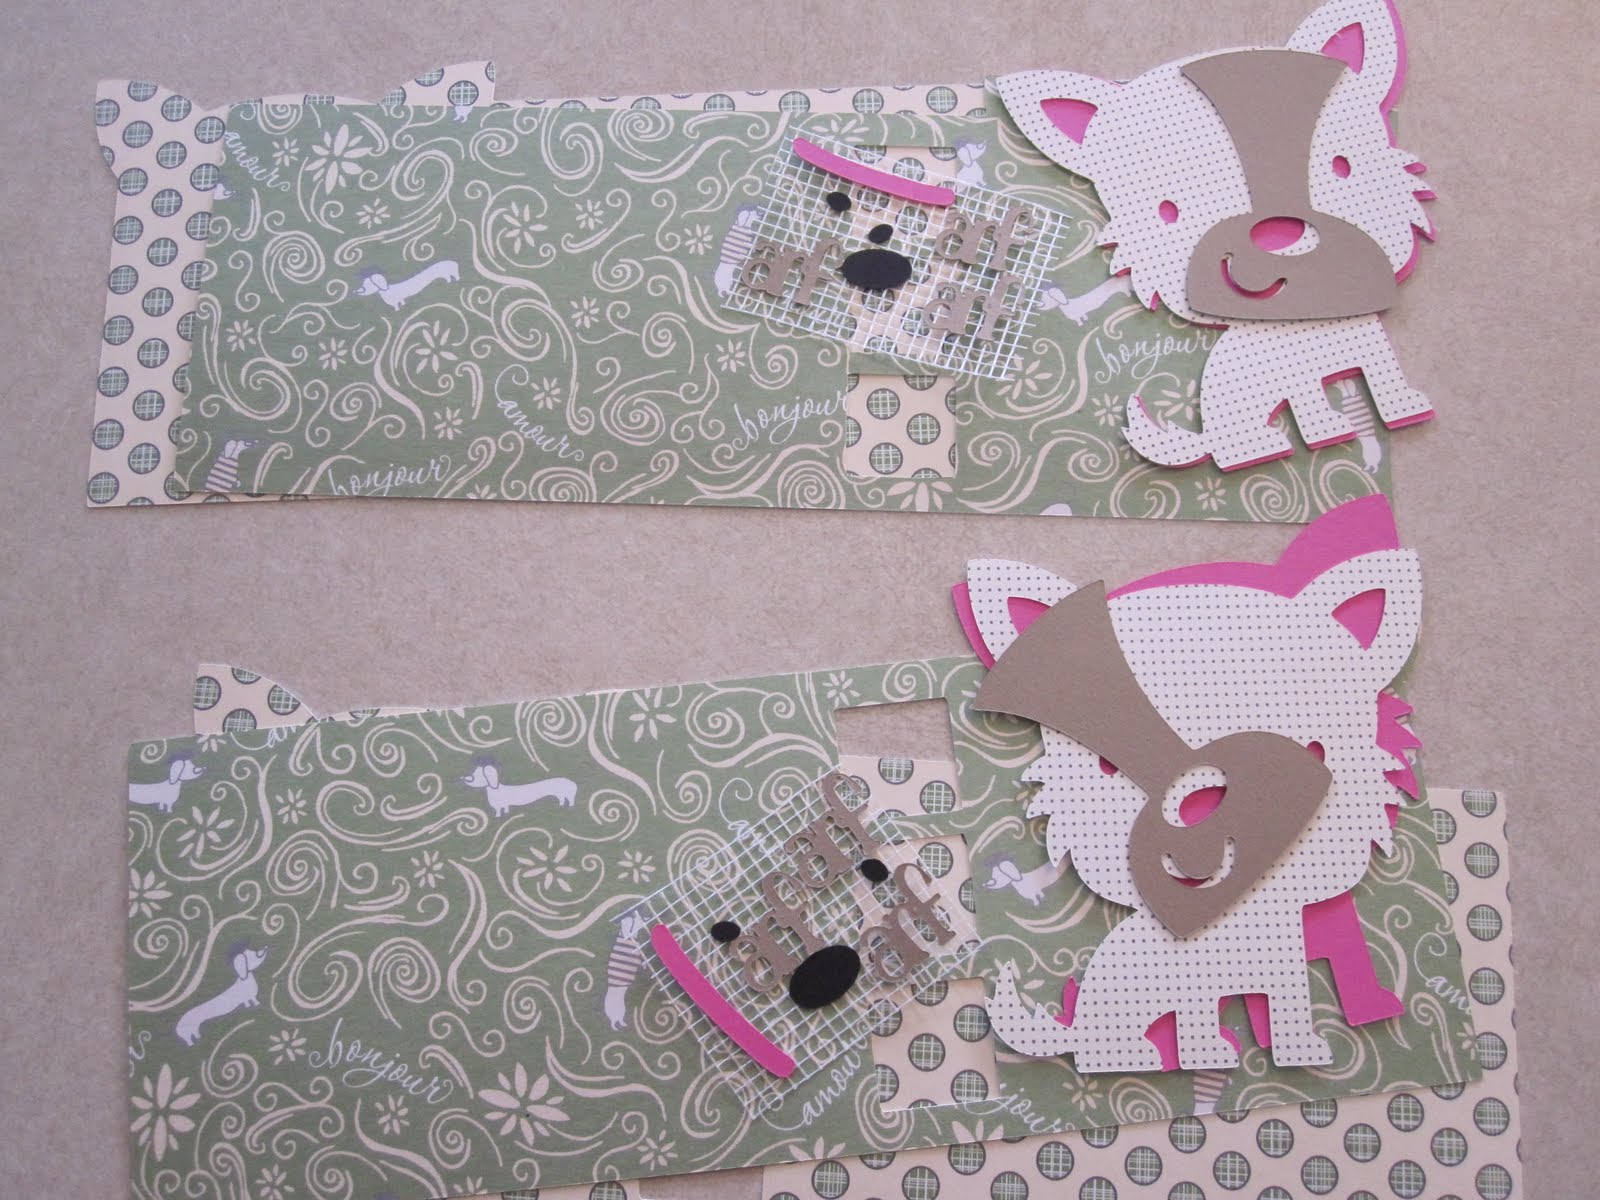
Now look at this face!!! Don't you want a little doggie like this one? I had a lot of fun with this little cutie. I used My Gypsy Woman and the Create A Critter Cartridge. Check out that paper, its from the DCWV Bella Cafe Stack.
First I cut all the pieces out seperating and making sure all pieces were accounted for.
I put the little pieces on my stickey tape to make sure nothing would get lost.
At first I wasn't too sure about the pick as I chose such a bright color, and I was afraid my layers would show through, but it worked out great.
When I went to score mycard I realized I had made the base card too wide and had to trim the card to fit an A2 envelope properly. I am still working and adjusting the cut file to cut properly as I type this.... I don't know yet if you will get a cut file. We shall see.
I scored the inside of the card as shown above. Note I trimmed this also as it is a mirror image of the base.
After scoring I trimmed off the fold. (Boy do I need lotion here, a day in the sun and wowsers did my hands dry out! Guess I shouldn't have looked at the preview!)
Inked the center fold so it will be less noticable.
I took all the contents of the kit out and decided I was wasting a lot of the acetate so I trimmed it in half and used half for each kit.
Then I started by putting all the pieces together. I too the base, used my Glue Glider Pro and adhered the acetate to the inside of the base. Then i adhered the inside to the base. The fold looks good doesn't it?
See how nice the front looks. I just love this paper.
Then I lined up the little arf words so you could see through the windows and glued them down. I trimmed the white piece to fit the inside for the sentiment and then stickled the three little arf words.
I attatched the puppy and added rhinestones to her little color... a girl just has to have bling!
Close up of the collar.
And here is the finished card. And you could take a card kit home to make on your own and I handled all the alterations! All you need to do is leave a comment to enter this drawing.
Here is a close up of the cute little windows that are quickly becoming a Sassy trademark!
Well I sure hope you enjoyed this little project. Do leave a comment for a chance to get this cute little card kit mailed directly to your home. All you need to do is make a comment by Sunday 8PM on 7/18/10 and watch for the announcement on Monday morning by 6AM on 7/19/10. It's that easy! But at ShesASassyLady, everyone is a winner because this is the Sassy Doggie Gypsy File and the Sassy Doggie DS File for you to download.
MyFreeCopyright.com Registered & Protected
So be sure to leave a comment and make sure I know how to reach you. I am always encouraged by your sweet - sweet words, they inspire me to keep scrapping and sharing things with you.
signature

June 28, 2010

Enter To Win This Cute Little Crab

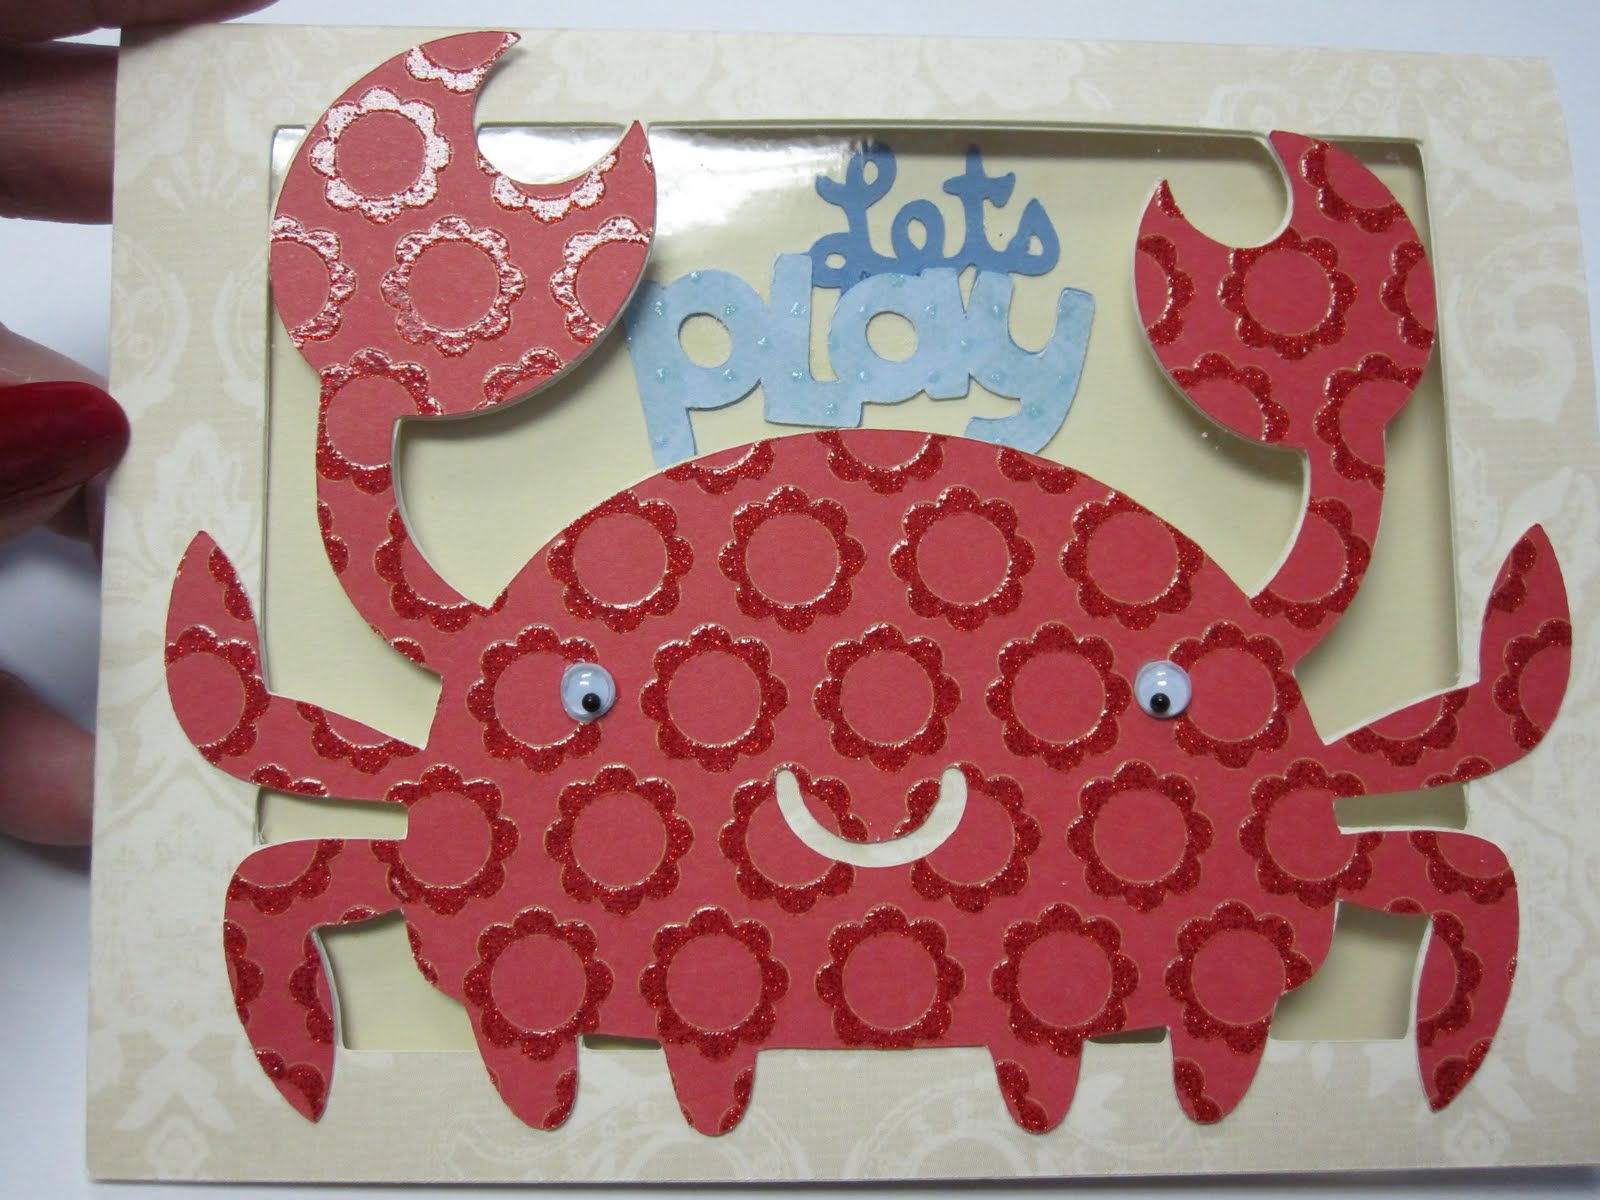
Isn't he handsome? He wants to come home and play with you! All you need to do to enter is leave a comment!
I love these little window cards that offer just a little peek of whats happening on the inside. This card is pretty easy with the Gypsy file that I am sharing with you.
As you can see this is a real simple cut and only 2 pages. The second page is for the 2 inside pieces; the acetate and the section to write on.
Above you can see how I score and fold the card and then trim the inside fold away so that the card fold securely.
These are all the pieces in the kit that you will receive if you win, and it does come complete with his little eyes. All you need to do is supply the adhesives and a little time.
I looked around and try as I might I forgot my glue Glider Pro at home and was not going to use glue on the window and go through that hassle again. So I improvised.
See, I used medium sized glue dots and they held perfectly! Then I used the Zip Dry glue along the paper edges.
I added glue to the sentiments area and attached to the inside bottom.
And then positioned the Lets Play within the window, not at the center of the card so it looks great when you are looking at the card while it is closed.
Notice all the room you have to write a little note.
Isn't he handsome?
This is looking down at the card while it is standing on a table top.... you can peek inside without disturbing.
And a close-up of the awesome paper from DCWV! Well I sure hope you enjoyed this little project. Do leave a comment for a chance to get this cute little card kit mailed directly to your home. You get an extra week to comments as I am on vacation so this card kit is a 2 week draw. All you need to do is make a comment by Friday 8PM on 7/9/10 and watch for the announcement. It's that easy! But at ShesASassyLady, everyone is a winner because this is the Sassy Crab Gypsy File for you to download.
MyFreeCopyright.com Registered & Protected
So be sure to leave a comment and make sure I know how to reach you. I am always encouraged by your sweet - sweet words, they inspire me to keep scrapping and sharing things with you.signature

June 21, 2010

Enter To Win Get Better Gator Card Kit

Hello, I thought we would do a Get Better card from Create A Critter today! Isn't he adorable? He is so easy to make you will want to use this cute file over and over again. This layout is very similar to last weeks card and the instructions will be similar. My paper is from DCWV's Animal Crackers Stack and the file cuts perfectly. I have been using a 12x24" mat lately and really love that mat as I canget an entire project done in  1 simple cut.
I originally cut out the heading in baby blue but it just faded into the card so I quickly grabbed paper from my leftover bin and WOW what a difference a little color made. Note I did not throw the light blue out I just glued the lime green on top of the blue and it was more like chipboard then.
I gathered the pieces together.
Make sure you score your paper for a straight fold as my window is so close it could give you a hard time if you don't.
I added a little in on the fold so that when I cut the inside lining it would match up nicely.
When I finally was ready to put together my little kit, I first started by making sure I had all the pieces.
I put the gator together first.
Trimmed the inside lining ever so slightly as you can see. It is just the size of the fold.
I glued the 2 sides together, using Zip Dry Glue and it was so much easier that when I used the Xyron as I could position easier.
Place the lining in for writting notes on.
Add the lettering and adhere to the front of the card.
Then attatch your Gator.
Almost done.
Add his little eyes. Then add stickles to the spikes along his back.
Isn't he adorable? I sure hope you like today's card, I know enjoyed making this little guy! Some lucky lady is going to get this kit to make a little Get Better Gator Card Kit sent directly to their home. All you need to do is make a comment by Sunday 8 PM on 6/27/10 and watch for the announcement on Monday morning by 6AM on 6/28/10. It's that easy! But at ShesASassyLady, everyone is a winner because this is the Get Better Gator Gypsy File and this is the Get Better Gator DS File for you to download.
MyFreeCopyright.com Registered & Protected
So be sure to leave a comment and make sure I know how to reach you. I am always encouraged by your sweet - sweet words, they inspire me to keep scrapping and sharing things with you.
signature