Showing posts with label Pop Up Neighborhood. Show all posts

June 9, 2012

Gyspy Made Simple - Challenged By The Sassy Dude To Duplicate This Awesome Shape Card

Well, I sure hope you are having a good day and are ready to tackle a BIG project! Bobby Hardgraves of The Cricut Couple designed an adorable little Scarecrow card and emailed me and said 'it would make a GREAT Gypsy Made Simple project Sheila'! Well I took on the challenge and let me tell you even with all the information that Bobby provided, this is not a simple project. But, don't worry I am sharing my file with you so even if you get lost trying to duplicate you have the actual file to fall back on so you can make a card! I warn you this is a LONG post with lots of videos, 4 to be exact. Trust me this will be the hardest project of the summer! So let's get to work. Grab a large cup of coffee and turn those Gypsy's on on lets get right to work.

Position all your pieces as shown on Bobby's photo.
 I followed Bobby's instructions to the letter as follows:
To start with, you have to cut shapes that are going to be the layers you add on the front of the card. The following are the cuts you will need.

The hat is from Paper Dolls for Everyday. Cut 2 at a height of 8.50 (this is an accessory layer, so you really have to blow it up big). You will need one for the hat (denim paper) and one for the hat ribbon (leather look paper). For the hat ribbon, cut the hat and then use a craft knife or scissors to remove this piece from the overall cut.
The circle is from CTMH AP and cut at a height of 4.00. I used cream colored card stock.
The bandanna is from Old West and cut at a height of 4.30. I used bandanna card stock.
The hay is from Pop Up Neighborhood. This is a circle exclusive cart, so if you don't have it, there is a grassy type piece on Pooh and Friends that would work too. For the P.U.N. cuts, you need two at a height of 3.90 and one at a height of 4.60. These are cut from a golden card stock (dark yellow).
Note the photos are of Bobby's Gypsy also.


After I had that done then it was time to get different parts in the right position. Add a layer with your Gypsy and copy one of all shapes over to the next page. Then you need to contour out the inner cuts on the bandanna and hat. Place them all together and then weld them. Please follow along in this video as it will be easier to understand.
It will look like this when completed:


Bobby did such a good job of explaining this on his Gypsy that I am using his photos.


Now let's start putting all our piece together.... You will see very quickly that there is a lot of prep work. All edges need to be inked, the flower needs to be coloring and cut out, the face made and the straw colored to look like straw. You will see that I am in trouble here and don't know it yet.


This is where I discover I am in trouble and go back to the drawing board.

Fortunately my Gypsy was right there and I was able to make a few adjustments to the base of the card.  See how high that hat sits on his little head. Everything else is perfect but I just didn't like that look. Yes I will still use the card, but I just can't leave this design as is. It is not perfect here and I don't feel like I lived up to the challenge unless it was just right.


In no time at all I had it re-cut and re-prepped. I think I am finally ready to put this card together and I know it is perfect this time and can't wait to share my card with you.

 
Here area few close-ups of the card. I colored using my copic markers and really enjoyed that. I have to admit making the little face terrified me.... I just copied Bobby's and it worked.

Now isn't he handsome? I just love this little card. I don't think I will give him away though... I worked too hard to let him go! teehee  You know I say that but he will be going to someone I love I am sure.
 This is a close up of his little face. I love the freckles.
Bobby's Card is on the left, mine on the right.
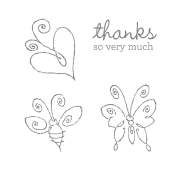
And the card in all it's glory. Now here is the challenge this week... I challenge you to make your own Scarecrow card! I would like you to try to make it on you own but HERE is the file if you need it. (NOTE THE FIRST FILE I DID WAS EMPTY, AFTER UPDATING MY GYPSY THIS FILE WORKS, SORRY FOR THE INCONVENIENCE!) I will be giving away this adorable little stamp set to 2 lucky winners chose by Random.org. All you need to do is link your card by Friday 4PM on the 15th and the winner will be announced Saturday morning. I hope we see many many scarecrows.
I hope you enjoyed today's post, I know it was a challenge for me to complete and I am thrilled to be able to share it with you.
Thanks for your sweet sweet words of encouragement and please give a few wonderful words to Bobby too, our very own Sassy Dude from the Cricut Couple. Your comments inspire me to continue sharing with you. Have a blessed week and let's see those scarecrows.

May 24, 2012

Sassy Dude... Create your own shape card...


Hey Ya'll,
Sassy Dude here from Cricut Couple.  Today, I had really great intentions, but for some reason, I can't get a correct answer from Provocraft on how to be able to update my machines or pull files from my Gypsy, so let's do a little lesson in welding, since I can't share the simple file with you.  Hee! Hee!  This is a really fun scarecrow card that I created with the Gypsy and it's actually really simple.  The hard part is having a design in your head and knowing your cartridge library enough to find shapes to pull it off.  Hee! Hee!  Fortunately, I kind of knew what I needed.  The hardest part was finding the hat.
 Here is what the finished card looks like from the front.
 I used these four cartridges for the card and all shapes.
 To start with, you have to cut shapes that are going to be the layers you add on the front of the card.  The following are the cuts you will need.
The hat is from Paper Dolls for Everyday.  Cut 2 at a height of 8.50 (this is an accessory layer, so you really have to blow it up big).  You will need one for the hat (denim paper) and one for the hat ribbon (leather look paper).  For the hat ribbon, cut the hat and then use a craft knife or scissors to remove this piece from the overall cut.
The circle is from CTMH AP and cut at a height of 4.00.  I used cream colored card stock.
The bandana is from Old West and cut at a height of 4.30.  I used bandana card stock.
The hay is from Pop Up Neighborhood.  This is a circle exclusive cart, so if you don't have it, there is a grassy type piece on Pooh and Friends that would work too.  For the P.U.N. cuts, you need two at a height of 3.90 and one at a height of 4.60.  These are cut from a golden card stock (dark yellow).
 Add a layer with your Gypsy and copy one of all shapes over to the next page.  Then you need to contour out the inner cuts on the bandana and hat.  Place them all together and then weld them.
 This is what the welded piece looks like.  Basically, this is giving you, not only the shape of the card, but also giving you a base layer for assembling your card.
 Finally, add a 3rd layer to your Gypsy file and pick a card base to use for your inside sentiment.  For this one, I used Close to my Heart Art Philosophy for this oval card shape.  You can use it as the file is, but I like to contour the score cuts out and score with a bone folder.
 You can see here how the card will open up.  You can also add to the Gypsy file and cut an extra oval, slightly smaller, out of he cream card stock for a sentiment mat.
 I inked everything for this with cocoa ink.  I also used colored pencils to give the hay a little more color and detail.  For the face of the scarecrow, I hand did the face with black sharpie.  I then used markers for the nose and freckles.  I also used a little tomato colored chalk to add a little blush.  I used the beautiful May 2012 CTMH Stamp of the Month set for the sunflower.  I simply stamped it with black archival ink and then colored it in with my colored pencils.  You can see in this angled picture how I used liquid glass on the eyes and center of the sunflower.
So... Looking straight on, this is the finished project.  I really love the way he turned out and had so much fun seeing the original thought come together.  I have to admit, I am pretty proud of this one.  Hee! Hee!  I hope you all will fire up that Gypsy and play with some shape card ideas.  This really does sound complicated, but the entire card took about 15 minutes to layout on the gypsy, probably 15 minutes to cut and about 15 to assemble.  I think I am going to make several of these this fall.
The finished card is pretty large, so if you like smaller cards, you will probably want to lay everything out with the measurements provided first to get the feel of it and then shrink things down a little bit to get the size that you want.
Again, I am so sorry that I don't have a gypsy file to share with you.  If I can get these machines to start getting along again, I will repost and share the file.  I will also e-mail it to Sheila so that she has a copy to share with you too.
So... think about something fun where you can really manipulate other shapes into a fun design!  It's really worth the work and lots and lots of fun!  I would love to know what you think about this card today and thanks so much for my friend Sheila for letting me play over in Sassy Land today!  If you have time, we would love for you to hop over to our blog for a visit!  Cricut Couple Blog