Showing posts with label Forever Young. Show all posts

February 16, 2016

First Project with Cricut Explore Air

Hello, crafters! It's Grace from Grace Notes for Today. I'm happy to share my first card made with the help of Design Space and my new Cricut Explore Air. 

Flower Pot Pocket Card

Flower Pot Pocket Card, by Grace Baxter

For the pot, I created my own template. After checking some similar styles online, I found that I didn't like the shape or smaller sizes. There are several flower pots available on cartridges but again, I wanted a cuff that I could decorate.

Details

Size:  The pot, full length before gluing sides is 11 inches long, 4-1/2" wide.
Flowers: 1 @ 2.79"w, 1 @ 2.89"w, 1 @ 2"W. Flowers are all from Forever Young.
Name plate on pot: Cut from Heritage, name was written with Explore Air. Attached with silver heart brads.
Butterfly:  Butterfly from Imagine More Cards, cut at 1.7"

I stapled a piece of green ribbon at the top, to indicate that the flower card needs to be pulled out. For the message on the card, I used the writing feature in Design Space. Sorry I don't remember what fonts as I tested many.

Flower Pot pocket card, by Grace Baxter

If you would like my template for this flower pot, please become a follower of my blog (click blue "Join This Site" button in right side bar) and leave me a comment requesting the template. Don't forget to give me your email address so I can send it to you. I'd love for you to visit my blog at GraceNotes4today.blogspot.com.


November 3, 2015

SPARKLY B-DAY WINDOW CARD

Forever Young and Pretty

For the feminine woman who loves pink, flowers, birds and sparkle, this card knocked it out of the park on all points.  Two Fall birthdays in my family are for women I dearly love; my sister and my daughter. I made two different versions of the card to suit their individual personalities. Here is the first one.


window bday card with sparkle and shine, front by Grace Baxter

I've been making a lot of cards lately with various kinds of windows. For this large window style, the inside has to be just as pretty as the front.
Card size is 5-3/4" square.

The window is a sturdy acrylic that I embossed with birds and leaves (perfect for my gardener recipient).

window bday card with sparkle and shine, inside by Grace Baxter

The cardstock I used for the front frame and inside verse are both from DCWV Cherry Limade Stack. The selections in this book are all beautiful -- some have foil accents, some have glitter. Sparkly model on the front is cut from DCWV Glitzy Glitter, and it surely IS that! The hardest part was choosing one from the many great options!

I was inspired to make this card by Sheila, of She's a Sassy Lady blog. Sheila shared a tutorial two years ago and I loved what she did with it.  Link to Sheila's original post and video: Making a window card with a large window

One more picture of this design 

Light shining through the "glass" reflects swirly branches and birds.
Watch for my next post featuring a similar design.
Drop by Grace Notes for Today

Wishing you a sparkling, beautiful day!

May 10, 2013

Happy Mother's Day!!!!!

I hope everyone has a beautiful Mother's Day and make sure you take advantage of this day to relax (and maybe craft!).

BTW, It's Danita from http://danitasdesigns.blogspot.com/.

I'm bringing in Mother's Day with some cards I made for my family and friends.

I made a total of 14 cards in one weekend, whew!!!!  I don't know what got into me, and that doesn't happen very often so I made good use of the energy!!

For this first set I used my Cricut E2, (yep, sure did) and the Forever Young and Mother's Day cartridges. I cut the card at 5.50 x 7.25 in CCR.
 
Inside of cards

 
This second set was made using my Cameo and from a free file I got off the internet.  Aren't they cute little Derby hats?  I really hope my friends enjoy these.
 
 Close up 1
Close up 2 
 
 
Want to see more Mother's day cards?  Head on over to my blog and take a peek.

April 14, 2012

Gypsy Made Simple - Reflections

Good morning.  Isn't this exciting. I am a part of Blog Hop with a great bunch of bloggers.... I am the last of the list so if you just stopped by do make sure you stop by each and everyone of them and check out there awesome projects.

1) Pam - http://www.thebugbytes.com/
2) Elizabeth - http://www.217creations.com/
3) Michelle - http://ladyofleisureink.blogspot.com/
4) Beatrice - http://beatrizguzman58.blogspot.com/
5) Jen - http://3catsandabug.blogspot.com/
6) Debbie - http://debseclecticthoughts.blogspot.com/
7) Lori - http://scrappinmystressaway.blogspot.com/
8) Bobby & Jill http://cricutcouple.blogspot.com/
9) Kelly http://kamscraftyplace.blogspot.co.uk/
10) Chris - http://chatterscene-mom.blogspot.com/
11) Kimberli - http://kimberliscreations.blogspot.com/
12) Sheila - http://shesasassylady.blogspot.com/

I am also designing for Cricut Is Close To My Heart today so please make one more stop along the way to see all the awesome designs there as they all feature designs that can be made with the Art Philosophy Cartridge.
Today I have a simple and fun project for you that can be made with a few steps on your Gypsy... I used the Close To My Heart Art Philosophy cartridge for the base of the card and the girl is from Forever Young. I really had a hard time taking a photo of this as you are looking through acetate and the light is reflecting on it.


Just follow along and you will see that in just a matter of a couple of minutes you will have 2 great cards.

The papers are from KandCompany for the base, a glitter paper from Joann's, and the solid mat is from the Summer Paper Package from CTMH. I also used the acetate/plastic page protectors of a notebook for the window in this card.(These pages are not stiff or gray looking they are clear and firm).


Don't you just love how fast that card came together. The stamp is from the Fasionista Stamp Set from CTMH, if you don't have Forever Young cartridge you can stamp one of the ladies from that set too or from any cart that will give you a solid person image. I wanted to use the stamp set but I want to make sure that everyone can participate and not just those with the stamp.

Don't you just love how delicate this card is? And the glittery paper just shimmers while the acetate give you the impression that you are looking at a mirror. I love it!

Look at this awesome sentiment.... sure to make anybody feel special no matter what their circumstances are. I love it! The pink paper matches the pink on the front of the card...
One more close up of this awesome card. Click HERE if you would like this Gypsy file. Now this week I want to see what you do! The holiday is over so there is no excuse, so let's see your project this week! I challenge you to make a card or page that uses a silhouette of some sort and acetate in it somewhere. Then link it up!!! One lucky person will will a stamp set thanks to Random.org. (I can't possible choose from the talent that is out there). Link your project by 4:00 pm on Friday April 27th to qualify, winner will be announced Saturday morning.
I hope you enjoyed today's project, I know I sure love this card and can't wait to get it in the mail! Now if you didn't start from the begining be sure to hop right over to The Bug Bytes and see Pam's great design. Thank you for your sweet sweet words of encouragement. Your comments inspire me to continue sharing with you. Have a blessed week.

February 8, 2012

Kitchen Diva

Good morning! This is Beatriz from Amazing Grace Blog.  It's my turn again to design for She's a Sassy Lady.  Even though I recently got the Cricut Imagine, I'm waiting for my husband to learn it and then teach me.  Until then, I'll keep using my Cricut Expression which I dearly love.

This layout was inspired by the Melissa Frances die cuts.  I used the Cricut From My Kitchen cartridge for the word "kitchen", the Quarter Note cartridge for the word "diva", the Forever Young cartridge for the lady and the Nifty Fifties cartridge for her apron.


Thank you, Sheila, for this awesome site filled with inspiration.  Have a wonderful and blessed day.

October 16, 2011

Vinyl Plastic Cups

Hi everyone.  This is Trenise from www.scrappin-neesie.blogspot.com   I am super excited and little nervous because this the first time being a guest on someone else's blog.

For my project, I decorating a clear cup with vinyl. It's fun, simple, and  quick and they look so cute. 


The supplies I used are clear plastic cups from Bed Bath and Beyond ($3.99), Cricut cartridge Forever Young, Cricut Lite cartridge Varsity Letters, Cricut transfer tape and vinyl (I got off of Amazon.com).


I first started by cutting the women figures I was going to use along with clothing and accessories.  After I have cut out the images, I remove all excess vinyl because its easier to see where you need to place layers and when you use your transfer tape you don't want to grab the excess parts. 

I cut these women out at 4 inches.  AKA is cut at 2 inches and 1908 is cut at 1 1/2 inches.  Layering hte pieces seemed to be the only hard part for me.  Trying to layer each piece right the first time because once it sticks down, its there.  *So patience is the key that I learned with working with vinyl.


After you have gotten your pieces put together, Next you will cut your transfer tape big enough to cover the image you are about to use. Then peel back the backing of the transfer tape to where the vinyl is sticking to the transfer tape.

* I tried to do one without using the transfer tape, BIG NO NO.  Transfer tape is your friend. Use it.  LOL


Next you will place your transfer sheet exactly where you want it on the cup, because remember once its down, it's down.  Rub over it to make sure all parts are sticking down and then pull back the transfer tape.


And then you'll add whatever other images you need the same way.


I had so much fun with these that a made some other things also.

Another cup with a dragon


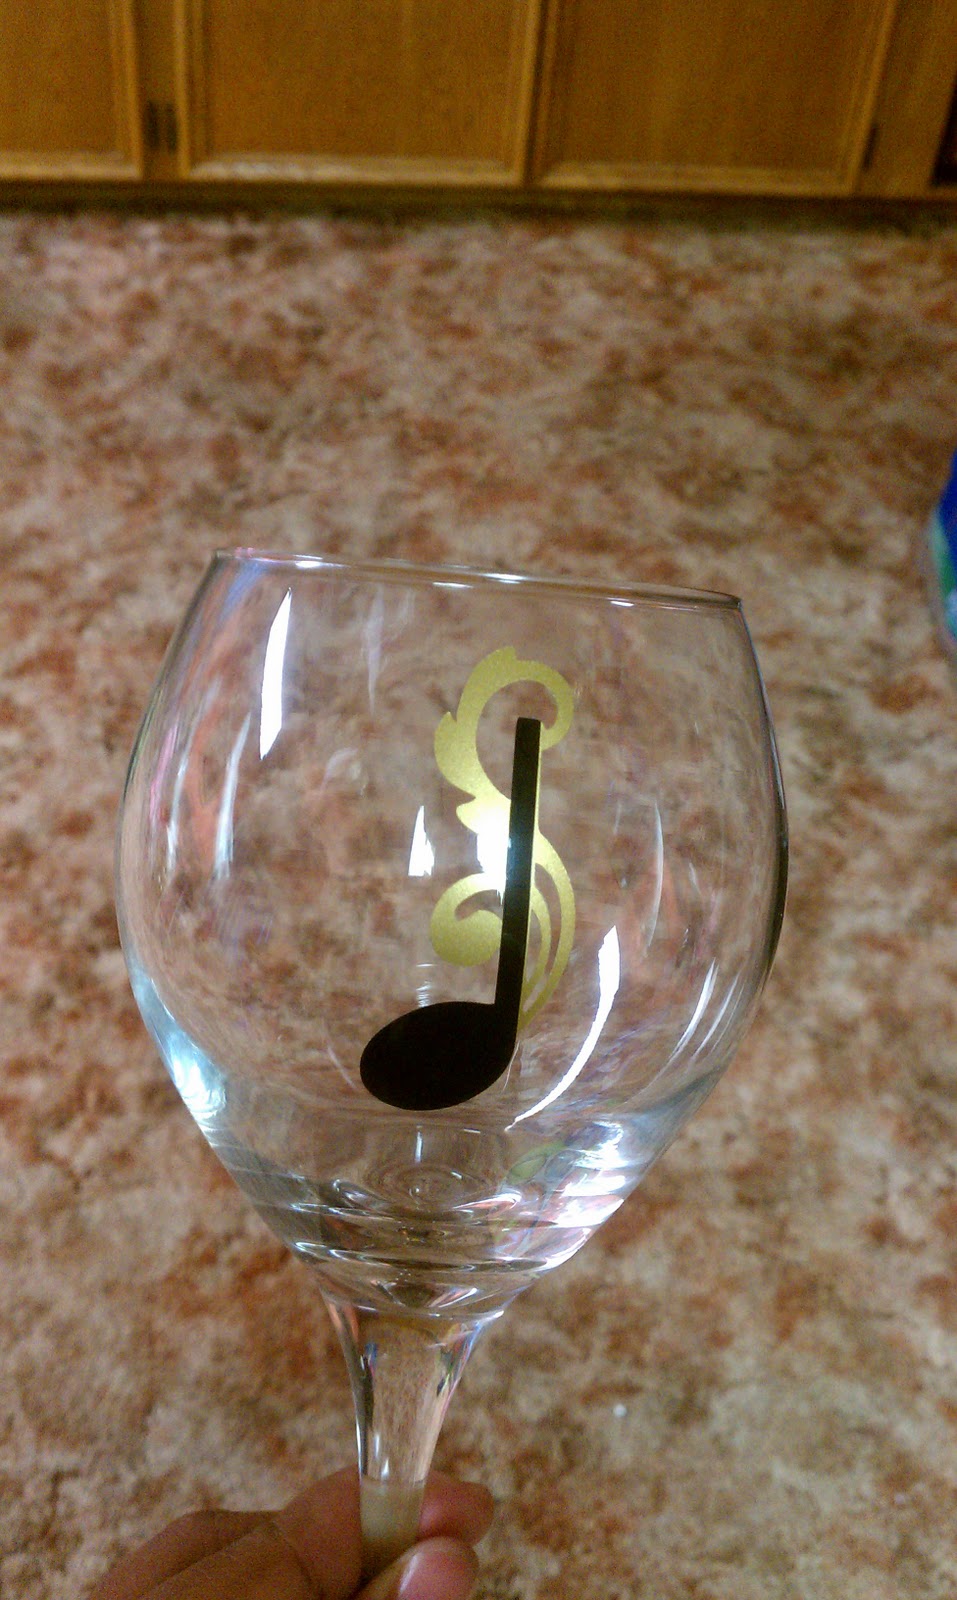
A wine glass with a music note


And a vase with a rose


Thank you for looking and I'd also like to thank Sheila, for having me here as a guest designer.

March 17, 2011

Birthday Banner

Good Thursday to Everyone!
Gaby here with a From Start to Finish Banner.
My Sister Monica recently celebrated her 40th B-day and I want to show you how I created this banner. I was inspired by a banner Jana Eubank created back in October for Halloween.
After deciding on the design and my sister's likes and her colors (yes, we were all asked to wear black and turquoise!..that's my family! Never mind be happy that I show up to you party, and maybe bring you a gift, but I must wear specific colors? lol... we actually enjoy that kind of stuff!) I set out to create or design on my Gypsy.
For the design: I first had to decide how many pieces/flags I needed for my banner: -HAPPY- -4OTH- -MONI- That is a total of 16 pieces/flags (I cut her name short, phew!!...kidding again, we do call her Moni). Next, I had the colors, black and turquoise and finally I had to decide on the actual theme. Even though my sister is on dialysis, she still keeps her spirits up by always wearing make up and wearing dresses and stockings with high hills most of the time. So there it was the other part of my design!
My next step was to see how much card stock and pattern paper I needed.
After I gathered all the pieces I decided to use
Cricut Country Life, Forever Young, MS All Occasions Cake Art, MS Seasonal Cake Art, and Base Camp cartridges for my project.
Using Country Life I cut 16 of this banners at 11.5" our of very thick heavy DCWV card stock.
I cut 16 of the layers using patter paper also at 11.5"
I adhered the base and layer together using my ATG gun.  I want to mention that I did not need to cut the layer using card board because there was no need since the base card stock was heavy enough, otherwise I would have had to cut the layer twice, once in card board, the other using pattern paper.
My next step was to create 16 rosettes, one for each piece/flag

Using the MS Seasonal Cake Art cartridge and my Gypsy just to see how many I could fit on sheet.  I was able to fit 6 pieces cut at 2".  I used 4 pieces for each rosette, so I had to cut 64 pieces or 10 times a whole sheet plus an additional sheet with only 4!!! My Expression was churning!
Here you can see that I had to score at each peak and valley.  That is 64 x 11.. that is 704 times!
Yes, my fingers were sore!  And I had to fold them too! (now you know why I cut her name short! lol)
This is how I folded each piece in a zig-zag motion.
Next I had to adhere 4 pieces together. You do this by overlapping the ends or two peak and one valley.
This is what it looks like when all 4 pieces are adhered to each other.
Next step is to bring it down or push it down and inward.  It is much easier than it looks. Here I am using one hand so that I can photograph with the other. But with a little finesse and both hands, it is not that hard.
At this point you need to have some 1" circles already punched and the glue gun ready!
Oh, you will be so glad you have a glue gun!
I forgot to take a picture of the scalloped circle I cut to use in between the flag/piece and the rosette.
I cut 16 scalloped circles at 5" using MS All Occasions Cake Art
This was my basic piece/flag for my banner.  I now had to create something to decorate each one of them.
I am not very please on the location of the banner's placement.  I don't think that it highlighted the design and colors, but the party was not at my house! I feel that a banner like this placed on a flat colored wall or surface would emphasise the design much better! What do you think?
For the 3D star I used a Sizzix die and for the 40th I used my Gypsy to weld everything together and create the layer/shadow. The 4 and 0 were size 5" and the t and the h were cut/welded at 2.88" using Base Camp.
She was cut using Forever Young at 7" and her layers. Added a little bling and tulle to her dress.
The lipstick was also cut at 5" with its layers using the Forever Young cartridge.
Added bling and Glossy Accents.
I additionally cut and decorated a piece/flag with a nail polish cut at 5"; the high hills/shoes at 5"; the perfume bottle at 4"; and the boots at 6" using the Forever Young cartridge.
All the letters were cut using Base Camp at 5" with their respective layers.
I finished the banner using lots of black and turquoise ribbon and black tulle.

Thanks for visiting and thanks to Sheila for allowing me to be part of this Awesome team/blog