Showing posts with label Birthday Bash. Show all posts

August 13, 2015

Candy Buffet Centerpiece

Hi everyone! This is Java Jen from JAVA JEN CREATIONS here to share a centerpiece I made for a graduation celebration for a friend! Thank you Sheila, for another opportunity! Sorry I've been MIA due to some family events and such! :-)  Here is the finished product that graced the center of a candy buffet:

Some closeups: 


Another view


I used several Cricut cartridges including: Sweet Treats,  Birthday Bash,  and a few others that I can't seem to identify! :-/ Ooops! :-)  I love doing these centerpieces because, for the most part, they are easy to design and cut and so much fun to put together! Thanks for stopping by today!

JAVA JEN


March 12, 2015

Happy Birthday Centerpiece

Hi, everyone! Java Jen here from JAVA JEN CREATIONS to share a little Thursday inspiration with you!  Thanks, Sheila for yet another opportunity!   I am always making centerpieces as gifts for people. I like to think of them more as paper bouquets! :-)  I made this one for a co-worker and she was amazed that I made it! (I just didn't tell her how easy it really was!) :-)  I used several different cartridges like Sweet Treats, Birthday Bash, Birthday Cakes and Celebrate. I simply cut my images out at the size I thought would look best and attached them to wood skewers and stuck them in a foam block inside a mason jar.  I used tissue paper to hide the foam block! So easy!


Thanks for stopping by today!!


July 24, 2013

Gypsy Made Simple - Shape Cards

Don't you just love fun cards.... those that bring out the child in your nature? I do. This card was so easy to make and so, so simple that it is must have in your card making arsenal. As long as you have the base of the card stored on your Gypsy as a template you can add any artwork you want to fit the occasion.


See how easy that was. Make your self a template and name it as such and when you need a fast card this little one will do the trick.... even if it is just adding words to the bottom.


These cards went together so fast and all I used is 1 1/2 sheets of 12x12 paper and 7 inches of trim that I picked up at Hobby Lobby.

Now doesn't this look cute? I must say the picture doesn't do it justice as it is so cute. The pattern paper are from Close To Heart, the Dotty collection, Coordination's for the gray and I used scraps for the white sentiment area.

I inked the edges with Cotton Candy ink and I love how it brings the pink to the inside of the card.

In less than a 1/2 hour these 2 cards were designed, cut and put together. Love that as I have such a busy schedule and often times I just need a card now! You know what I mean? This little card will do the trick.
Thank you for joining us today, I hope you enjoyed this little project and it helps you with your Gypsy. Thanks for your sweet sweet words of encouragement. Your comments inspire me to continue to share with you. Have a blessed week.

May 9, 2013

Birthday Party Decorations


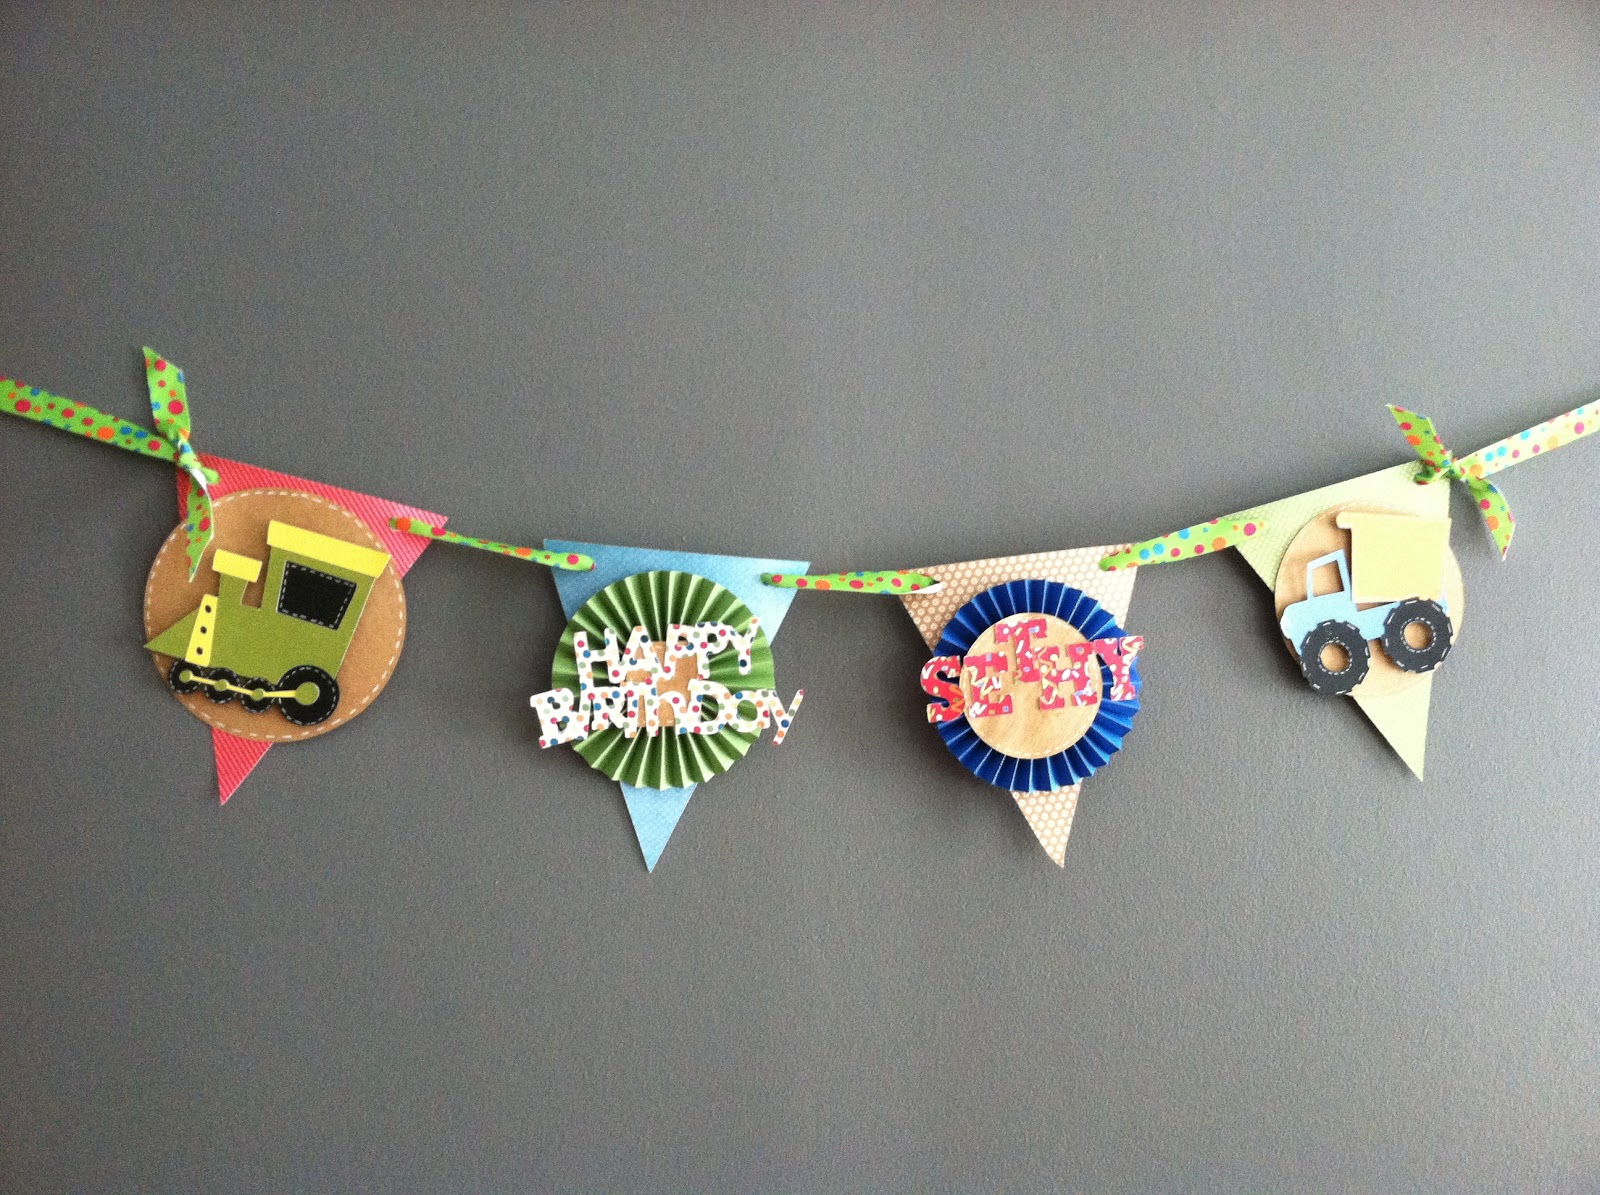
Happy Thursday, everyone! Java Jen here from JAVA JEN CREATIONS and it's my turn to share here and over at CRICUT IS CLOSE TO MY HEART! As you know, if you read my post from last week, our Sethy turned 2 so I just had to make a few decorations to add to his party!  I used the Art Philosophy, Boys Will Be Boys and Birthday Bash Cricut cartridges.

These are from Birthday Bash and are cut at 10.5".


The pennant shape is from Art Philosophy. The train and truck are from Boys Will Be Boys. I made the rosettes by hand using my scoreboard. 

Some close-ups.


I made mini flags to put on the cake.


Our daughter-in-law made an adorable race track cake that was a big hit!

Here is the birthday boy eating one of his favorite treats: Watermelon! :-)

Love him so much!!

Thanks for stopping by today!
Be sure to stop by CRICUT IS CLOSE TO MY HEART too, to see all the crafty goodness that goes on there!

April 17, 2012

Sushi & Donuts layout...

Hi everyone! This is Kristy from craftin-on-my-door and I want to thank Sheila for allowing my to be her guest designer again today! I look forward to my monthly She's a Sassy Lady posts!
Today I have step by step pictures of how I put a layout together. These pictures just crack me up! Little Stinkerbella likes to do certain things. For example, whenever she has a doctor's appt. and has to get shots I let her pick what and where she would like to go for lunch. The past two times she has picked sushi and donuts! Of course I had to preserve these memories! ;)
I started by placing my 3 photos onto the page.
 The background piece for the title is from Graphically Speaking and was cut at 6.74" in width and 6.50" in height. Then I tied twine around it and attached it to the page. I also picked which Kiwi Lane Design templates I wanted to place onto my page.
 I took one template off at a time and traced them onto my papers. For the grey shadow, I traced the template, cut it out, and then cut it down the middle.
 For the title the word "Sushi" is from the MS Birthday Cake cart and was cut at 2.25". The word "Donuts" was cut from the Birthday Bash cart at 2". I thought it would be cute to have the "o" in donut be made out of a donut! The donut is from Slumber Party, was cut at 2.25", I also added some Glossay Accents to the frosting, and used foam adhesive to pop it up. The "&" sign is from Sugar and Spice and was cut at 7.15".
 Then, I attached the title onto the page.
 Next, I attached the pictures onto the page and used a fun SU punch to add a tab to one of my pics.
 I used a mixture of rub-ons to put the date onto my page.

 I also used a grey marker to add some journaling, straight to the page.
 I also added some small round stickers that said, "YUM!" to the tab.

Thanks for stopping by today! I hope you all get some scrapping time this week! ♥Kristy

April 3, 2012

Shape Birthday Spinner Card

 Well hello, it's Sheila from She's A Sassy Lady and today I am so excited to share this shaped spinner card with you on The Bug Bytes and Cricut Is Close To My Heart. This is such a fun card and is great for children and adults alike. I used the Close To My Heart Art Philosophy cartridge for the base of this card, George for inside the spinner, Birthday Bash for the butterfly and Celebrations and Sentimentals for the sentiment.

Now wasn't that easy... I just love these fun interactive cards, don't you? Be sure that you have all your supplies on had and it will be easier to put your card together.
 Don't you just love this paper? It is from the Close To My Heart Lucy paper packet. I used Martha Stewart glitter glue in place of stickles as I was out of pink. I inked all papers with Cotton Candy Ink Essentials.
 Doesn't the inside of the card look beautiful? I love the layers and there is still room to write a little message to the person receiving this card. Won't they feel special when they see all the work you did to put a smile on their face.

I sure hope you liked today's card and give it a try on your own. Click HERE if you would like the Gypsy File for this card or HERE for the plain rectangle Spinner card. I challenge you today to make a spinner card of you own. Link it up by 4:00pm, April 13 and you might win a stamp set!!! Now remember this must be a new card, not something you made before. Winner will be announced on She's A Sassy Lady the morning of the 14th.
Thank you for your sweet Sweet words of encouragement. Your comments inspire me to continue sharing with you... See you Saturday at She's A Sassy Lady for Gypsy Made Simple.
Again thanks so much for visiting me today! Well March was an exciting month for me. So many friends signed up with CTMH and I am so thrilled about that! There are also a few things that CTMH did during the month that we want to introduce to you, so we are going to have a little prize for this month on She’s A Sassy Lady for you!  I am going to be giving away a great stamp set to one lucky person …
Nice, isn’t it? Well, you have the opportunity to win this! For the entire month of April, anyone who goes to the SassyLady CTMH site and registers to receive the brand new monthly newsletter will be entered to win the contest! On the last day of April, I will randomly draw a winner from the list of customers and announce the winner here on May 1st (no purchase necessary)!
Cool Huh? CLICK HERE for the registration page!
Each month, you will be the first to get the latest information on CTMH specials, techniques, tips and what is going on! Be sure to register today.

October 8, 2011

Re-Visiting The Tri-Fold Card With A Little Blog Candy


Don't you just love the new E2 Machine? I do too but I didn't buy one as I really didn't need it. And you know I love that exclusive cartridge that they have for those nifty tri-fold cards and decided we needed to make them on our Gypsy, so that is exactly what we are going to do! You know sometimes when you are creating a design it is just impossible to keep it all in your head. For those moments I get out the paper, pens and even markers so that I can tell shat side of the paper my design goes on. Even at that I sometimes second guess myself but that is why the paper is so helpful as you have a reference point. 
This is one of those designs. It is a difficult design that is made easy just by planning and taking it one step at a time. So get your cup of coffee or tea, turn your Gypsy on and let's get to work. This is going to be a long post but the finished card is so worth all the steps you will take to complete it. Oh, and along the way we are going to make a template so you can make another sometime in the future.

First I want you to start out by making the boxes for the base of your card. You can use any cart that you want for the artwork to go on your card but you first need to complete the base. I need you to make 4 boxes: 2x11.50 (square corner), 3.87x2.30, 4.25x3.80 and 3.50x2.30 (all 3 rounded corners). Once you have them made we will continue.


Now you need to line up these boxes as shown in the video. Make sure the final size on your screen is 5.50x11.50. Then you will group and weld the base of the card together.
Once you have this done save your design as 3-Fold Template so that you will always have that to work from. After your artwork is added you will do a Save As with another name so that you will have 2 files. As you are watching this you will see that I made a major sizing error. I didn't change the video as in the 2nd video I discover the error and fix it. I left it as you need to know how to fix your card if you do the same.


Please use what ever cart you have in your collection for artwork to add to the base of your design. Separate out so you have a page for the three elements you choose making it easy for you to layer.

Because of the complexity of the card I took some of my scrap paper and made a practice cut to make sure it cut and folded properly and it was perfect. I have to admit when I have a challenge like this one it gets the blood stirring and keeps me awake until I have a completed project! Watch the next video to see how it all comes together.

I have to admit this was a fun card to do! It was a challenge but well worth the effort!

Now I challenge you to make one of your own and link it up to my site. I will use random.org to select 1 lucky person to win a stamp set! You have until 10/14 3PM to link up your card and the winner will be announced on the 15th.
Thanks for joining me today and I sure hope you learned something new that you can use on your Gypsy. Thank you for your sweet sweet words of encouragement, your comments continue to inspire me.