April 6, 2013

Gyspy Made Simple Word And Art Work Shape Card

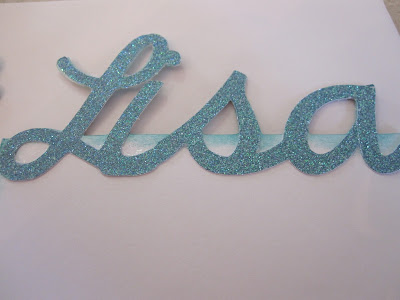
 Don't you just love this card? This is a little gift for a beautiful lady named Lisa. I really think Lisa will receive her gift the day that this post hits as I already dropped it in the mail! I was one of those that ran a little thing on face book saying that if you are one of the first five people to comment I will send you a crafty item in the next year! Well this is what I made Lisa and I also sent her a wonderful Close To My Heart stamp set. I just love the papers on this and all the glitter. The paper is from K and Company.
 All you need to do is revamp the card that we made last week and crank it up a notch or two!.... Now go grab a cup of coffee and turn you Gypsy on and let's get to work. The video below will take you from design to completion and I just love it! I think I will have to make a set that says Sassy!


Now wasn't that easy? Remember the base of the card is only 4 inches high but with the addition of the letters it goes to 5.5 inches so it will fit perfectly in an A2 envelope.

This is all four of the cards together. I love the whole look of this card and all I did was pick a font that I like and a piece of art that I thought would compliment Lisa and it came together in no time at all.
These colors are just so yummy together and I just love the glitter paper, don't you? I get the paper at Joann's and it cuts like butter on my Expression.
Here is the inside of the card. I used a dauber and my Close To My Heart Lagoon Ink pad and inked around the edges and it really made the card look a lot nicer.... you know a finished look.
See how moving the I close to the L allowed for the dot to remain on the name. I love it!
The Forever Young cart is wonderful for girly cards and it is also easy to cut as they are silhouettes.
Well I hope you liked today's post.... I sure enjoyed making this card and spending time with you creating. It gets lonely in my craft room with out you! Thank you for your sweet sweet word of encouragement. Your comments continue to inspire me to share with you.
Have a blessed week!

April 5, 2013

Mother's Love

Hi
This is Pam from Papillondigitaldesigns & TheBugbytes today on She's a sassylady
Thanks Sheila for allowing us to post in your lovely and inspiring blog.
My Show and Tell today is this card "Mother's Love"


The image/sentiment is from bugaboostamps called Just a While
Isn't the sentiment so so precious....


Oops sorry for the long pause but just had to grab a hanky!
 The inside of the Gatefold card


Now for the mundane
The embossing folder is from craftwell called Regency
The trims on the sides is from Martha Stewart Blossom punch.
I love the eyelet lace as you can weave another ribbon through it so that you can match up your projects. here I weaved a pink/apricot color? ribbon to match up (of course you can always get seam binding and color it up using copic or any other inks to match up your project too) Added some pearls and there you have it a simple card. I love using whites. Guess I am in the whites color phase now
Thank you all for reading. And for those who are so kind to leave comments which so so inspire me - A big Hug and a special thank you.

post signature

April 4, 2013

TUTORIAL: DECOUPAGING A SOAP CONTAINER/BOX FOR A GIFT

Happy Thursday!  It's Audrey!  I am so very happy to be back here this month, and thanks so much to our fabulous host Sheila for her patience; she held my spot for me and I appreciate that.

Today, I'll be sharing a decoupage project with you that makes a wonderful gift!  This is a pretty lengthy post, so grab a cuppa and let's begin with my project:


I've used my box for soap, however, it can also be used to hold jewelry, candy, or whatever you choose to use it for.  What you'll need:
  • Plastic travel soap dish (got mine from Walmart)
  • Your choice:  tissue, paper, cloth material, etc. (less the size of 1/2 sheet of an 8.50" x 11" sheet of paper torn into pieces)
  • Decoupage glue (or 2 parts Elmer's glue to 1 part water mixed well will do too)
  • Small foam brush or paint brush
  • Old button or ear ring
  • Trim of your choice:  lace, beads, ric-rac, etc.
  • E6000 or other stong glue (for trim and button)
  • Fine glitter
Plastic soap container from Walmarts (some Dollar Stores)


Okay, if you've got all your materials together, cover your work area to protect it from the glue-mess and let's get to decoupaging!!!  I'll be using a metallic tissue (the kind used for gift bags), bling mesh ribbon for my trim, and a  gem instead of a button.  To begin, you'll first paint the top of your box with the glue:


Next, using your wet brush to pick up the tissue, begin carefully layering by painting the tissue onto the top of the box then apply a thin layer of glue over the paper:


Use your fingers to very carefully smooth out any air bubbles or wrinkles as you go (I actually like some wrinkles because it adds a nice texture).  Also, don't worry about any paper tears, just add another layer of the torn paper to cover the tear.  If the air bubbles are persistent, carefully press down on them with a damp cloth to release the excess air and/or glue trapped beneath the paper:


Continue layering and smoothing until the top is completely covered (do not worry about the sides as the trim will cover this).  To make certain you've covered your entire box top, open the box and look for any areas you can see through; cover those areas:


Once covered, your box should now look something like this:


Once the box is smooth and as wrinkle free as you'd like, use the damp cloth again to make sure air bubbles are removed (you will probably need to do this several times as glue dries and don't worry if it looks a bit funny, it'll turn out to be a beauty in the end); allow glue to set for about 30 minutes then brush an extra thin layer of the glue over the top tissued area then sprinkle the wet area with glitter and allow to dry completely:


Once completely dry trim away any lose excess paper from around the edges of the box, apply your trim, and using a strong glue like E6000 attach a button or piece of jewelry to the front of the box to use to open your box and cover up the slit that's the closure:


Any excess glue on the bottom of the box cleans up easily with a mild soap and water wipe down.  All done!!!  Now... isn't it pretty?!!! A bit messy but sooooo easy and so much fun to do..., and a great gift!!!  Here're a couple more I did:


Hope you enjoyed my project and tutorial!  Thanks for stopping by, and...

I'll be seeing you!

April 3, 2013

Baby Shower Decorations


Hello everyone! This is Java Jen from JAVA JEN CREATIONS and I am so excited to share here today! We had a diaper drop baby shower for my daughter-in-law over the weekend so I just had to try out my newest cartridge from Creative Memories - Tiny Treasures! This is an awesome cartridge and if you don't already have a CM consultant, feel free to stop by my website ------> HERE to order this or any of our other amazing cartridges or products!


Here are pics of my finished projects and then I'll give more details. I used the Cricut Craft Room to cut everything! I usually use my Gypsy but they haven't added Tiny Treasures in an update yet! I'm actually glad, though, because this is the first big project I've done in the Cricut Craft Room and I really loved it! Just as easy as my Gypsy, but a bigger screen! Yay! For anyone who wants it, I have included the Cricut Craft Room file at the end of this post for your personal use. When the Gypsy is updated, I will update this post with the Gypsy file.


Some close-ups:
hanging star, cut at 8.028" - pg. 57 of handbook
banner with letter cutouts are located throughout the handbook and were cut at 6.014"


Sorry, I didn't get this pic rotated! The elephant is on pg. 32 and was cut at 4.028".

This adorable duck is on pg. 36 and was cut at 5".

This tag is just too cute and is on pg. 67 and was cut at 4.278".

This sweet giraffe is on pg. 33 and was cut at 6.375".

"It's a Boy!" is on pg. 70 and was cut at 4.292".

There are so many possibilities for this cartridge! To make the centerpiece I simply cut out these images  and taped them to lollipop sticks and stuck them in foam blocks that you can find in the floral department. If you don't have lollipop sticks you can also use wood skewers. The banner is hung on twine using mini clothespins. I love how the clothespins add some extra dimension!

Thanks for stopping by today and remember, you can visit my website------> HERE to purchase this awesome cartridge! 

Here is the free Cricut Craft Room file:


April 2, 2013

Organizing Your Acrylic Stamps To Fit In Small Area


Good Day! I hope you are having a wonderful day. As you know I have recently been organizing my craft space to take advantage of every inch in my Craft Room. Well I started on my stamps and just love the system that I have. Now you need to know I do not have a ton of stamps like a lot of you do but I do have quite a few and my system can be adapted to fit your needs.
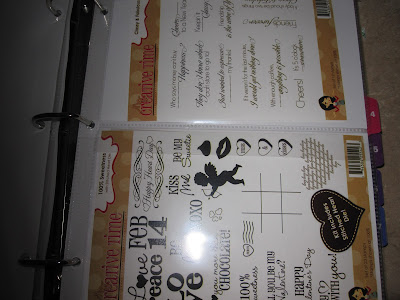
The first thing I did was go to Staples as they make great binders that have a life time guarantee! They have really turned me into a notebook snob as I really love the quality. I also purchased the Martha Stewart page protectors and inserted white card stock in each one so that you could not see through them. Then I sorted and placed all my stamps in order.


After I did that I typed up my contents pages and then put everything in order. Please check out my video to see.


Isn't that wonderful? So easy to find everything and I have plenty of room to grow. All I need to do is add a notebook and more sheets and I am good to go.

 I kept my cover simple with an enlargement of my personal stamp.... Love the cover, don't you?


And don't you love how you can fit the stamp sets in the protector and they can't fall out because of the little top flap holding them in.


Here is another page and an area that I have to add 3 more pages.... I couldn't wait to share with you as I am just so excited at how easy it is to find the stamps I want now.


Thanks for joining me today, I hope you enjoyed today's little organizational tip. I know I sure love being able to find just the right stamp for the occasion! I really think I am going to do this with all my Close To My Heart stamps too as I have so many of them and I just have the hardest time finding just what I need.
Thanks for your sweet sweet words of encouragement. Your comments continue to inspire me.

April 1, 2013

Love Mini (File Folder)


Hello!!  This is Lori from ScrappinMyStressAway with fun mini album today.  I am super excited to be at She's A Sassy Lady today.  

I do not have an April Fool's project for you, unless you count the big April Fool's joke Mother Nature has been playing on us!!!

I am using spring colors because I am waiting patiently for spring weather to come!!!

I saw a project similar to this a while back and wanted to give it a try.  I am taking a short break from scrapbooking - I have been at it hard and heavy since my middle son will graduate next month and I have to have his album completed!!


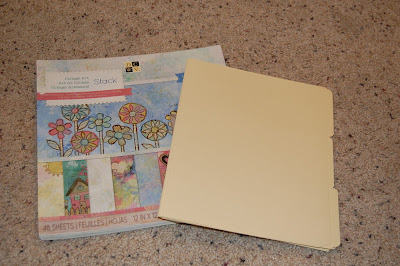
I bought a pack of 10 file folders at the Dollar Store and paired one up with this yummy DCWV Stack of paper called Collage Art.  I found this at Michaels.


I took one of the file folders to make a template.  I folded the bottom 4" up to create a pocket.  I then folded in 4" from the center out on each side.  This was easier than measuring from the outside edge due to the tab.  

I have seen other dimensions, I just kind of eyeballed what I wanted and measured.


The banner was fussy cut from one of the squares.

Can you believe I did not even use my Gypsy or Cricut???


I used my ATG gun to adhere the edges of the pockets.

I cut some pieces from the paper pack.  One page had several sayings and a couple of journal tags on it.  I trimmed them to fit my space.

I inked all of the edges in pink.


Here is the back.  I used a big piece of yellow paper to cover the back.


I adhered some 3Girl JAM ribbon under the paper in order to tie the mini album closed.


This was a fun little project to make.  I have 8 more file folders and lots of paper so I will probably make more :)

Thanks Sheila for having me over today!!

I hope everyone has a wonderful April!