


It is with great pleasure that I am a Sassy Lady today!!! I am Lori Apgar from scrappinmystressaway.
I am going to a weekend crop with my Sister-in-law and her mom this weekend. The mother of our hostess is celebrating her 80th birthday. She cooks and serves the meals at these crops. We are giving her a card shower and I made this card for her!
I used Lacy Labels to make the card and Straight From the Nest for the birdcage and sentiment.

Here is the inside of the card.

On Lacy Labels, I used the label from the middle row, the third one from the left. I put one on the screen 4.79 w x 4.18 h. I copied it and flipped it so it was a mirror image, then welded the two together. I copied a second label to use with the patterned paper inside the card.
At first, I wanted to use the patterened paper on the outside but the paper I cut out looked too busy that way so I put it on the inside.

I sized and cut out celebrate from SFTN. To size it, I opened a second layer and put the word on the card showing through from layer 1. I increased the size to 3.62 w x 1.31 h. I wanted it as big as possible because it was a delicate cut.

I used the same sizing process for the birdcage. When I added the birdcage layers, I added all three at the same time and kept them grouped (all blue on the screen). I sized the largest piece which is the shadow piece. Then I ungrouped the pieces and arranged them on the mat by color of paper I was going to use.


I scored the card using my Martha Stewart Score Board.

I creased the fold with the bone folder to give it a crisp edge.

I inked the edges of the card. I did not like the look of the front of the card blank, so I found some paper that had some vintage-looking writing on it. It is subtle and pleasing to the eye! I inked the edges of that paper too and glued it to the front of the card.

I used a Fantastix tool to help ink the birdcage. I would have preferred to use the pointed tip, but I did not have one dedicated to brown (or a blank one), so I had to use a bullet tip.

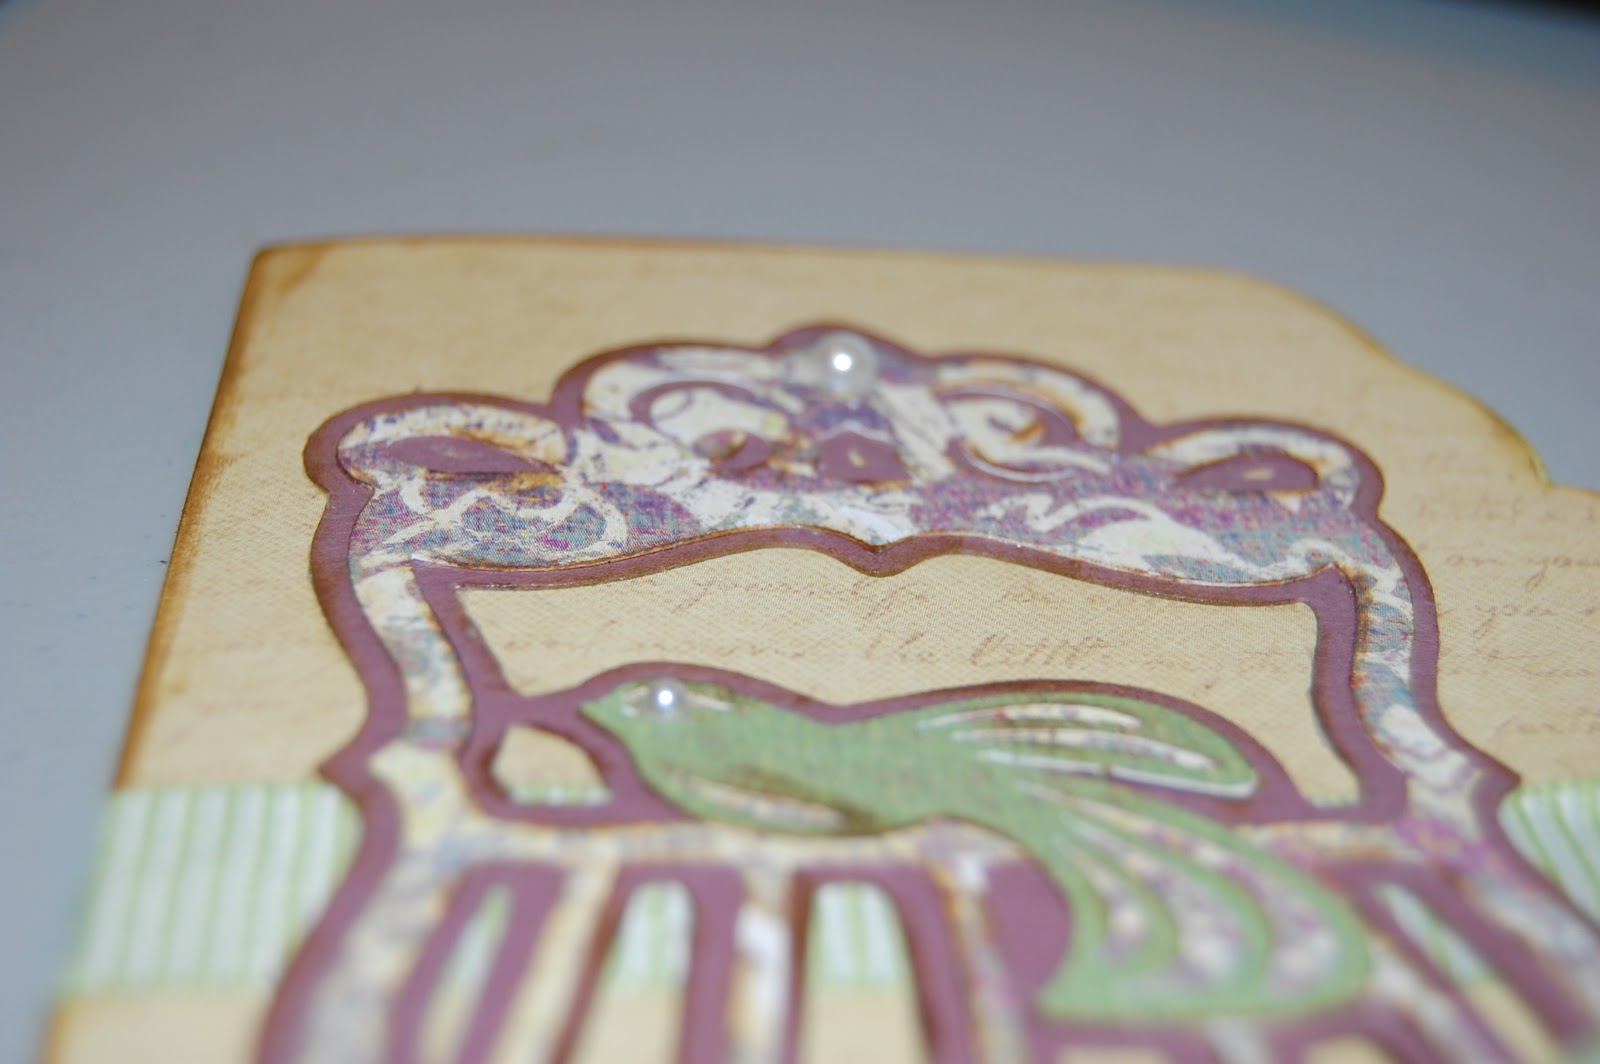
Here is the birdcage assembled. I used a small pearl for the bird's eye and a decoration on the top of the birdcage.
I lightly inked the word Celebrate.
And here is another look at the front of the card.
Thank you Sassy for having me on your blog!! I like being a little Sassy at the beginning of each month!!
It is always an honor to Guest Design on Sassy's blog, she has been such an inspiration to me!!!


10 comments:
Lori what a great card! Love the ribbon on the outside and then tying it together. It give such a different look. I see you are using the distress inks too. Love that. Great tutorial.
This is a very beautiful card!
What a gorgeous card Lori! I love the birdcage and the ribbon! Great inking too! Thanks for sharing.
Melissa
What a beautiful card! :) TFS! :)
What a beautiful project!
I am sure she is going to love the card.. you did a great job with the tutorial.
what a great idea with the ribbon. TFS! I will keep that in mind :)
Lori, there you go being a whiz on your Gypsy!!! Great card and tutorial!!!
This is so soft, elegant and beautiful! Lovely work
Lovely card and great color combo.
Post a Comment