Hello everyone. I hope this New year is finding you in good health and happiness. It's been great for me so far.
My name is Danita Kinney. I am new designer for She's a Sassy Lady. I am so honored to be a part of this amazing team. I will be posting my designs on the 30th of each month. Please feel free to drop by my blog to see my other creations. http://danitasdesigns.blogspot.com/
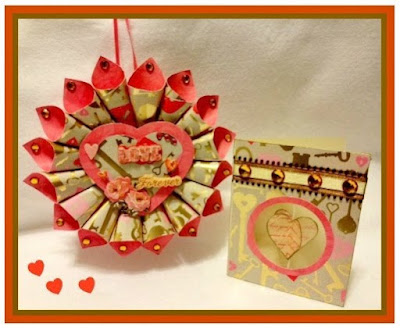
For my first post as a Design Team member, I decided to go with a Valentine's day theme. I hope you like it. It's a mini Valentine Cone Wreath with a matching Spin Card. rThey are really easy to make.
Let's start with the card. I used cardstock from the Martha Stewart Key and Heart paper collection.
Cut your cardstock 4.5 inches wide and 5.5 inches high (this will be your card front) and cut your ribbon at 4.75 inches.
The Card
I used my Cameo to cut the card base at 9 inches wide and 5.5 inches high. The hole is 2.5 inches in diameter. At this point you will also want to go ahead an cut out the facing for the card.
Next I cut out 3 hearts at 1.75 inches and folded them in half. Then you will glue each folded half to the other. Before you glue the last one, insert your twine. For this card I used twine cut at 4.5 inches. Using the card as a guide, trace a circle onto the front of the card. I used an Xacto knife to cut out the circle. Don't worry about it being perfect it will be covered up with the facing. Glue the twine down to the backside of the front.
Using my ATG I attached the front to the card base, glued on the facing and embellished with rhinestones. Finish off you card with a sentiment of your choosing. The card will actually lay flat, you may want to crease the hearts with your fingers a little to help it along.
The Mini Cone Wreath
Start out by cutting a 12 x 12 double sided sheet of cardstock into ?? strips. I then cut the strips into 2.5 inch squares. This will give you 16 squares.
Choose which side you want to show on the outsised then form the squares into cone shapes and glue together.
For this size cone, I decided a 2 inch circle would be best suited for the base. I used a punch, but you can use whatever you wish. Remember, it doesn't have to be perfect as no one will see it. I drew .50 inch and .25 inch circles in the center to help me line up the cones. I think you should use a glue gun on low heat for this project. It is paper but can get a little weighty. Just start gluing the cones down around the circle. Be sure to line them up evenly.
For the next step I glued a .50 inch square of styrofoam in the middle of the cones to support the hearts that I added. Without the styrofoam, there would be a deep in the middle. You can actually fill this with whatever you like, some people even add more cones to even it out.
On the back side I added a 4.5 x 4.5 inch square and glued on some ribbon for a hanger.
Add the hearts and other embellishments and finished the card to suit your taste.
Thank you for looking.


6 comments:
Double WOW!!! What a great spinny card and cone wreath!!! Love the paper you used for the cones!!
Congrats on your first post!!!
What an amazing project! Love the wreath and it is easier to make than it looks.... great tutorial. and the card is just awesome! Look at the awesome papers you picked out too! Love It! Thanks for sharing with us today!
This is fabulous - love the card and your wreath is wonderful. TFS
These are beautiful. Looks like you and I had "spinner" on our minds when putting our posts together. (I post after you with a suspension/spinner using my Gypsy)
Love it!!!!! I can't wait to try this come wreath.....TFS
That turned out gorgeous! I'd love to try making this very soon. Thanks for the instructions.
Post a Comment