Hello everyone! This is Java Jen from
Java Jen Creations - here to share a project that I am so excited about!! Thank you, Sheila, for another opportunity to share!
If you have tuned in lately to
My Craft Channel , you have probably seen Heidi Swapp's Create to Remember shows! They are so full of great ideas and projects! She has a new product called Memory Files and they are simply decked-out file folders! :-) I had so much fun embellishing my project and I am quite certain that I will probably be adding even more before I call it done! :-)
Here is what I started with:
A plain, standard-size file folder
THIS is what I ended up with:
This has to be one of my favorite projects yet! :-) I will be giving it to my husband for Father's Day - that is, if I can wait that long! :-)
So, in a nutshell, here is how you put something like this together:
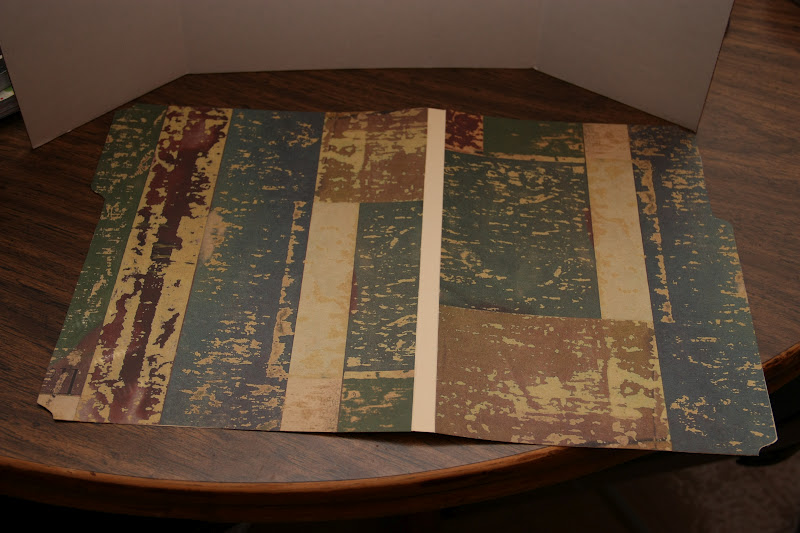
I used the DCWV Heirloom stack to cover my folder - front and back, as shown below:
Next I covered the middle seam with washi tape. (Just recently discovered this stuff and I LOVE it!)
Next, I decided to cut a hole in the cover of my folder like I saw on one of Heidi Swapp's videos so I could have a "peek-a-boo" window to the cover of the mini album inside. (There are so many fun details to this project!)
I used the Creative Memories Custom Cutting System to cut this hole.
Next, I placed my mini album, (that we'll get to shortly), in position so that the desired part of the cover would show through the hole I cut and used a craft knife to cut slits in the folder along side the album. I cut them a little longer than the album so that the mini album could fit through and be securely held inside the folder.
Not sure if you can see the slits here but that's what I'm trying to show you! :-)
Here is just the cover of the album tucked through the slits, ready for the pages to be added.
(NOTE: this pic shows the mini opening to the right but when I actually put everything together, it worked better for it to open to the left.)
Here is how it looks from the back.
The mini in this project is from the Cricut cartridge, Fabulous Finds. (This cartridge is packed with all kinds of tags, clips, hinges, mini albums and tons of other stuff!)
This picture above shows how I stamped the pages and inked the edges. The globe stamp is from a Tattered Angels set called Grand Scale. I used Tim Holtz's Vintage Photo distress ink for inking all the edges throughout this project.
Here are a few pics of some completed pages:
I used a lot of CTMH stamps and products throughout this project and I will put them in list form at the end to, hopefully, make it easier for those who might want to purchase them from
SHEILA or
MYSELF.
I used twine to secure the pages in the book and tied it around to the outside. There will be a better pic on down a bit.
Here I used packing tape on each side of this tag to create a hinge so I could include some journaling and another small pic on the back.
These corrugated letters are from Jillibean Soup and they were perfect for this project! I inked the edges and that really set them off!
This is a fantastic product from CTMH that I will tell you about right now, (instead of waiting til the end) :-) These are called Flip Flap Memory Protectors and they are perfect to fit in my folder. One end has adhesive on it, allowing you to stack them and then be able to flip through them! They come in other sizes too! Super great idea!!
The completed inside! I just love looking at it! The clipboard cut is from Fabulous Finds, as well. The "For The Record" tag is from My Mind's Eye's Life Stories.
A close-up of the window and mini clothesline. I attached the twine with CTMH's Liquid Glass - another fantastic product!
Close-up of the Liquid Glass. Oh, and the tags that are hanging are cut from the CTMH Art Philosophy Cricut cartridge and stamped with the Thoughtful Tidings stamp set. I wrinkled them up a bit to give them a distressed look.
Some close-ups:
Stamp inside back of mini album is from the CTMH "Made with Love" set.
The Flip Flap Memory Protectors up close.
I love how this album closure turned out - another great cut from Fabulous Finds!
Here is my finished project once again:
Now for the promised list of CTMH products:
Z4114 Flip Flap Memory Protectors
S1202 Thoughtful Tidings
D1507 Urban Alphabet
D1387 Made With Love
D1378 Notice the Details
D1363 Picture Perfect
Z679 Liquid Glass
CRICUT cuts:
mini album - Fabulous Finds
clipboard cut-out - Fabulous Finds
closure for mini - Fabulous Finds
hinges on mini - Fabulous Finds
"Handle With Care" - Printing Press
Thanks so much for stopping by today and remember to enjoy the everyday moments!