Showing posts with label Sophie. Show all posts

February 29, 2012

Spring Wreath

Good Morning Everyone! This is Chris from Get Inspired With ChatterScene and I am very honored to be guest designing here at She's A Sassy Lady again this month! TY so much Sheila for having me!

Well I am ready for spring so I decided to focus on a spring themed related project!


For this project I used my Cricut Imagine.
I used two cartridges. Cricut Imagine Blossom and Cricut Sophie Cartridge.
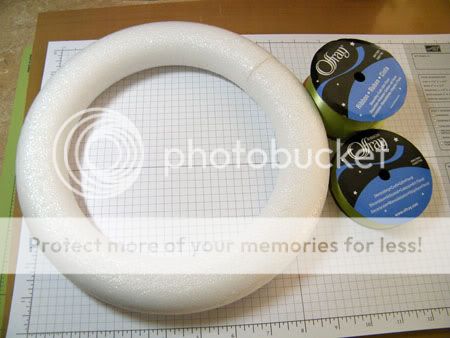
These are the supplies I used. I ended up adding a SU ribbon to the mix that isnt shown in the 
photo.


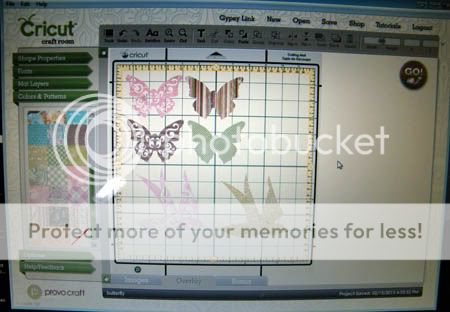
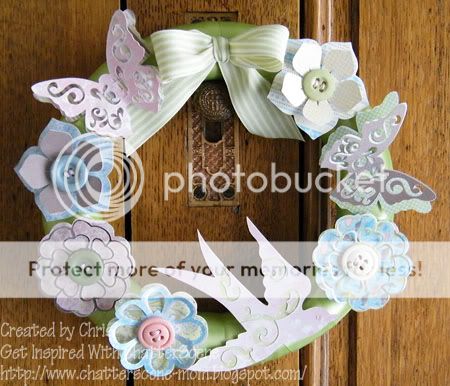
I went into cricut craft room and flood filled flowers, butterflies, and bird using the Sophie and Blossom 
cartridges.

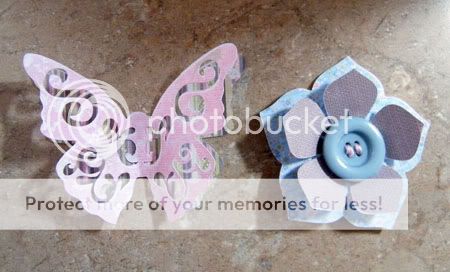
Assembled the items with some cute buttons. 
Wrapped the circle with the ribbon.
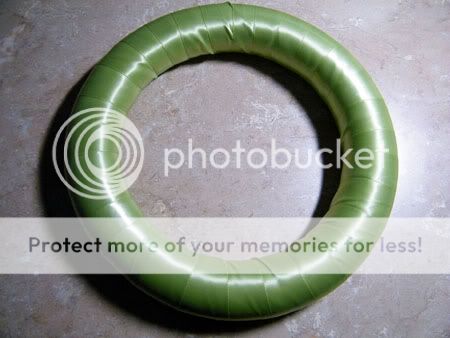
And then glued the flowers, butterflies, bird, and bow to the front of the wreath.


Thank you so much for looking. 

January 9, 2012

My heart belongs to you.

Hello my crafty friends! This is Kimberly from My Craft Spot and I have a vintage style card for you today!


The patterned cardstock is from My Minds Eye - Lost & Found.  I absolutely love these 6x6 paper pads!  The sentiment is from my new Always & Forever stamp set.  The birdcage and layers were cut at 5.19 inches from the Sophie cartridge.  I wanted two birds so I used my Gypsy to flip and weld a second bird to the top of the cage.


I covered the red birdcage with glossy accents and then cut tiny pieces of dimensional adhesives to pop it off the card a bit.  

Helpful Hint:  When cutting intricate shapes from thick cardstock, I like to set my machine to cut 2 times and reduce the speed to 3.  I set the pressure at 5 and the blade depth at 6.  It also helps to have a newer blade.  This helps reduce tearing and gives you a clean cut. 


I love to add a light coat of glitter that doesn't overwhelm the diecut!  So,  for the birds, I first inked the edges with a brown ink and used my black pen to make eyes, then used a sponge to brush a light coat of glossy accents over each bird.  I lightly sprinkled the glitter on and tapped off any excess.


I used crackle accents on the heart and the button.  Then tied the tag and button on with a bit of twine and added some Aqua Mist crinkle ribbonI inked everything with Walnut distress ink. 


Come join the fun at My Craft Spot!

September 22, 2011

10 Things I Love About You Card...

Hey Ya'll,
Sassy Dude Day for me.  I have a very special card to share with you today.  I made this up for Jill.  I thought it up back when I first saw the images of the bookmarks on the Sophie Cartridge.  There is also a great scrapbook layout like this in the CTMH idea book that helped me finish up the thought.
 I printed the patterned papers for this card from Cricut Imagine Elise Cartridge.  I only used three traditional Cricut cartridges for this card... Shocker, right?!?  They are...
 You can download the Gypsy file HERE
 I used the book marks for the little tabs.  I simply contoured out the tab cuts in the center.  This way, I could write on them.  I put together all of the layers as shown above.
 I loved this birdcage image.  I cut two of each birdcage and birds.  I wanted plenty of layers.  I also added the flowers and leaves on this screen.
 I ended up cutting this entire shape out from TBBandM, but I used my straight cutter to slice off the highlighted part.  I only needed the pocket.  After everything is was cut, I inked it all with a rust colored ink.  It worked really well with the printed papers.
 This is what the tabs look like when all of the layers are together.  I used glossy accents on the numbers and it really makes them much richer than without.  When these are dry, you can start writing your special notes on each one.
 I folded and added ribbon and lace to the front of the pocket and then folded the edges under before attaching it to the card.  I then added it to the card and added my other cuts.  I also used glossy accents on the bird cage.  I added glitter to the bird and some gems here and there.  I used lime green stickles on the center of the flowers as well.
I found a font that I liked and printed out the "10 things I love about you!" strip on the computer.  I then used regular old fashioned scissors and hand cut out the banner shape.  Hee! Hee!  I almost forgot how to use scissors.  Hee! Hee!  I used 3D adhesive on the banner like the other pieces, but I used a little wet glue in between to give it a wave across the bottom of the card.  I then coated every bit of it with stickles (crystal).  Once that was completely dry, I coaded every bit of it with gloss accents.  It really brought out the font that way.
 For the inside, I added more flowers and leaves. and a sentiment mat.  I did use every flower cut from this setup on the gypsy, but you wouldn't have to use that many if you don't want to.
Once it's all dry and done, simply write out your ten things and place them in the pocket. It's that simple!
Jill loved her card and I was so happy with the end result.  Don't you just love it when a thought in your brain comes out almost exactly like you pictured it?!?  YAY!  We would love to know what you think of it too.

Sheila has offered to let me design again for you on the 29th, so to celebrate, I am having a little giveaway over on my blog at Cricut Couple.  Come on by and leave us a comment! I will be announcing the winner on the 29th, when I share my extra project for this month!

Thanks so much Sheila, for letting me play!  This is so much fun and thanks to everyone for visiting today and telling us what you think!  We all love your comments!