







Showing posts with label Projects. Show all posts

July 29, 2013

Fridge Magnet Project

Hi Friends,
 Sandy here with another post for She's a Sassy Lady.  Today I am going to show nice project that I made for my sister. Her and the family are leaving for Africa in 4 days for two years. She will work as a teacher/missionary.  So...yeah, I'm a little emotional right now.

She asked me to make some thank you cards to give to those that support Martin's 4 Africa.  But, I got to thinking, thank you cards are nice and all, but I wanted something that people can see everyday.  And when they do, they might be reminded to say a little prayer for her, Joe and the kiddos.  I came up with refrigerator magnets. It is something that people will see when they head to the fridge. She loved that idea and even helped me make them.  We spent the night, laughing, remembering and just enjoying each others company.

So let's get started...
You will need:
  • 3x3 chipboard square ( I got a poster board sheet of chipboard at the craft store, we made 50 of these from that sheet)
  • Mod Podge
  • 1 piece of 3x3 cardstock 
  • 1 piece of 3x3 Pattern Paper
  • Adhesive
  • Nail File
  • Distress Ink Pad
  • Embellishments- punches, stamps, die cuts, etc.
  • Magnet strips (can get in a roll or on a sheet at the craft store)
Here are the magnets that I made for my sis ...
  • The Africa shape is just a clip art that I downloaded and printed from the computer. 
  • First, Adhere the card stock and pattern paper to the front and back (great way to use up scraps) on the chipboard square
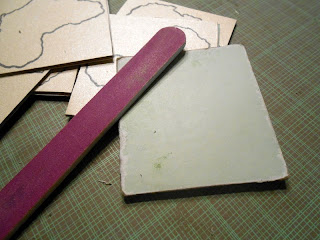
  • File the edges, this will help the paper stay on the chip board.
  • The heart is from Cricut Craft Room Basics, cut @ .5" and the sandals are from Life's a Beach and cut at 1".
  • I wrote the sentiments on the front with a calligraphy pen and ink the edges and sides with the distress ink, 
  • After you decorate the front of your chipboard, do the back if you would like 
  •  You are going to Mod Podge with a couple of coats (we did 3-4 coats and it is well worth the extra time).
  • The Sandals represent the money (over $2000 that the kiddos raised for Shoes 4 Africa)
  • The heart is over Ethiopia, where they will be
  • Their Faith, Hope and Love is what has gotten them this far in this calling on their lives.
This is the back. 
                                 
As you can see, I decorated that back with this cute sentiment stamp. And using my Just Right 15pt. font set, I was able to sign them Martins 4 Africa.
Everyone was amazed that these are chipboard/paper and not wood.  With the Mod Podge texture and the extra coats, they are so sturdy and will last for a long time.

I hope you were inspired with this project.  Very easy to do, makes great gifts. Other ideas, are using photos of people or places that you have been, making personalized magnets to hold the kiddos school projects or even a to-do/shopping list.

ps: here are the "thank you" that I did previously for my sis. I used Life's a Beach and welded the letters together.  I attached with a brad to swing the top sandal over.


Hope you have a blessed day and thanks for stopping by,

 

June 29, 2013

Perfect Spinning Pinwheels


Hi friends,
Sandy here from Scrapbook Blessings.  This is my first post at She's a Sassy Lady, and I am very excited.  This is the first blog that I followed when I got my Cricut and Gypsy wayyyy back when.  I just love all the tutorials and inspiration, and now I can something with you too!  Talk about coming full circle.  Thanks Shelia for letting me be a part of your team of wonderful crafters!

Since today is my first post AND my birthday (late 30 something, lol),  I wanted to share a fast and easy project that I do with my kiddos and for parties... A very cool SPINNING Pinwheel done for you step by step.


  • Items needed: 12x12- double sided pattern paper, scissors, paper piercer, skewers, button, 2 small plastic beads, and floral/jewelry wire


  • Measure and cute paper into 4 pieces of 6x6


  • Score corner to corner (back side of paper to show score lines better)


  • Crease and fold, making sure all score lines are going the same way (this is what helps with the spinning)


  • Cut on each score line 3/4 of the way


  • Now prep your handle by grabbing the skewer and floral wire, and cutting off about 4", wrapping one end around the stick


  •  Back to the paper, fold a corner point into the middle like below


  • Fold every other corner in to the middle to create the wheel


  • When you have every other point meeting in the middle, used your paper piercer and make a hole in the middle of the pinwheel. Keep it on the piercer to hold in place


  • Going back to the skewer, 1) place one of the pearl beads on the wire for the back


  • 2) next comes the paper 
  • 3) the other bead for the front


  • 4) the button comes on last


  • The hardest part for me is getting the wire through the other whole of the button and tight enough (I have to do this part for the kiddos too, but it can be done!). Then I wrap the wire behind the button to keep it on.


  • Almost done!  Now for the finishing touch, a little tag for the stick.  I used a scallop circle tag (a cut using the Cricut) and tied on with some ribbon.


  • My ribbon secret..... Tie it Upside Down on the skewer!  


  • You will get your tails to point down if you do!


So I hope you enjoyed this tutorial on making a Spinning Pinwheel! Perfect for the kiddos at any party!

(FYI: Cricut Craft Room has a special exclusive- 3D Pinwheels!  It is a set of 5 different pinwheels digital cuts that you can use with your machine. You can find them HERE)


Hope you have a blessed day and thanks for stopping by,
 

December 10, 2009

Making Christmas Glitter Ornaments


Supplies:    Martha Stewart Fine Glitter
                  Glass Ornaments from craft store
                  Pledge Future Wax - Clear
                  Matching Ribbon to tie on ornament
                  Small piece of plastic wrap
                  Napkin or paper towel
                  Sheet of paper


This is just so much fun! Start by getting your supplies and may I suggest that you use the 1/2 off coupons that Michael's, Hobby Lobby and Joanne's offer to hold your cost down.


Remove the metal clasp from ornament. Pour a little wax (about a 1 or 2 TBS) into the ornament, place plastic wrap over opening and then swirl and tip to coat entire ornament (don't shake as it creates bubbles). Pour excess wax back in bottle. Immediately pour glitter into the ornament (1-2 TBS) and swirl again until entire inside is coated with the glitter. This time cove the opening with the napkin or paper towel to prevent glitter from spilling out. Pour out excess on a sheet of paper so you can funnel back to bottle. Retain for another project or ornament if dry. Toss if wet. Carefully place the clasp back on.

Tie a ribbon on the clasp and you have a beautiful ornament just as it is to place on the tree. Or you might like to add stickers or even use your cricut to cut beautiful designs, words, or monograms on the ornament. If you choose vinly my I send you to this blog as Denise has a video on cutting vinyl and applying it to glass and tile. Either way this is a gift that is sure to please everyone on your Christmas list. I will ad another photo after mine are all decorated.

I like to do projects with my grandchildren. They are too young yet to handle glass ornaments, but that is ok many of the craft stores carry plastice ones that would be perfect for the little guys. You might want to get some cheap plastic bottles at the dollar store and place your glitter in that to make it easier for them to handle. If you are on a tight budget but still would like to do this project with the children you can use the inexpensive glitters at Walmart. They work, just not quite as shiny and you may need to put a little more glitter in to cover effectively.

I got this idea from the projects on Christmas with the Cricut gals. If you haven't visited their site, run now. It is full of ideas and they have give aways each and every week.
MyFreeCopyright.com Registered & Protected


Thank you for leaving a comment! I do appreciate and am encouraged by them!

Shhh, Its A Secret!!!


This is my grandson Justin and my grandaughter Sydney and we are making Christmas presents for Mommy & Daddy so don't tell anyone, OK?.   But, just so you know we are not going to tempt them by showing a photo of their project until after Christmas. We just want to share how important it is to spend a little time together as a family to make someone else's Christmas as special as can be.

All the craft stores have pre-made projects this time of year for these little ones. So even if you feel you are not creative you can pick up at kit for under $5. I picked up a little project that took them only an hour to do and both Mommy and Daddy will have a gift under the tree made with their little hands. What a wonderful memory both creating and receiving this special gift!


Justin finished his first and decided to have a little snack while Sydney was hard at work on her Daddy's gift. She told me she loves her Mommy and Daddy a lot so they needed to be really really nice presents!


Sydney is sooo happy her gifts are done and she said she will have to put them way under the tree all the way in the back up against the wall so her Daddy couldn't get at it and shake her gift to him! Don't you love it!


We want to wish you and everyone in your family a very Merry and Blessed Christsmas Season!
MyFreeCopyright.com Registered & Protected







