Showing posts with label Lacy Labels. Show all posts

January 7, 2013

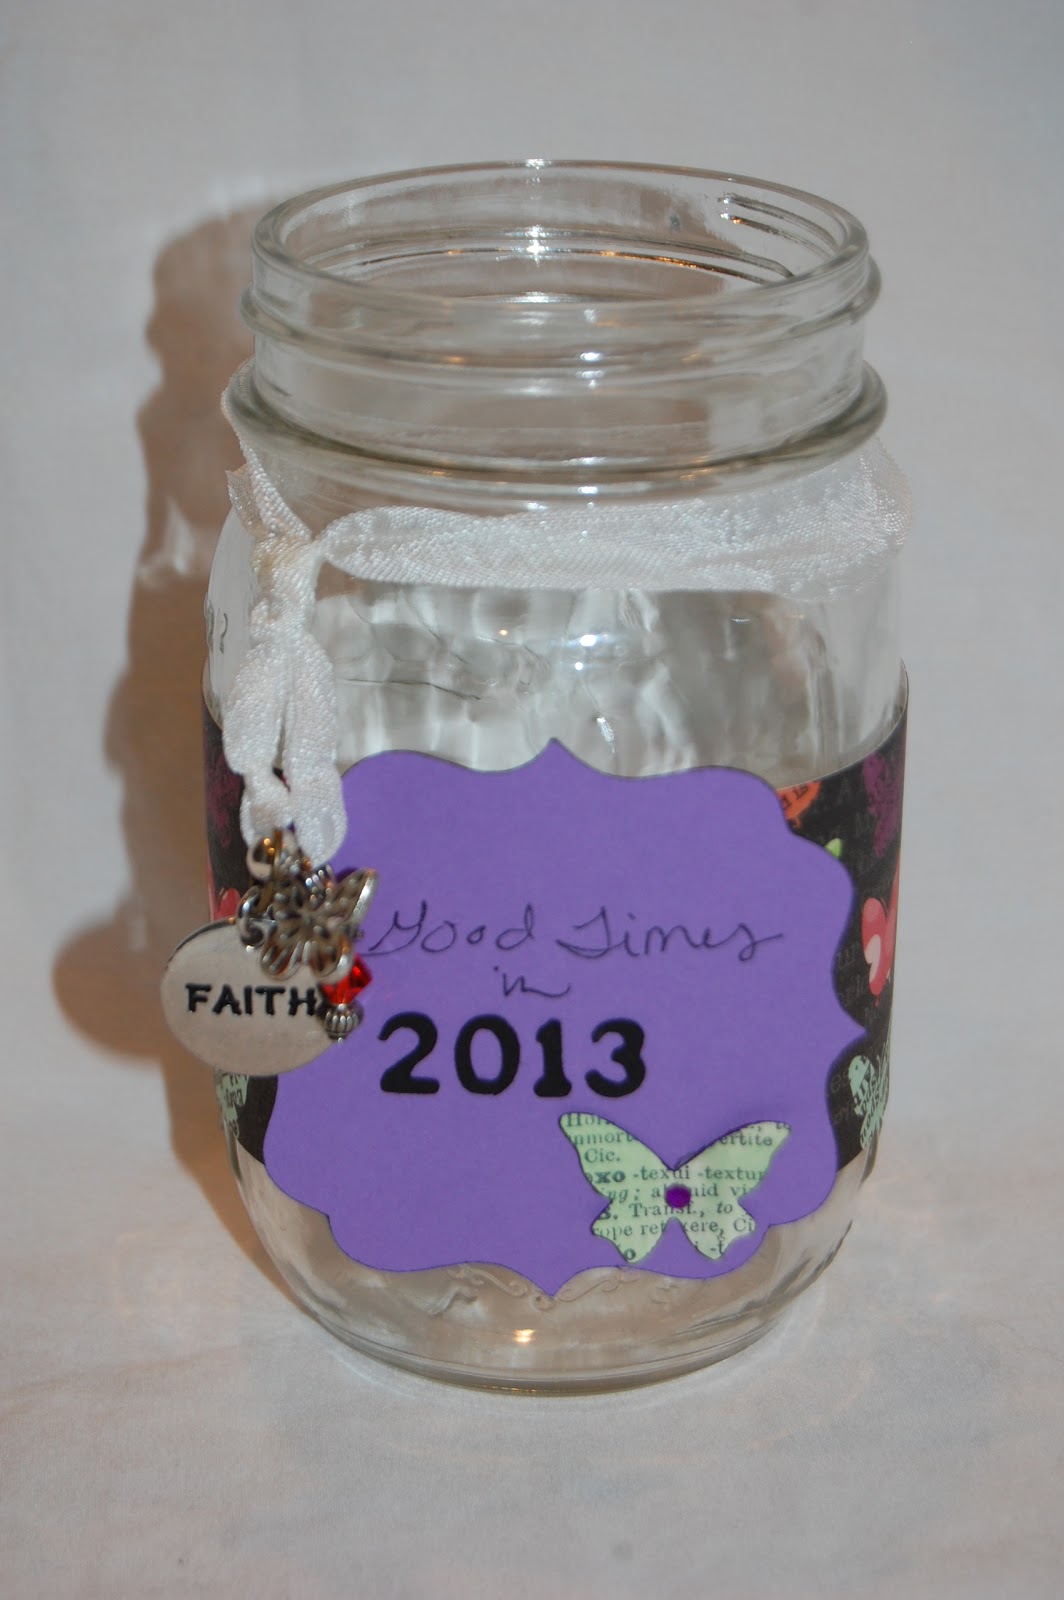
Good Times in 2013 Jar


Lori here from ScrappinMyStressAway.  I am excited to be back today at She's A Sassy Lady.  I was a day off and posted last Tuesday (because I thought it was the first Monday of the month).  Lucky for me, Sheila did not have anything else scheduled so we left it posted.

  I don't know about you, but 2012 was a rough year.  At the end of the year, I had a hard time remembering the good things that happened (and there were some great things) because the bad things seemed really bad.

My uncle passed away, my college-aged son had ACL surgery, my mother-in-law had rotator cuff surgery, my husband had kidney surgery, and I broke my right wrist were the big things.

Please - I don't need sympathy - that is not the point.  The point is I want to remember the GOOD things that happen at the end of each year instead of dwelling on the bad things.

I saw one of these jars on facebook and had to create one for 2013!


I took a Mason Jar that was left over from my cousin's wedding (good thing in 2012) that I got to co-host the shower and make decorations (great thing in 2012).

I wrapped some butterfly scrapbook paper around the jar.  I cut the paper to 2 x 12 inches.  I tied some white crinkle ribbon around the top and added some butterfly charms and a charm that says "inspire" because I was inspired to focus on the positive.

I used my Sizzix butterfly emboss and cut die that I got from Stampin' Up to cut out a page from an old book.


I used this image from Lacy Labels sized to 2.65 inches.  I cut it out of purple cardstock.


I inked one of the butterflies green and used a mini glue dot to adhere it to my label shape.


I used Hello Kitty Font sized to .65 inches (.53 inches for "in") for my title.  I cut them out of black cardstock.  My cricut was being naughty and did not cut out all of my letters, so I ditched the letters and kept the numbers.


I wrote "Good Times in" and added a purple gem to the butterfly.


Every time something good happens in 2013, I am going to write it down on a slip of paper and put it in the jar.  On New Year's Eve this year, I am going to read them all!!!

I am really trying to focus on the positive in 2013 and my One Word is SMILE.  When I smile, everything seems better :)

I hope you have a wonderful 2013!!!  I plan on it!!

April 8, 2011

Digital Coloring and Cricut Cuts

ss_3_0

Confession time…I am lazy. I absolutely love the look of colored images, but just don’t have the time to do it well. So, I resort to the many gorgeous digital images available on-line. Printed on any of my Cricut cuts, gives beautiful results in no time!

Ingredients:


  • Digital Image

  • Lacy Lables Cartridge

  • Assorted Cardstock

  • Ribbon

  • Home printer

The Recipe:

First choose the image! There are many sources for purchasing color images; Lettering Delights and PC Hug Club are two examples. However, do not forget clipart and image searches! Just be sure that the image is copyright free or for personal use only before you proceed.

I did a Google : Image Search : Spring Flowers. The selections was amazing!

Googleimage search

Amongst the many, I found this graphic, perfect for my needs:

thumbnail!

The indicated picture is a thumbnail (a very small representation). In order to have the clearest print, click on the picture. You will connect to the host website. Here you will find information about downloading, copyright and developer. This particular graphic is copyright free and downloadable; if you would like it, click here. Save the picture to the hard drive of your computer.

Cut:


  • neutral cardstock 4 1/4 x 11. Fold in half to create an A2 card.

  • light background square 4 x 5 1/4.

  • From the Lacy Labels Cart, choose two shapes and their shadows:

    • neutral paper: actual size 3 1/2

    • accent paper shadow: actual size 4

    • sentiment foreground: actual size 1”

    • sentiment shadow: actual size 1-1/4”

Ink all edges.

Download the file “Axis,” a graphic file that can be opened in any graphics program. Click here to download.

axis

In your graphic program, open "Axis.jpg” and “spring flowers.jpg”. (I use Photoshop Elements 7.) The files appear at the bottom of your screen.
 PSE7_1

Left mouse click, hold and drag the “axis,jpg” to the main window of your screen. (wrong file…I apologize!)3_7

Add a layer to your graphic.

3_6

Be sure your new layer is highlighted; drag and drop “spring flowers” into this layer. It will appear on top of the axis.

layer 2

Highlight the second layer; “handles” will appear around the graphic on this layer only.

highlight

First size the image. Note that there are white margins around the entire image. You can size the image by using the boxes in the corners, or you can resize with accurate dimensions.

ss_3_5

From the menu select Image : Resize: Image.

resize2

To be sure that this graphic fits on your 4” cut, select Constrain Proportions and size the height to 3. Select OK.

Using the handles as guides, center the graphic horizontally and vertically over the axis.

center

Save this file as”Springflowers_1”. Send to your home printer. This creates the base for printing on your cut shape.

Audition your cut object by laying it over the printed image. Does any part of the graphic peek out? If not, center your cut. Lightly mark with pencil.

3_11

Turn the cut image so that the wrong side is up and place small rolls of invisible table at the top, bottom and sides.

3_12

Turn the cut over, tape down and center the cut once again over your image. You should see none of the printed image. Return the preprinted page and cut to the printer. Take care that the page is placed correctly in the tray for duplicating the image on the cut. (My printer requires that I place the preprinted image/cut face down in the tray.)

BEFORE you cut, return to PSE. You do not want the axis to print the second time. In PSE, select the “eye” to the left of the layer, turning the layer off; in other programs you may have to temporarily delete the axis image.

turnoff-layer

Select print.

When the print menu opens, be sure that the Scale of your image is 100%. There should be no axis visible! Send to your printer.

3_9

When your graphic has printed, remove it from the background template.

3_14

Mat this image and complete the card as desired.


I hope you enjoy pairing your home printer with your Cricut as much as I do! Until next time, keep sorting the scraps and generating the gems! Nonna

November 29, 2010

Cricut Couple Snowflake Card

Jill and I are just thrilled to be ask to guest design for She's a Sassy Lady.  I just hope ya'll don't mind that this project was made by a DUDE!  Hee! Hee!  This was a really fun project and I sure hope you try it yourself.  It makes a really beautiful card, but also works fantastic for ornaments.
You will need a Gypsy to complete this card for the base shape.  I used When it's cold outside, Accent Essentials and Lacy Labels for the cuts in this card.
This card shape is from Accent Essentials.  The cut on the screen makes two cards.  Simply make the shapes a height of 5.20 and then over lap them in the center and weld them together.  This is the hinge for your card.  For this card, this was cut from a sage green card stock.
 On the left, this mat is cut from patterned paper at a height of 4.75 and the sentiment mat is cut from white card at a height of 4.29.
 This page is for the snowflake details.  This entire page is cut from the snowflake patterned/glittered paper.
This page is also for the snowflake details and is cut from pearlized white card stock.  While your shapes are cutting, you can prepare your folding project!
Cut two strips of patterns paper.  Both strips are 3" x 12".  Punch down one side with your choice of border punch.  This one is from a Martha Stewart set for corners and borders.

Starting on the front, use your scoring board and score a line every half inch.  This is scored the entire length of the strip.
Then flip over the strip and score again, every half inch, but score this in the center of the other side's scored lines.  This will make it much easier for folding.
Fold your two strips using the score lines you created to make two long accordian strips as shown above.
Keeping the detail side facing inside, glue your ends together.  Use a good paper glue and then clip the ends to hold.  Make sure you allow this to dry well before continuing.
While the glue is drying, it's a good time to ink your project.  I used a chocolate ink for the card layers and an opaque white ink for the brown snowflake cutouts.
Once the glue had dried, simply spread out the snowflake side of the tube you created and bring the uncut side to the center.  This will form your snowflake circle background for your card.  Sit a can or something in the center to hold it down.
Using the cut from your card shape, stick with double sided tape on the outside front of your card.  Stick down your folded snowflake circle to the front of the card.
Then add your snowflake shapes.  Use 3D tape or zots if you want to make the layers pop, like this one.
You will see that I used stickles here and there to add some bling to the project.
On the inside, I used the same patterned paper that was used on the outside for a border.  Then made the white sentiment mat.  I also added a few small brown snowflakes to finish it off.
Again, this technique makes fantastic ornaments too.  It can be used in so many ways!
Thank you so much for Sheila for letting us play in her yard today and please feel free to stop by our blog at Cricut Couple and check out our other goodies!  Also, be sure to watch both of our blogs as we are teaming up with some amazing bloggers for the All That Glitters Blog Hop on December 11th!

October 4, 2010

Celebrate Card


It is with great pleasure that I am a Sassy Lady today!!!  I am Lori Apgar from scrappinmystressaway
I am going to a weekend crop with my Sister-in-law and her mom this weekend. The mother of our hostess is celebrating her 80th birthday. She cooks and serves the meals at these crops. We are giving her a card shower and I made this card for her!

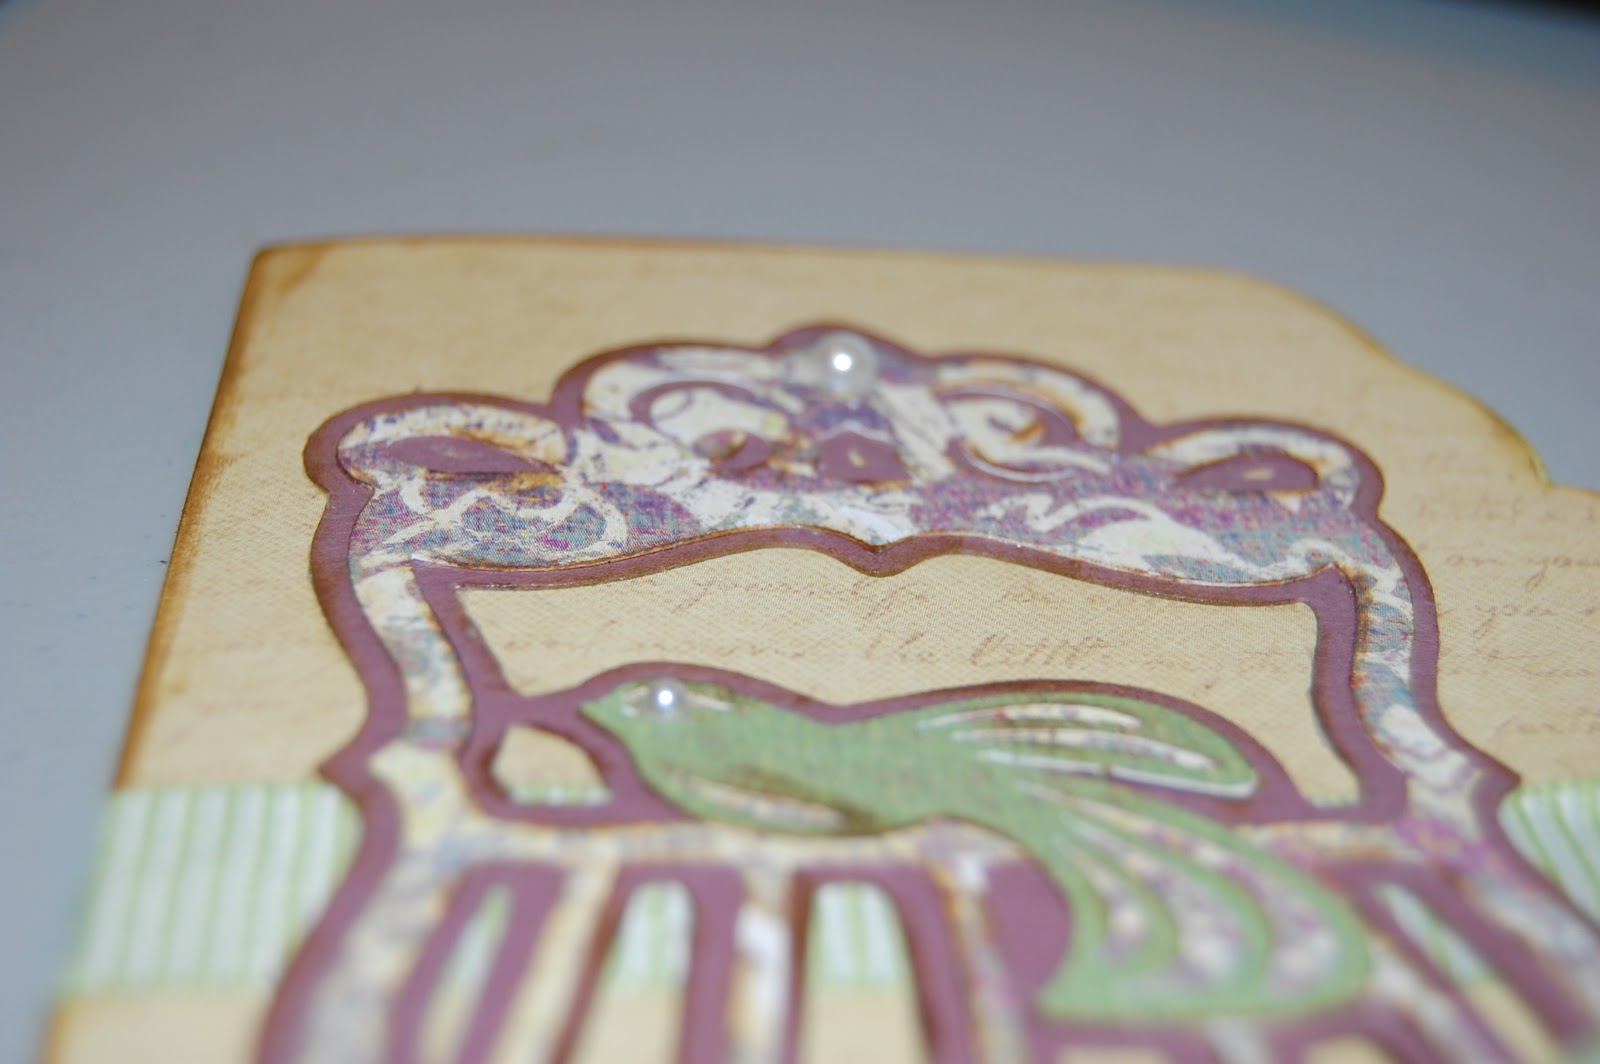
I used Lacy Labels to make the card and Straight From the Nest for the birdcage and sentiment.


Here is the inside of the card.


On Lacy Labels, I used the label from the middle row, the third one from the left. I put one on the screen 4.79 w x 4.18 h. I copied it and flipped it so it was a mirror image, then welded the two together. I copied a second label to use with the patterned paper inside the card.

At first, I wanted to use the patterened paper on the outside but the paper I cut out looked too busy that way so I put it on the inside.


I sized and cut out celebrate from SFTN. To size it, I opened a second layer and put the word on the card showing through from layer 1. I increased the size to 3.62 w x 1.31 h. I wanted it as big as possible because it was a delicate cut.


I used the same sizing process for the birdcage. When I added the birdcage layers, I added all three at the same time and kept them grouped (all blue on the screen). I sized the largest piece which is the shadow piece. Then I ungrouped the pieces and arranged them on the mat by color of paper I was going to use.

Taking care to put the paper on the mat with the arrow on the LEFT (don't ask why I remember this!!!), I cut out the pieces and the card.


I scored the card using my Martha Stewart Score Board.


I creased the fold with the bone folder to give it a crisp edge.


I inked the edges of the card. I did not like the look of the front of the card blank, so I found some paper that had some vintage-looking writing on it. It is subtle and pleasing to the eye! I inked the edges of that paper too and glued it to the front of the card.


I used a Fantastix tool to help ink the birdcage. I would have preferred to use the pointed tip, but I did not have one dedicated to brown (or a blank one), so I had to use a bullet tip.


I wanted to add a little color and texure so I glued a ribbon to the outside of the card. I will just tie the card shut and not use an envelope since I am not mailing it.


Here is the birdcage assembled. I used a small pearl for the bird's eye and a decoration on the top of the birdcage.


I lightly inked the word Celebrate.


And here is another look at the front of the card.

Thank you Sassy for having me on your blog!!  I like being a little Sassy at the beginning of each month!!

It is always an honor to Guest Design on Sassy's blog, she has been such an inspiration to me!!!