Showing posts with label Crafts Misc.. Show all posts

April 12, 2013

Charger Plate

Hello all!! I hope this day finds you in great health and happiness. It's Danita from http://danitasdesigns.blogspot.com/

Those that know me, know I like to decorate charger plates for gifts. I'm often get asked "how do you center your image?" so I decided to give you a quick demo using my Cameo. ( The basics are the same even if you are usng another die cutter machine)

I was asked to make this plate for a teenage girl who loves zebra print. Personally I would have gone with a different contrast color rather than pink, but this is the color that was requested. I hope you can see it. It was rather hard to photograph.


The first thing I do (and most important) is measure the circumference of the inside circle of the plate and work inside of it. In this case the measurement is 8.25 inches.  You will need to make sure you measure this because not all charger plates are the same.


Then pick your design.  I chose a circle flourish design (from the Silhouette store) and placed it inside the circle. (sorry the picture is not that clear). Circle designs work best because you can just size it to fit. Then  placed the intials (also from the Silhouette store) and welded them together. I added six single flourishes to the design also. Then cut.
(try to place images a close together as possible if you want to save vinyl)


Once you have everything cut out and weeded ( notice the initials are different fromt the finished product, I made a boo boo but forgot to tak a picture of the corretion, so for the purpose of this demo....well, you get the idea. lol) You do not have to "mirror" your images (yay!) for charge plates.

I used clear transfer tape on the image. Make sure you burnish (rub hard) your image so that it will stick to the tape. Peel it up slowly.  If any of the image doesn't transfer to the tape, simply lay the transfer tape back over it and burnish it some more. Now cut away the single flourishes from the circle design. Place image on the plate and burnish it. A lot of burnishing I know, but it helps to adhere the image to the charger plate better and smoother.

 I just kind of eye where I want the flourishes on the outer rim to go and make them with a water base maker( so it will rub off). Add your bling and you're done!!

It's a quick and easy gift and I have found that people love anything with their name of initials on it!

Thanks for looking and you can check out more of my charger plates on my blog. Here's the link: http://danitasdesigns.blogspot.com/search/label/Charger%20Plates

March 14, 2012

Altered tennis shoes

Good morning!  This is Beatriz from Amazing Grace and today is my turn today to design for She's a Sassy Lady.  As is the case for most of you, my #1 creative passion is for scrapbooking and working with paper crafts.  However, there are times where we just have go "outside of the box".  Here is an example of going "outside of the box" (a shoe box, that is); a customized pair of sneakers that would make Michael Jordan envious.


Granted, they're not very practical for a 5k run or a day in the park, but they're just perfect for that very special occasion.


Here is my friend Karen's precious baby, Mary Kate, who turned one-year-old last week, wearing her fancy shoes while she rides a hobby horse that she got for her birthday.


Hope you have enjoyed this cute idea. Have a great and blessed day!

December 11, 2011

12 Drawer Chest

Hi Crafty Friends :)

Thank you Sheila for inviting me to Guest Design Today.

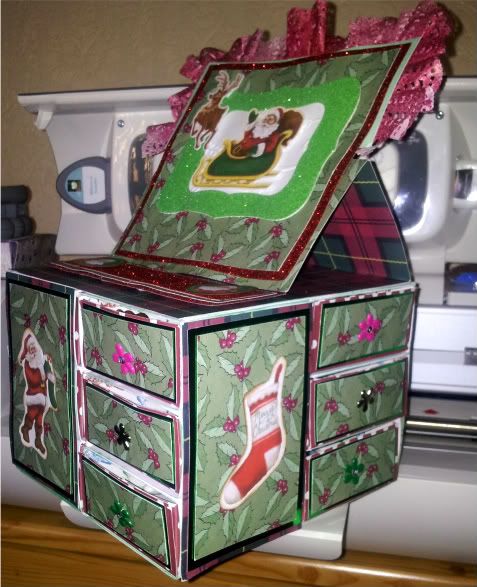
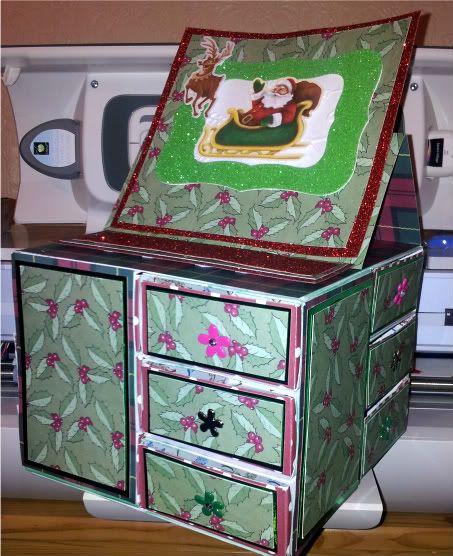
I made this versatile 12 drawer chest, it is for my 13 year old Grandaughter


This is a great gift for any occasion, as the 3" drawers are so useful :)

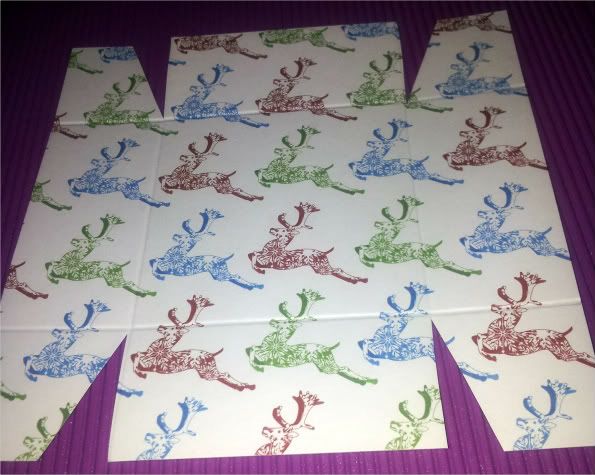
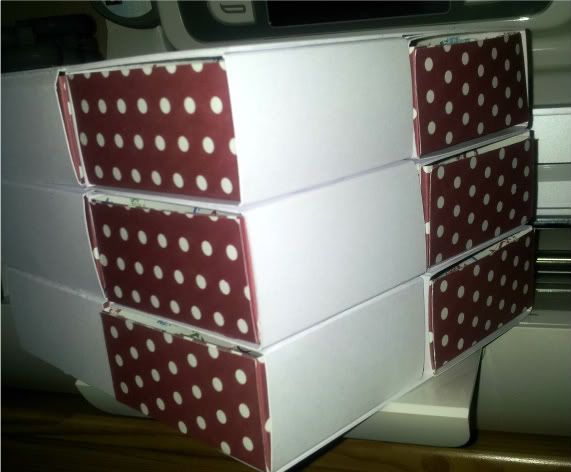
First you need 12 pieces of card stock sized at 5 3/4" x 5 3/4" for the drawers
Score at 1 3/8" around all 4 sides, snipping away pieces as shown below to make the tabs


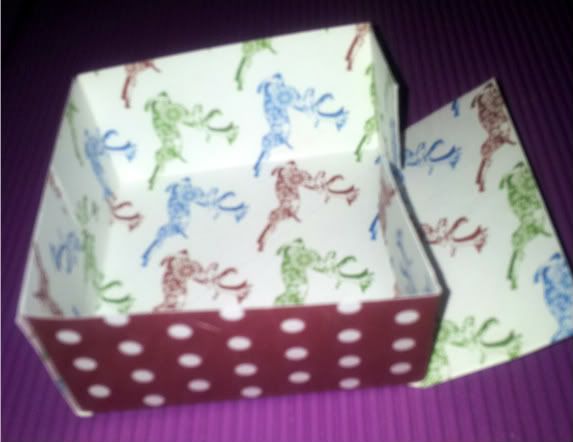
Fold all 4 tabs together to form your box.


Next you need 12 pieces of card sized at 3"x12"
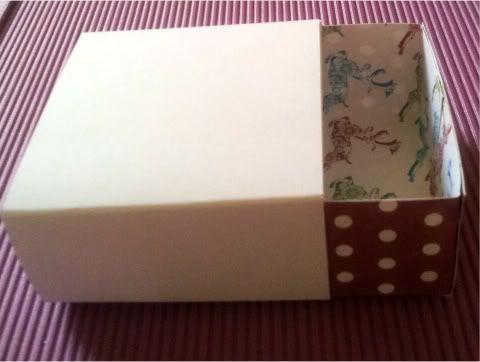
Scored  at 3", 41/2", 7 1/2" & 9" This makes the wraps for the boxes to sit within.


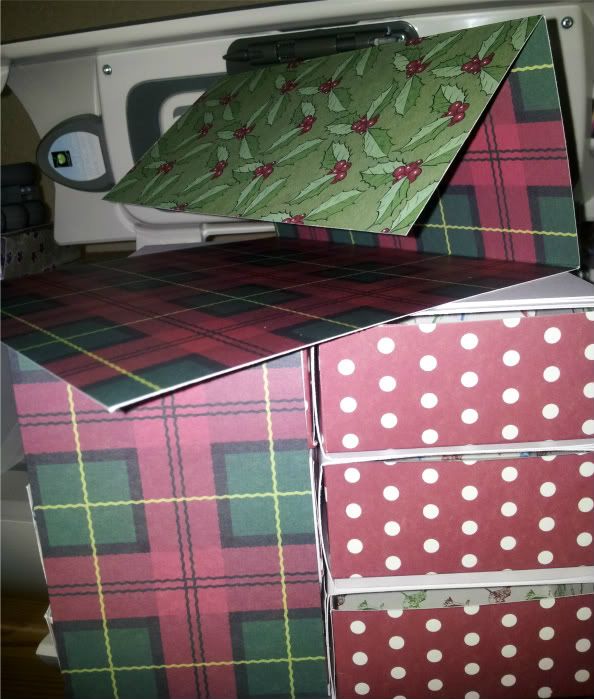
To form the chest you need to stack 3 boxes on top of each other, placing the set of 3 at the far right of an 6"x6" base all round the 4 sides, add another piece of 6"x6" on top to make more secure.


With patterned paper of your choice you next need to cut 4 pieces at 4 1/2" x 3" for the front panels and with the same patterned paper cut a separate piece at 6"x12" for the easel card, score at 6" and 9"


Next you need to cut some matting card stock for the front panels and drawers
 you need 12 pieces cut at 2 1/4" x 1 1/4"
4 pieces cut at 4 1/4" x 2 3/4"


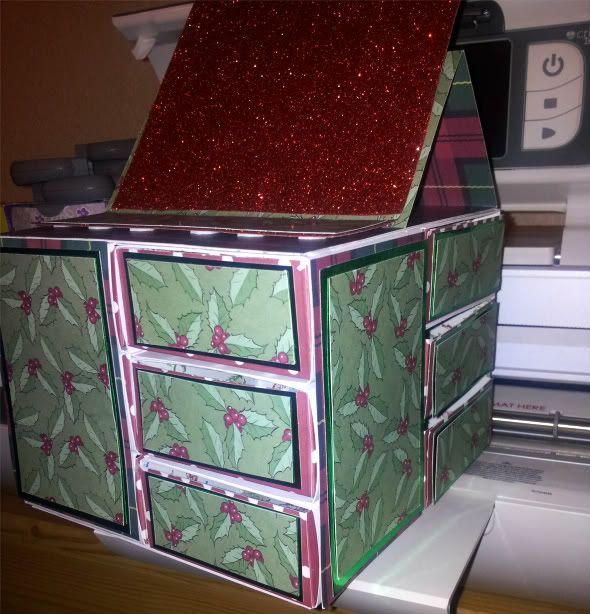
The next step is to add your patterned paper as a mat over the front panels and drawers, these need to be cut at  2 5/8" x 1 1/8"  for the 12 drawers and  4 = 4" x 2 1/2"  for the front panels

For the Easel card section
I also added red glitter card stock for the card front cut at 5 3/4" x 5 3/4" along with a strip to act as a stopper cut at 1 1/2" x 6"
Then added my patterned paper cut at 5 1/4" x 5 1/4"


I use Santas Village for all my embellishments cut at 2 1/2" for the larger images
 and 1" for the rounded Santa head's,
 I also used some ink dyed doilies trimmed to form a folded fringe around the back of my Easel Card and added some brads for the drawer openings.


I think my eldest Grandaughter will love this for her trinkets :)


 I hope you all like my project, sorry for the long post !!


Happy Crafting

Hugs

Adele

December 7, 2011

Advent Calendar


Hello my scrappy friends, this is Kate from Sassy and Scrappy. This year I made my first advent calendar and I'm excited to share it with you today. The calendar came in pieces that I painted and then assembled. It was a pretty simple process and allows you to embellish it as much, or as little, as you prefer.

I used one six by six paper pad for all 25 boxes. I created a simple template and then all I had to do was cut and paste. The real fun starts when you begin to add all the details!


Below are a couple of close ups of the boxes. I didn't do any die cutting on this project, of course that's an option.


A variety of embellishments including; buttons, brads, Thickers, ribbon, twine and stickers.


I know this isn't a traditional tutorial but hopefully it will inspire you to create your own home decor project. I've seen several variations of advent calendars at scrap stores. I ended up giving this one to my brother and his family, but next year I'd love to make one for myself.

Details:
  • Pattern Paper: Simple Stories '25 Days of Christmas'
  • Number Stickers: Thickers and Simple Stories
  • Sentiment Stickers: Cosmo Cricket
  • Brads: My Mind's Eye and Tim Holtz
  • Buttons: Jenni Bowlin
  • Hemp and Ribbon
  • Ink: Tim Holtz 'Tea Dye' and 'Festive Berries'
I wish you all happy and safe Holidays! Thanks for stopping by and I hope to see you soon. You can find my blog here.

October 25, 2011

A DIY Project

Hey everyone
~Happy Tuesday To You~
This is Stacy from LoveThatBug with a really simple project to share with all you. First, I need to thank Sheila for having me here today, and for dealing with a few issues I was having. Thank you so much Sheila, I always feel right at home here
OK, I figured with Halloween being right around the corner, I would show you how I made my little "DIY Garlic Keeper" It really is so simple, it is almost silly.
First you are going to need a clay pot and a clay saucer (make sure your saucer is the same size inches as your pot is) and of course you are going to need some garlic.


The first step is to soak your saucer in warm water for about an hour and a 1/2. This will make the clay a little softer making it easier to drill holes in the top of it. We are making these holes so there will be good air circulation.
After it soaked, take a 1/4 inch drill bit and drill about 3 holes into the saucer, if you want to add a drawer pull like I did, then you would want to drill 4 holes. If you don't have an old drawer pull, you can use anything you want to "act" like a handle to make it easier to lift up the lid.
To cover up the whole in the bottom of the pot, you can use a lid, a coffee filter or even just a piece of card-stock (which I know you all have) This prevents the garlic skins from going onto your counter.
That is pretty much it, easy peasy right? I made a little video explaining the process a little better, but this is what it will look like when it is all finished. Of course you can make yours as fancy as you would like, I left mine natural. The best part, it really does keep your garlic fresher a lot longer.


OK, so here is the video. If you have any questions, don't hesitate to ask. The other great use for garlic is of course to keep all those vampires away on Halloween. Hope you enjoy
Hugs, Stacy

July 16, 2010

SUPERMAN IS FOR ADULTS TOO!

Isn't this fun! This wonderful emblem is now on the door of my partners office. I was telling my partner Roger that I got on EBay and purchased this cart and don't even have any children at home! I just can't get on EBay without buying a cart! CARTRIDGITIS must be what I have! He picked it up off my desk, looked at it and said "can you make one of these for my door" and pointed at the emblem. Sure I replied. You see our boss says we all need to remember to smile so he placed yellow smiley faces on the office doors and all over our showroom. We have smileys on each door and many windows. There is one for all employees but the guy who applied them wouldn't touch Roger's door as he has been here the longest and said he didn't need a reminder. Now Roger says the 'S' stands for smile! Now being a good employee I made sure I asked the bosses consent before I did it and Charlie loved the idea and gave me the OK.
 
The design, well let me tell you it couldn't get easier, no welding, no stretching just make to size. My smiley was 7 inches high his Superman 7 inches high.
I got all my supplies together. The yellow vinyl is from Provocraft and the red from Vinyl Expressions. This was a part of the Blog Candy I got way back in December. I used contact paper as it is inexpensive and easy to work with. I had my Pampered Chef mini spatula that I use for scraping off my mat and a couple of CLEAN mats. Please make use your mat is free from any type of debris so that it doesn't skip or tear while cutting.
Make sure that you place the vinyl on securely with no bumps or air pockets. Measure accurately as you don't want to have to cut this twice.
Make sure you also get your little pick out of your Cricut Kit.... Thanks again Nurse Viper for mine. I use this kit every time I scrap or create anything.
After I cut the background I pulled off the excess around the emblem leaving the emblem secure. I remove the vinyl off the mat while my cut is still on the paper. I then measured and cut my contact paper to lay on top of the emblem making sure there was a little excess so I could place it on the window. By the way the hardest thing I did was trying to separate the clear from the paper backing.... embarrassed to say I sat in a chair and spent 5 minutes trying to get apart having that blond moment when I thought of using the little pick!!! LOL
I trimmed off the side as my contact paper was much wider that my project.
After cutting the red I pulled off the part I did not want off using my little pick.
This was just so easy that I was waiting for something to go wrong!
Isn't this beautiful, a perfect cut?
This is a better photo of placing the contact paper on the cut, see how easy. Now very important you must rub the contact paper on your cut so they adhere to each other. I used the little tool I got for putting my protective shield on my cell phone as it was solid yet made of rubber. You can use other items but be very careful that you do not rip it.
As I finished them I hung them on my kitchen cupboard and then cleaned up my mess and got ready for work. I made sure I had my tools in my trusty bag of tricks and was ready for the drive.
I then moved the two pieces to the inside of my bag and attached them to the flap as shown above. I figured this was the safest way to make a 30 mile trip to work and walk in without drawing attention to the Superman Emblem.
See how nicely it fit and the flap on my bag kept it secure.
I then placed it on the window with the little edge I placed on it. I got out my new Evo4g phone and used the level app to make sure it was level. My hubby would be so proud of me as there isn't a level picture in my house as I hung them before I got my Evo! LOL
After I placed it on the window I got my handy burnisher thing out and pressed it down securely removing the air bubbles. I want to add that I lifted this background on and off at lease 10 times as I had to get level on the top and sides had to be an equal distance. You can barely see but there is a clear line of glass without privacy film on it and that was my problem. The person that put the privacy film up installed it crooked.
As you can see I then carefully pulled the contact paper off. When I pulled off the contact paper there were air bubbles that I hadn't seen before. I worked on getting them out also.
This is when I was trying to take a photo while adding the S..... I almost dropped both the S and the camera. It is not easy doing both. I like the photos when I am learning as I can refer to them often till I get it in my head.
AWESOME - Superman Has Arrived! This is just too cool. I put the red up pulling it off twice before I felt comfortable with its position. Then went to work getting those little air bubbles out.
Here is Roger's finished door, didn't it turn out awesome?
Here is where I spend my days, my office is the one on the right. I hope you liked today's project I had fun doing this and working on vinyl. This is the second time and I will definitely be using it in the future.

I am always encouraged by your sweet - sweet words. Your comments inspire me to keep scrapping and sharing things with you.
signature