May 31, 2010

This Weeks Card Kit Give-Away, Meet Tommy The Turtle

Don't you just love him? He is so adorable and so easy you will want to take him home for sure. This little cuttie is from PC's Create A Critter Cart.
Two whole cards will fit on one 12x24 mat and can be done with 1 quick cut. I have it designed so the shell will be seen on front and back so he looks complete which ever side you look at. All it took is one weld.  I didn't cut out the inside of the card as I will stamp my greeting. The kit does not have either.
After cutting just score the card for a top fold.
I seperated the pieces for my 2 card kits, one for myself that you are seeing me put together and the other for one lucky winner.
Then I ran the pieces through a Zyron and placed all parts in individual bags and matching ribbon. I couldn't stand waiting so I put mine together within two hours after cutting! I think I need to cut a few more out! This is a fast and easy card.
All I had to do was pull off the layers and put it together.
I took this photo so you could see how both sides are completed and match perfectly. Doesn't it have a nice finished look?
I then got out a stamp and ink to do his little face.... don't you think I made him look studious?
And if you have the Create A Critter cart, this is a must have! It's Peachy Keen's new Critters Faces set. I just love it!
Look how handsome, once he has a face! Your Sassy Card Kit will come complete with a stamped face if you win this Sassy Tommy The Turtle card kit.
And the kit took less than 3 minutes to put together! Some lucky person is going to love this card!!!

Oh I had to show you how nicely he stands on his own. I sure hope you like this weeks card and enter to win. All you need to do is take a minute and leave a little comment. I left the inside blank so you can add any sentiment you want or use it just as a note card.
Some lucky lady is going to get this kit to make a little Sassy Tommy Turtle Card sent directly to their home. All you need to do is make a comment by Sunday 8PM on 6/7/10 and watch for the announcement on Tuesday morning by 6AM on 6/8/10. It's that easy! Everybody is a winner because even if you don't win the kit you can download and make your own with this Sassy Tommy Turtle Card- Gypsy or Sassy Tommy Turtle Card- DS.
MyFreeCopyright.com Registered & Protected
So be sure to leave a comment and make sure I know how to reach you. I am always encouraged by your sweet - sweet words, they inspire me to keep scrapping any sharing things with you.
signature

Splish Splash Card Kit Winner

This little cutie went unclaimed for 10 days so we have a new winner:

bandit said...


This card is adorable. I love your cards.

bandit831@att.net
Please email me at shesasassylady@hotmail.com with your name and address so I can get this in the mail to you! Card kit must be claimed within 7 days or it will be forfeited to another entry.
Thank you everyone for joining in on the fun. Come back later today and enter for next weeks contest.
signature

May 30, 2010

Sydney - Practicle Scrappers Challenge


I just fell in love with this simple little layout and thought I would do a quick page while waiting for our company to arrive.... I completed this in less than an hour and without turning my gypsy or cricut on! I used a few items that I had in my scrap room. I sure hope you like.

This is the sketch over at Practicle Scrappers. See how easy.


I took the 3 photos of Sydney that I had sitting on my dresser and went into my scrap room and chose my paper, ribbon, and chipboard letters. I grabbed my trimmer and ATG gun, a little tape and a couple of mini glue dots and just sat at the kitchen counter and literally put this together in less than an hour.
I used ribbon to seperate the colors.
I secured the ribbon on the back of the paper with tape.
I used mini dots just to secure ribbon so it wouldn't move.
Aren't these chipboard letters awesome. I used my Zip Dry glue and then set my Creative Memories trimmer as a weight on them till they dried.
I added rhinestones in the shape of hearts that I pickup on sale for only $1.
The chipboard letters are from Peachy Keen and they are awesome, this is a close up of Syd's name.


I sure hope you enjoyed today's project! Every now and then I have to stick a really easy project in... Now wasn't it easy?
MyFreeCopyright.com Registered & Protected
I am always encouraged by your sweet - sweet words. Your comments inspire me to keep scrapping and sharing things with you.
signature

Shes A Sassy Lady Is Growing!!!! Meet 4 New Designers...

Shes A Sassy Lady is pleased to announce 4 more Sassy Designers!!! We have been growing and want to continue serving you in the best way we can. I can hardly contain my excitement with the talent that is now a part of this Sassy Team! Our new format will contain a New Card Kit Give-Away each week followed by a new design every Tuesday – Wednesday – Thursday and Friday!!! These designs will be brought to you by a wonderful group of VERY TALENTED LADIES!!!
Please join us in welcoming in June; Barb at Crafty Girl, she is awesome offering detailed layouts that you will just want to scraplift and call your own!!! I have been following and learning from Barb for months now and I encourage you to check out her site. Another STRONG layout person and ARTIST is Debbie at Love Life's Little Pleasures, again check out her amazing designs and you will know why we are excited to have her join the Sassy Designers, one look and you will be hooked on her work. New to blogging and growing her talent in leaps and bounds with her beautiful cards is Lisa at Lisa's Craft Room lately she has been working her way through Create A Critter and Just Because Cards. Be sure to stop by and visit Lisa. And we are thrilled to have Angi at Cokie Pop Paper who brings with her a FRESH BRIGHT cheerful look in any design, I just love the colors Angi brings to her projects. She can teach us soooo many wonderful things and I know you will love her designs.
Don't forget our original Sassy Designers:  Beatriz at Amazing Grace, Becky at My Journey To Creativity, Beth of Thunderbirdlindy By Design, Cheryl at Cheryl’s Window, Elizabeth at 217 Creations, Kimberly at My Craft Spot., Lori of Scrappin’ My Stress Away and Pam of The Bug Bytes and Tuesday Treats. Wow isn't that a strong line up? And they do 1 project for you each month so their ideas are fresh and creative.
I hope you make the opportunity to see for yourself all that these ladies have to offer by visiting their blogs.
I look forward to your sweet words of congratulations to these very talented ladies... I am sure they will be greatly encouraged by them.
signature

May 28, 2010

That's the Ticket

I'm so happy to share my project with you today as a Designer for Sassy Lady.  Sheila has put together an amazing team of Designers and I am so honored to be one of them.  

I don't have a project per se to share with you today, but I do have some inspiration for you that hopefully will be a springboard for even more projects and designs for you.   I love my tools and toys, but I also want to find out how to get the most out of them.  My Gypsy opens up all kinds of possibilities, much of what you already know, some of which we'll continue to learn together. 

Today, however, I used my Gypsy to create a template for another product I have.   I LOVE the new dies by Tim Holtz and Sizzix.  His ticket strip is no exception.  (I now want the coordinating ticket stamp so very bad)! 

I created a layout that I wanted to use these tickets as journaling pieces, but I didn't want to stamp or hand write my journaling notes.  I decided to use my Cri-Kits pens with my Gypsy and write my journaling directly on my ticket strip, but I needed a template to work within.
(Note from Sheila aka SassyLady: I do not endorse these pens and personally use my Cricut Markers. I would strongly advise that you check your warranty on your Cricut before attatching another product to it. I would also like to add that this technique is perfect when using your marker, the line will be a little thicker but the process is the same. Cher has done a WONDERFUL job in showing you how to use the marker and offered an AWESOME page, see how Beautifully our Cricuts perform.)

I did find a ticket shape on Fabulous Finds.  This isn't the exact shape, but close enough to work with since I am not actually cutting the tickets for this project.  If you don't have this cartridge, you could just as easily just use a rectangle.  With your Gypsy, you could still use this shape from Fabulous Finds even if you don't have it for this project.  The reason being is that we are using it as a template, not as a file to actually cut.    The thing you must remember here, whichever shape you use, is to set your Real Character size (real dial size) ON.  You can make your shape the exact size then.   For example, these actual tickets were 2 x 1 1/8".  So, I set my true size and created a ticket sized 2 x 1.125" on my Gypsy.   Once I created one ticket, I then copied this and put them right next to each other to create a similar-appearing ticket strip.  I did weld these together as well. 


Notice that I placed my die-cut ticket strip on my mat at 6" down and 1" over.   This was done intentionally.   I wanted to create an easy boundary/ guideline to actually place my die-cut ticket strip on my Cricut mat.  

I then created a second page on my Gypsy in order to use the created template for placement of my words.   I added the words I wanted to use and rotated them on a slight angle.


Here is another close-up.


After loading my mat and making sure settings are set for the Cri-Kits and it is inserted properly, we then hit cut and it draws!!!!  I love watching my Cricut work. 

Here they are all drawn.  And I love how these tickets are already perforated, so all I have to do now is separate them and place them on my layout. 

See how much these tickets added to my whole layout?   If you'd like to see more details about the layout itself, just scroll down to the previous post on my blog at www.cherylswindow.blogspot.com or click HERE.

I hope you enjoyed this look at another way to use your Gypsy and use this as an inspiration to create your own "out of the box" projects as well as find even more ways to get multiuse out of any other supplies and tools you may currently have. 

Thanks for visiting with us today, here at She's a Sassy Lady and Cheryl's Window
Cher~

May 26, 2010

Finally I Finished My Flag Book


My Friend Audry at Cute and Some sent me this flag book as a consolation prize... I came in second in a contest. But, because I came in within a matter of seconds of the winner on a puzzle game, Audrey decided to send me a gift too! She is so sweet and Audrey made it just for me. I had to decorate it though. Now you need to know I have never ever even made a word book. I admire all you ladies that have and do continuue to amke them. I may do page layouts and goodies like that but I never know where to start on one of these books.
So here is my book, I sure hope you enjoy my experience in decorating my flag book.  Let me go on record as saying to Audrey I love you, but I decided that I am not as talented as you on these books so tell me you love it even if you have to lie to me!!! I am very insecure about this project.
These are just a couple of shots of the book as I received it from Audrey, you know before it was completed with decorations.
See the inside had two seperate pages.... like flags, kind of cool isn't it?
This is the spine.... I was so intrigued with how Audrey made this that I actually sat down and figured it out.  The binding so to speak is an 8 1/2x11 cardstock folded in half followed by 1/4 inch folds till you get the number of pages you desire. The cover and back, inside and out are 8.5x5.5 inch carstock adhered to the spine/binding which ever term you prefer to use. The individual pages are 8.5x5.5 cardstock cut again to form two seperate pages or flags on an individual page.
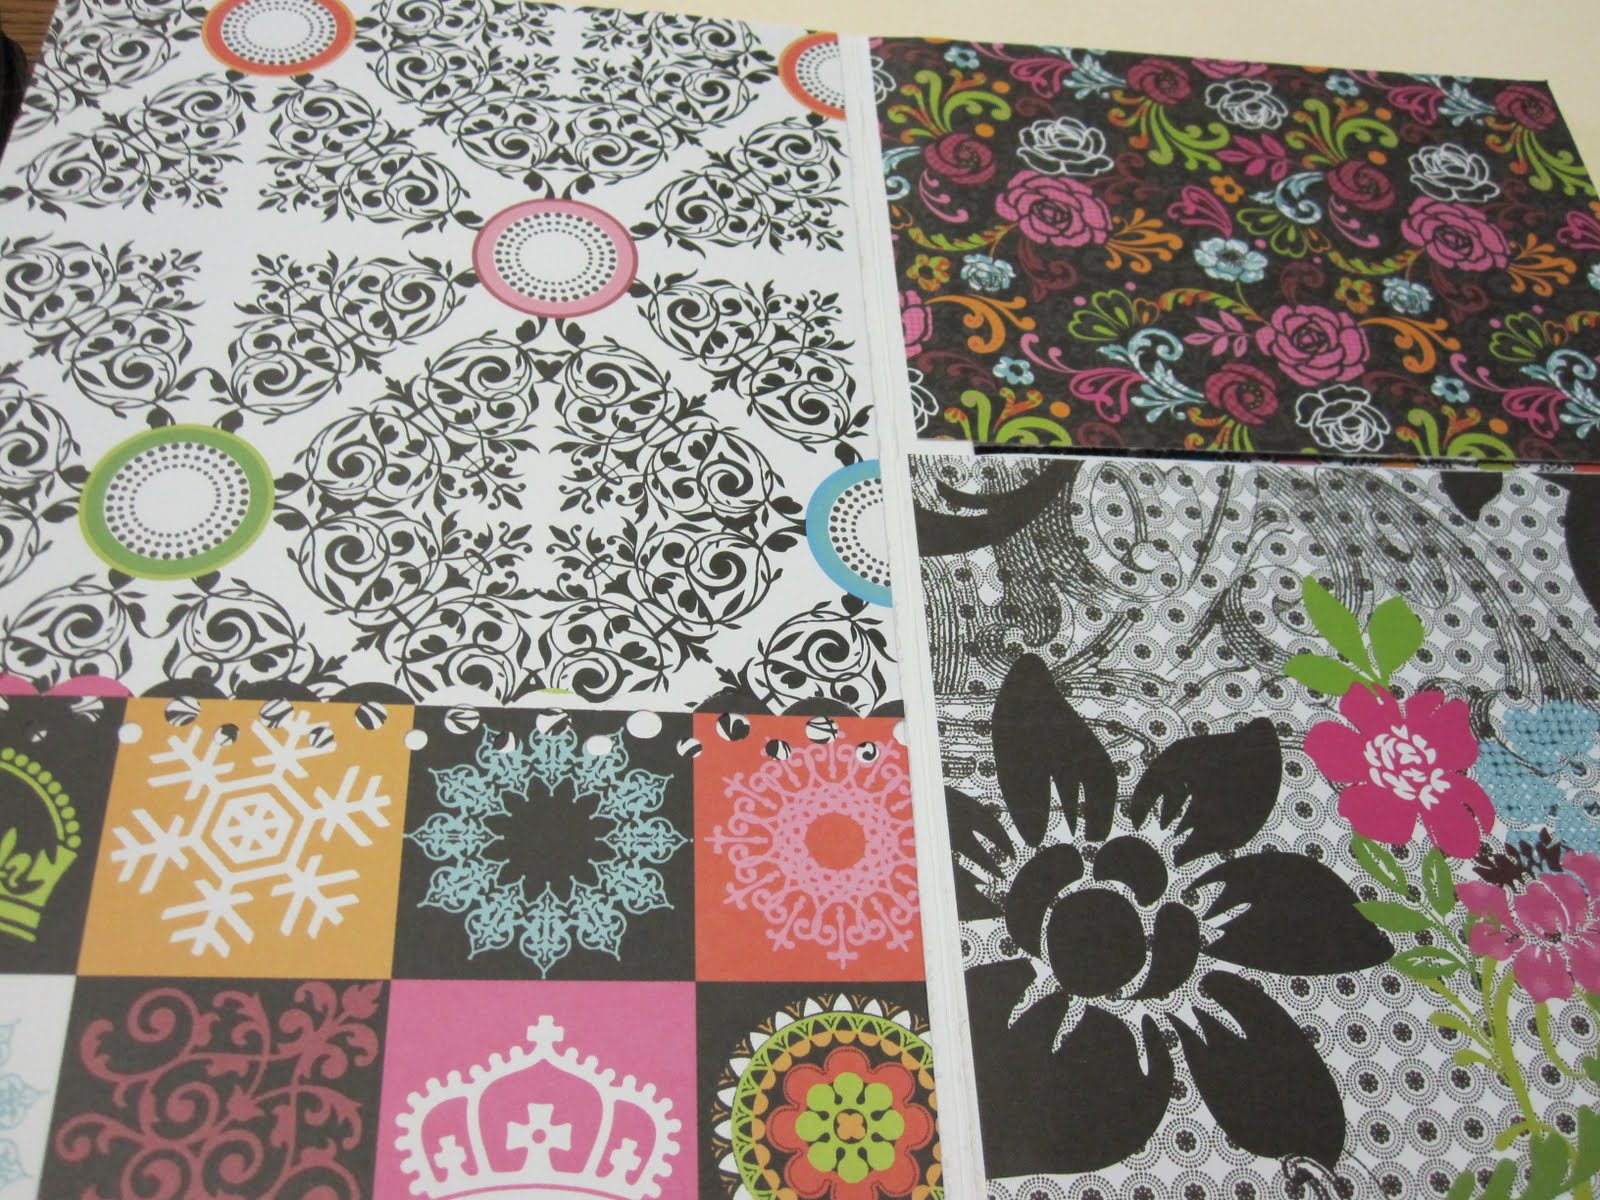
I sat down and folded a sheet of paper and marked, measured and counred all the sheet I needed.  I used a paper stack from Me&My Big Idea so that all the papers coordinated perfectly. I was really excited to use this paper as I got a whole stack on a close out sale for only $4 and later in this post I will show you some of the matching sticker packs they had that I only paid $1 each for at Joannes. I cut all the little pages and attached them to the book. I used some of the scraps and used my Martha Steward punch to create a scalloped edge.
I mixed the different patterns, and even though it looks extremely busy. Look closely on the lower left and you can see the punched edge. I am sure it will be wonderful when I add photos to it.
Then I sat down with My Gypsy Woman and laid out 3 pages of cuts. You know simple embellies. I used my scrap box to pick out papers and more of this stack.
I cut out all the embellies at one time. I just love how you can just layout a bunch of little scraps and come up with something beautiful.
I made sure that I scored all my objects with a fold. This is my tag pocket.
And the little purse to match her dress for the cover.
I took all the little pieces.
And put them in my to go bag. This time their were 2 bags one to hold the book and keep it clean and protected and the other for all the embellies. I made this entire book away from home on my lunch hour at work at my desk.
Here are all the different stickers and chipboard I had available that matched the papers. I just couldn't pass up a good deal at $1 per packet and some of these will come in handy for this little book.
The little purse was too thick for the cover so I gave it another fold and placed glue on the top to hold together yet allow a little poof at the bottem so it had dimension to it.
Now doesn't that look cool?
Then I started adding the embellies that my cricut cut to the pages.
See the cute little pocket on the left, its from TBBM and I added the matching stickers so it looks like it fits right in with the book.
The tag is easy to pull out and ready for journaling on. 
Just a few embellies here an there on the pages and they are now ready for photos.
I added a little lawn chair to this page and a butterfly to another. 
Isn't he cute with his little smiley face? I did the double wings to give the look of movement.
This close up give you a good idea of how the MS punch looks. I love the little frame as it adds plenty of room for journaling.
And this is a another closeup using a chipboard square.
And the full page view. 
Here is a side view of this little flag book after the embellies have been added and the cover tied together.
One last view of the cover.
And another close-up. I sure hope you enjoyed my first little book. I shared all the photos so you would have a good idea of how to put one of thes books together from begining to end. I can't wait for our next backyard barbeque as I will take lots of photos and fill my flag book up.
We are installing an above ground pool this week so we should have plenty of fun photos over the weekend. I believe it is the everyday details that make our lives so rich. The time that we spend with our families, the details of a good meal with loved ones, funny quips, and laughter. Yup my little book will be filled with FUN DETAILS OF OUR LOVED ONES AND THE MOMENTS WE SPEND WITH THEM.
I am always encouraged by your sweet - sweet words. Your comments inspire me to keep scrapping and sharing things with you.
MyFreeCopyright.com Registered & Protected
signature