February 29, 2012

Spring Wreath

Good Morning Everyone! This is Chris from Get Inspired With ChatterScene and I am very honored to be guest designing here at She's A Sassy Lady again this month! TY so much Sheila for having me!

Well I am ready for spring so I decided to focus on a spring themed related project!


For this project I used my Cricut Imagine.
I used two cartridges. Cricut Imagine Blossom and Cricut Sophie Cartridge.

These are the supplies I used. I ended up adding a SU ribbon to the mix that isnt shown in the 
photo.


I went into cricut craft room and flood filled flowers, butterflies, and bird using the Sophie and Blossom 
cartridges.

Assembled the items with some cute buttons. 

Wrapped the circle with the ribbon.

And then glued the flowers, butterflies, bird, and bow to the front of the wreath.


Thank you so much for looking. 

February 28, 2012

From CCR To Finished

Hey everyone
~Happy Tuesday To You~
I am so happy to be here with Sheila today and am excited to share my CCR layout with all of you.
I really enjoy using CCR to see how things will look prior to cutting anything out. It helps me not waste paper which is always a good thing. You can see in the "sketch" below how my layout looks. Even though we can't turn our mat horizontally I just added another 12 x 12 square right next to the original mat to accommodate my two page layout.


All of the pieces, patterns and images came from the Imagine cartridge Enjoy The Season, and the title came from the digital cartridge Cricut Font And Basic Shapes. The finished layout is below, the only thing I added was a few more butterflies.


These are all pictures of my son and his friends one summer, and even though I used girly shapes, I don't think the layout looks to girly. I hope you enjoy and you all have a great day.
Thanks so much Sheila for having me stop by today.
Hugs, Stacy
AKA Lovethatbug

February 27, 2012

Celebrating A Golden Birthday

Hey y'all! Happy Monday! Aymee Gandy of 'A Scraphappy Southernbelle' here with you today to share a project I have created for a Golden Birthday. I have a client who asked me to create a special project for her. She has a daughter named Eva who will be celebrating her Golden Birthday this March. Eva will be turning 9 years old on March 9th and they will be celebrating her special day in a big way. I was asked to create a card that could be a keepsake for Eva to have as she grows older. It was requested that I use lots of golds to match the 'Golden Birthday' theme. When I thought of all this gold, the theme of 'old Hollywood' came to my mind. I knew I wanted it to be super girly and use lots of vintage patterns. I also wanted to use a silhouette and a vintage font. With the use of my Cricut and several other scrappy goodies, here is what I came up with...

"Happy Birthday"

Supplies Used
Cardstock: Core'dinations, The Paper Studio
Patterned Paper: Die Cuts With A View, The Paper Studio
Pearls, Rhinestones: Queen & Co, Studio 18, Michaels
Flower: Prima Marketing
Lace, Floral Embellishments: bought locally at Surplus City
Crinkle Ribbon: My Craft Spot
Stickers: Making Memories
Jewled Brad: Creative Charms
Border Punch: Fiskars
Thread: Coats & Clark
Electronic Cutter: Cricut Expression (Provo Craft)
Cartridge: Gypsy Wanderings
Softare: Cricut Gypsy, Sure Cuts A Lot (Craft Edge)
SVG: My Grafico
Adhesive: Helmar, Zip Dry (Beacon), hot glue/hot glue gun
Other: sewing machine, bone folder, transparency
 The silhouette of the little girl is from the 'Gypsy Wanderings' cartridge. I placed it on a shape that I cut out using the same cart and added some rhinestones. I also added the number '9' since Eva will be turning 9 on her birthday.
 This phrase is also from the Gypsy Wanderings cartridge. The card is a 5x7 inch easel card. The jeweled brad holds the card up when opened.
 I used pop dots to pop up the silhouette.
 Love this flower from Prima! I added some gold embellishments I found in the floral section at a local store next to it.
 A touch of pearls in the corner...
 The sticker that I used for the number has a glittery effect to it as well. I also added a rhinestone to the pony tail of the silhouette.
 This jeweled brad is from Creative Charms.
 When you flip the card over on the back, I left a blank space so that Eva's parents could write her a special message on her birthday.
 Now, since this card is 3 dimensional, I knew it would not fit in a standard envelope. Also, since the client mentioned they wanted it to be a keepsake, I wanted some way to keep the card safe when not in use. So I cut this gift box out using my Cricut, SCAL software, and a file from My Grafico. I decorated the gift box to match the card.
 I added Eva's name to the front as well as some crinkle ribbon from My Craft Spot.
 Here you can see the gift box top opened to reveal the card inside...
 I lined the inside of the box with coordinating paper as well.
I hope Eva will enjoy this card! I also hope that you have enjoyed this project and that it will inspire you to get crafty today! Thank you so much for stopping by the blog today!

Have a good one!
Happy Scrappin'!!!

February 26, 2012

In the beginning....

...there was torn paper, stamps, and ink!
Then there was a sky and some mountains!
Grass and weeds began to appear!
Blue water came on the scene!
Pine trees were added!
A big pair of scissors came and straightened up the edges!
A fisherman decided to try his luck!
With a little inking and a sentiment...the card was finished!

Hi, this is Carolyn from Carolyn's Creative Corner!
The man in the boat is from the
Cricut Cartridge "Cricut Sampler"!
This is a Cricut image leftover from a project!
I have several cards made from Cricut leftovers!
Check these leftover cards at....

Thank you for visiting today!  Please come back!
Comments are loved and appreciated!

2/18 Weekly Challenge Winner

We had some fabulous entries this week and I just wanted to take the time to thank everyone of you for playing along this week.... so many sparkly entries and all so beautiful! I just love Random.org because I would hate to have to choose. I hope you all get the chance to check out all of the blogs represented with each entry.
Our winner is Michelle from Wondering Scissors for the beautiful card she entered. Michelle be sure to hit the contact button and send me your name and address so I can get your gift out to you.
Have a blessed day everyone.

February 25, 2012

Card Party Scrapbook Pages & Weekly Challenge


It is just so nice to stay on top of your scrapping! I just love it! These pages started out by really giving me a hard time but wit a little persisitance and trial and error I think they turned out great! The design was great but I really do have a hard time picking out just the right paper. These papers are from SEI and they are gorgeous..... they just compete with the gorgeous women in the photos!


I try to be so organized for my pages but every now and then you just need to work out the details after you cut your pages. As you can see from this video I need to mat the photos to give it a calmer look.

Here are the pages on my Gypsy woman. As you can see I used a 12x24" mat and it worked great. I was going to use a banner on the right side and I  didn't use every cut as it would have been too much.
Here are six of the seven ladies at the party (I didn't get a photo of myself) having a great time. We scrapped for hours... I couldn't beleive that everyone stayed until 11:30 that night. See what happens when you are having fun!
Hereis the right side of the two page layout.
After I put together my pages I took the photos of the cards we made and the photos I didn't use and covered every bit of my album pages. I used a black Copic marker and wrote on the photos so that I would always remember who designed each card.
I laid the banner that I didn't us on my layout on the left photo page and it looked great. I still need to tack it down.
Here is the right side of the photo pages. I am just so excited that those 4 pages are done... the best part of a scrapbook are all the completed pages, don't you think?
I sure hope you enjoed today's pages and really consider working on you pages too. This week I challenge you to do a page or a card or a craft and incorporate a photo in it! Then link it up. One lucky lady chosen by Random.org will win a set of Studio 12 stamps. Just link up by 4PM on Friday March 1st  to qualify. The winner will be announced on Saturday morning.
Thank you for joining us today and for your sweet sweet words of encouragement. Your comments continue to inspire me to share with you.

February 24, 2012

Tilda with Kite

Morning all,
Here's my card for today. I have had this stamp for quite a while and it hasn't been inked up till today. I know naughty isn't it. It's a tricky stamp as until I had these papers that were a freebie from a magazine I really didn't know how to arrange her.
These papers are gorgeous. Really bright and summery. I used spellbinders dies. It's a little bit annoying as they're not nesting very well and they should.
For tilda I used my copic sketch markers. Kite YR07, YR18,E55, Y18. Trousers/ Socks B24, B26, B21. Top /shoes R24, R27, R29. Skin E11, E21, E00, R20. Hair YR20, YR21, E31.
I'm becoming more confident when using my copics now. Getting to know light to dark etc. I still have quite a way to go but hopefully I'll get there.
Thank you to Sheila for having me today.
Kelly x

February 23, 2012

Cat in the Window by Sassy Dude...

Hey Ya'll,
Sassy Dude here today from Cricut Couple.  I have something very different for you today.  When I thought up this design, it took a LONG time to lay it all out.  It took lots of practice, but when it was all done, I was so excited with the way it turned out.  To start, the base for this card is a half size (8 1/2 x 11 folded in half)  I used a lavender card stock for the base.
The next step is to print out a picture that will fit on the cover of the card.  This is a picture I found on Google.  You could use anything you want that creates a scene like you are looking out of a window.  At the bottom of this post, I will be sharing box files for you to download.  One is the picture and the other is the Gypsy file.  You will also need some white card stock.  I used textured white for this and inked it with Pansy Purple from CTMH.  You need to cut the following with a straight cutter.
1 piece at 3/4" x 8 1/4".
2 pieces at 1/2" x 8 1/4".
2 pieces at 1/2" x 5 1/4".
The window picture is 5" x 8".
Once all of the pieces are inked, this is what you will have.  You probably wont see it, but I inked the picture as well just to be safe.
Stick down the two side pieces first, then a 1/2" piece to the top and the 3/4" piece to the bottom.  Below is what it will look like.  You are basically creating the window frame and your mat at the same time.  I used ATG tape to do this.  You will have a 1/2" piece left.  Pop it with 3D adhesive.
When you add that piece, you will have what is shown below.  It looks like the ledge at the bottom of the window.
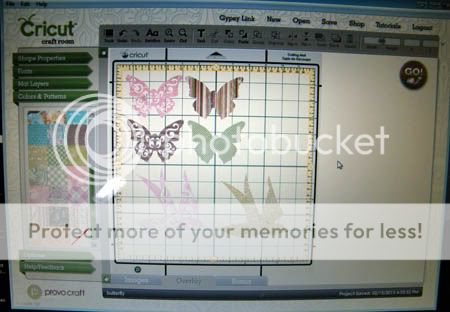
Once that is done, you can start assembling your window.  Below are the pieces that you will get from the Gypsy file.  I used Martha Stewart Elegant Cake Art, A Child's Year, Cake Basics, Flower Shoppe, Mother's Day Bouquet and Ribbons and Rosettes for this card.  Even if you don't have all of these carts, you can still download the file to your Gypsy or CCR and change out whatever shapes you don't have.  All of the sizes are in the file for you.  The drapes on the window are actually a tear drop type of shape.  When those cut, you will need either cut them in half like I did, or fold them in half.  If you use thinner paper, I would recommend folding them so that they are good and strong.
Above is how you layout the pieces.  Add 3D adhesive to all pieces.  When you have finished with that, flip over the bottom most row of the valance and add ribbon.  I used this beautiful white seam binding from My Craft Spot.  I simply ran a strip of ATG tape across the bottom of the scallop and then gathered the ribbon as I went along.  I then tied two bow ties to use for tie backs.
When you pop all the layers and add them, below is what you will get.  Also, when you cut the file, there are two cuts of the cat.  Glue one directly to the picture and then pop one and let the tail hang over the window ledge.  It makes the shadow of the cat really look good.
Then add your tie backs to your little drapes and the front of your card is done!  That was easy, right?  Well... sort of.  This was about 6 tries later.  Hee! Hee!
For the inside, you will just cut your mats with a straight cutter.  The bottom most mat is 5 1/4" x 8 1/4".  The second mat is 4 1/2" x 7 1/2".  The white sentiment mat is 3" x 6".  Again, everything is inked with the Pansy Purple Ink.
Once everything is together, I stamped my sentiment.  This is from a stamp set called Friends and Neighbors from My Craft Spot.
Add all of the little leaves from the Gypsy file.  I just used Scrappy Glue to attach them all.  That is my FAVORITE GLUE!!!
Then just add your flowers.  Just be careful not to cover up part of the words of your sentiment like I did.  Oops.  At least you can still read it, right?  Hee! Hee!  If you want a little more detail, you can ink all of the flowers and leaves as well.  For this card, I didn't think it was necessary.
Once it's all done and dry, simply hit it with a couple of strips of ATG and stick it inside your card.  When it's all done, below is what you have in all of it's layered glory!  The final thing is the banner in the front.  I used the Friends and Neighbor stamps again for the sentiment.  I inked the edges and then rolled the paper back and forth with a pen.  This made it look like it was just flying or something.  Love that!
Then, when you open the card, you have this beautiful flower arrangement surrounding your message.  Pretty Cool, Right?  I used Anna Griffin Papers for the patterns in this card and recollections solid lavender for the flowers and base.
It took many tries, but I really love the way this card turned out.  Now that I have the Gypsy file created, I will be making this card again and again!  I hope that you will try one too!  Now... Here are the files.
We sure hope you enjoyed today's project!  Thanks Sheila for letting me be Sassy today!  I would love to know what ya'll think about this, so please leave us a comment.  Thanks so much for sharing your time with us today!  BTW, if you want to see what the other things we have been up to, hop on over to Cricut Couple and check it out!