







Showing posts with label Alphalicious. Show all posts

June 1, 2010

Cute As A Button

Isn't this adorable! I am 3 weeks late on the SOUS Challenge with this layout, but I don't care!!!! Their button challenge was the inspiration for this layout. This is also a qualfier for Frosted Designs Button Challenge. This is our little Gavin and he is a hoot. I think he is going to be the class clown or grow up to be a comedian! He looks you right in the eye and says... "HaHaHa" and as soon as you laugh he just cracks up with laughter! We were waiting for dinner to be put on the table and he was as happy as could be with his little HaHaHa.
This is my layout.... it sure doesn't get easier that this does it? Cut twice and ready to go.
I had so much fun with this layout and tried to keep it as fun as Gavin. Buttons are kind of fun to work with as they come in almost every color size and shape. I just used what I had on hand.


The papers are from DCWV, the Cafe stack. After I started cutting I added the orange page from another DCWV stack. I really think the orange mad the page pop.
I started by stapling the 2" ribbon stips on but it just added too much bulk and seemed like it would be harder to adhere the buttons so I changed and used mini dots. First I added a dot to the center to hold it folded in half and then one under it to hold it in position. as shown below.
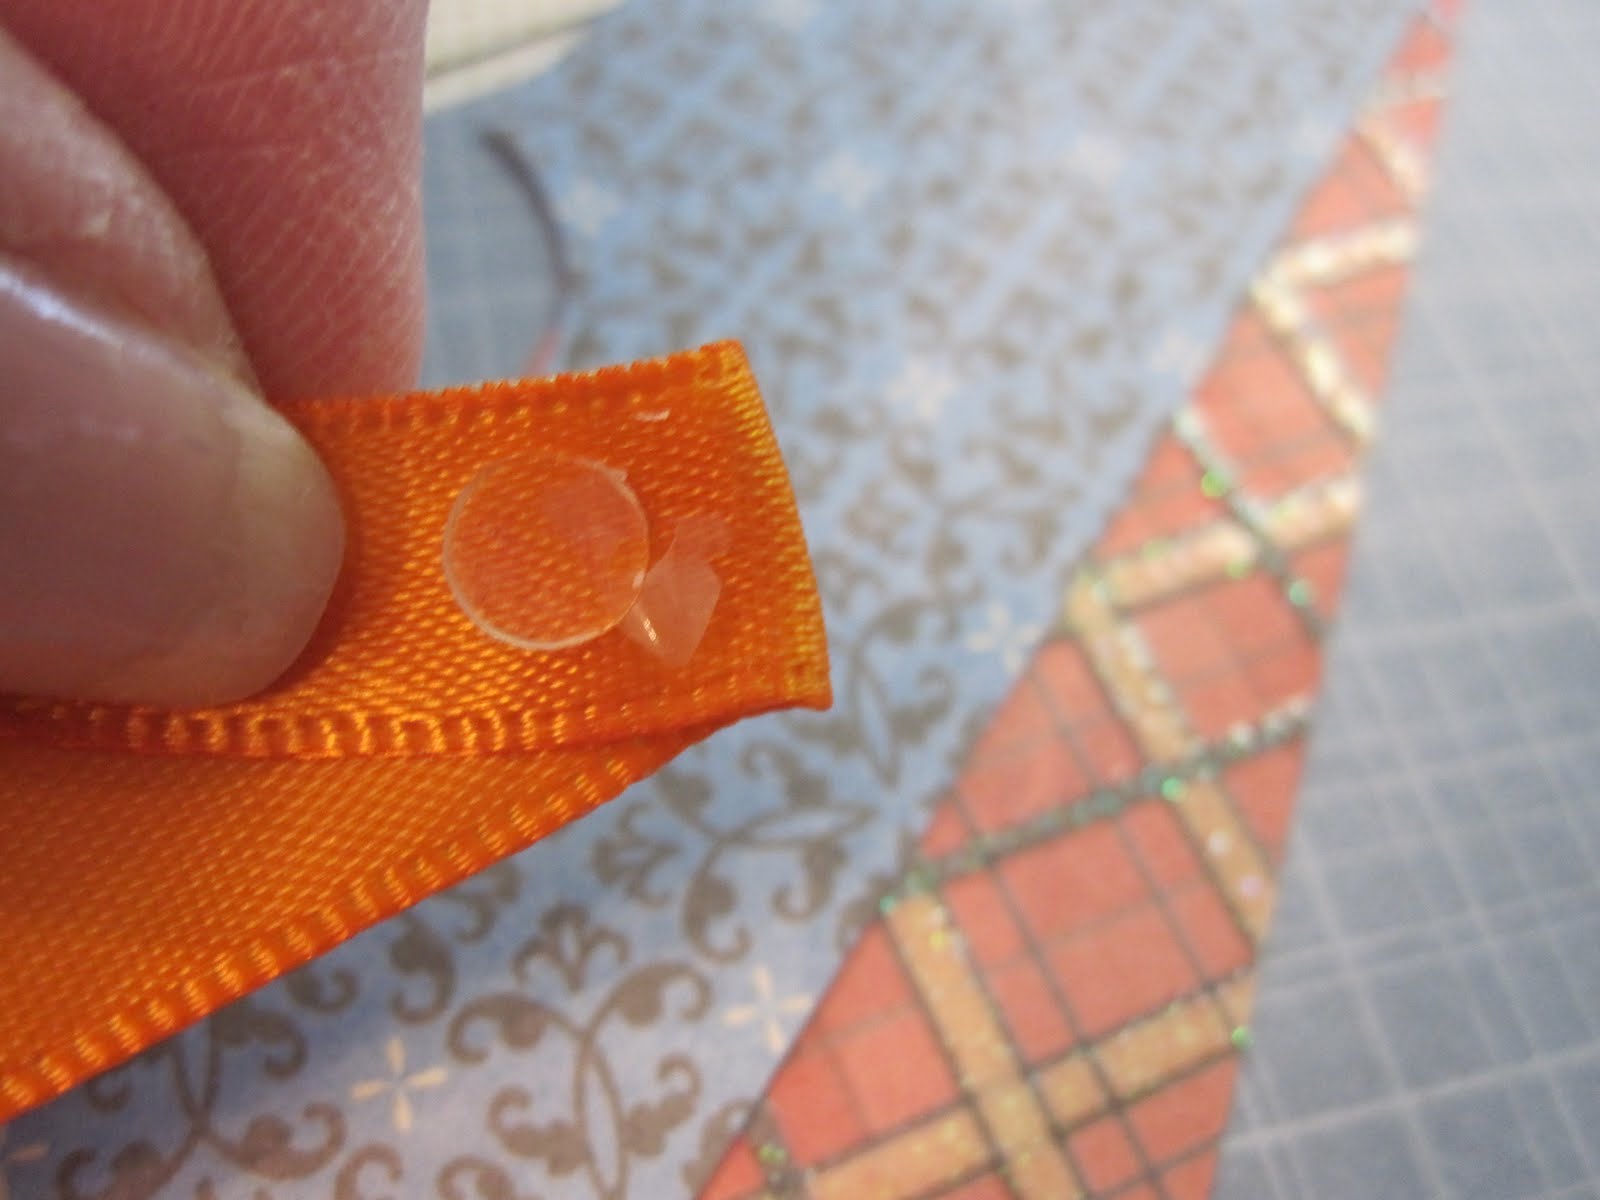
You can easily see the difference in using and not using the staples in theses photos. I quickly changed and stayed with the mini glue dots.
I placed the ribbons in opposite corners as I wanted the colors of the paper to show. If I had used all the way around I think it would have been way too much for a boys page.
I cut the title out twice and glued together for a thicker almost chipboard look and then used pop dots to lift the title to give it added dimension.
I also cut the little butterfly out twice and cut off the wings of one and glued on to the other, and folded the wings up so when it is on the page it has movement to it.
Isn't he cute? On this photo you can see I even glued a couple of heart buttons on the large round to add a little interest.
See when I pull the camera back our little butterfly looks all a flutter!
I did do some journaling on this with a simple tag.
Thats my page our our handsome little Gavin. I hope you enjoyed todays project. Here is the Cute As A Button Gypsy File.
MyFreeCopyright.com Registered & Protected
I am always encouraged by your sweet - sweet words. Your comments inspire me to keep scrapping and sharing things with you.
signature

April 11, 2010

You're A Hoot - MB Challenge

Well here is my Hip Hop & skip project from the Gypsy Chat MB weekly challenge..... see Pam I can do this! I don't use the figures as precise as many but this challenge is complete!
I had to quickly adjust my design as I placed the paper in the wrong position on the mat when I got home form work Thursday night and never checked it when I cut it today!! So the boxes I did cut by hand. The owl and the letters cut perfectly.
I left the letters on the mat as I didn't want to reposition. I got out my handy dandy tape and lifted them in one piece, flipped them over and when ready applied the glue. I left my zig glue pen at work so I had to use my zip dry.... it worked just as good.
Now it is time to put together so I got everything together and in no time at all the card was complete. Notice I did emboss the papers that were applied to the card.
After I put my little owl together I added the stickles and set aside to dry while I put together the balance of the card.
Isn't it amazing how quick the letters go down when you use this tape! Just press firmly and slowly lift using your cricut spatula to hold down anything that lifts a little.
I added the small googly eyes to the letters, and then the owl.
Now wasn't that easy? Hope you enjoyed today's little card. Have a blessed Sunday. This is your Gypsy Owl Card File and this is your DS Owl Card File.
MyFreeCopyright.com Registered & Protected
Your sweet words of encouragement always inspire me when I read your wonderful comments.
signature

April 6, 2010

Glass Etching!!!

Our afternoon with the cricut started in the dining room with a little white wine, grapes, artichoke dip, salsa and chips, chicken salad spread and tomato basil spread...
So you know what the importance was today....
We did however finish two great projects..... below you will see the small glass jar with chocolate hershey kisses in it.... look a little closer and you will see my last name McShea, etched in the glass!

Below you will see a green baking dish etched with my name and all kinds of different fruit from the all new Preserves cart. It was difficult to see in the photos so we used a red towel  to make it easier to see the design.

Isn't this just too cool? Just think of all the gifts you can make.... endless. This jar was only 3.99 at Hobby Lobby and that was full price..... next glass sale I will be all over it!
This is Kim, she and her sister in law Laura came by today and btought all the goodies. I want you to know while they were snacking I did finish my Tuesday Treat project for Thursday so be sure you come back to TuesdayTreats.com on Thursday to see a layout designed from TBBM.
As soon as I finished the layout we went to the kitchen and started working on the etching right on the kitchen counter.... I might add both of these lovely ladies will be getting a Gypsy after meeting my Gyspy Woman and watching her strut her stuff!
Laura and I played Patty-Cake with my new 12x24 mat to ready it for the vinyl I was going to place on it.
After cutting the center design I realized I need to get my design off a piece at a time so I used an exacto and the edge of my cutter.
I carefully removed all the background from the cut as I was going to do a reverse etch so my letters and art would be clear. Isn't my design cool looking? I just love the new Preserves cart.
I then cut a piece of clear contact paper and used that to lift the vinyl from the mat.
I caution you to make sure it is stuck down and lift ever so slowly making sure the vinyl is coming up.
Yipee I got it... one piece.
Laura helped me center it to the bottom of the baking dish.... I guarantee no one can accidently take this dish by mistake, thinking it is theirs!
Then I made sure all the air bubble were out and all the edges were securely adhered to the dish.
Success, I have melted in the heat and the stress of getting it securely on.... I'm sure the wine had nothing to do with it....
I put cute little words on the side.... blueberry, applecrisp, cherrypie, muffins.... great baking dish. I checked it out completely before putting on the etching cream.
Lookin' good.
I applied the etching cream.... next time I will apply it thicker.... I bought too small of a jar or Armour Etch® Glass Etching Cream for such a large job. Directions said 5 minutes and rinse off. I used 20 and really think it could have stayed on longer for this type of glass..... tempered and all.
While it was being timed, Kim went to work to get the jar ready....
She loved how it was coming up in one piece.
Voila! It is done!
I then cut it away from the scrap and applied the contact paper.
We applied the cream and went back to the baking dish.
We washed it off and then proceded to try to get a photo... and boy is that hard to do on a sunny day.
So we put a red towel under it so you could see.... perfect for chocolate cake or brownies!
See how nice it turned out...
And here is the jar...
Well I hoped you enjoyed todays project, we sure had a lot of fun making it and learned a lot in the process.
MyFreeCopyright.com Registered & Protected
Thank you for your sweet comments, they always encourage and inspire me.
signature








