January 31, 2011

She Sews a Fine Seam

Happy 5th Monday, everyone! This is Sandi of Soft Side of Sandi  (personal blog) and also Stuck on U Sketches  challenge blog.  I was so flattered when Sheila asked me to do a Guest Designer spot for her. My approach may be a little less "technical"  than you normally see here at She's a Sassy Lady ... but I figure that's okay. I mainly do layouts and only a few other types of paper crafting projects as needed. So, I decided I would just walk you through how I usually approach a layout and share my cut file.  First, let me show you the finished product:


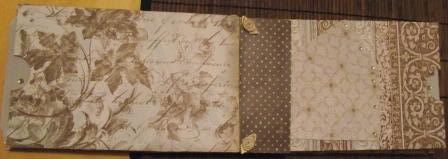
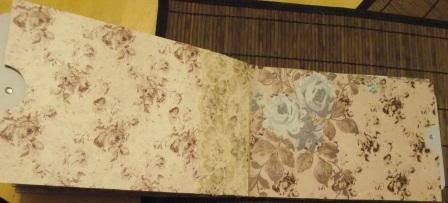
My first step in doing a page is to decide upon the photo (or photos) I will use and then to select papers to go with my them. That for me is the hardest part! I love paper and have far too many options! On this page I wanted to keep the photo as a color photo and chose to match my mom's blouse. TIP: When I first began to scrap, I would rely on my Color Wheel quite frequently for assistance. Over time, I use it less and less .. and bend the rules somewhat to meet my needs. But if you are new to paper crafting, I highly recommend using one.  Here's a pic of the papers I chose:


Love using purple and teal together! Today I've used Webster's Pages Shine a Light and Foo on Film, as well as misc cardstock.

Next, I usually select a sketch to go with the number of photos I will be using. I also have a few fall-back sketches memorized that I use when the mood strikes, like with this page. (TIP: There are lots of great sketch sites online.  I have even recently downloaded some sketches to my I-phone from the App store. You may at first feel limited when using a sketch ... until you see how it can improve your results.)  Then I start designing either on my Gypsy or in Design Studio to see if my page elements will fit and look balanced. This was how my page looked in DS:


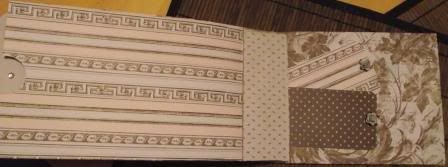
Here's a few photos of some of the cut elements:


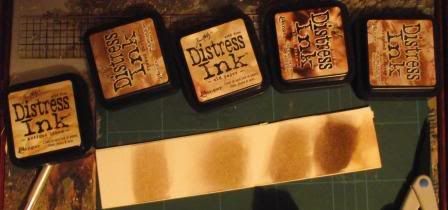
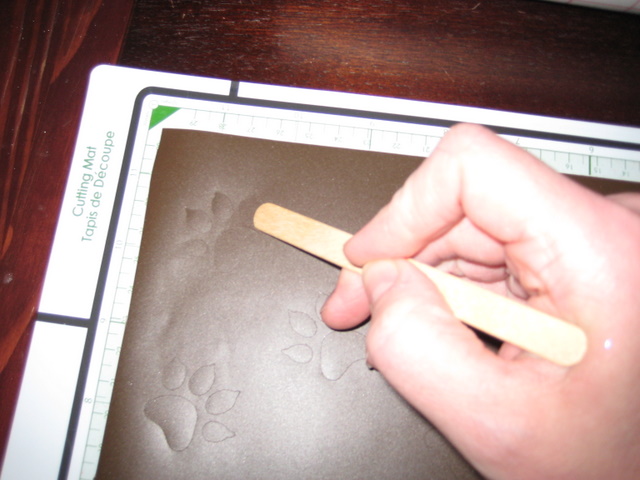
Next, I used my Zutter Distress-it-all to distress my 12x12 paper edges, then inked them with Tim Holtz Chipped Sapphire Distress Ink. I normally do more layers on my pages but since I was using a large photomat, a large title and the dressform cut, I decided I would like to stay with one continuous paper.  After distressing my edges and inking them, I adhered the purple paper to black cardstock. TIP:  If you do not have a distressing tool, you can always just use the edge of your scissor blade.


I scanned the photo of my mom and did some photo editing before printing it and adhering it to the photomat which was cut using the Cricut Sentimentals cartridge. TIP: Scan your photos before using them so that you will have digital storage and will not have to use your originals. Before I adhered it to my paper, I assembled my title and the shadow layer using my Zig 2 way pen. Those were cut using the Nursey Rhyme cartridge. Then, after inking my edges with Tim Holtz Distress Ink in Broken China.  I adhered my photo and title to my page, as well as the black corner scrolls which were cut from the Cricut Heritage cartridge.


My dressform was cut multiple times using the Cricut Forever Young cartridge to make it thicker without stopping to cut some chipboard. Then I decorated "her" a bit with some ribbon for her skirt and flat-backed adhesive pearls at her neck. TIP: Foam squares were used on the backside of the dressform to provide some dimension and lift it off the page.


Before placing my flowers on my page, I used Terrifically Tacky Tape along the bottom of my photo and attached some black trim from my stash. Once the flowers were in place, the scissors (also from Sentimentals) were glued to my flower cluster. My flowers are a mix of Prima Guava Peony Etude and Petaloo Chantilly Mixed Blooms in Green. TIP: You could also easily use your favorite hand made paper or fabric flowers.

Lastly, I added some purple crystals to the chandelier, pearls to my photomat and a single Jolee's purple Fluer-di-lis on the right side of my black trim.  I did journal beneath my photo after taking a photo for this tutorial. The crystals and pearls are the Prima E-line variety from my stash. TIP: I use a flat blade like a wallpaper knife to lift my stones from the packaging and to transfer then to my paper. Works great for me!


If you are interested, here is the link to the DS cut file: http://www.box.net/shared/9yv1ntpnti
And here is the link for the Gypsy version of the file: http://www.box.net/shared/2gjydfef51

In closing, I just want to thank Sheila for having me here today.  I hope you enjoyed hearing about how I made my little project! Please let me know if you have any questions.

 Sandi

January 30, 2011

Your Cricut Blade and Housing Needs To Be Cleaned Regularly

Ladies have you ever seen this on your paper while cutting? If you do, you have a problem and you need to stop your machine and clean your blade housing. Some papers just have a lot of texture to them and they fray so easily. The problem comes in as your blade and blade housing seems to collect this mess. Then of course your machine performance dwindles away or just stops completely.
Take a close look at all the fibres that are accumulating on my blade housing. If that happens, it is time to clean.
Look at my poor blade.... really it is in there. All you need to do is touch the top of the housing and your blade will push out.
See it will look like this. Isn't that amazing, When the housing fills with debris like the the performance of our Cricut is non existent. Take the blade out, clean it off and don't for get to blow in the housing to get all the debris and loose fibre out.
This is all of the junk that came off and out of my blade housing. Amazing isn't it? I only wish that I had thought to do this on a white sheet of paper so you would have a better idea of what collects inside that housing and on the blade. Mind you this is from 1 sheet of thick paper. It took me 10 cuts to get through this but I didn't think to check the blade until the 6th cut. After that I seemed to make fast progress.
Do take the time to check your machines from time to time as some papers just seem to create a mess and add a lot of dust. All that dust collects and creates problems when cutting.
Thanks for spending time with us today. I hoped I helped you a little and your creating goes a little easier! Thanks for your sweet words of encouragement. Your comments continue to inspire me.
signature 

January 29, 2011

Gypsy Made Simple - Gate Cards

Well hello! Today I have a great little card for you that is soooo simple and so timely with Valentines day just around the corner.So go grab a cup of coffee or tea, turn you Gypsy on and lets go to work to create this wonderful Gate Card.

This is going to be such a fun card. I was sitting at work talking and fidgeting with paper and was folding the paper while talking and instead of the usual letter fold I did a gate well the customer left and you know I couldn't leave the paper alone until I had a good card for Gypsy Made Simple.

I had the right concept I just needed to decide on the size and shape. It took me a little while but I finally got it going in the the right direction, and was amazed at how quickly this came together. Usually I don't like gate cards as the front is so weak as things are always attached to the front. I never want a card that I make to fall apart, so for me I just avoided the design. But now with the Gypsy this design at the front of the card is a part of the base. So it is secure and unique to boot.

Well the new camera is working out well, but low and behold while making this video it crashed. My heart sank thinking what did I do! Well it was just the storage card for it filled up and then shut the camera off! Phew. Well let me tell you I was one happy camper when my new 16G card arrived as these HD cameras seems to take more storage space. Hope I didn't bore you too much with that.
Isn't this paper yummy? It took 10 cuts with my Cricut blade set at 6 and pressure high! Mind you I had to stop and clean the blade every now and then as it just filled with debris with this paper.

Never fear I had this wonderful cinnamon roll from Panera bread while I was waiting for the papers to cut... did you enjoy yours?
Yup, these papers are yummy! Love them.
Score your card at 2 1/2 and 7 1/2 inches, and then place a tight fold on it.
Now you are ready to complete the card.... that is what your last video is all about.


Now wasn't this a great little project? I thank you for joining us today. Today my challenge to you is to Show Me Your Gate Cards!!! That's it, so easy I expect to see plenty of posts of all different kinds of cards. Just link it to my site so we all have plenty of fresh ideas.
Thank you for your sweet words of encouragement. Your comments always inspire me to continue sharing with you and your linked projects thrill me beyond belief. Have a great week and hopefully next week my new camera will have arrived and we will have clearer videos to look at.
signature

January 28, 2011

My first Paperbag Album

Hi all,
It's Kelly from http://www.kamscraftyplace.blogspot.com/ .Here's my first project of the year for Sheila. I decided I would have a go at a paperbag album. I had seen a tutorial on how to put it together on You Tube. Here's the link to the tutorial. http://www.youtube.com/watch?v=IAcsKl87Ryg . It's not easy finding paperbags over here in the U.K. I found some on Ebay but I haven't been able to find them anywhere else. If you know where I can get some please let me know in the comments.
After watching, pausing and rewinding the tutorial many times, this is what I ended up with.
Here is the album put together. I used Mountboard for the covers as it's hard to find 12 x 12 chipboard here in the U.K.


To decide which distress ink I should use I tried them all out on a spare bit of mountboard. I chose Walnut Stain


Here is the distressing around the front cover. I repeated this on the back cover.


Here's the front cover Finished.


Here are all of the Pages completed.


Thanks for looking at my project. I hope you liked it.


Kelly :)

January 27, 2011

A Little Treat for Four Feet!


Hi ya everyone this is Melissa from MelissaMade and once again I'm back and ever so excited to share a project with all of the wonderful followers at She's A Sassy Lady.  Thanks Sheila for letting me share again today!  My hubby and I have friends that lost their old doggy and recently got a puppy!  He is ADORABLE - a black golden doodle - now have you ever heard of a BLACK golden doodle! LOL he is just the cutest so we decided to make Dexter a little gift.
 I started with a left over jam jar.  I removed the label and ran the jar through the dishwasher.  I measured the height of the jar and the diameter of the lid.  My jar is about a 4 inch high jar and the lid is about 2 inches across. I also took a sheet of paper and measured around the outside of the jar and it was close to 8 inches.  On my Gypsy I used the new Lite cartridge Four Legged Friends and placed paw prints randomly around the page.
 Next, again with my Gypsy, I made a circle and it's shadow using George and Basic Shapes for the 2 inch lid.  I also added the sentiment from Four Legged Friends that says "Wet nose Warm heart".
 I cut a sheet of brown vinyl on my Imagine for the paw prints.
 After the prints were cut, I rubbed them down with a flat wood stick and took a sharp tool and peeled away the layer of vinyl I wasn't going to use.
 I just poke through the top layer and peel back at a sharp angle making sure that no prints came away with the excess.
 I used transfer tape and again using my wooden stick rubbed the paw prints so they would adhere to the transfer tape.
Next, I peeled back the tape at a sharp angle making sure the paw prints came with it.
 My hubby helped here by holding the jar as I wound the tape around the jar.
I rubbed all the prints to the jar and slowly peeled back the transfer tape.
  I also added one little paw print to the inside of the jar lid.
 Next, I cut the circles and sentiment with the Imagine and adhered the circles together using my Xyron.
 I then glued the words to the sentiment.  I used my ATG gun and taped the round tag to the top of the lid.
 I used some beautiful crinkle ribbon and tied a little bow around the top of the jar.  Finally, I added some milk bones!

I hope that Dexter enjoys his treats and his little treat jar.
Thanks Sheila for having me back and don't forget to ask questions if you have them and stop by MelissaMade for more fun projects!
Hugs
Melissa