Showing posts with label Weekly Challenge. Show all posts

March 10, 2012

Quick Page & Weekly Challenge


No Gypsy, no Cricut and your scraproom tore up adds up to a quick page. This week was rough with all my equipment unaccessable I took on the challenge of still creating a page for you! With everything tore up in my scraproom I was still able to get at the papers... so I thought I would utilize goodies I had on hand.
As I have shared with you I am a new Close To My Heart Consultant, well I haven't got my kit yet but as an avid shopper of CTMH I had some on hand. I did however chose a discontinued pattern as it went so well with my photograph. I loved it as it was one of the Reflections packages that I also purchased the matching stickers on, so I was able to scrap without my equipment. And didn't it turn out beautiful?


This video will show you just how easy it is to put together a page using just paper, matching stickers and alphabet. It just amazes me how pretty the page is in just a few short minutes. CTMH has many different Reflection kits that will help you along.... Now if you want to window shop just click HERE for my CTMH site. For those of you that wanted to take advantage of the CTMH Sign up bonus for the Art Philosophy cart or $100 additional FREE merchandise click this  SASSY LINK It will take you directly to the sign up page. So... Have questions?  Click SASSY INFO!
I challenge you to do ANY project this week and link it up. Two lucky entries will win a stamp set this week! All entires must be in by Friday 3/16 4:00 PM and the winners will be announced Saturday morning. All you need to do is use the little link up button below.
I hope you enjoyed today's little project.... it was so much fun to put together. Thank you for your sweet words of encouragement. Your comments inspire me to continue sharing with you.

February 4, 2012

2012 Scrapbook Intro Page & Weekly Challenge

I am so excited to start scrapping again! This is the introduction to my 2012 scrapbook. I used a black Creative Memories album that I had saved for years and love that look.... I feel like I have opened our heritage when I open this book with it's leather cover. The first page seems to set the stage... this book is bout Jim and I and focuses on our life and not our children. Yes they and our grandchildren are an intricate part but we are so much more that parents and grandparents. I love the romantic feel to the into page, don't you?
I want to thank all of you that have sent emails asking for layout pages. And I also have to thank Beatriz of Amazing Grace, Lori of Scrapin My Stress Away and Gaby of Gaby Creates for the awesome inspiration they are to me with their consistent sharing of their beautiful scrapbook pages. The whole reason I got my Cricut and Gypsy Woman was to make my scrapping easier. I couldn't believe that it has been months since I did some pages but I am going to try to do what Bea set her goals for 2 pages per month for her and hubby... I think that if very realistic and offers me the opportunity to make pages ahead of time and all I need to do is drop in the photos.
First I laid out the page on my Gypsy Woman, remembering to save each piece on a different page so I could do the separate color cuts. On the left you can see that I have welded the frame and the silhouette dancers together creating a base for my page. On the right I have the pieces laid out for a 2 color cut.

On the above photos you can see that all I did was copy and paste so that my layers would be in different colors.... so simple you just have to love it.


Just a quick little video showing how fast this page goes together. I doing a layout on the Gypsy or if you prefer Design Studio and Cricut Craft Room, because once you have the layout done all you do is cut and put together your pieces and you get a BEAUTIFUL PAGE! Love it!
This is a close up of the people.... See how I added bling for a necklace and also on her belt?

And this is a close up of the couple. I love it! So dramatic on the black pages.
Well I sure hope you enjoyed today's post. I know I enjoyed creating this page and sharing it with you. For the Gypsy file for this layout just click HERE.
I challenge you to make a layout this week and share it with us! I will be giving our a set of Studio 12 stamps to a person that links their page and another set to someone making a comment..... Random.org we love to use you!  Yes you can do both and you can link daily if you make that many pages!!! You must link your project by 4:00pm on Friday February 10 and the winner will be announced Saturday morning.
In the mean time have a blessed week!
Thank you for your sweet sweet words of encouragement. Your comments continue to inspire me!

January 21, 2012

Be Mine Pocket Card

Don't you just love to make pretty things? Well that is what I think about today's card.... it is just pretty. Today we will be revisiting the pocket card and turning it into a Valentine card that will hold little bags of candy. You know you need to be creative with cards when you family lives so far away! This card was actually my daughter's idea. I just took her ideas and in a matter of a few minutes designed this cute little pocket card. She picked out the pattern paper and we used only a sheet. I wish I could tell you who it is from as it is so pretty, but I forgot to ask Jen. The glitter paper is from that $2.97 stack I purchased and she only used 1 sheet. The pink is Coordination's stock that was on sale 5 sheets for $1 at Joann's. So you see with a very little amount of cash you can produce these cards. The big expense was the candy, and that was little of nothing $2.99 for a bag and she only used half of that.


Now the first thing I did was go to the Tea Time card I made 2 weeks ago (HERE is the URL to that post if you want to see it again) and adjust my Gypsy file for the new card. You really need to follow along and do this on your own so that you get used to altering cards of your own or from files that you have downloaded from sites like mine. Note I will provide this Be Mine file at the bottom of this post.


This is how you put this card together.... so simple you will love it.

This is how the card looks from the front, as you can see it is a wonderfully simple design, great for mass producing.

This is the inside of the card... see it even offers plenty of room to write or stamp a sentiment on it.
Another close up....
Now I sure hope you like this weeks post and took the time to watch the videos so that you too could learn how to make these awesome cards. Click on BE MINE for the Gypsy card file and remember you can alter it if you do not have the Mickey Font just by following the directions in the first video.
This week I Challenge you to make a Valentine Card or Valentine Page. A lovely lady took the time to write me to remind me that we need to do layouts and you know what she is right and in the near future I will be spending more time on layouts and catching up with my scrap booking. I just like to start the new year with plenty of cards to mail to friends and family. So use the Valentine theme and make something and link it up! Let's see what you do. I just love to learn from each of you too. Just this week I have started following 20 new blogs! So much talent out there, I just love it.
Thank you for your sweet sweet words of encouragement. Your comments continue to inspire me to keep sharing with you!

January 14, 2012

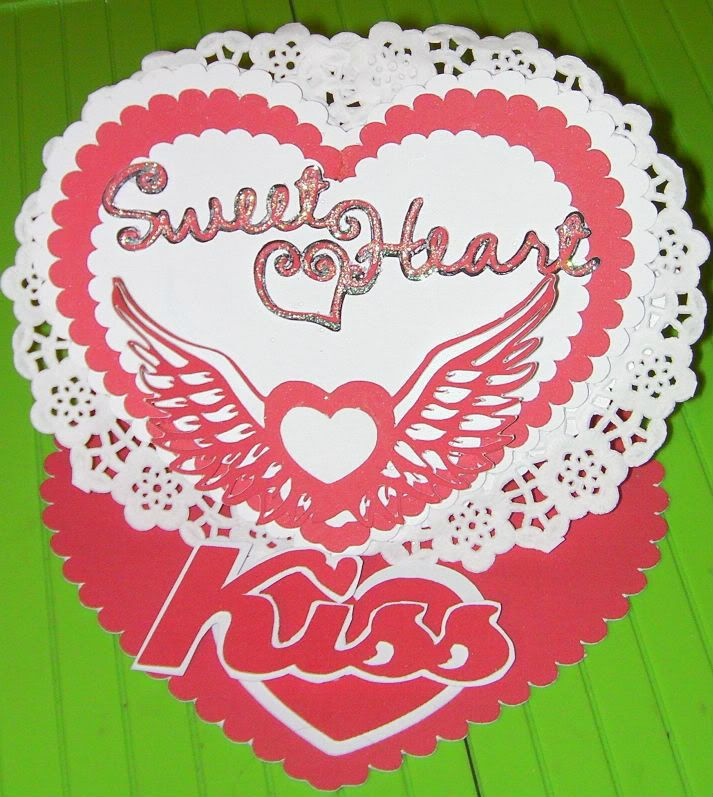
My Husband's Birthday Card & Weekly Challenge

Hi Crafting Friends :)

I hope everyone has a great Holiday !!!

I have been ill, so haven't been able to enjoy all the festivities of the Christmas / New Year :(

Not to worry, Today I want to share a card I have made for my Darling Husband, whose Birthday is on the 15th (just before our very own Bobby's from the Cricut Couple )

My husband is also my Carer (I'm disabled) and he does a terrific job of taking good care of me, he's my rock, my best friend, my sweetheart and I am so lucky to have him in my life.

So on to the card


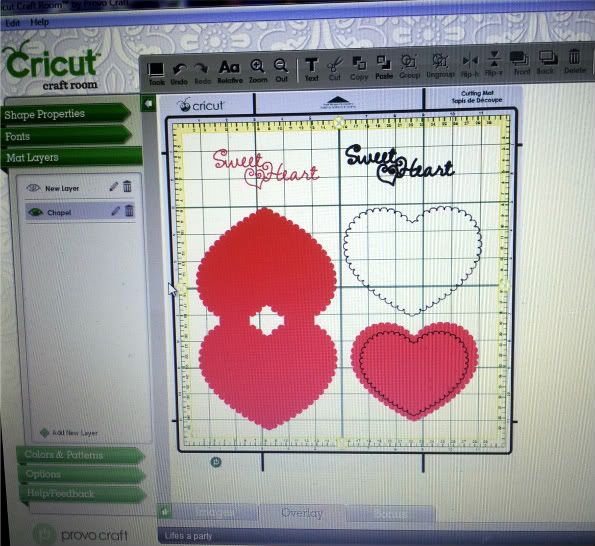
This card was designed using CCR, Love struck 2010 and 3 Birds - Life's A Party cartridge's
Not your typical Man Card right LOL!! Hubby appreciates the sentiment, rather than the images...phew !!
First I used Life's A Party for the card base sized at 8.389"
I added another Heart sized at 4" in white
 Another in red sized at 3.75" with another sized at 3.208" placed inside to make a frame
Sweet Heart sentiment was sized at 1.528" for the font shadow and 1.472" for the font


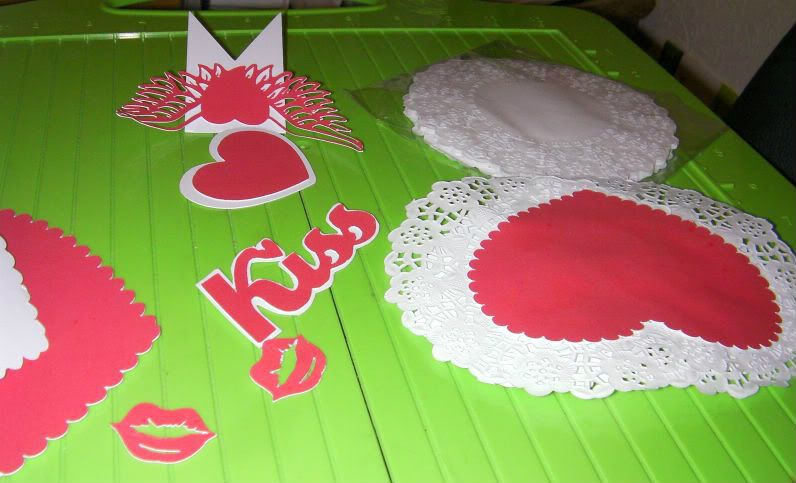
The next thing was to add my embellishments using Love Struck 2010 cart.


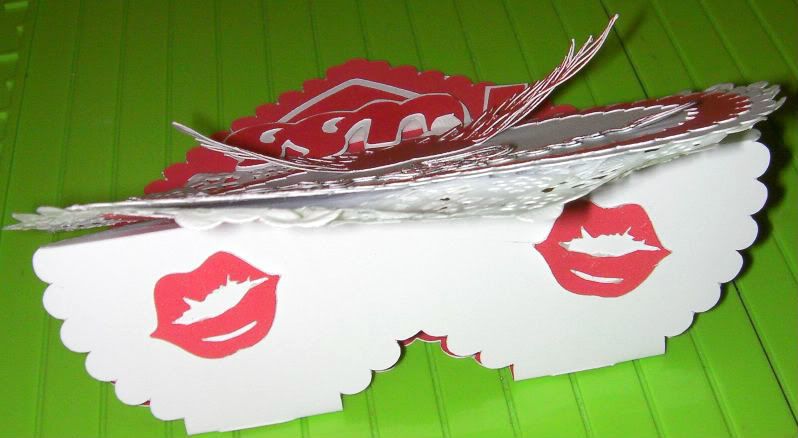
Kiss was cut at 1.5"
Both lips were cut at .75"
Winged hearts were cut at 2"
Hearts were cut at 1.75" & 1.5" (I flipped the smallest to sit on top of the larger heart)
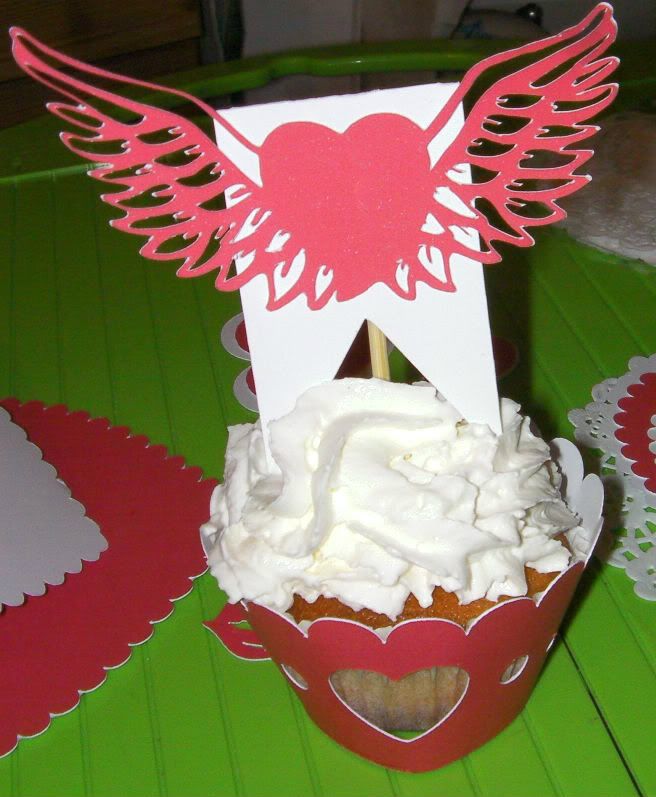
Cupcake topper banner was cut at 4.931"
Finally the cupcake wrapper was cut at 7" (we have smaller cupcakes here in the UK)

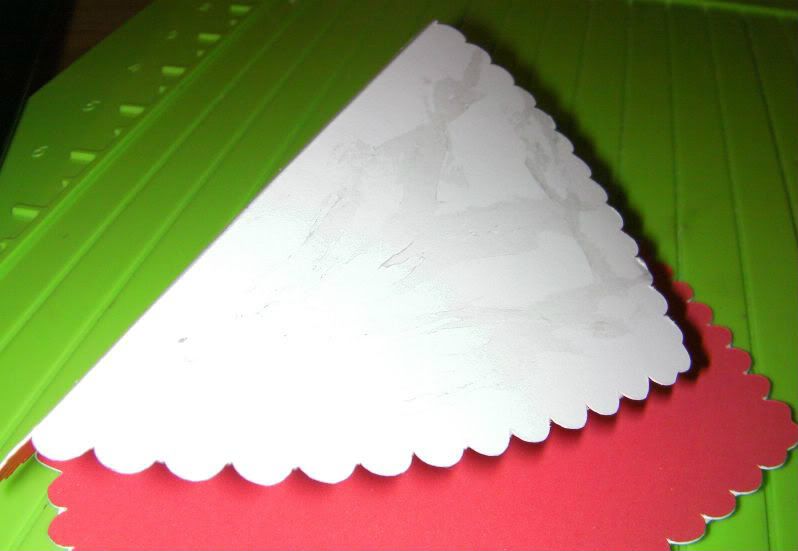
Firstly I scored my heart card in half , then folded one half of one side inward, to form my easel base


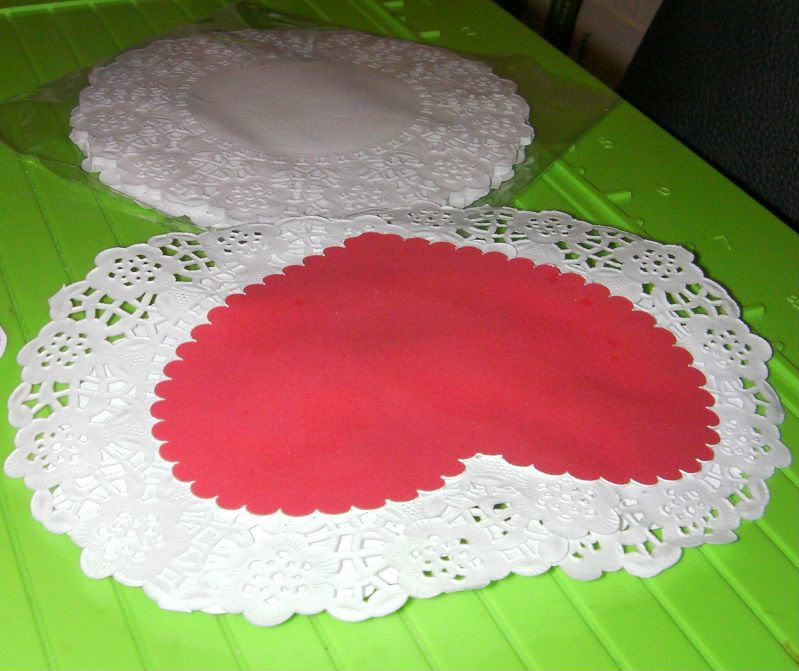
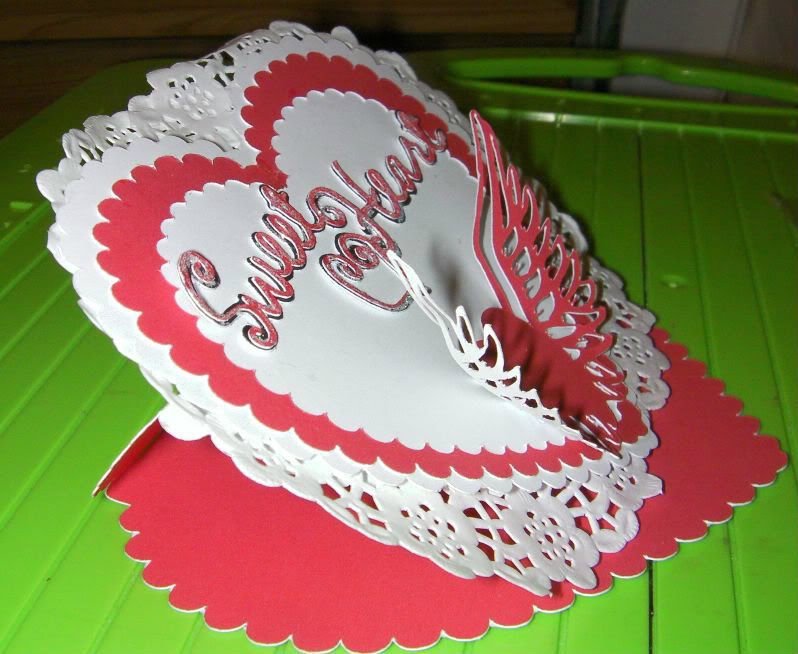
Next I added paper Doilies to the cutout section of my frame


I added one of the winged hearts to my cupcake topper and put the 2 hearts together


I hadn't used the "Kiss" phrase before and it cut out 3 times around all sections strangely, so I used the centred cutout and hand cut a white base for it.

Here's the cupcake I made for my Hubby


Needless to say it didn't make it to the final picture LOL!! (Good job I made plenty more ;) )

I added the red frame and then added the Sweetheart sentiment to the front of my white heart along with the matching winged heart from the now devoured cupcake :)


Next I glued directly on to the upper facing folded part of my base card

Then I added my framed heart to the adhesive section of the base


and not forgetting the back


My card was completed by adding the "Kiss" onto the hearts that were pop dotted onto the base to act as the stopper

Thank you Sheila for allowing me to share my little project with you all here today :)
Happy Crafting everyone

Hugs
Adele

WOW! Sheila here...
Now wasn't this a great birthday card? And did you see that yummy cupcake? Love it and just in time for Adele's hubby. As you know I use the month of January to make my cards for the year.... yes I often come up a little short and have to make more but I have great intentions. So this week I challenge you to make a Birthday Card or a Birthday Layout to celebrate the birth of someone you love. Then link it up.... it's that easy and we can all get some really neat ideas if we link up. Just to make this fun let's have a give away too. 1 Lucky person will win a stamp set, but you must link up to qualify. All entries must be in by  4 pm on January 20th. The winner will be announced on Sunday morning the 21st.

January 7, 2012

Making Multiples With Your Gypsy

Shhhhh, don't tell my friends or Charlotte over at A Little Bit Of Detail, but this is my card for my Friday the 13th Card Party! Isn't he just too cute? Well is was so easy to do, thanks to my Gypsy Woman and I thought I would just take a few minutes and share with you because so many times we need multiples. This card will make 9! Yes I did say 9. I needed 7 for the party and I made 2 extra for my stash. I had to chuckle because after I put my card together on my Gypsy I saw Edna at Create With Expression and the Cricut Magazine had featured this card also... see great minds!
Let's get to work and make this card...


Now wasn't that easy? If you need a refresher on shape cards just go to the Gypsy tab at the top of my blog and you will find it under one of the Gypsy Made Simple tutorials. I thought it would be best if I shared this as we really need to take full advantage of the Gypsy and start designing more that 1 object at a time. Personally I think it is easier to make in multiples as you only have to choose the paper one time! It takes me longer to choose paper that to make the silly card!
Now let's get this card put together...


Another easy make. I was going to flip the video like Stacy from Love That Bug said but then I realized I kept turning the papers for you to see and they would have been upside down so I left it. I still like this angle though as you can see much better what I am doing. Be sure to tell me what you think as I do this for you and not me. Click for the IGLOO FILE or PENGUIN FILE.
This week I challenge you to make multiple cards all of the same design and link them up! I can't wait to see what you created. Be sure to tell me in the heading of your link how many you made.
Well I hope you liked today's post. I sure had fun making these cute little cards and I hope the ladies will like them too. Thank you for your sweet sweet words of encouragement. Your comments continue to inspire me!

December 31, 2011

Weekly Challenge - Thank You Cards

Well Christmas is over and the New Year celebrations will be tonight. We have all been touched by so many wonderful people with gifts, parties, dinners and all types of hospitality over the past two weeks. And you know what that means... it's time to get out the thank you cards. We all need to write them and let those we love know just how much we appreciate the caring and generosity. What better way than to send them on a hand made card!
This weeks challenge is THANK YOU cards! I know I need to send you quite a few so I thought I would keep my card simple. So I got out my Gypsy and just did a very simple design.


I picked out some wonderful paper from My Minds Eye and let my Cricut do the work. Oh I mentioned in the video about a funny story and caught my self in an error and forgot to tell you, so....
Hubby and I stopped at CVS to pick up some hairspray. The lady in line in front of me was picking out a Birthday card for someone in your family and when the cashier rang it up the total came to $8.08 and the lady says in a very loud voice "you have got to be kidding! This of course got our attention, I turned to my husband and said aren't you happy that I make all our cards? He replies "that's what I keep you around for!" Can you believe $8 for a card! I send out over 200 cards every year so that is a big savings in our household even if were only $1 per! Okay, I guess I have bored you enough with my silly stories and get back to the business these simple thank you cards. We need to have plenty of them in our stash to let others know how much we appreciate them.
So this week I challenge you to make Thank You Cards! Then Link them up. I can't wait to see what you come up with as I too am always looking for some fresh ideas.
Thank you for your sweet sweet words of encouragement. Your comments always continue to inspire me to share with you.

December 24, 2011

Advent Calendar


Hi Everyone. This is Chris from Get Inspired with ChatterScene. I wanted to thank Sheila for allowing me to share my project with you. I had a bit of Internet trouble and she patiently waited till my issue was fixed. Thanks Shelia!
I had step by step pics but when I got my laptop back they were deleted from my desktop.

For this project I used my new Cinch. I have never used a binding system before so I messed up the one edge but think it still looks okay.

I used the Cricut Craft Room to create the numbers. Using the craft room basics cartridge. The words were cut out with the basics too. The bow is the 3d bows digital cartridge from the craft room. And Santa and his sleigh is from Joys Of The Season.

I do have it glittered up but the glitter didn't show up in the photo.

I hope everyone has a great Holiday and A Happy New Year.

Sheila here, don't you just love Chris' project? Just adorable, and a great lead to this weeks challenge.
This week I challenge you to make something using red, white or green! It can be anything. Just make sure you link it up by 4:00 pm on 12/30 and you could win a stamp set! Have fun and let's see what you can come up with.

Now be sure to leave Chris a little blog love! Merry Christmas Everyone!

December 3, 2011

Christmas Tags & Weekly Challenge

So are you getting ready for Christmas. I know I sure am.... Still working on presents and I need to address my Christmas cards. This weekend I hope to finish my Christmas shopping too. So we are moving right along. This week I mass produced Christmas gift tags.  And I want to tell you I had so much fun with these little stockings. I know I scrap lifted them and I think it was from Emma at My Creative Time basically because of the boa!!! She loves to use them and so do I but it wasn't until I did this project did I realize why I stopped using the feathers..... What a mess and so hard to clean as the little feathers fly all over! But it was well worth it!
Today I have 2 videos. I designed the little stocking to flip open on my Gypsy which is what you will see on the first video. The Gypsy makes everything so easy to design so grab your coffee and let's get to work.


Then for the second video I changed the design as I was out of red 12x12 paper and I wanted something super simple. Now if you are in a hurry and you want to save money this second video is for you! Such a simple design and so fast to put together. If you need to mass produce this is your method. I did 32 tags in 2 hours! That is from design, cut, assembly all the way through clean up. You gotta love that.


This is just so simple! You will love it.

The first thing I did was adhere all the backs on the stockings. Easy-peasy with my ATG.

Then I put a little hot glue on from my glue gun. And I want you to know this is the first time I did not burn myself with it... I am so proud.

 Then I pressed my little pre-cut pieces of boa to each stocking.

 I then added a little twine to each stocking after I punched a little hole in it.

That simple! Now I challenge you to make ANYTHING you need for Christmas and link it up! Anything; Christmas cards, tags, trees, gifts, banners but it must contain red or white... just link it up. This week's winner will receive either a stamp set or a set of monogrammed note cards (winners choice). The winner will be chosen via random.org. All entries will be in by Friday 4PM on December 9th and the winner will be announced Saturday morning the 10th.
Thank you for joining us today. I hope you enjoyed today's post and thank you for your sweet sweet words of encouragement. Your comments continue to inspire me to keep sharing with you.
November 26, 2011

Snowmanlover's Letters to Santa Gift Card Tutoria! Weekly Challenge

Snowmanlover's Letters to Santa Gift Card/Candy Card Tutorial!  


HI! I am Barbara Gornick from Snowmanlover's Paperie! 
I am so very honored to be a Guest on 
Sheila's She's a Sassy Lady Blog!

I am an Independent Stampin' Up! Demonstrator and blog daily, sharing ideas on how to make Cards and fun Paper Projects! I absolutely love my "job" and get to play with paper all day! I reach most of my customers, via my BLOG. I am from the Midwest and transplanted in Dallas, but my customers are from all over the Country! They can either order on my Online Store or become involved in one of my Long Distance Hostess Clubs, Ribbon Shares, Card Kits, Etc. or just enjoy my Blog for inspiration! I love sharing my love of Stampin' Up! and Card Making and Paper Crafts!


I have created a TUTORIAL with 7 different Gift/Candy Cards and a bonus box!


Today, I am going to give you a "Sneaky Peek" and share with you how to make the the 1st Card from my Letters to Santa Tutorial. All supplies featured, are from Stampin' Up! and can be purchased HERE at my store!

I call this my "Snowmanlover Pop Open Card"
It is really super easy and fun to make and is sure to surprise it's recipient! 

First score 1 sheet of 8.5 x 11 Cherry Cobbler Card Stock at 2" and 6 1/4" going down

Next turn the card stock 90 degrees and score at the 8" mark. Where the scored lines meet, cut those out. I have scored them with an "X".


 It should look like this


Next take your 12x12 patterned piece of Double Sided designer paper from the Letters to Santa Designer Paper pack, using the piece with the Santa...

and cut it like this.  The Santa part is 7 3/4" x 1 3/4".
Next cut the side pieces from the extra paper at 7 3/4" long  x 1 3/4" wide

So it looks like this when adhered with tape runner adhesive

Add the "Naughty and Nice" with some Silver Brads

When you flip the flap up, add the other side of the double sided green Santa paper. I cut it at 2x 4 " and placed it on the flap

Now you need to create a "Belly Band" to enclose the card


For the Belly Band cut a piece of Early Expresso Card Stock at 2 1/4" x 9". Wrap around the card and fold as you go and you can also score the lines.
Cut out the "he's gonna find out who's" at 2x4"
Add Silver Brads. Adhere with Adhesive.


To close up your card, close your side flaps, then the fold the bottom flap up and add the belly band around the bottom part


Just tuck a Gift Card inside or add some candy to the outside and tie a gorgeous bow around the card!


All supplies needed for this card:
Letters to Santa Designer Paper #111349
1 sheet 8.5 x 11" sheet of Cherry Cobbler Card Stock # 119685
1 sheet 8.5 x 11" Early Expresso Card Stock # 119686
26 " of Cherry Cobbler 1 1/4" Striped Ribbon $125056
Silver Brads #104336 (optional)
Simply Scored Scoring Tool # 122334 (optional)
All supplies are available at my blog HERE.
Here is another example of my "Snowmanlover Pop Open Card", using another sheet from this darling, Letters to Santa Designer Paper pack from Stampin' Up! I used the sheet with the large ornaments on it. Each package of Designer Paper comes with 12 double sided sheets of paper in 6 designs.


Thank you for stopping by and checking out my "Snowmanlover Pop Open Cards" 


To view more of my Cards, with 6 Other styles, from this Tutorial, please click HERE.


I truly hope you come visit me on my Snowmanlover's Blog, often! I try to update my blog daily and on Sundays, I have a "Simply Sunday" post featuring non craft related topics with yummy recipes and at times just a bit of whimsy!


You can check out some other great Christmas Cards made from more Stampin' Up! Designer Packs and other fun projects by stopping by my Blog! 


Please stop by my Blog HERE to check out my
 Awesome Christmas Give Away!
{thru November 30th!}
Thanks for stopping by and  thank you, dear Sheila! 


This is Sheila and This week I Challenge you to make a Christmas Item of ANY kind and link it up! It must be made of paper. This weeks winner will receive a Personalized Monogramed Note card set (color may vary). All you need to do is click the little link below and follow the directions to be entered in this weeks challenge. You have until 4PM December 2nd to enter your project. I can't wait to see what you made. Barb offered us plenty of ideas and a great tutorial to take off from. I hope you all leave her plenty of blog love and maybe we can get her to come back and visit us someday soon.

Photobucket