Welcome to my fun little site. My name is Sheila, you may know me as Sassy Lady. I am a Chicago transplant to the Birmingham, Alabama area. I like to say I am southern by the grace of God! My blog was started to share with family and friends my love for scrapbooking and of course special moments with those around me. Being an avid scrapper I also dabble in card making as I love to remember people and their special times with a card. Click Here To Read More!
Grab my button for your blog! Copy and paste the text below:
GET $10 OFF DIGITAL SOFTWARE
CLICK PHOTO TO ORDER YOUR SOFTWARE TODAY. YOUR DISCOUNT CODE IS STMMMS32096
Unless otherwise stated within the post, this is my original work or design. You are free to use any of my designs as INSPIRATION for your own personal use. My work is not for use for publication, contest, message board entries or for profit. If my designs inspire you in any way please give credit where credit is due. If you post information about my files to any message board or mail group, please direct users to this blog rather than attaching the file itself. Leave me a comment and by all means post a link to my blog. Thank you!
I bought this set of Etching papers several years ago. I wasn't sure what I would do with them but they looked like fun!
I
I discovered that "Engraving Art" is not just for kids! It is a recognized art form!
Mulit-colored paper is covered with a black coating that can be removed with sharp edges. Various tools are used to remove the coating to create pictures!
I began to develop an idea for using "Engraving Art" on my cards.
Using stamps, VersaMark "Watermark" and gold embossing powder, I stamped an image on the black surface.
Then heat embossed the gold powder to make it permanent.
Now, the fun begins. Using the tools, I removed the black coating within the lines on the stamped image. It is fun to see what colors are under the black coating!
Tip...the color goes all the way to the surface of the paper. The lighter you scrape, the more intense the color. The harder you scrape, the lighter the color!
The black coating will come off. I put my image in plastic before attaching it to the card base. This will prevent accidental removal of the black coating.
This is the card front in plastic before gluing to the card base. This is a Martha Stewart stamp. The printed paper is from DCWV "Trade Winds"
Completed card.
Another card using a Tim Holtz Stamp and DCWV paper "Garden Party".
Tip...When using this technique, it is best to use stamps that have lots of open spaces. Notice, it is difficult to see the image in this card.
I have one more project that I created using "Engraving Art". Please come visit my blog to see another way of using embossing powder and "Engraving Art"
Hi my crafty friends :) Adele here.
Again it is my turn to be Guest Designer at She's A Sassy Lady, Thanks Sheila :)
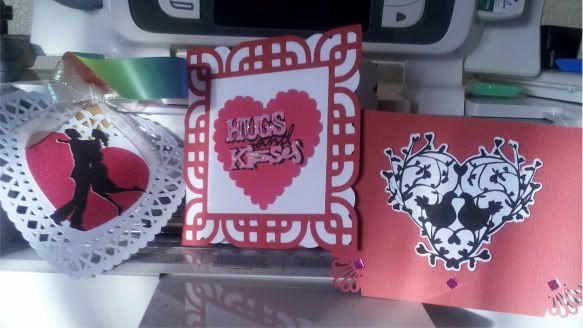
I have a couple of projects to share with you today, one being my Valentine's card co-created with my eldest Grandaughter Monique !! ( Sorry heavy in pictures )
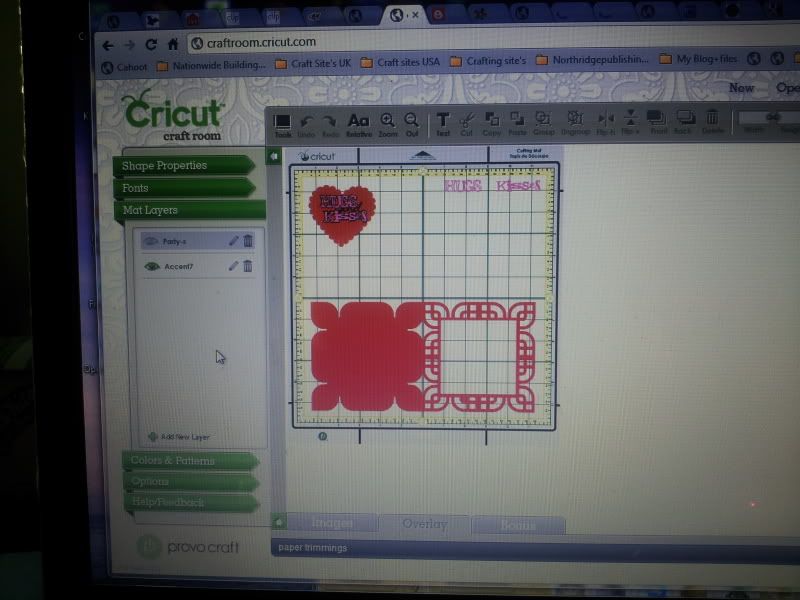
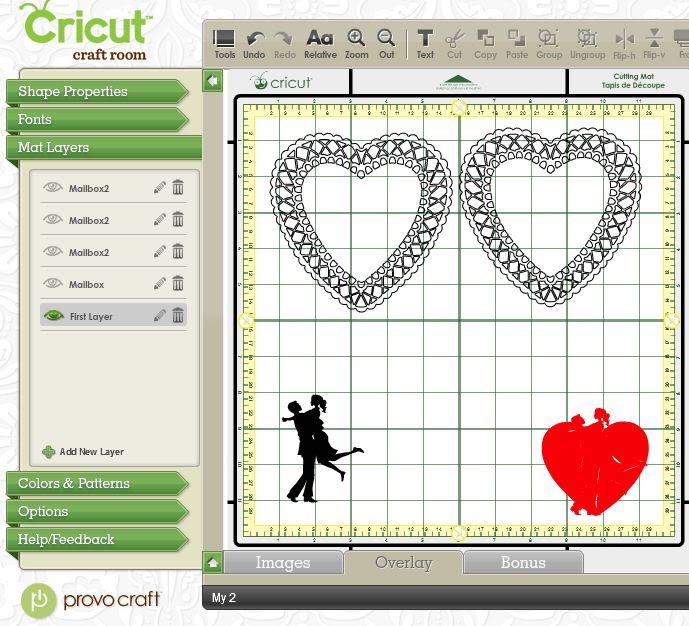
This card was created using Paper Trimmings for the outer part of the card in CCR
I welded Accents5 shape sized at 5.222" to Accents5-S also sized at 5.222"
The Hugs and Kisses Heart was sized at 2.917" all layers combined, Hugs and Kisses were sized at 0.583"
( I did this in two stages, the first was print only with everything removed except the combined heart, the second stage was load everything except the combined heart, back to the mat to print and cut).
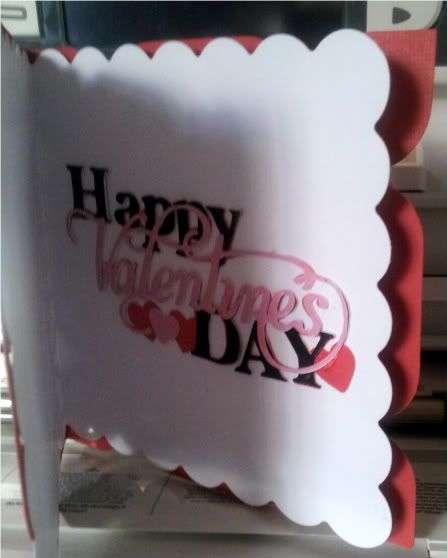
I added all this to a 5"x5" card base, then added "Happy Valentine's Day" sized at 2" with all the layers to the inside, using the Phrases cart,
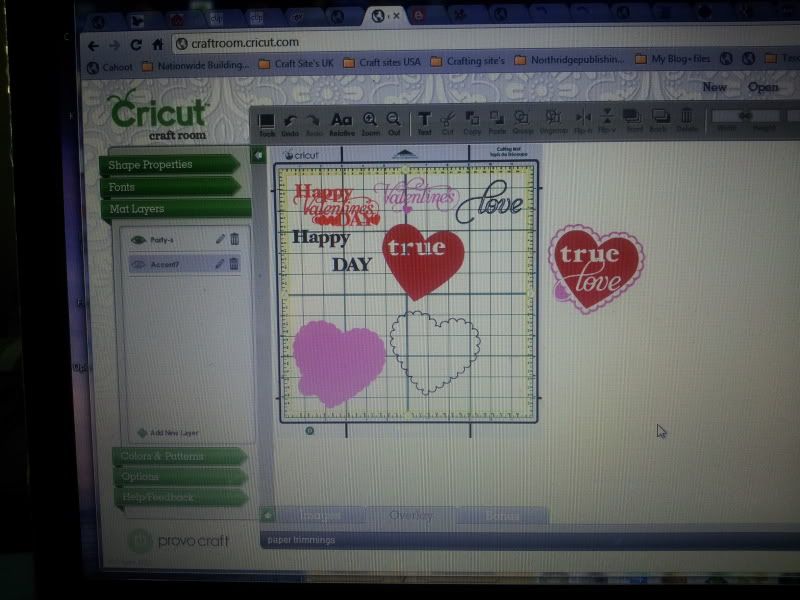
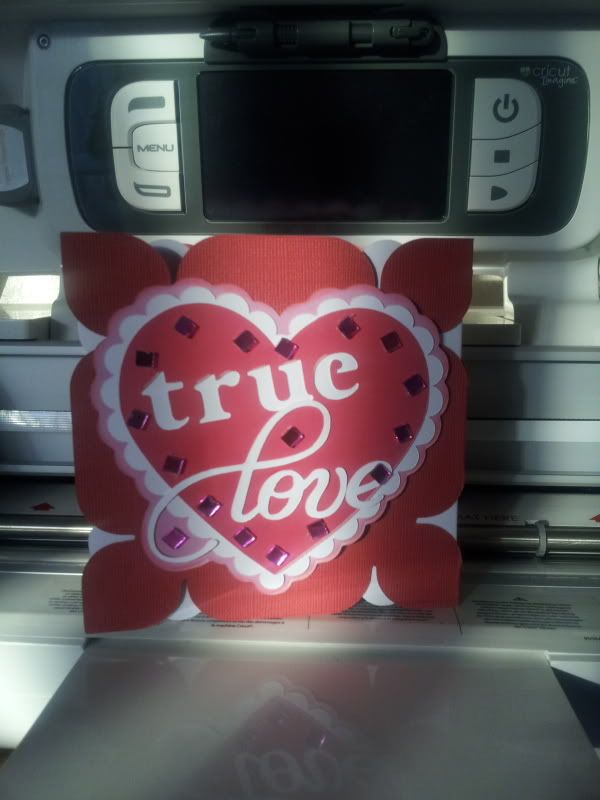
On the back (Moniques' Design) I placed the "True Love" sized at 4.347" also using the Phrases cart.
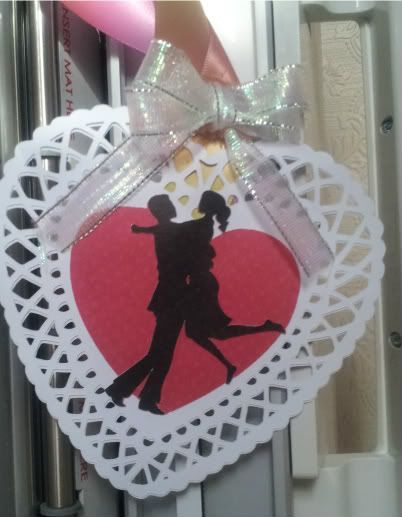
My next project was the Valentine Heart, this was created using the Art Philosophy cart gluing 2 hearts together sized at 5", some ribbon wedged between the two hearts.
The Centre couple are from CCR exclusive cart "Valentine's Sweets" both layers sized at 3"
Finally I wanted to make the cute challenge card that Sheila made a few weeks ago, I wasn't able to do the challenge at the time, due to illness, so here is my card using the template that Sheila shared with us all
I hope you enjoyed my projects, I had a great time creating them :)
With so many of us having an enormous amount of scrap papers/left overs, etc. I have been on a mission to not only use more of my stash, but to utilize the countless amount of scraps I have spread over 3 art bins! With that in mind, I found an idea via Pinterest that popped out at me. Its an easy way for me to use my smaller scraps and cut them into various sizes and place them on a card...best part is this is a simple project even your children, grandchildren or school children would enjoy to put together! It can use scraps for any occasion/theme, because we all know as paper crafters we have paper for every holiday, theme and occasion!
I chose to do a Valentine's themed card which my 9 year old daughter help me to create! We had fun making it to give a little something special to Grandma for Valentine's Day! We used pieces of scraps from last years Valentine's papers. We used some of my CMTH stamps and the Cricut Cartridge Love Struck 2010 for the hearts. Of course what would any Valentine's card be without a little sparkle so my DD chose to put Stickles around the trim of the hearts. To give the strips a little variation, we cut some with ribbon/flag end, some with decorative scissors.
Simple yet easy and fun project for all ages that will get you to use your scraps! Thank you so much for looking!
Well it is about 4 in the afternoon and my guests are due to arrive in just a couple of hours. So I got my dining room table ready by placing a sheet of plastic on it that I bought at Hobby Lobby to protect the table from glue. I then took some Stampin' Up sheets and covered them with a She's A Sassy Lady blog header to make it look pretty and to define each ladies work area.
At each place setting my guests found a little Creative Memories photo holder (I used to be a consultant) to place their finished cards in, my ATC, a little treat bag with chocolate, heart rhinestones and a ticket for a couple of door prizes that will given away later in the evening.
Here are the door prizes, 2 DCWV stacks and a Creative Memories Hexagon punch. And if Kristie were here from Craftin' On My Door she would be snatching up that tulle!
I started by placing Chocolates at the table but moved them into the kitchen with our snacks. Since the space was so limited we kept all drinks and food in the kitchen as to not take a chance of any ones cards getting spilled on. I should have taken a photo of the goodies.... so yummy. We had guacamole and chips, jalapeno jelly on Philadelphia cream cheese with crackers, chocolates and little cakes a delicious punch and even champagne! Um Um um we took many breaks for food!
Here is Charlotte of A Little Bit of Detail and Abby. Abby made here first card with us on her mother Anita's Expression.
Charlotte with her friend Linda.... They have been friends for years, and Linda just got her Cricut for Christmas... wait till you see her first card! Yikes!
Here is Anita on the left, my daughter Jennifer, and Jennifer a good friend of mine, I didn't have a photo of me taken as you already know what I look like.
Now wasn't that fun, you get to see everyone of the beautiful cards we made. I did take a quick shot of each on too for you to see.
This card was designed by Anita.... Sorry to say, I made my little owl body upside down! The inside says Thinking of you. Isn't this just adorable?
My friend Jennifer designed this little Kleenex box holder for each of us using George and Elegant Edges.
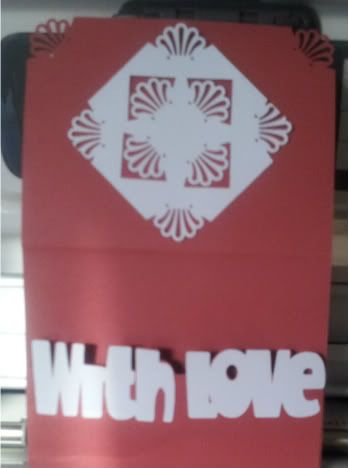
This is a 5x5 shape gate card I made using my Gypsy, George and Gypsy Wandering. The free file is under the Gypsy File tab.
This is another card I made on my Gypsy that the file is available too if you want, just look under the Gypsy tab.
Here is the inside of the card. As you can see it easily holds 2 tea bags in the little pocket. It is so easy to make you will love this card.
This adorable card was designed by Charlotte and is as cute as can be.
This is my little Igloo Penguin Shape card from Create a Critter cart. He is so handsome.
This is Abby's first card ever. I couldn't get over the intricate design. The inside says Valentine Day, but I am not sure which cart she used.
This is a gift card holder that I made using My Creative Time's Die cut and stamp set. Note I used the left over papers from Jennifer's card to make these.
This is my daughter Jennifer's card. She had the idea written down and I designed it on my Gypsy Woman using George, Gypsy Wanderings and the Mickey Font.
This is the inside of the card. It holds candy. She placed 2 bags of Sweethearts candy in it.
This is my friend Jennifer's card. Isn't it great. It says Sweet Wishes on the inside. And I made my card like this signed it and took it to my Mother's the next day for her birthday. Jennifer was kind enough to give me another!
This card just blows me away. It is Linda's card, her very first card. Can you stand it? Well it turns out she is an avid scrapbooker and had the help of her friend Charlotte to show her how to work her new Expression! Love this card and it took me forever to put it together. Everyone else whipped it right out and it too me a long time but I finally finished it. It is beautiful don't you think?
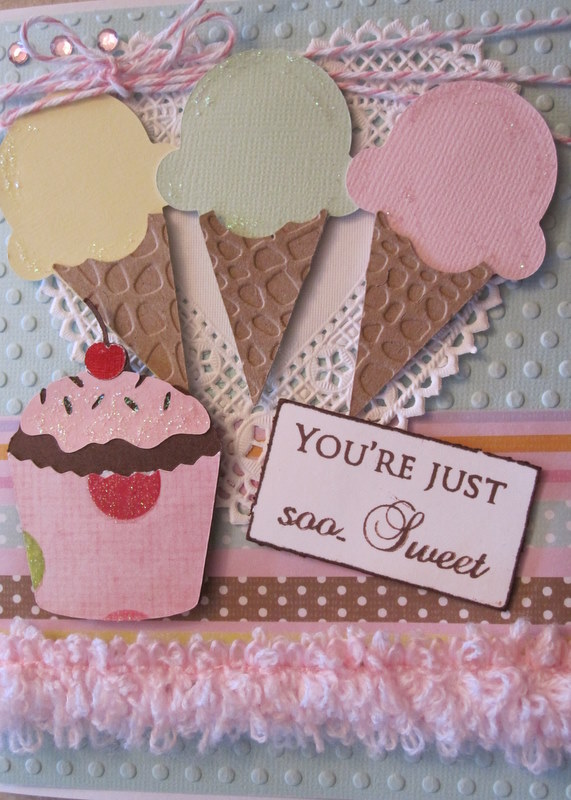
This last card is my favorite. I love all the texture and detail in this card. Charlotte used the Sweet Treat Lite cartridge, fibre, her Cuttlebug, twine and skittles too to make this awesome card. I really don't want to give it or any of the other cards away. That is a problem I have and that is why I usually make two of all my cards, one to give away and the other to admire! LOL
Well I sure hope you enjoyed learning about our little party. We had so much fun and I encourage you to try this with your friends too. I have cards that are so different from what I usually do and I am so thankful as I learned so much from each of the ladies that came, including our first time card makers. Fun Fun Fun is the only way I can sum up our time together. We did what we enjoy doing... Paper Crafts.
I challenge you to make something this week, anything and link it up. Let's see what you make, the only qualifier is you must use paper on the project.... anywhere on the project.
Thank you for joining us this week. Your sweet sweet words encourage me. And your comments continue to inspire me to keep sharing with you.
Hi all,
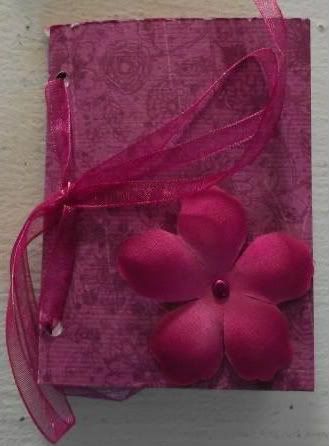
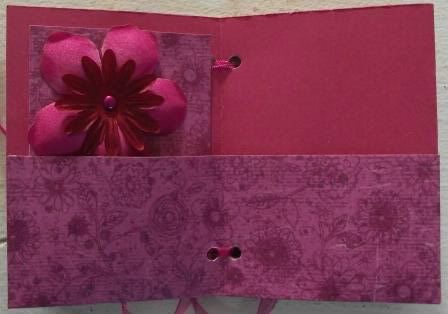
Today I thought I'd share with you a mini album I made. I'm involved in a Round Robin atc swap. We each make a folder and an atc. We then send this onto the next person in the list. We make a atc for each of the folders we receive. Eventually I'll have this one back full of atc's made by the others in the round robin. I found this book here . This is where all of the scoring measurments are. It is made from one piece of 12 x 12 card. Very quick and easy to do.
Here's my sheet of paper. You can see on the left I've already folder over one pocket and I taped the other side ready to fold over. I took this so you could see how this step works. You then fold it up. I then cut holes along the spine of the album and threaded ribbon through to hold it together.
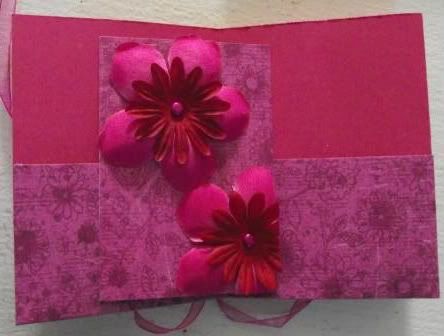
Here is the first two pages and the atc I made. I wanted my atc to match my album. I can't wait to see the other atc's.
Here it is in the first pocket. I hope you have a quick go at this mini album as you could put tickets or photos in the pockets instead of atc's. You could even store stamped images in the pockets. Thanks Sheila for having me today.
Sassy Dude here from Cricut Couple! Well, today is a very important day for a few different reasons. For starters, today is my second day with projects using the adorable new Build a Valentine and Always and Forever stamps recently released by My Craft Spot. It's also Sassy Tutorial Day on She's a Sassy Lady. So... since the schedules crossed, I thought I would just lump it all together and share a simple thing that was lots of fun to create and that I am thrilled with the way it turned out. I made my own background paper using the Build a Valentine stamps!
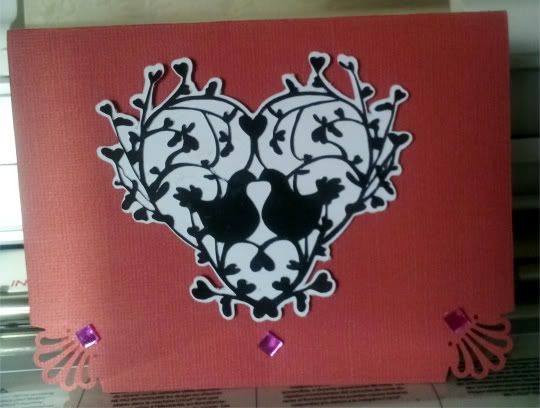
This is the front of the card. I made the background paper. Very simple to do. The trim is cut in black using the Cricut and the Martha Stewart Seasonal Cake Art Cartridge. The floating hearts were punched using a Martha Stewart Heart Punch. You could use your Cricut if you wanted to, but this was just very simple.
I used Twine from My Craft Spot and ran it from the top of the mat to behind each of the floating hearts. I added a little stickles to the edge of the hearts to make them stand out a little bit more.
I stamped the sentiment on the inside and added an extra piece of trim to finish it off.
This is the Build a Valentine set and the background paper. I simply took a 12x12 piece of white card stock and stamped the heck out of it. Hee! Hee! I picked 4 colors of ink. I used the solid heart stamp (larger) and stamped all over the page. I then picked one of the conversation heart stamps for each colored heart. I used black ink and then stamped over the hearts. I didn't want them to be totally perfect, I wanted them to be off a little bit. Perfectly imperfect. Hee! Hee!
Here is a closer shot so you can see how the paper turned out. This was so much fun to do and I will certainly be doing more of this.
For my second card, I had a lot of fun with this one too! This is also from the Build a Valentine set. I immediately had a frog in mind when I saw the "Looking for a Prince" stamp. The frog and crown are from Paisley, The circles are from CTMH Art Philosophy and the thought bubble is from Phrases.
I just popped all of the layers and added glossy accents to the eyes of the frog and on the hearts.
For the inside, I used three different stamps from the set to make the sentiment. So simple!
Now, Kimberly over at My Craft Spot is giving one lucky follower their choice of one of stamp set. You can choose Always and Forever, or Build a Valentine. All you need to do is leave a comment and be a follower of Cricut Couple to qualify, so hop on over and leave us a comment.
Thanks so much to Sheila for letting me play today and Thanks to Kimberly for sharing these great stamps with the world and letting me talk about them on both blogs today. We would love to know what you think of the projects today and we really appreciate you spending time with all of us today!


 I
I