Showing posts with label Close To My Heart Artiste. Show all posts

September 21, 2013

It's About To Get Wild Around Here


Good morning, here is an adorable little card made with Crocs Rule and the Close To My Heart Artiste cartridge that is great for a new baby card or even a friendship card. And it is so simple to make using the CCR or your Gypsy. Grab a cup of coffee and follow along.


Now wasn't that easy?  And you only need two cartridges for a fun little shape card.


Easy to make cards two up using just 1 12x12 sheet of paper for the base and scraps for the balance of the card.

 
Here is a close up of the little croc coming out of his egg. Notice I did ink the edges.
 
 
Finally a close up of our card. Thank you for stopping by today, I sure hope you enjoyed today's post.  Thank you for your sweet sweet words of encouragement. Your comments inspire me to continue sharing with you. Have a blessed week.

September 14, 2013

I Feel Like A Slug! Artiste S Fold Card


Hello my friends, I just can't wait to share this cute little card I made this week. I am having so much fun using all my Close To My Heart carts and stamps and this week is no different. This particular card boast a set from The Stamps Of Life.
You see I am having a card party in two weeks so I keep trying out cards trying to decide what to make..... Well I will show the card party card next week, as then all the cards will have been turned in for the party.


Now wasn't this just too easy. I love cards like this as I go through so many cards and I like to keep my stash full of all types of cards so that I am ready for any and all occasions.


Here is the back of the folded portion of the card and all I had to do was stamp it!


And the sentiment lined up with the front of the card making it look like it was just a little shadow.

 
Don't you just love his little google eyes? I feel like a slug.
Love it. Hope you enjoyed today's fun little card and you too take advantage of all the wonderful cuts found on the Close To My Heart cartridge sets with over 700 pieces of art on each one!!! And all simple to use.
Thanks for your sweet sweet words of encouragement. Your comments always inspire me to continue sharing with you. Have a blessed week.

July 27, 2013

Making The Artiste S Fold Card On CCR


Shh, don't tell anyone but I am showing you a card made from a stamp set not yet released!!! So shh, don't tell Amy at May May Made It that I am showing it off! I am so excited to spend some time with you making this adorable card from the Artiste cartridge.... it was so easy on CCR I just had to share it with you. Once the base of the card was done I had the hardest time figuring out how to decorate it as I have so many beautiful stamps, just like most of you do too. But this little bee was just too cute to pass up so hang in there I understand Amy will be releasing them soon.


Look what a little glitter and Glossy Accents do to this adorable stamp. Don't you just love him?


See how easy it is to make your card on CCR... I know, I know I talked alot but it has been a week since I spoke with you!!!


I find that in card making or scrap booking it is the little details that set your project apart. Taking time to ink, stamp, glitter or even stickle really adds life and dimension to your project. This video shows you how to add glitter that won't fall off.


In this video I change the card up a little offering you 2 different ways you can put this card together. I love how beautiful both turn out, don't you?


Here is the second card and it is all ready to stamp a sentiment on it if I need to or I can just leave it as is and write a little note on the inside of the card. I just love working with these stamp set as they really add life to the card.
Thank you for joining me today. I know this was a long post but there are so many things you learn from it that will save you time in the long run. Thanks for your sweet sweet words. Your comments inspire me to continue sharing with you.

July 20, 2013

Just A Simple Thanks A Bunch & The CTMH Artiste Cartridge


Hello there. I am so excited as I got a little craft time in. Monday is my day to get the house clean and the laundry done... you know I was little Miss Suzie Homemaker! Well I just made a simple little card using the CCR and my Close To My Heart Artiste cartridge.... I just love the simplicity of making these little cards. The height is 4.25 and in just 1 cut I made the card with the matching envelope.


With Close To My Heart anytime you spend over $35 they give you the option to purchase the stamp of the month for only $5, a $17.95 value! I just love that and that is what this stamp is from; June of 2013. Each month it is different and sometime I just order goodies just to get my stamp set! I know that is silly but I just love their little sets.


I know that was a little long but I honestly never noticed the time as I was busy sharing with you! Besides I hadn't colored anything in a long long time!


Look at these papers, I used a My Minds Eye for the envelope and the card was made with a basic white that I used Tim Holtz Antique Linen distress ink on. I stamped the flowers and sentiment and then matched the colors of the flowers to the envelope and they now look like a matched set.... Don't you just love having ink and markers!


Then I got out my Stickles and had fun coloring in the little flowers with my CTMH Markers so again it would match the glossy envelope! Love it!


Here is a final close up of the card, I just love it don't you? I sure hope you enjoyed today's post today and take the time out of your busy schedule to create something too!
Thank you for your sweet sweet words of encouragement, your comments inspire me to continue sharing with you! Have a blessed week!

April 25, 2013

Pattern Paper Buttons


Hi! Leah from Paperblossoms here to share with you how you can make your own pattern paper buttons.  All the buttons in my card were made using this tutorial so let's get started!


First you'll need to cut your buttons out of pattern paper. You can use a die or your Cricut. I used my Cricut and the Artiste cartridge page 46 to cut my buttons at 3/4". You will also need some VersaMark ink, clear embossing powder and a heat gun. I tried using Ultra Thick embossing powder and really didn't like the results. It made the paper have a very yellowish tint after embossing and muddied the pattern of the paper, so I used Clear Detail embossing powder instead with much better results.


To get a more defined button hole especially when cutting them out with your Cricut, I used a 1/8" hole punch. Then you coat the top of each button in VersaMark ink by lightly pushing them into your ink pad.


Tweezers come in very handy for the next couple of steps. Now that your button is covered with ink you coat it well with your Clear Embossing powder and then heat set it. I then immediately poured more embossing powder over it while it was still hot as the powder will stick to itself and heat set it again giving it two coats. Then set aside to dry.


After you get them all embossed you have some fun buttons to use on a project! I chose to make a baby card and added some embroidery thread to each of them. Even though the pattern paper is fairly light weight, the addition of the embossing powder actually gives the buttons a bit of stiffness and I didn't find any trouble using the thinner paper. I hope you'll give it a try! Thanks so much for joining me today. :)

February 4, 2013

Be Mine Card

Hello and Happy February!!!  

This is Lori from ScrappinMyStressAway and I am in Valentine mode as I am sure most of you are!  I am so excited to be here at She's A Sassy Lady today!!

I bought my CTMH Artiste cartridge from Sheila and I LOVE it even more than the CTMH Art Philosophy cart!!  I was at a crop last weekend and saw some of the z-fold cards that are on this cart (from the CTMH vendor) and I was inspired instantly!!!!

I saw the cuts in the booklet and could not picture what they would make or look like (I am a visual person)!!

All of the function buttons on the "S" key are z-fold cards with different cut out shapes.  Naturally, I picked the heart to work with.  I sized two card bases to 5 inches.

NOTE - I created a file on my Gypsy with all of the cards and coordinating shapes so I would not have to hunt the next time I want to make one.   I labeled my file cards.artiste.

You can easily cut out the card base once and go with it, but I wanted to layer some paper on.  I cut one card out of red cardstock.  The other is a 2-sided paper from the Carta Bella Devoted Paper Kit paper.

It is super easy to fold the card in half and then fold the front half back.  There are score marks to guide you.


I trimmed off the front flap out of the Carta Bella paper.

 In order to create a red mat, I trimmed a tiny bit off of the sides.  I adhered it to the front of the card.

On Layer 2 of my Gypsy I placed the shapes I planned to use on the card.  I wanted one more card layer so I copied it onto this page as well.

I put "Be Mine" sized to 1 inch on my mat.

The hearts are sized from 3.20 to 3.47 inches.

I put white and black cardstock and another double sided paper from Carta Bella and cut them out.

I ended up using the back side of the cupid paper.  I inked the white heart with black and adhered the "Be Mine" sentiment.

Here you can see how the heart seems to move when you open the card.

Two patterned papers on one project is as many as I am comfortable with!!!  I left the heart red but added a Recollections white paper flower, red button and some twine.


What a fun card!  I can't wait to make the others!!!

Thank you Sheila for having me over today!!!


January 24, 2013

Valentine Pillow Box Owl


Hello! I am so happy to be posting here and want to say thank you to Shelia for having me:) I'm Leah from Paperblossoms and for my project I wanted to share with you my process for making a sweet pillow box owl. I think this would be the cutest Valentine project or for birthday favors or just a cute just because gift. Let's get started!

I chose Kraft as my base color and used my Art Philosophy Cricut cartridge from CTMH to cut the pillow box. The cut is found on page 28 and I cut mine at 6". My favorite adhesive for boxes and such is Scor Tape as it's no wait time for drying and it holds really, really well.  I scored all my lines and after adhering it together you get......

this :)  Now we are starting to get to the fun part! Now you want to cut all the fun details that will bring your little owl to life.

For the scalloped borders I cut them using the Art Philosophy cart again, page 65 cut at 1" two times. I looked through some different cuts for my eyes and found these in the Artiste cartridge (also CTMH) and realized that if you didn't turn them to be scary, they are sweet, scalloped eyes. The eyes are found on page 77 cut at 1" with the Real Dial Size ON.  The heart,, which is for the owls feet, is also from the Artiste cart, page 66, cut at 1" with the Real Dial Size ON. Finally, for her little beak I just hand cut a small triangle out of the same paper that matched her feet.

I wanted to not have all the elements be flat, so to get some more dimension I just took a round tool, you could use anything...a pencil, pen, etc. and curled the heart, which are the feet, and after trimming all the scallop borders down to the size to fit across the box that will make the feathers, I curled them too.

Once everything was curled I was ready to start assembling all the pieces onto the pillow box. For the feet I glued them to the bottom of one end of the box being sure to leave the scalloped part of the heart hang over to give kind of a perching effect.

Next, I adhered the scallop borders for the feathers. My favorite adhesive for things like this is Scotch Quick Dry Glue. I find mine at Target or Michaels.

Once the eyes and beak are glued on you have a very basic owl. But, she looks a little naked to me ;) So I got to work on all the fun embellishments of some ribbon, flowers, a button and what girl can go without some sparkle?!

This little sweetie is going to my daughter for Valentines day filled with some fun treat. I hope you enjoyed the process of my pillow box owl! I think they would be just as cute if made up for a boy....which I have two of so I'll be working on those next. Thanks for stopping by! hugs.....

January 1, 2013

A Happy Sassy New Year!


Happy New Year!!!

Lori here from ScrappinMyStressAway and I am excited to spend my New Year's Day with you at She's A Sassy Lady!!!

Normally, my January Sassy post features my hand made Thank You cards.  This year I thought it would be more fun to share my goals for 2013 instead.

My Crafty Goals for 2013 are:

1. Find the rest of my mojo!!! It broke with my wrist and I have gotten some back. I need to seek out challenges, blog hops and classes to rejuvenate!!


2. Finish Tyler's High School Album before his Graduation Party!!!


3. Reinvent my scrapbook style - I am feeling a little stale and very cricut dependent!


4. Seek out DT opportunities that match my talents and goals.


5. Conquer my fear of creating videos and learn how to edit!!


My Personal Goals for 2013 are:


1. Clean and organize my closets.


2. Clean and organize my scrap nook.


3. Worry less.


4. Smile more.

5. Stay healthy.


I did not get to clean out my closets, storage room and scrap room last summer because I broke my wrist.  I got a jump start the few days before Christmas and shredded 3 boxes of old paperwork - which felt GREAT!  I cleaned out the storage room - so I need to KEEP it clean!!!


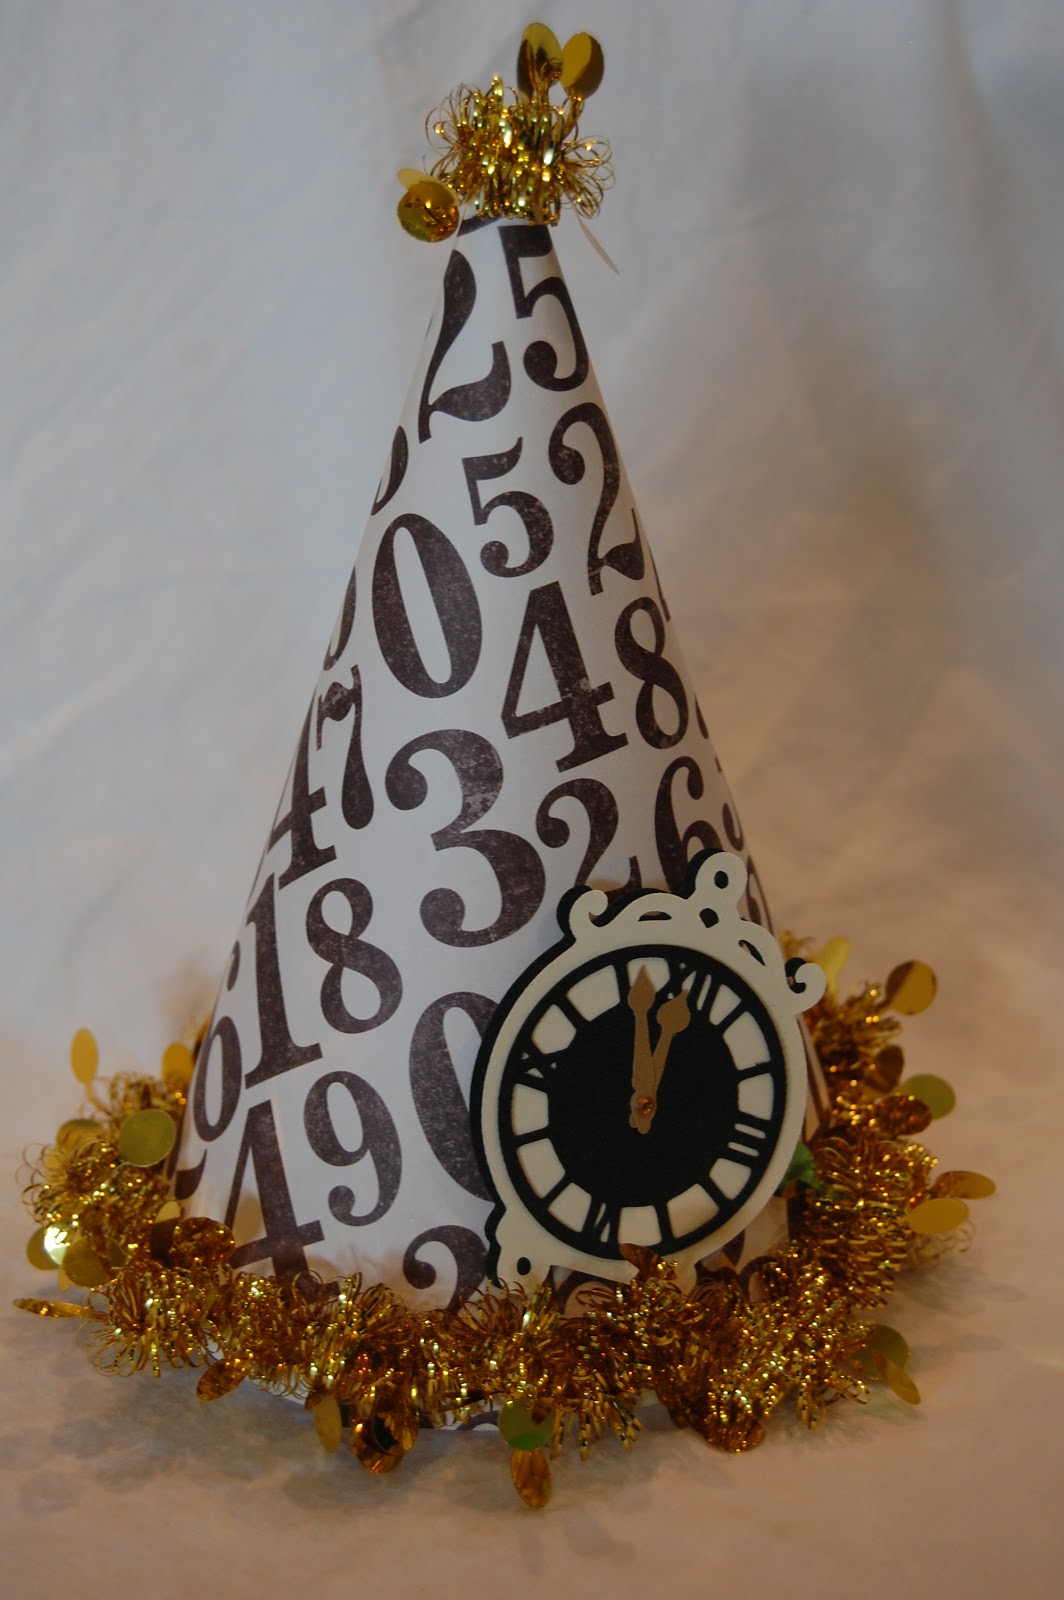
And Finally, I have a New Year's Eve Party Hat to share with you!!


Isn't this a fun hat!!  I found the inspiration for this (and the photo at the top of my post) on Pinterest!


I used this party cone from the DC Comics Batman cartridge.  I sized it to 8.06 inches and rotated it -30 to fit on the 12 x 12 mat.


I used this number paper from Michaels because it reminded me of the countdown to the ball dropping!


I was going to use crinkle ribbon around the edges of the hat, but found this fun gold trim at Michaels and thought it was even better!!


I used Glue Dots to adhere the trim to the top and bottom of my hat.  I kind of gathered it as I glued it down to give a little bit of flair (as opposed to just wrapping it tight around the bottom of the hat).


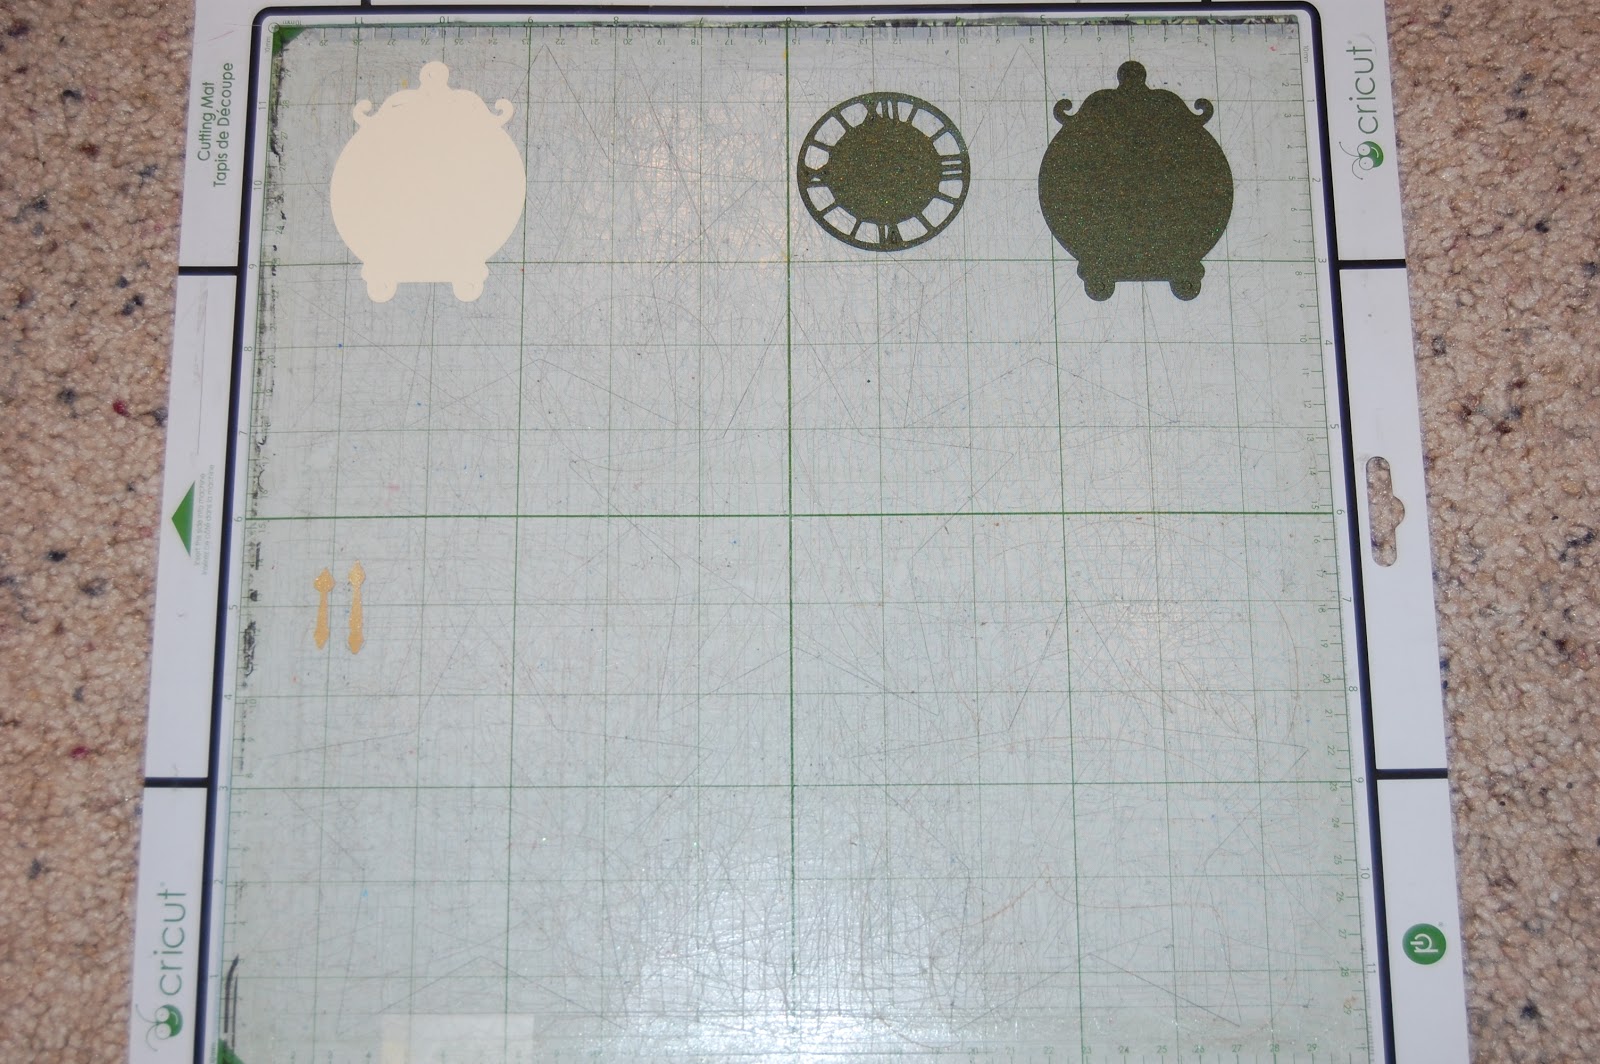
I found the clock parts on Close to My Heart Artiste and sized them to 3 inches.


I cut them out in cream cardstock, black glitter cardstock and gold cardstock.


I cut out the clock shape in black glitter as well as cream.  I offset the cream on top of the black to give a partial shadow.  I stuck a gold gem at the bottom of the hands.  I pop-dotted the clock onto the hat.


Here is my party hat!!


I hope you have a wonderful 2013!!!


~Lori