September 29, 2012

My September Haul


Good Morning! I was out of town again this week but I did get this wonderful package in the mail so I thought I would share it with you. I shopped on line for all my Christmas paper and just can't wait now to get started on making my cards. I sure hope you like the goodies I chose!
First I want you to know I went shopping at Close To My Heart. I scheduled an on-line party for my self as I knew I was going to spend over $200 and that enables me to get some free goodies. And I don't know about you but I am always there for free and discounted crafting goodies. The video will show you exactly what I got and I hope you enjoy the papers I pick out as much as I do. I figure if you like it so will the people that recieve my cards.


Now don't you just love all the goodies I got? If you want more information just hit the contact button and I will get back to you.
Thanks for joining me today.

September 28, 2012

Penny Black

Hi all,

I thought today I'd share with you some Christmas cards I've made. I know it's not Christmas yet, but I needed to make a start. They all use a Penny Black image. I love the snowman. The papers are from Dovecraft. The dies are memory box ones. The snowflake punch is a woodware one.


Well I hope you liked my Christmas cards. Thanks Sheila for having me today.
I'll also have some fab news to share soon.

Kelly x
Kelly's Crafty Place

September 27, 2012

Fall Favorites Card...

Hey Ya'll,
Sassy Dude here from Cricut Couple today with a fun card project for you. I am sorry, but even with a brand new laptop, I can not get my Gypsy files transfered so that I can share them, but I wanted to share the card with you today, just the same.
I used the "Fall Favorites" stamp of the month for this design. It's still available for a couple more days. It's my favorite fall stamp set to date and lots of fun to color. If I could figure out how to use markers, I would probably love it even more. Hee! Hee!
For the scarecrow, I cut a label shape from CTMH Artiste cartridge. It's just a basic shape. I also used a label shape from the same cartridge for the pumpkin stamping on the inside and that's it with the cricut. Everything else is cut with a straight cutter and punch.
I stamped the image with chocolate ink and then used my colored pencils to color all the details. I stamped the word "fall" twice. Once with Olive and once with Autumn Terra Cotta. I cut out the "a" from the terra cotta one and then popped it in the center of the word. I used a straight cutter and cut out a rectangle and then used a rounded corner punch for the corners. The border on the bottom is also stamped repeatedly with chocolate and then colored in the same way as the scarecrow. I also used a border punch on chocolate card stock to make the lacy border on the bottom. For the piece behind the scarecrow, I simply stuck the scarecrow on the paper and then used the straight cutter to cut a 1/4" border around the edge. Then used the rounded corner punch on it as well.
I added a couple of just regular silk autumn leaves behind the word fall. The rest of the papers are from a recollections paper stack that I got a Michael's last year.
For the inside, I just added another label shape with pumpkins stamped and colored the same way as above. The entire card and all layers are edge inked with Autumn Terra Cotta as well.
Well, I hope you enjoyed today's project. I was hoping to have something a little more advanced than this, but time has just not been something I can get my hands around lately. Hee! Hee! Thanks so much to Sheila for letting play again today.

September 26, 2012

Altered Lamp


Hey everyone! 
It's Candy here from Candy's Craft Corner!
It's my day to share a project with you here at She's a Sassy Lady! 
Thanks so much Sheila for having me!
I want to share with you a lamp that I altered to match my craftroom. I purchased the lamp and shade at Walmart. I got out my glue gun,bling and lace and got to work. 
Plain white lamp from Walmart. Kind of  boring.
Shade purchased from Walmart.

Glued the lace to the top and bottom of shade.

Cut long strips of bling mesh and glued to top of lace. I always burn the edges of my bling mesh with a lighter. I hate those little pokey things!
Here is my finished lamp. All decked out to match my room. I actually made two of these. I just love how they turned out. Hope you do too.
Thanks again Sheila for having me!
Take care,
Candy

September 25, 2012

Personalized Dog Leash


Hello Crafty Friends,
Sherri here from Sherri's Crafty Place
First I must start by thanking Sheila, for letting me share my project with you today, I needed to pick up a new leash for my puppy, Lola....I couldn't really find anything I liked.....so I went with a black one knowing I could pretty it up with some vinyl,
so with my Gypsy and my Expression this is what I came up with,
using some Cricut Pink Vinyl, and some Zebra Vinyl from Vinyl Couture, 
LOVE IT Zebra Vinyl!!!!
 so using a plain retractable leash
and my pink and zebra vinyl, cut at 3,3,3....blade speed, pressure and depth  
and my tweezer bees....a must have for working with vinyl... 
the Letters are from Birthday Bash and the polka dots are from Plantin Schoolbook

 here is the new leash for my puppy Lola....it was a bit plain so I added some polka dots...
and here is my 9 month old puppy Lola sporting her new leash...
Thank you so much for stopping by today, I hope you enjoyed my project, and next time you see something that isn't quit what you want...maybe you could just add some vinyl.....
❀Sherri❀

September 24, 2012

Small Halloween Banner

Hi there!

Since this is my first post on She's A Sassy Lady, allow me to introduce myself.  My name is Ian and I am from A Newbie Crafter.  I have worked with Sheila on other blogs and she recently asked me to join the design team for She's A Sassy Lady.  I could not be more excited to join this design team.  There are so many talented individuals on the team that hopefully my work will measure up to theirs.  I have been crafting since January of 2011 and have never looked back.  Crafting is a chance for me to turn off the world for awhile and craft away my stress.  Anyway, I'm rambling, so I'll get onto my project for the day!

For today's project, I made a very quick and easy small banner for my front door.  In my apartment, I'm lucky to have a window in my front door.  For the longest time I have wanted to put something in the window to welcome both myself home, and friends to my apartment.  Recently I fell in love with Imaginisce's Monster Mash line.  If you haven't seen it yet, it is so cute!  I went a little overboard and ordered all of the items that come with the Monster Mash line.  Below is my completed project.


I took one of the 12x12 pages and cut it into 5"x5" squares.  I took the die-cuts that were already printed in color and cut out, and pasted them in the middle of the 5"x5" piece of cardstock.  For the "happy Halloween" sentiment, I cut the same patterned paper at 5"x8" so that I could center the sentiment.  (That's fun to say:  center the sentiment).


Once I had all die cuts glued down, I took purple sparkly ribbon from my stash (I believe I got it from Michael's over a year ago), and placed it in the center.  To adhere it to the back of the cardstock I used packaging tape which will give it a firm grip.


I'm really excited with how the small banner turned out.  It wasn't anything back breaking but it sets the tone for Halloween which is coming up soon!  Hope you are preparing for it as much as I am.

Craft on,
Ian

September 22, 2012

Gypsy Made Simple - Christmas Tags - Making Multiples The Easy Way


Missed you the past couple of weeks while I was taking care of a few family issues. The issues are still there, as they are not going to change for a while. So we are just going to keep moving along, maybe a little bit slower than normal but we're going to keep Gypsy made simple going.

Well it is that time of year again where we are making multiples galore for our Christmas Cards and tags. And our little Gypsy is the perfect little tool to make your life easier. So go grab a cup of coffee and turn your Gypsy on so we can get some work done.

I am partaking in a Christmas Tag swap with designers from The Bug Bytes and She's A Sassy Lady and I have 15 tags to make. Only the first 15 to join became a part of the swap. Well I am still undecided and not sure if I am using this tag for the swap or for my gifts here at home, but either way they are great little tags and cute as can be.

I used my new CTMH Artiste cartridge for the tag and had to make it to the correct dimension, 6 1/4 x 3 1/8. That was the easy part. I then just made duplicates and cut my papers. I also used the little penguin on the Create A Critter cart and set up pages according to the size. Please watch the video so you will understand how it works.


Now wasn't that easy? You can do it too and I can't wait to see what you do do with your multiples!


I Challenge you to make a tag for Christmas and mail it to me. Be sure to sign your name on the back and list your blog if you have one. I will share these tags the first Saturday in November so all tags must be received by the 15 of October to make this date. Send to:
Sheila McShea
3005 Stonecreek Trace
Helena, AL 35080
Note tags will not be returned unless you send a self addressed stamped envelope to send it back in.
Thank you for joining us today.

September 21, 2012

Hello Fall Frame


Hello my friends, it's Lisa from Lisa's Craft Room, taking my turn to design for you today. Thanks Sheila for having me again this month. :) I decided to make a Fall frame for my mother. I started out with a plain wooden frame I purchased some time ago at AC Moore.


I painted it with Acorn acrylic paint.


I popped up the leaves with dimensionals. The pumpkins were stamped first, then I stamped them again on patterned paper, cut them out and paper pieced them on top of the stamped image. I did the same with the wagon. I love that wagon, I think it is so darn cute. I added Peachy Keen Everyday Character faces on three of the smaller leaves. The sentiment was stamped on white paper, then punched out. I inked around it and popped that up with dimensionals.
 Thank you so much for taking the time to stop by. Have a wonderful weekend. :)


September 20, 2012

The Colors of Fall

Hello everyone.  I am Charlotte from A Little Bit of Detail and thrilled to be sharing some of the colors of fall with you.  The card I have made is 6.5" X 5" on an ivory base.


The background mat is kraft paper that has been embossed with the Spellbinder's M-Bossibilities folder "Flora, Flora, Flora".  I inked over the embossing with a little olive, bronze and brown ink.  The pumpkin is a cut from the Smiley Cards cartridge  and inked with bronze and mustard ink.  


The two sunflowers are cuts from the Flower Shoppe cartridge, which happens to be one of my favorite cartridges.  I added leaves made with a Martha Stewart punch.  The little sunflowers are from Recollections at Michaels.  


The sentiment is from a Scrappy Mom's stamp set.  It is inked in Momento's Rich Cocoa.  I just love making cards in fall because I think the colors are just beautiful.  And, it just happens to be my favorite season.  I am so glad you visited today.
Charlotte


September 19, 2012

Cuttlebug, Cricut, and Baby Wipes!

Did you know that baby wipes are a great substitute for handmade paper?  Have you ever had a box of baby wipes that dried out before you could use them?  Don't throw them away!  Tear the edges, ink the edges, crinkle them up, and use the dried sheets just like handmade paper!

SERENITY!
 
This card was created using a sheet of dried baby wipes as the torn background!
Not only does it give the illusion of handmade paper, but it has a pleasant fragrance, too!
The base for the front is a piece of 5 inch x 7 inch
patterned paper.
The next layer is a dried baby wipe, torn around the edges, and then inked in the center and around the edges with
 Colorbox Chalk Ink.
The blue oval frame is a Cuttlebug emboss/cut folder "Carly".
The frame is glued to the front using dimensional tape
to give depth.
The birdhouse is an image from Cricut Lite Cartridge "Botanicals".
The birdhouse is adhered with dimensional tape.
The roses are cut from the Close to My Heart Cricut Cartridge
"Art Philosopy"
The butterflies are from the Cricut Circle Exclusive Cartridge "Paper Trimmings"
The leaves are from a Cuttlebug Quilling Flower Set "Daisy"
To add interest to the birdhouse, I glued it to some fibers. Then cut away the extra fibers. I also colored the little house with Copic Markers.
The stamped sentiment is from TPC Studio "Faith Greetings"
More roses and flowers were added.
A little blue bird sits atop the bird house. Notice the fibers are slightly pulled out the opening.
 
Hello, from Carolyn's Creative Corner!  Please visit my blog for more details about this card that was created for an art inspired challenge!


September 18, 2012

Smell the Roses.

Hi everyone, its Karon here from Karon's Krafty Korner and that time of the month for me to share a project with all our friends and followers here at She's A Sassy Lady. I hope you are all having a good week so far.

I'm currently loving this Recollections paper called Timeless, and my 8" by 3" card bases. After all, I am trying to use up my stash of pre-folded cards.


The first layer was cut at 7.75" by 2.75", and the second 6.75" by 1.75".  I wanted to show more of the bottom layer on this one. I inked all the edges of my layers with Tim Holtz Distressed Ink, Tea Dye.

The flowers are from the Art Philosophy cartridge, (page 69, Font Shift) cut at 3" and 2.5".  Its the first time I have actually got round to using this particular flower and I'm really pleased how they turned out.  I added a small pearl dot in the centre of each flower, and I have used glimmer mist on the flowers but it doesn't show up in the photo.


The leaves are also from the Art Philosophy cartridge (page 43, Branch 1) cut at 3" length.  I embossed the leaves with a stylus to make them look a little more realistic.

The sentiment is from the CTMH stamp set that came with the Art Philosophy cartridge.  The layers for the sentiment were cut at 3.25" by 1.25" and 3" by 1" and I popped this up using foam dots.


A little bow to finish off the card and I promise to have something a little more exciting next time :-)

Have a great day everyone and thanks for stopping by.

Happy crafting.

September 15, 2012

Gyspy Made Simple - Making Multiples

Shhhhh, don't tell my friends or Charlotte over at A Little Bit Of Detail, but this is my card for my Friday the 13th Card Party! Isn't he just too cute? Well is was so easy to do, thanks to my Gypsy Woman and I thought I would just take a few minutes and share with you because so many times we need multiples. This card will make 9! Yes I did say 9. I needed 7 for the party and I made 2 extra for my stash. I had to chuckle because after I put my card together on my Gypsy I saw Edna at Create With Expression and the Cricut Magazine had featured this card also... see great minds!
Let's get to work and make this card...


Now wasn't that easy? If you need a refresher on shape cards just go to the Gypsy tab at the top of my blog and you will find it under one of the Gypsy Made Simple tutorials. I thought it would be best if I shared this as we really need to take full advantage of the Gypsy and start designing more that 1 object at a time. Personally I think it is easier to make in multiples as you only have to choose the paper one time! It takes me longer to choose paper that to make the silly card!
Now let's get this card put together...


Another easy make. I was going to flip the video like Stacy from Love That Bug said but then I realized I kept turning the papers for you to see and they would have been upside down so I left it. I still like this angle though as you can see much better what I am doing. Be sure to tell me what you think as I do this for you and not me. Click for the IGLOO FILE or PENGUIN FILE.
This week I challenge you to make multiple cards all of the same design and link them up! I can't wait to see what you created. Be sure to tell me in the heading of your link how many you made.
Well I hope you liked today's post. I sure had fun making these cute little cards and I hope the ladies will like them too. Thank you for your sweet sweet words of encouragement. Your comments continue to inspire me!

September 14, 2012

Ohh! Scary Little Ghosties!

Hi all! This is Jeannie with Nonnasscraps. I am so excited to be back over here  as guest today. I am always so humbled to be here.


I saw these adorable ghosts in the September 2012 issue of CardMaker magazine and I knew I had to do something with them! Since I subscribe to the digital edition it was easy! I chose the page on my I Pad and sent the PDF page to my printer. I then took the print-out and scanned it, creating a .jpg image on my computer. From there MTC took over and it helped me bring this cuties to life!

4 x 8" cardstock base (to create a 4" sq. card)
1-4" square orange cardstock
1-3.75" square purple cardstock
1-3.5" square black cardstock
6" square white irridescent cardstock (ghosts)
6" square black cardstock (ghost backing)
Embossing glue
Stampendous Kaleidescope Embossing Powder
Hampton Art "Outlines" Stamps (from Michaels)
September 2012 issue of Cardmaker magazine

1. Import the graphic for tracking. I used the default settings and it traced well.  


2. I had a few spots to clean up (note the green circles). With the cut selected, I chose break from the menu; I could simply click on the bits that I did not want and delete.


3. I then duplicated this little guy. I have my settings circled in green. Click on apply.


4. I chose one image and selected the icon to blackout the image. This will become the black backing for the white ghost.

5. Select both images and duplicate for a total of 4 cuts. 


6. I then chose one set and (ghost with eyes and blackout) and decrease the size 1/4". The larger ghost is approximately 2 3/4" long.

7. I arranged the cuts so that I would be able to mat a 6" square on the top and on the bottom. In that way I can cut the ghosts from the correct color -- at the same time! 


8. I layered the squares in this order: 4" orange, 3. 75" purple, 3.5" black. I then stamped the sentiment and the web with the embossing glue. I sprinkled the powder and heat set it. The final step was pop-dotting (is that a word?) the ghosties in their spots. 

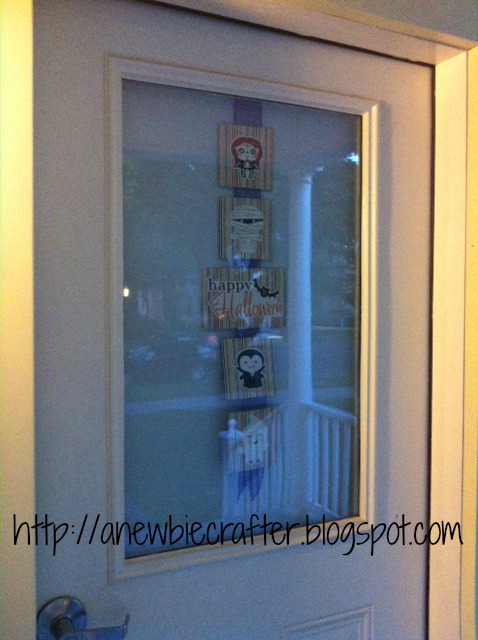
Ohh! Scary little ghosties! Have a Boo-tiful month!