Showing posts with label Gypsy Wanderings. Show all posts

May 19, 2015

CUPCAKE SHOPPE BIRTHDAY CARD

Hello fellow crafters! Grace Baxter here, and I am happy to share my latest card design. I call this one my Cupcake Shoppe birthday card.

Cupcakes and birthdays naturally go together. But how about an entire Cupcake SHOPPE!


Cupcake Shoppe Birthday Card, collage by Grace Baxter

Rather than make a flat card front, I decided to add a sweet awning to the shoppe window.


I had in mind a particular striped paper for the awning. This one reminds me of the striped canvas sling lawn chairs my Dad used to enjoy. And this striped paper looks exactly like that style.

I might just have to make a few of these to have on hand. Once I figured out the best way to make the awning, the rest was easy!


Inside

For the inside verse, I used one of my own poems. This one is a general verse that works for either male or female recipients. (Click the top picture collage for details.)


Cupcake Shoppe Birthday Card front, by Grace Baxter

Cartridges Used

Gypsy Wanderings - awning and bakery window ledge
Straight from the Nest - cupcakes


Cupcake Shoppe Birthday Card, 3D awning, by Grace Baxter

I hope you enjoy this card project.

Be sure to drop by my blog for more
inspiration on other themes!

gracenotes4today.blogspot.com


November 25, 2013

Pumpkin Z- Fold Card

Hi everyone,
  Sandy here from A Working Mom's Joy and Scrapbook Blessings Club, I am so happy to bring you a short tutorial today. Thank you Sheila for letting me be a part of this awesome blog!

  I am one of those people that "Christmas" and Christmas crafts don't start for me until AFTER Thanksgiving, lol.  So, I am still in fall/harvest mode (even though there is snow on the ground and hubby is outside stringing up the lights). With that, I have a very easy card fold that with a touch of Fall to share with you all.

  So here we go... I made very easy pumpkin card very easy using the Cuttlebug, embossing folders and the Cricut E2.  Starting with a regular A2 card but you will fold the top flap in half and back, just as shown below. This will give you a "z-fold" card.
 Second, pick out you pattern paper for matting and a couple of pumpkin die cuts. They were cut at 1.50" using the Cricut E2 from the Gypsy Wanderings however there are over a hundred different pumpkin Cricut images to chose from.

Now adhere you mattes to your cardstock. These were cut at 5.25 x4" and 5.25 x2".

-Using the Cuttlebug and three different folder, emboss you pumpkins
-Brown ink (any would do) and a dauber need to ink the edges of your pumpkins
-Add pop up foam tape to the back of your die cuts

 When you adhere her die cuts to your card, you will only adhere to the left side top panel.

 To finish it off, you can add a sentiment ( I kept the outside blank, to add my sentiment to the card when I need to actually use it. That way this card can be for different fall occasions).  Using a stencil, I drew a couple of line leaves to fill the blank space.

Here it is open. To keep with the line leaves, I just did a simple handwritten line sentiment to the inside panel.

Once again, thank you Sheila for letting me share a very easy quick and fun card for you readers.

October 1, 2012

Halloween Dangler


Happy October!!!  I am super excited to be here at She's A Sassy Lady today!!  This is Lori from ScrappinMyStressAway and I have this fun 3D Halloween card to share with you.  I saw a birthday card that was similar to this and just had to figure out how to create it!!  Since Halloween is my favorite holiday (not to mention today is October 1st) I just had to Halloween-ify it!


I started with a rectangle with a rectangle window from Gypsy Wandering.  I put two on my mat sized to 5.5 inches.  I welded them together.

  I copied and pasted another set on my mat because I needed three of these pieces to make my card.


I used some K and Company Halloween paper to cut the cards out.


I scored each card at 3.5 inches and creased the fold.


This is a view from the top of the three card pieces scored and folded.


I cut out these phrases from Happy Hauntings in black cardstock.


I adhered one phrase on each side of the card at the bottom.


From the Pumpkin Carving cartridge, I cut out two each of the witch, bats and haunted house out of lime green, purple and black cardstock.


I adhered the pieces together with twine in between.  I used stickles to create eyes for the bats and to color the moon.

I adhered the cards together one side at a time.


This card can also be used as a center piece!

I hope you have a wonderfully spooky Halloween month!!

September 12, 2012

Easel Framed Card

Hi Crafters :)

Today I'm sharing my post here at Sheila's blog and at my blog

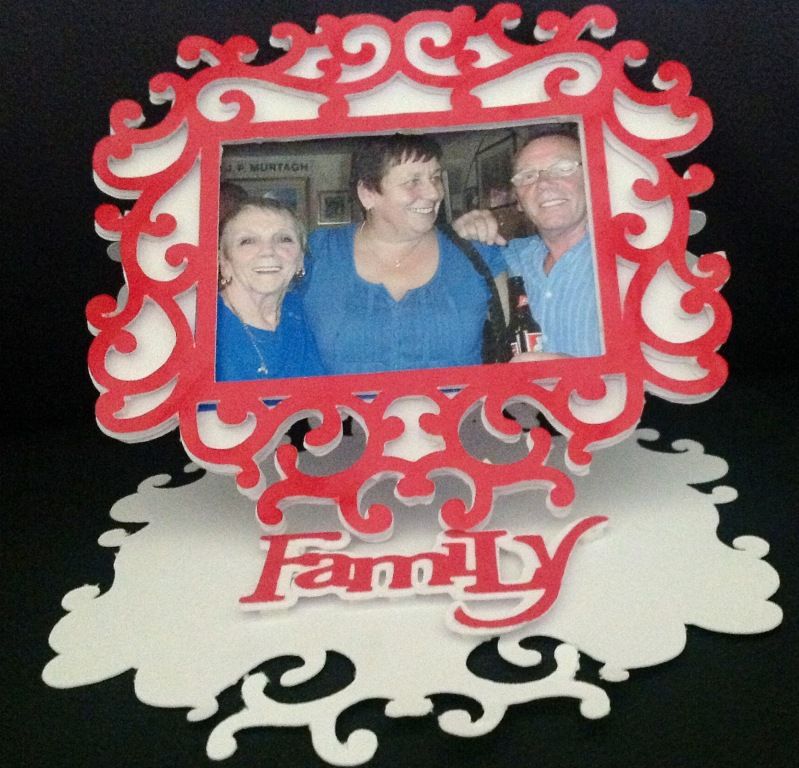
I just recently had a Family reunion in Brighton, my eldest brother came down from Scotland to join us, we had a blast as we hadn't seen him for years, so I wanted to make a special card for my Mum, it's an easel framed card I designed using Fancy Frames as my base, with the phrase from Gypsy Wanderings.


This card measures 5" x 5.5" , it holds a 3.5" x 2.5" sized photo.

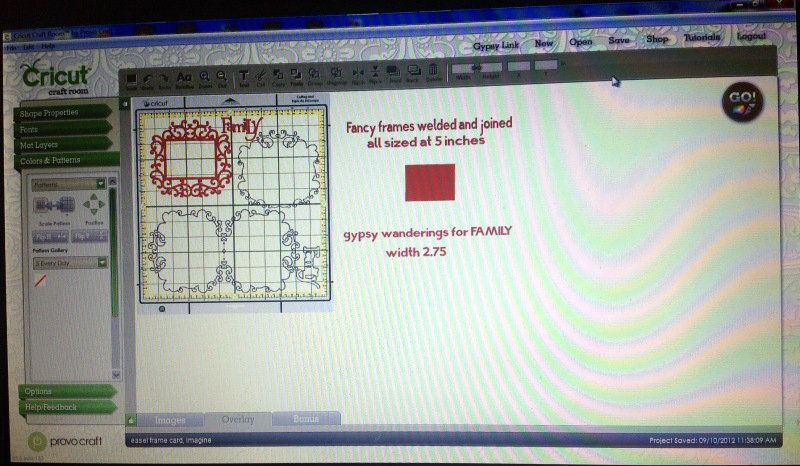
All the frame cuts were set at 5", 2 shadow cuts were flipped and welded together to form the base.
The "Family" phrase was cut at 2.75" wide, from GW

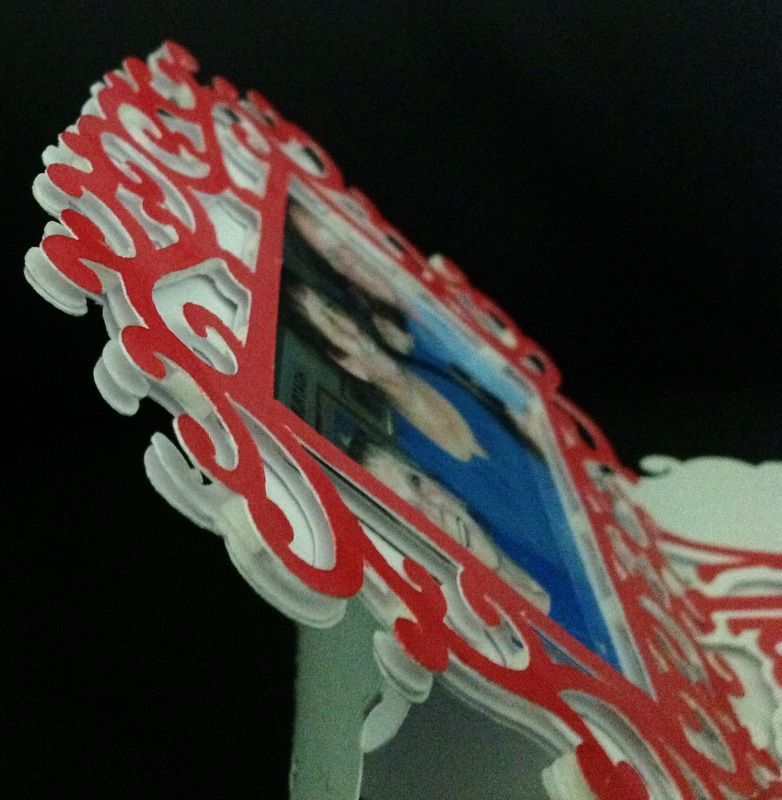
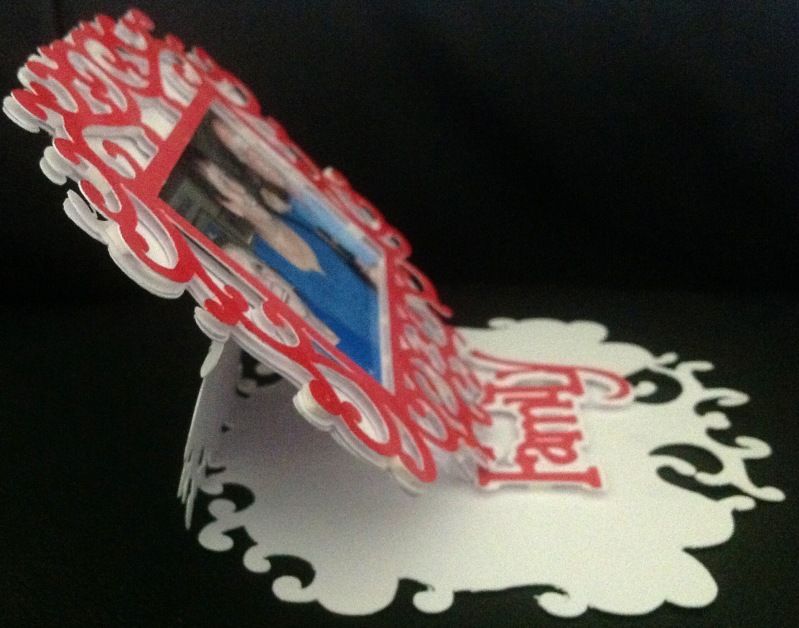
I used foam pads (pop dots) to adhere the frames together, then adhere my picture to the back of the opening, next I adhered the assembled frame and picture to my shadow frame, then glued the bottom half of the shadow cut to the folded card frame.


I also used foam pads on the phrase to give the dimension needed to be used as a stopper when the card was erect.


My Mum will love this card with her, my eldest brother and his wife :)

Because of my poorly eyesight right now, I used CCR to design in, though I have made the file available in the Gypsy format too, for those that want it, the files are below

Gypsy file can be downloaded HERE   (Expression mats used)

CCR file can be downloaded HERE  (Imagine mats used)

Thanks for popping by today and thanks Sheila for allowing me to share my DT project with you all :)

Happy Crafting

Hugs

Adele

June 17, 2012

KISS Teapot Card

Hi Crafters :)
Adele here from adelescricutcreations

We are keeping things simple ( in Sheila's words "Keep It Sassy Simple ) :)

So..on to my KISS project, this little card was very quick to make
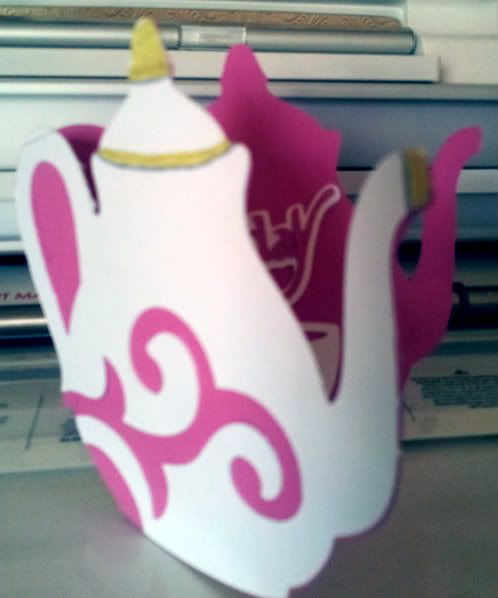
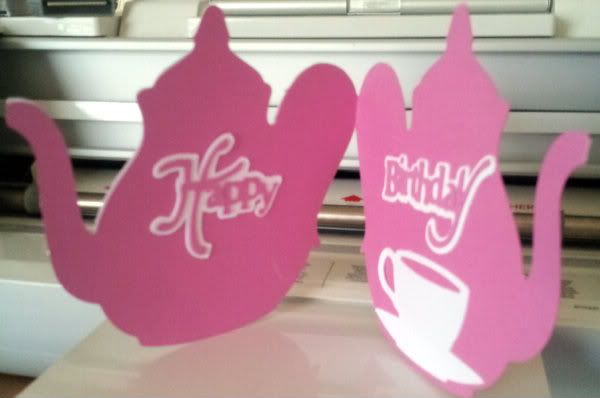
My Sister just loves tea, so with that in mind I made this Teapot card from Damask Decor & Gypsy Wanderings


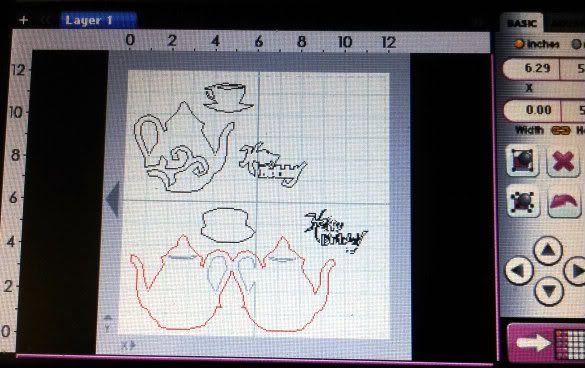
Here is the Gypsy Screen, nice and simple :)


The base card was made by welding two "Layer1" teapot's together, (one flipped)  from Damask Decor.
These are tiny so were sized at 15.35H and 5.20W

The top layer for the Teapot was from key feature "Card", this was sized at 4.18H and 4.70W
The cup was cut at 11.04H and 2.80W another tiny one from key feature "Layer2" I didn't use the "Shift" for the shadow layer though it is on my Gypsy screen, it is sized at 9.11H and 2.77W.

I then switched to Gypsy Wanderings and got the "Happy Birthday" sentiment, the shadow was cut at 2.00H and 3.21W, using "Phrase & Shift", the layered part was cut at 2.00H and 2.94W


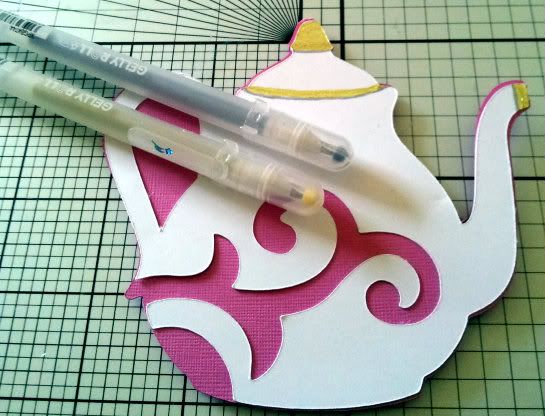
I added a gold glitter Sakura gelly roll pen to enhance the lid and spout, with silver to add highlight's  the final card measures 4.5" x4.5"


My card was complete but I want to show you another thing I made, not sure what I'll do with it yet but hey...it was fun making it LOL!!

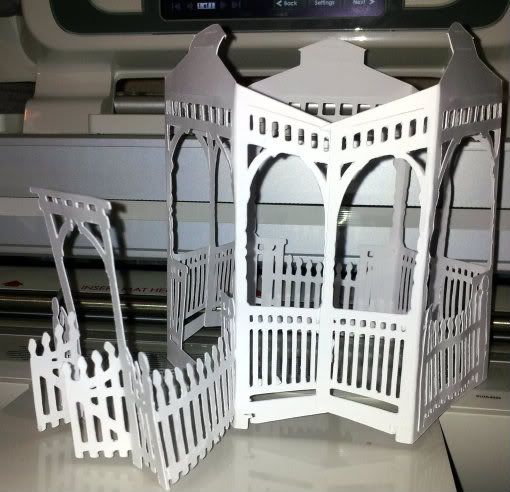
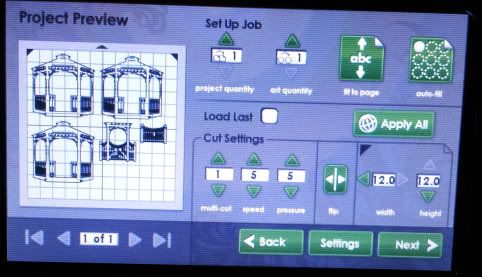
This was using 3 Gazebo pieces joined together with 3 fences and a gateway from Spring Cottage cart


This was the last time I got to play with CCR as it has stopped working for me at the moment, so had to revert to showing you a screen shot from my Imagine direct.

Well that was my KISS project for this month, I hope you manage to get time to make a quick project yourself

Thanks for stopping by

Happy Crafting :)

Hugs

Adele

April 15, 2012

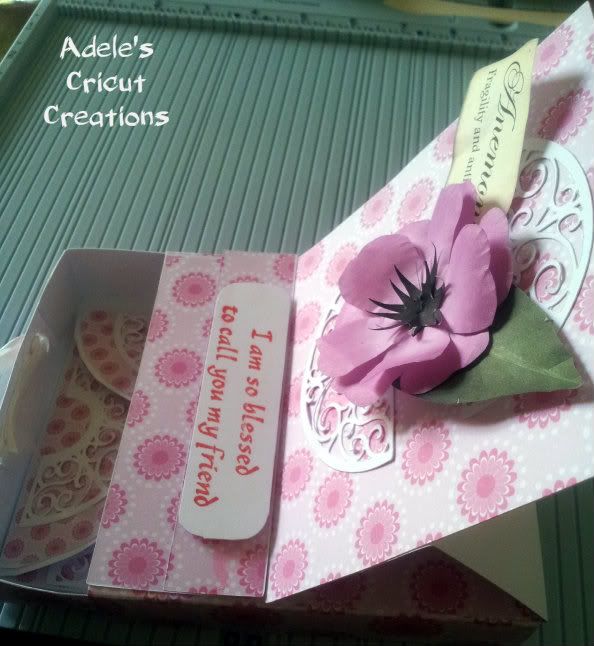
Easel Drawer Box & Card


Hi Crafty Friends, Adele here
Today is my turn to guest design here at She's A Sassy Lady
Thanks Sheila :)

Today's project is an Easel Drawer Box, I made this design in CCR & on the Gypsy so for anyone that would like these files, I shall put them at the end of this post.
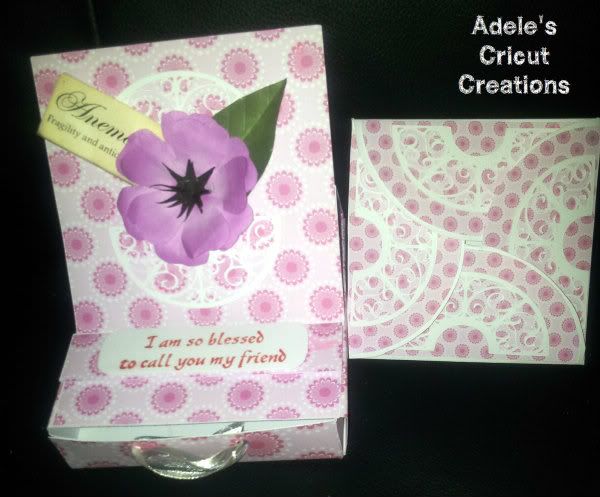
So, here is the Easel Drawer Box


This includes a 4x4 square folded card to fit inside the drawer.
You will need the following card stock

Drawer Box
6.5" x 6.5"  for the drawer
4.5" x 12"  for the wrap of the drawer

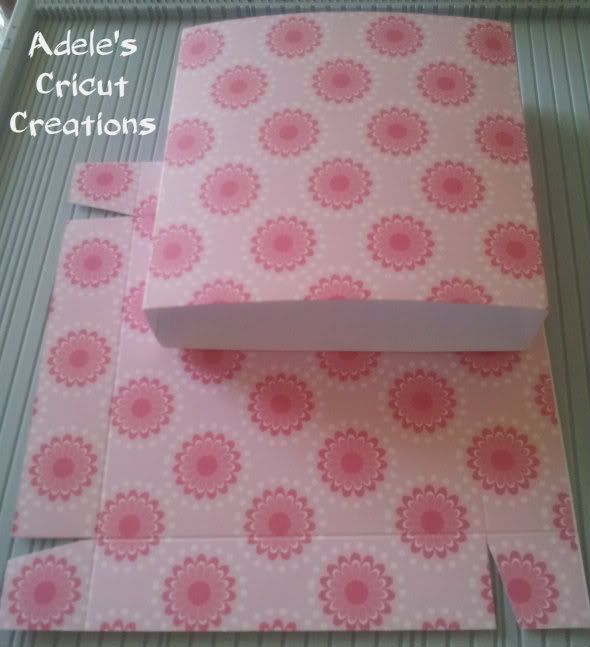
Score the drawer 6.5" square card at 1" around all 4 sides, 
cut a small triangle into 4 edges to form the tabs, glue together.

Score the wrap 12" at the top, at the following marks on a score board
1.1/8", 5.5/8", 6.3/4", 11.2/8" 

(If using a Crafters Companion Ultimate, then use the "box base" side to score the following)

Score at 1", fold then push this fold to the right edge and score again at 4.5", fold and push this fold to the right edge and score again at 1", fold push to right edge and score at 4.5", fold, push to right edge and score at 1"
This forms the wrap for around your drawer base


Now on to the Easel Card, for this card you will need the following card stock


Easel Card

4.5" x 9" for the card, score at 2.25" & 4.5"
4.5" x4.5" for the front panel
4.5" x 1" for the stopper bar.

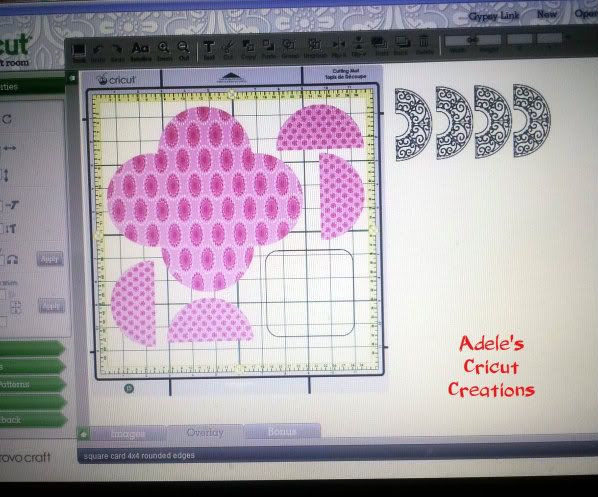
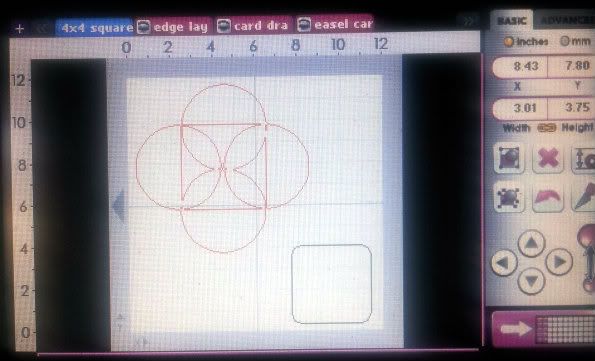
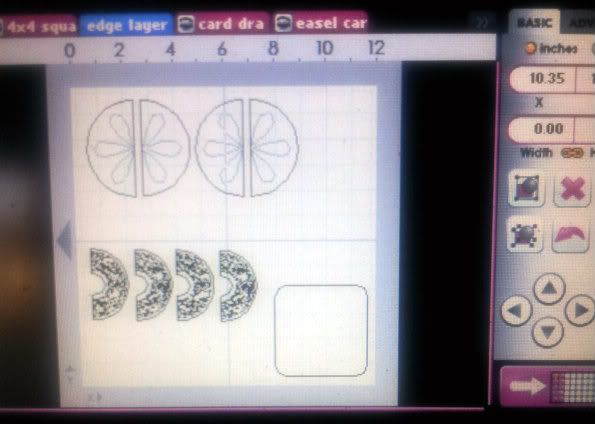
I used Gypsy Wanderings, Ornamental Iron, George & All wrapped up for decoration and the semi circle panel pieces ( using the hide contour feature on Gypsy wanderings grapefruit)


Here is the Gypsy view


This is how the 4" x 4" card should look after adding the semi circle panels and the Ornamental Iron decorate pieces to the underside of the card.


And this is how it should look when folded


Now, on to assembling the Easel Card to the drawer box
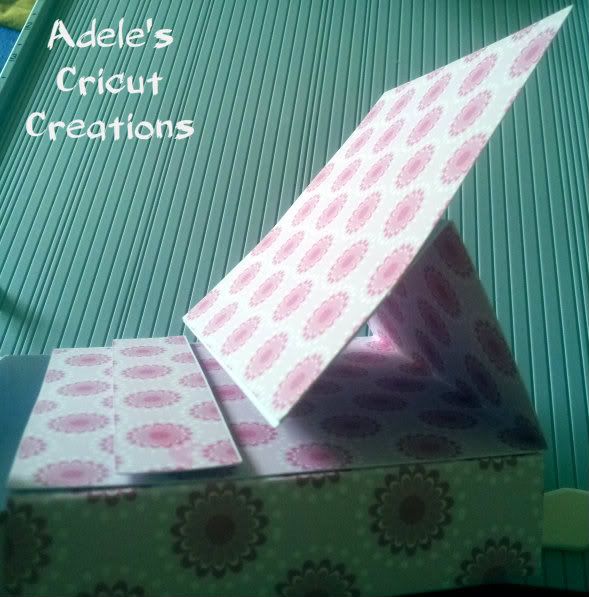
 With the 4.5" x 9" card attach it to the top of the drawer wrap and fold the easel part so you can attach the front easel panel, add the stopper bar too, as shown below.


Now it's ready to decorate :)


I have made several of these in various sizes, they are so handy for so many occasions, here is a few I have made recently, using Heartfelt Creation die's as well as my cricut.


Sorry for such a long post but I thought the detail would help others recreate these.
Here are the links to my files


Thank you so much for having me again Sheila.

I hope you enjoyed this project, I certainly had fun creating them :)

Happy Crafting

Hugs

October 24, 2011

It's A Boy

Hey y'all! Happy Monday! Aymee Gandy of 'A Scraphappy Southernbelle' here with you on this gorgeous fall day to share a little card I made. I hope all of you had a wonderful, relaxing weekend! Did you enjoy it? We had perfect weather here, great football games, and a lot of relaxation/play time with our new Yorkie puppy. It was a fabulous time!

Anyways, I have created a card for my brother and sister in law. As you may already know, they are expecting their second baby in April. Well this past week we found out that they are having another boy!!! Carter (that's my nephew) will have a baby brother!!! My whole family is so excited to welcome this new little one into our lives! I can't wait to meet him! To congratulate them on finding out that it's a boy, I decided to make a little card to send out. Instead of going with the traditional blue tones of baby boy cards, I wanted to switch things up a bit and went with a mixture of lime greens and grays. I hope they will like it!

I used my Cricut Gypsy to design the card and cut it out on my Cricut Expression. This was a very easy and fun card to create. I had it finished in a little over an hour, so not too bad. Here is my project:

"It's A Boy" Card

Supplies Used
Cardstock: The Paper Studio, Bazzill Basics Paper
Patterned Paper: First Edition Paper
Twine: My Craft Spot
Button: The Paper Studio
Pearls: Queen & Co.
Glitter Glue: Stickles (Ranger Industries), Eucalyptus
Electronic Cutter: Cricut Expression (Provo Craft)
Software: Cricut Gypsy (Provo Craft)
Cartridge: Gypsy Font, Gypsy Wanderings, New Arrival
Adhesive: Helmar
 The outside shape of the card is from the Gypsy Font cartridge. The bottle in the background is from the Gypsy Wanderings cartridge. I added a little twine bow/button combo to glam up the bottle just a tad.
 This border is from the Gypsy Wanderings cartridge. I used pop dots to pop it up for added dimension. I then added some Stickles for a bit of bling.
 For the inside of the card, I cut out the same shape that I used on the card front in coordinating papers. I then cut out my sentiment from the New Arrival cartridge.
 I finished off the back of the card with more coordinating paper and my custom stamp.
I hope you have enjoyed this card and that it will inspire to get crafty today! Thanks for stopping by the Sassy blog! We sure have enjoyed having ya! Enjoy the rest of your week!

Happy Scrappin'!!!