May 11, 2015

Wood Wedding Sign

Hello!!  May is a month of celebrations!!  Mother's Day, Graduation, Birthdays and Weddings.

Lori here from ScrappinMyStressAway with one of my very favorite wedding gift ideas.  I made this for my friend to give as a gift.

I used my Silhouette Cameo to design my stencils.  I cut the heart, name, date and LOVE out of vinyl.
I painted some turquoise chalk paint on my wood sign blank.  The sign is made from old fence boards.  I then used a stencil to paint the heart using a maroon paint.  I used my electric sander to distress the paint a bit.
Next, I placed the words and date where I wanted them using clear contact paper from the Dollar Tree and my Pampered Chef scraper.
I slowly painted with white paint.
As soon as I finished painting, I peeled vinyl right up.  Any imperfections are ok as I will sand and distress the sign again when the paint dries.
I love making personalized signs!

Thank you for having me on your blog today Sheila!!!

May 7, 2015

Graduation Owl

Hey everyone....It is Sonya here today from Sonya's Paper Trail and I thought some of you might be needing some inspiration to make graduation cards this time of year.  Our babysitter (probably our last one, based on how quickly my son is growing up) is graduating from high school this year and I wanted to make her a special card in her school colors.  

This is what I came up with:


I love this super smart owl cut from the Silhouette Online Store.  I made one small change to it.  Instead of cutting out tiny black spots for his eyes, I simply used a black gemstone.  So very much easier and it adds just a tiny twinkle to the owl's eyes.

The patterned paper is by MME and is from the "Remarkable" stack.  That paper pad is just full of fabulous designs.  I know it will be put to good use!  The various cardstocks I used are by SU.

Are you making graduation cards this year?  I love making them, such a wonderful milestone to celebrate!

Have a fantastic day!

May 5, 2015

Cute As A Button

Isn't this adorable! I am 3 weeks late on the SOUS Challenge with this layout, but I don't care!!!! Their button challenge was the inspiration for this layout. This is also a qualfier for Frosted Designs Button Challenge. This is our little Gavin and he is a hoot. I think he is going to be the class clown or grow up to be a comedian! He looks you right in the eye and says... "HaHaHa" and as soon as you laugh he just cracks up with laughter! We were waiting for dinner to be put on the table and he was as happy as could be with his little HaHaHa.
This is my layout.... it sure doesn't get easier that this does it? Cut twice and ready to go.
I had so much fun with this layout and tried to keep it as fun as Gavin. Buttons are kind of fun to work with as they come in almost every color size and shape. I just used what I had on hand.


The papers are from DCWV, the Cafe stack. After I started cutting I added the orange page from another DCWV stack. I really think the orange mad the page pop.
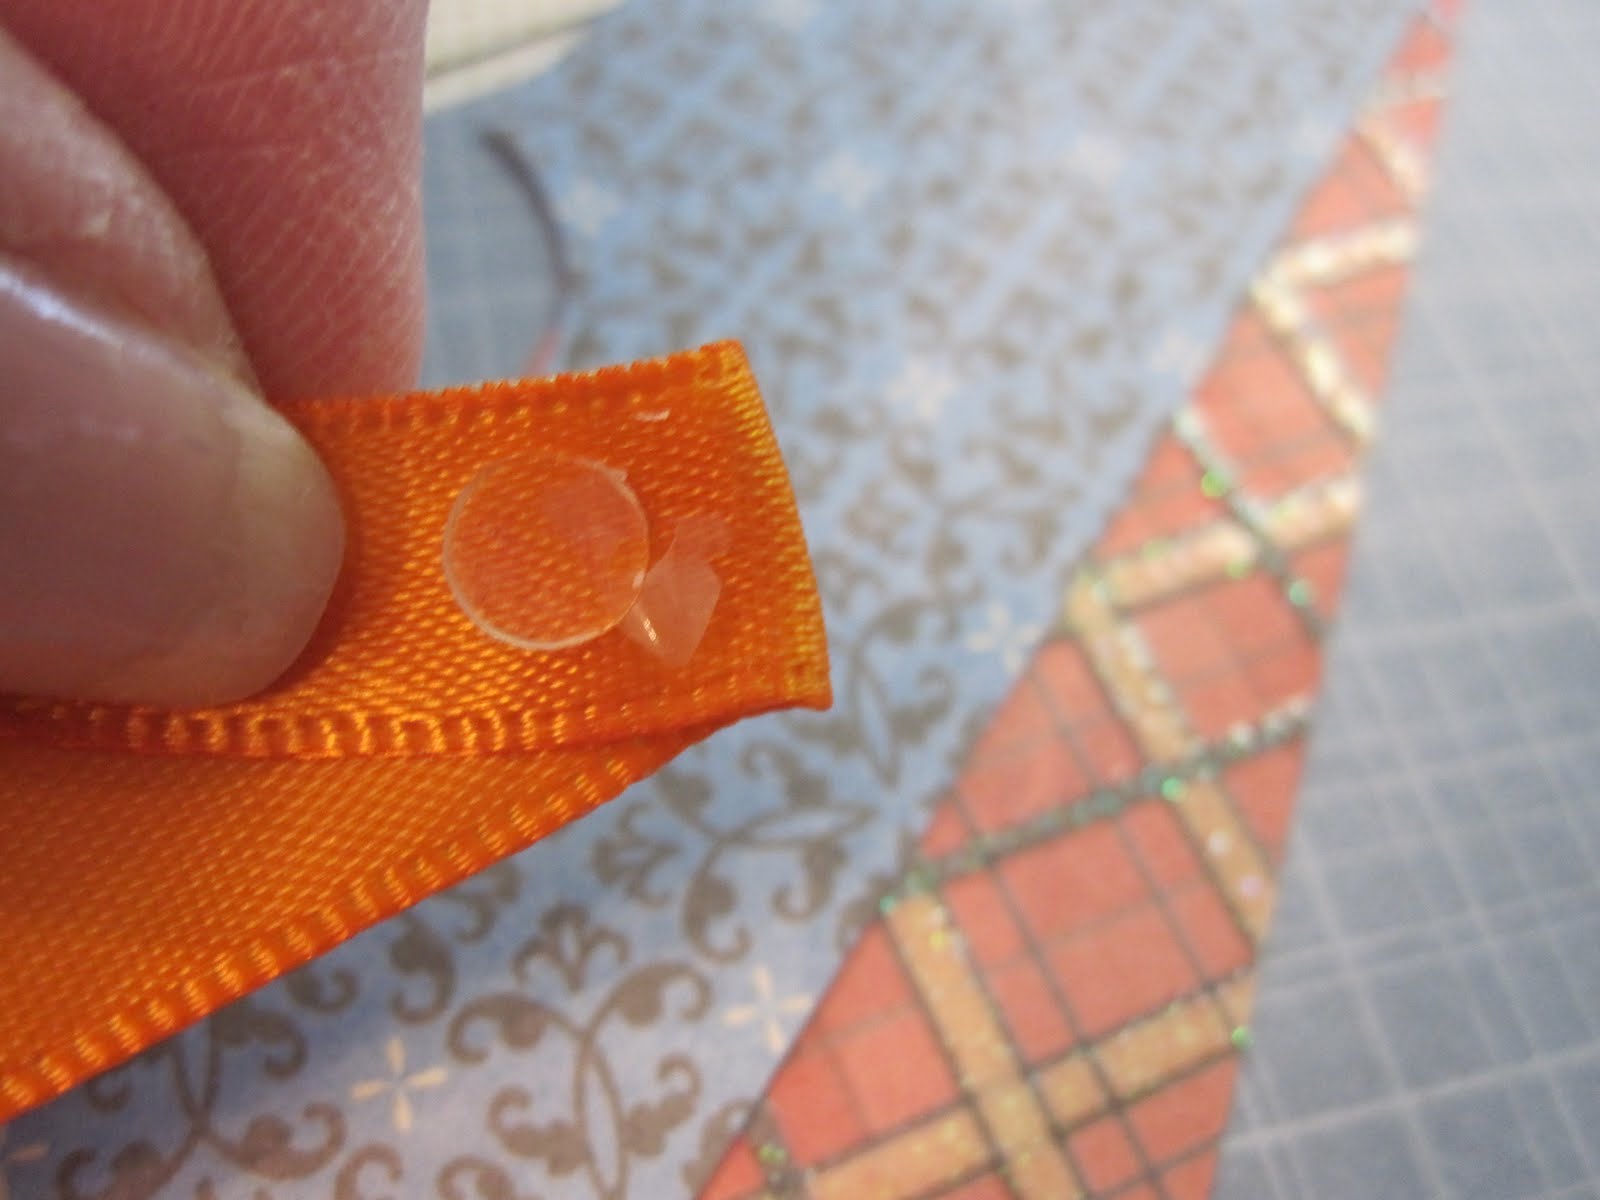
I started by stapling the 2" ribbon stips on but it just added too much bulk and seemed like it would be harder to adhere the buttons so I changed and used mini dots. First I added a dot to the center to hold it folded in half and then one under it to hold it in position. as shown below.
You can easily see the difference in using and not using the staples in theses photos. I quickly changed and stayed with the mini glue dots.
I placed the ribbons in opposite corners as I wanted the colors of the paper to show. If I had used all the way around I think it would have been way too much for a boys page.
I cut the title out twice and glued together for a thicker almost chipboard look and then used pop dots to lift the title to give it added dimension.
I also cut the little butterfly out twice and cut off the wings of one and glued on to the other, and folded the wings up so when it is on the page it has movement to it.
Isn't he cute? On this photo you can see I even glued a couple of heart buttons on the large round to add a little interest.
See when I pull the camera back our little butterfly looks all a flutter!
I did do some journaling on this with a simple tag.
Thats my page our our handsome little Gavin. I hope you enjoyed todays project. Here is the Cute As A Button Gypsy File.
MyFreeCopyright.com Registered & Protected
I am always encouraged by your sweet - sweet words. Your comments inspire me to keep scrapping and sharing things with you.


May 4, 2015

Personalized Mother's Day Tea Towel

Hello and Happy May!  I am happy to be a Designer at She's A Sassy Lady today!

May is my favorite month!!  It is the beginning of baseball, my birthday and Mother's Day.  Lori here from ScrappinMyStressAway with a fun Mother's Day project today.

Most of you know that I have an in-home daycare.  I have the same kids for 5 years, so I try to do something different for Mother's Day every year.  This year I bought a Heat Press and decided to make some very special personalized tea towels.
I had each of my children 2 and up color a picture with a marker.  I scanned the picture on my printer and put it on a Silhouette virtual mat.
I traced the image and then made a mirror copy of it.  The heat transfer vinyl carrier sheet stays in one piece so the vinyl goes on your mat shiny side (carrier) down.
I sized the images to be around 5 inches wide and put them on my mat.

I cut them out of black Heat Transfer Vinyl.  I use the setting for smooth heat transfer vinyl and added a double cut.
I used my poker tool to weed the extra vinyl pieces out.
I pulled off the rest of the extra vinyl.
I pressed the tea towels for 3 seconds and then I folded the towel and pressed again for 3 seconds.

I placed the vinyl design on the center panel and pressed for 15 seconds.  I flipped the towel over and pressed an additional 15 seconds.
The towel is ready!!!

Thank you Sheila for having me over today!!  Happy Mother's Day to all of my mother, step-mother and like a mother friends!!!

May 2, 2015

Slainte - An Irish Blessing To You!

A Gaelic Irish Blessing that my hubby and I pass along to you from our recent trip to Chicago. This page was so much fun to do and is done only with the Plantin cart. We are in a town called Barrington in the Northwest suburbs at  a new Irish Pub call McGonigals having a wonderful dinner with family and friends. Slainte' to you!
I used new paper I just got at Michaels's the In My Minds Eye Home paper stack, I love the texture and it cut like butter. The glitter pages did need to be cut 2 times. The gold tulle I picked up for less than $1 and this is the second project I have used it on this week and haven't even used half of it.
I backed the circle with the tulle, tacked down and then applied glue once I had a smooth fit.
I put together the little flowers and after the page was completed I used diamond sticles on the flower tips.
I hand cut the plume from the paper to use as an accent.
'Sláinte chuig na fir, agus go mairfidh na mná go deo.'
Health to the men, and may the women live forever!
Then I used pop dots to lift the plume for added dimension. Added the flowers.
And as you can see the heading faded into the background so I then used pearlized chalk to deepen the color.
Added a few beads from the bridal section that added the bling needed with the stickles. Added one of my had made butterflies from a few months back and 'viola  the page is done.
I hope you enjoyed today's project, it is a simple one that any of you can do!
MyFreeCopyright.com Registered & Protected
Thank you for your sweet words of encouragement. Your comments continue to inspire me.
signature

May 1, 2015

You've Taken Me To New Heights!

Happy May Sassy People!

Did you know Teacher’s Appreciation week is May 4th thru May 8th? With four little ones in school, you know I am busy! I haven’t decided if I am making cards and gifts for the immediate teachers or all of them…only time will tell!

Anywho, today I am sharing a non-traditional teacher appreciation card. I used some cuts from the Silhouette Store (hot air balloon, clouds & banner). I brought the images on the virtual mat and ungrouped them. I duplicated the ballon to stamp a weaving pattern on the Kraft card stock. I cut the balloon and clouds out. On a separate virtual mat, I typed out my sentiment and placed it on my banner to print and cut. I also changed the color of the banner. I did this by ungrouping the banner and changing the color for the fill and stroke. I changed the cut lines of the sentiment to no cut. I was ready for the pnc.


Once everything was cut, I used a piece of blue Bazzil textured card stock for the “sky”. I was going to emboss it, but because it was textured, I decided not to. I assembled card and placed the oversized banner on the card. I love the way it turned out! I will put it in a 5x7 envelope so the banner is not crinkled.


I hope you enjoyed today’s project! If you have little ones or grand little ones, please don’t forget their teachers! The play a vital role in their lives. Until next time….stay crafty, Kenya~