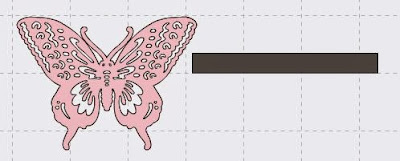
This is a bit photo heavy, but please bear with me. A
few things to keep in mind at the start:
1.
You need to have a single layer image. So if the image you choose has a layer or
layers, just delete them before you start.
2.
The latest update of DS has an “insert shape” button on the
left panel where you can grab a square and then just unlock the lower left
corner and create your rectangle.
3.
Use your arrow keys when moving the bottom of your split image
so you keep everything aligned. This
becomes obvious later on.
4.
Turn on your grid.
First bring your single layer image and a rectangle on your
canvas.
Size and place the rectangle where you want to
split your image, highlight it and your image and click Weld.
Create another narrow rectangle and bring it
centered on top of the rectangle you just welded, highlight everything and
click Slice. Slide the cut pieces away
and delete the little pieces, but hang on to the rectangle.
Now bring that sliced rectangle on top of the bottom
half of your image. line it up right to left, and pull it down to cover the
entire bottom half.
Highlight everything and click Slice. Your image
should look like this. Then slide the
rectangle away and delete it
Use your arrow keys to move the bottom half to make a space
for the word or name you want to insert in there (about an inch apart). Now highlight the whole image and click
Attach. You’ll see top and bottom move
together as one.
Now create your text, highlight it and click Attach. Slide
your text in the space you created; stretch it out to fit but don’t have it
touching the top or bottom of the split. (I did notice my “h” was touching the top line and I did
adjust that before cutting.)
It's time now to decide whether you want to cut the name the same
color as the image or not. If you want
two different colors, you’re set, because when you hit Go, two mats will come
up: one color for the image, one color
for the name.
If you want to cut everything the same color,
highlight everything (or Select All) and click attach. You can see the difference here.
I am so excited I was able to personalize my laptop with my
first vinyl project. Not a great picture
(silver on silver), but here it is.
Thank you for stopping by today and I look forward to seeing
you all next month.


.jpg)


7 comments:
OOOO this turned out GREAT!! I can't wait to see more vinyl projects. I LOVE playing with vinyl!!
I LOVE it! AND I'm stealing your split butterfly idea to personalize a water bottle for a sweet little friend. Thank you so much, Charlotte. Great tutorial!
What a wonderful tutorial this is! Love the detail in the project. Thank you so much for sharing this with us today!
Love the butterfly, Charlotte - and go you for mastering something new :-)
Charlotte, this is beautiful. I don't have the Explore so can't try it but it looks wonderful!
Thank you so much for sharing your tutorial! Very useful.
Thank you so much for the tutorial! A great benefit!
Post a Comment