July 5, 2010

Cousins and Friends Mesh Together

Hi ~ I am Lori Apgar from ScrappinMyStressAway here making a mesh!! Seriously if you could only see my scrapbook table!!
I am excited to be here as a Guest Designer today on Sassy's blog ~ Sassy has pulled me out of my funk more than once with her challenges and her projects and I am grateful for the opportunity to design for her!

Many of you know that I am waiting for my Gypsy to get back home. She got a deep wrinkle in her chin (cracked screen) back in May. She went to the spa for a facelift, and played a little trick on me by giving her plane ticket to a look alike. I had to send the look alike back to PC (they forgot to serialize her) and here I am again not-so-patiently waiting for her to come back!
Lucky for me, my friend Crista is busy planning her niece's wedding and is too busy to scrap ~ she loaned me her Gypsy!


This is a photo of my cousin Kristin and I taken this Easter. We were very close growing up, but now live in different states and don't get to see each other very often. I long for the days that we swam, rode bikes and giggled for hours on end!


I started my mesh with Gypsy Wanderings. I selected the Border option of the Shoe button. I put two of the borders on my mat.


From the Advanced Menu I kerned the two borders to -.60 and welded them. To weld, first you need to group the two borders from the Basic Menu, then select the Weld button from the Advanced Menu. I always preview (eyeball button) to see that it welded. The red lines are the cut lines, the gray lines do not cut.


Next, I copied the welded image (two borders) and moved it down.


In order to line the two up perfectly, use the x coordinate. My original mesh is at 2.45, so I highlighted the copied mesh and set the x coordinate at 2.45 by tapping the number in the x coordinate box. The number key pad will enlarge and you can enter the number you need ~ this time 2.45.


Once they are lined up, I flip the bottom row.


Next, I move the bottom row up to overlap the top row and weld together.


Once you have welded the two lines together, you can repeat this process by copying the two lines, lining up the x coordinates, flipping and then moving and welding it together. Depending on how big you want your mesh, you can keep going.

NOTE: Once I meshed together 4 rows I saved my project. This way if I needed to make any changes I could scrap the project and start back at this point!!

After I made my test cut, I realized that my mesh was a bit tall. I went back to my saved project (4 rows) and added 3 more instead of the 4 I originally planned on using.


Meshes are very delicate so be very careful when removing them from your mat. It is helpful to use cardstock or similar thickness when cutting a mesh. I had my E set on High speed, Max pressure, and blade at 5 (my normal setting for the blade).


I used my dental tool to weed the mesh.


I used my 9" Xyron to adhere my mesh to my paper. If you don't have a 9" Xyron, you can use a glue pen with a fine point.


Once I run the mesh through the Xyron, I rub the top of it. This helps with the extra sticky pieces that like to stay behind. I also use a white eraser from a mechanical pencil to remove some of the remaining stick.


I peel the backing off and roll it up similar to weeding my vinyl.   By pulling and rolling up the discarded pieces, your mesh doesn't stick to the pieces it shouldn't!


Here is the mesh glued down.


I matted the photo on brown metalic cardstock and used pop dots.


I love this paper, but this is way too busy for me!! I also wanted to add a spot for journaling so I pulled out the Gypsy again. I found this frame in Heritage and used Hide Contour to hide the inside cut. I put two frames together and welded them like a card. Then I grabbed my title "Cousins" from Sans Serif. This is a very plain font and perfect for such a busy page.


I put down a border on the bottom of the page using the same metallic brown paper I matted the photo with. I glued down my title and hidden journal spot!


I added a gold sheer ribbon, some flowers and a little bling.  The paper is from the Songbird paper pad from DCWV and Metalic cardstock, both from Michaels.

I hope you try a mesh if you haven't already ~ they are fun and unexpected!

Thanks again Sassy ~ it is always an honor to be on your blog!!

July 4, 2010

New Blog Award

I have met so many wonderful people blogging and Barb at Crafty Girl is one of them. She is a lovely and talented beyond belief. You must take a few minutes and check out her blog! She is so sweet, she sent me this new blog award! Now I need to follow the rules and pass it along…
So... here are the rules:

This award comes with a set of rules...

1) Thank the person who gave it to you 2) Tell seven things about yourself 3) Pass the award on to five bloggers whom you think are fantastic.
  1. I am a Christian.
  2. I love my husband and family.
  3. I think grandchildren are the bestest and I should have skipped over having children!
  4. I am a major beach bum!! Give me a beach and I will post a sign saying NO I AM NOT A BEACHED WHALE!!!

  5. I love sweets.
  6. My house is always clean, but I don’t do outside work.
  7. My handsome hubby and I will celebrate 4 years of marriage this year. We were high school sweethearts.
Now I am to pass this on to 5 Fantastic Bloggers which is so imposible as there are so many.

Pam at The Bug Bytes.
Cheryl at Cheryls Window
Beatriz at Amazing Grace
Audrey at Cute and Some
Jeannie at A Place For My Cards

Please stop by these fantastic blogs and share some blog love with them!! They are all so wonderful and sweet!! Thank you for always being so kind and supportive!! I love all the super sweet comments you leave each day!!

July 3, 2010

WOW A CART GIVE AWAY!!!


This is so exciting... WE HAVE A CART GIVEAWAY happening here thanks to Pam at The Bug Bytes! Pam was our Sassy Designer yesterday and surprised us with this wonderful drawing and a SPECTACULAR design from the all new Cindy Loo cart. All you need to do is click HERE and it will take you to the entry where you can leave a comment to enter. Pam is such a sweetie and good friend of my and is tying to help my blog grow to 500 followers!!! Isn't that sweet? So don't forget you must be a follower to win. Just think that  by July 10th you could be owning a new cart to design with. Be sure to take a few minutes to look at all the other things on ShesASassyLady while you are here. We have a card drawing also that is happening right now that you could win also... just look to the top right and click on the little crab to enter to win it. And there are all types of design files for you to download too. Now don't forget to become a follower and click HERE to enter for you chance to win, and just think you get to see that SPECTACULAR card that Pam created too. Don't leave a comment on this post go HERE!
BEST OF LUCK TO YOU!

July 2, 2010

Doe a Deer And A Give Away

This is Pam and my blog is The Bug Bytes and I am the guest designer today on Sassy's blog
Yes I did say giveaway.
First let's get the exciting part out of the way ;). So  the card .. 
Ha Ha  got you.. Nope :) it is the giveaway that is exciting isn't it?

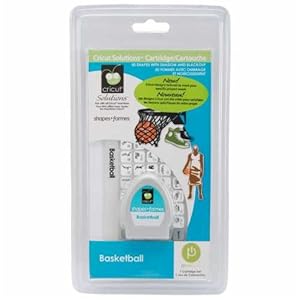
So I will be giving out a basketball solutions cartridge on She's a Sassy Lady blog to a winner who will be randomly picked on July 10th morning. Be a follower of She's a Sassy Lady blog and leave a comment with your email in this post .
I did say I was now watching her blog to see if she hits 500 didn't I?
 Be kind and please do follow my blog also lol ;)
Ok now that we have that out of the way.

Here is the card which I named Doe a Deer with a matching envelope.


The cartridge used is Cindy Loo and just one shape from gypsy wanderings (a small rectangle to weld). For the envelope I have also used Martha Stewart punch - Arch lattice which I picked up from Walmart at a clearance price when they cleared up the shelves for the lite cartridges.

Here are the two part videos

Part 1


Part 2.


Now for the how to's
Let's take a look at the gypsy file
Page 1


I have welded two shapes and used the hide and contour to hide the insides . But even though the shape looks symmetrical instead of just copy pasting (after hiding the contours) I have also flipped the 2nd image for in cricut we never get a perfect symmetry and for perfect alignment it is better we do this. I also welded a small rectangle to the shape .


Apart from flipping make sure the two circles are aligned by using the y axis to check


Page 2


The envelope is also from the same cartridge with the label next to it hidden. usually we choose the envelope first and size the card. But here since I could not have the card  lesser than a particular width so that the cuts are ok and larger than 2 inches I had to strike a balance and  I allowed the top of the envelope to cut off. I did not like the shape too so to get the extra 2 inches I cut the same paper I used for the card base and then used the martha stewart arch punch on it. It co-ordinates beautifully instead of a plain envelope.


the layers - pages for the deer


Ok now for the papers. I used these papers . The last one is rice paper


Here are the cuts


Note the paper on the right. It is rice paper painted brown and the strips are the paper torn to get some texture.Here is some green painted paper


 I pasted the lace paper with the deer directly on the card base and colored just the trunk of the tree brown and then used the brown and green torn paper (which I painted with watercolor) strips to add some nice texture.


here's how it looks up close (and very personal :) - ohh!! Robert Redford - even though the effect does not look that good ;) it is not bad either. Kind of pretty I must say )


I also added some stickles. Then I painted the deer with q tip and dew drop inks - first applied the platinum and then the cosmic copper. This gives a soft blend for the spots. you can also use copic marker and paint completely and then use the colorless blender which will erase back or push back the color to give you spots. I added more stickles and some bling  to the whole card


Here are the stickles, punch, inks I used


Some ribbons and flowers and bling  completes the card


So except for the painting , tearing and gluing the rice paper a pretty easy card to put together. Hope you enjoyed this project. I will soon put up the gypsy file in my blog. Thank you sassy for having me on here - it is truly a honor and thank you readers for staying with me a while and looking at this project. Don't forget to leave a comment in this post  for a chance at winning the cartridge and become a follower.
Have a blastful July 4th..

July 1, 2010

Note Cards Make A Great Little Gift To Others, As Well As Yourself!

As you know every week I send out a Card Kit to some lucky reader and with it I send a little note. Well I have scads and scads of before cricut cards that are just card stock, colored paper and a ribbon that I did years ago. As I was to design something with the Sentimentals cart for Tuesday Treats for July 6th, I thought I would do note cards, and this was going to be it. You know they are cute but, it's not my blog and you know the Pink Stamper and Tammy and all the big names have designed on Tuesday Treats so I thought I better go back to the drawing board. Don't get me wrong these are cute, and I will use them but I want something really Sassy! Shhhh, don't tell Pam, but I don't know if I can do something with Sentimentals and be Sassy! So I will share my note cards on my blog! Shhh.
This is how I laid it out on the mat. Notice the upper left hand corner, I wanted a contrast but wanted to keep the scallop edge so I duplicated the notes made them about 1/4 inch smaller and ran them off the mat so I wouldn't waste paper.
This is how I laid it out on the mat. Notice on the right the writing on the paper matches the direction of the envelope.
I trimmed that little excess off the top of the contrasting color.
Then I grouped all the pieces together and bagged them up to make on my lunch hour. I did soooo many projects this week I needed to put them together on make them on the run.
I made sure that I had all my supplies and proceeded to put the little cards together.
I stickled the little flower, and felt it needed more so I then stickled Sassy and the scallop.
I also stickled the scallop on the envelope so they matched. Now it has some Sass!
And for a wonderful little gift just tie them all together with coordinating ribbon.
Well that's it for today! I hope you enjoyed this quick little project as it works so well for little gifts too. Do remember to keep note cards for yourself on hand. Then you are ready to make someone feel special with just a little note from you!
MyFreeCopyright.com Registered & Protected
I am always encouraged by your sweet - sweet words. Your comments inspire me to keep scrapping and sharing things with you.
signature