January 7, 2013

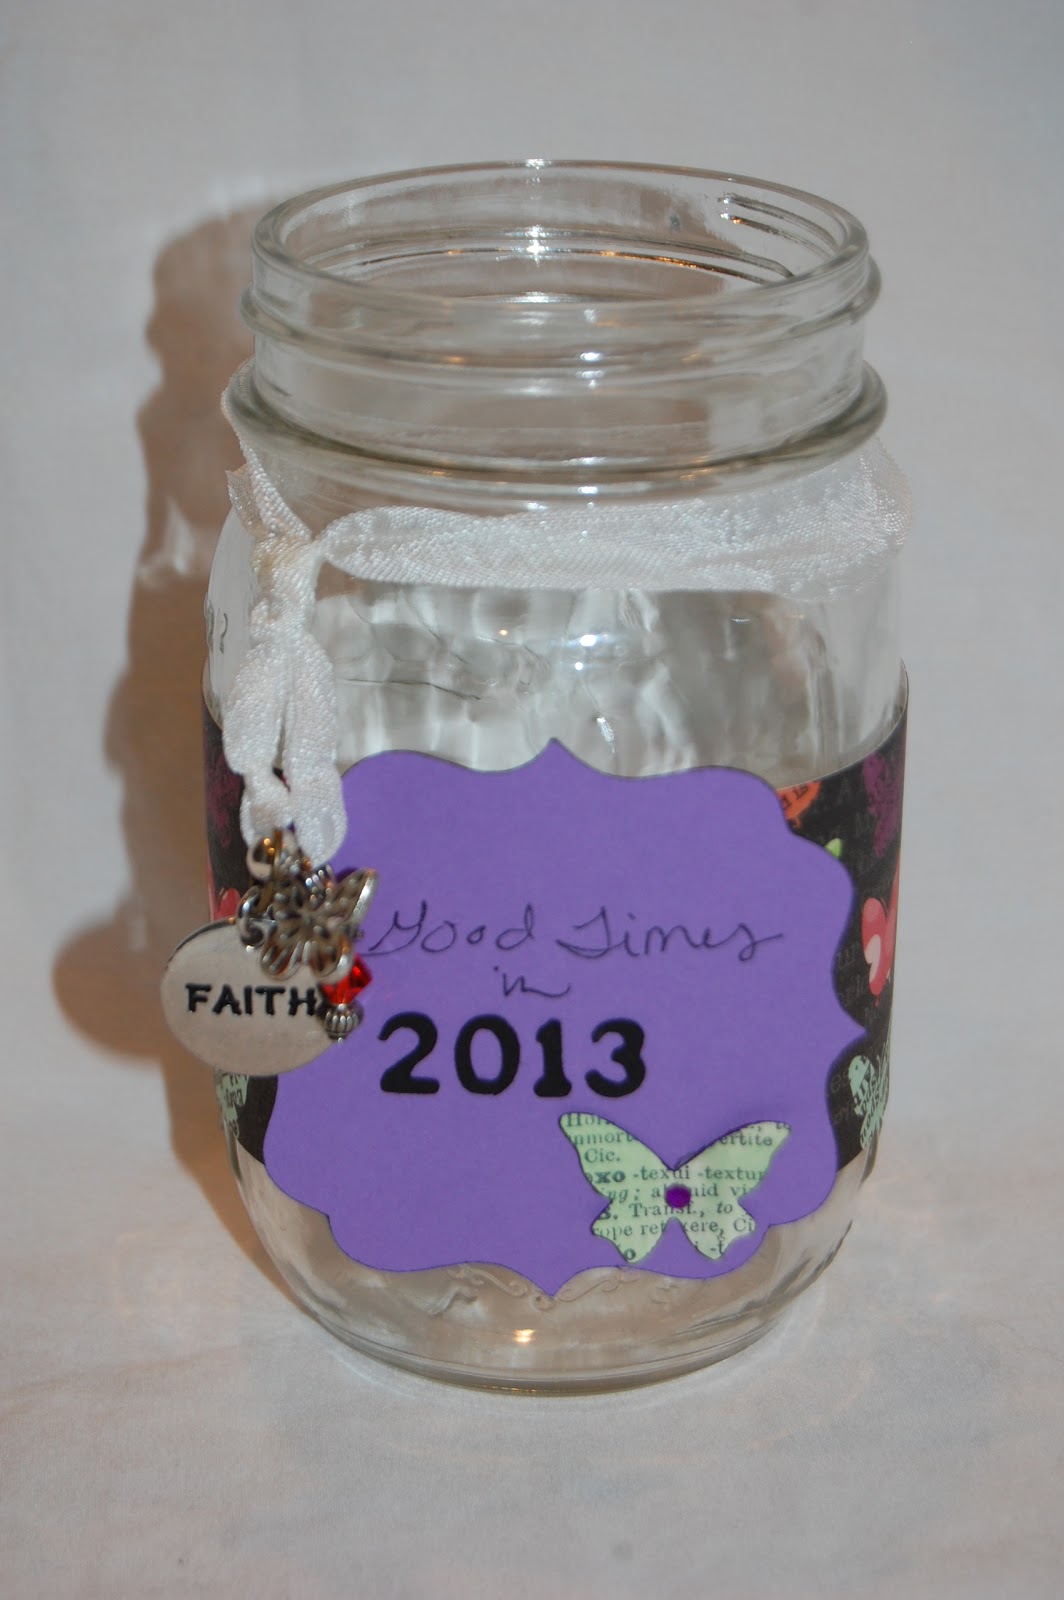
Good Times in 2013 Jar


Lori here from ScrappinMyStressAway.  I am excited to be back today at She's A Sassy Lady.  I was a day off and posted last Tuesday (because I thought it was the first Monday of the month).  Lucky for me, Sheila did not have anything else scheduled so we left it posted.

  I don't know about you, but 2012 was a rough year.  At the end of the year, I had a hard time remembering the good things that happened (and there were some great things) because the bad things seemed really bad.

My uncle passed away, my college-aged son had ACL surgery, my mother-in-law had rotator cuff surgery, my husband had kidney surgery, and I broke my right wrist were the big things.

Please - I don't need sympathy - that is not the point.  The point is I want to remember the GOOD things that happen at the end of each year instead of dwelling on the bad things.

I saw one of these jars on facebook and had to create one for 2013!


I took a Mason Jar that was left over from my cousin's wedding (good thing in 2012) that I got to co-host the shower and make decorations (great thing in 2012).

I wrapped some butterfly scrapbook paper around the jar.  I cut the paper to 2 x 12 inches.  I tied some white crinkle ribbon around the top and added some butterfly charms and a charm that says "inspire" because I was inspired to focus on the positive.

I used my Sizzix butterfly emboss and cut die that I got from Stampin' Up to cut out a page from an old book.


I used this image from Lacy Labels sized to 2.65 inches.  I cut it out of purple cardstock.


I inked one of the butterflies green and used a mini glue dot to adhere it to my label shape.


I used Hello Kitty Font sized to .65 inches (.53 inches for "in") for my title.  I cut them out of black cardstock.  My cricut was being naughty and did not cut out all of my letters, so I ditched the letters and kept the numbers.


I wrote "Good Times in" and added a purple gem to the butterfly.


Every time something good happens in 2013, I am going to write it down on a slip of paper and put it in the jar.  On New Year's Eve this year, I am going to read them all!!!

I am really trying to focus on the positive in 2013 and my One Word is SMILE.  When I smile, everything seems better :)

I hope you have a wonderful 2013!!!  I plan on it!!

January 5, 2013

Gypsy Made Simple, Making A Window Card With A Large Window


Good morning, it is time for another Gypsy Made Simple. It has been so long since I turned on my Gypsy I was amazed that I even remembered how to work it... now I can hardly put it down.


Today I am sharing a wonderful card with you that is so pretty it just shimmers in the light and yours will too! So go grab a cup of coffee turn on your Gypsy and let's get to work.


Now wasn't that easy?  Let me tell you all the work on this card is in the designing and at that it wasn't too difficult. This design makes the most amazing cards and you get to use up the plastic covers from your cartridges to boot! Love to recycle


See how easy that was to put this card together. You can use any paper you want along with any piece of artwork you like. Then you get to choose the embossing folder you like to make that window just glisten. I am so short of birthday and get well cards that I will be using this design alot with just a few changes in the art on the cover. I love it!


Thank you so much for joining me today. I hope you enjoyed today's post. Be sure to leave a comment as I will be giving away a Gypsy cover to 1 lucky person. Just much comment by 4:00PM on Friday January 12th to be eligible and the winner will be announced on January 13th.
Thank you for your sweet sweet words of encouragement. Your comments inspire me to continue sharing with you.

January 4, 2013

Happy New Year - Year of the Dragon

Hello
This is Pam from Papillon Digital Designs & The Bugbytes today at Shes a Sassylady.
Thank you Sheila for having me as a designer on your blog.
I want to wish you all a very very Happy New Year.
This year according to Chinese New Year is the year of Dragon.
Some of my childhood years was spent in Malaysia which does have a huge Chinese population and New Year is celebrated with  dragon dance in the streets. I loved it.
Year of the Dragon - I am also a big fan of science fiction and love to read this genre books. And yes at last we also have the last book of Wheel of Time to be released soon. So dragon was foremost in my mind. As I was telling my son about it he wanted to do a project based on Dragon.
So today I present you his project in which I just helped him a tad bit.
A dragon puppet and a dragon card


My younger son found this video in youtube and here is the link - http://www.youtube.com/watch?v=DW-y-zKP0Qo. Our dragon did not come as cute as this guy's but and not bad for a first attempt. He is planning to decorate it further.
Now the image on the card is from silhouette studio.


I just flipped and welded it. But had a slight problem when welding it as it would not just weld. When such a thing happens try filling the image with color. It will mostly refuse to fill up.


That means that the image is not closed and the path is open somewhere. You can confirm this by selecting the image and double clicking it. It will go into path mode. (In this case I had to ungroup first, as it has 3 images. Double click will only work on single image or compound image. It will not work on grouped images. So ungroup first. As you can see the 2 smaller loops are filled so they are closed but the dragon itself is not) Amongst all the grey square nodes you will see a red dot somewhere like this


Now it is simple - just zoom so that you can see the region better. You will see 2 red dots. That means the path is open there

Grab hold of one of the red dots. If it is very close to the other red dot then just grabbing the red dot will make it go like a magnet to the other dot and close up with a snap. Else just pull alongside the other and it will snap closed and if you had filled color before then it will automatically get filled.


Now once it is closed you can weld.
So once I did that I copied the changed image and then flipped aligned overlapped and welded it to make a shape card. We cut it out using silhouette and then my son assembled it.
For the puppet I used 1 paper towel roll and cut it into 3 pieces. You can also do this with card stock rolled into tube. For photo purpose I am using just a paper rolled into tube.


Then cut one of the rolls into 3 smaller pieces. These 3 smaller pieces are added to the body to give strength  like ribs.
Now cut the other 2 - one piece - the front to look like a maw/mouth and the 2nd piece to look like a tail


Paint the 2 pieces. You need not paint the 3 smaller pieces.
Pierce the front and back ( the hole in the front piece should be at it's back with enough space left so that you can glue the body piece to it. Vice verse for the back piece) and weave in a chopstick

Here's the front ( you do this after you paint. This is just a demo piece in white)


Now make sure you cut the front properly and give it a maw 
and DO NOT CUT LIKE THE ONE BELOW


If you do your dragon will look more like an eel. Talking from experience as this is how our first face looked like lol


We then recut the face to look more like a dragon

Now for the back piece

Now take some crepe paper (you can use 2 colors - I have used green and red) and cut them to the body length you want and glue together alternating the colors to form a width which can go around the tubes and cover . Then glue the ribs - smaller 3 tubes inside and glue the body to the front and tail tubes

Add eyes and brows and teeth and lips to front piece and decorate the tail further and have fun with the puppet
Here's another look at the puppet my son made not yet complete to his satisfaction as he wants to work on the head more


Wish you all a Happy New Year once again.

post signature

January 3, 2013

Quick Digital Pages With Close To My Heart FREE Program


Hello, I am so excited to be with you today. I trust you all brought the New Year in safely and with family like I did. We had so much fun as it was just my handsome hubby and I. We went to see the movie Parental Guidance and loved it. I can't tell you when the last time we went just for us... usually we are taking a grandchild or two. This time we sent just the two of us.... would you believe we even held hands! Guess I better stop the chatter and get to my post.
Well, as you know I went to my daughter's in Chicago 2 weeks ago.... well these are the pages I did from our little visit. We had so much fun making the cake pops that I just had to scrap them. And, being that it was right at Christmas I did them digitally with Close To My Heart's Studio J program.... Just click HERE and you too can see just how easy it is to make gorgeous pages on your on in just minutes. All you pay for is the printing of your pages and it is so afforable you will love it!


It took me 20 minutes to do these two pages and I love how they turned out. I just love how you drop the photo in and they are good to go and you don't even have to measure to get even they just come out perfect each and every time... no crooked lines or jagged edges to mask!


And this is what the two pages look like facing each other.... just like it says simple! I hope you enjoyed today's quick little post and do try out the digital pages too.
Thank you for your sweet sweet words of encouragement. Your comments continue to inspire me to share with you. Have a blessed day.

January 2, 2013

Finished December Daily


Hello, this is Kate from Sassy and Scrappy.  I can't believe December has come and gone...as has another year.  Goodbye 2012 and hello 2013.  Last month I shared the beginning of my December Daily album and I'm back to share the finished product with you.  I'm not going to show every completed page, but I did choose several that I thought you might enjoy.


I added this title page.  It's a little hard to see, I apologize, but the tag simply says Merry Christmas.


December 8-My nephew's first birthday.  I didn't do a lot of journalling for this page, I'll save that for a scrapbook page.  In the little pocket on the left I included some of the tags from the gifts he received.


December 11-This page documents an unexpected gift I received in the mail.
 

December 17-I included some information about a center I volunteer at (it's a place for grieving children and families and I work with a group of 6-12 year old kids who have had siblings die).  I wanted to share a little about our last meeting before the holidays and how we remembered our loved ones.


December 20-I included a picture of some of the gifts I had wrapped and prepared.  In the journalling I talked a little about our family holiday traditions and how we give/receive gifts.


December 22-Annual cousin's party.  Every year before Christmas all the cousin's from my dad's side of the family gather together for fun and festivities.  It started over 25 years ago and is something we all look forward to every year.  The ages of the cousins in attendance this year range from 33 to 5.  There's a lot of us, and it's a total blast.  My youngest brother and sister in law moved out of the country last spring but were able to join us over Skype.  We even managed to play Scattergories together.  Great memories.


December 25-The big day!  I chose to end my December Daily here, some people go through the entire month, but this worked out better for me.  And as you'll see in the picture below, my album was completely stuffed.  For  Christmas day I included the events of the day, a package label for a pair of shoes I received, a printed movie ticket for Les Miserables, and a picture of the stack of games and gifts my oldest nephew received.  Hopefully he won't complain of boredom any time soon.


And there you have it.  I really enjoyed documenting December 2012 and plan to do it again next year.  The holidays always seem to fly by and this was a fun way to slow down and remember the moments.  Happy New Year!

January 1, 2013

A Happy Sassy New Year!


Happy New Year!!!

Lori here from ScrappinMyStressAway and I am excited to spend my New Year's Day with you at She's A Sassy Lady!!!

Normally, my January Sassy post features my hand made Thank You cards.  This year I thought it would be more fun to share my goals for 2013 instead.

My Crafty Goals for 2013 are:

1. Find the rest of my mojo!!! It broke with my wrist and I have gotten some back. I need to seek out challenges, blog hops and classes to rejuvenate!!


2. Finish Tyler's High School Album before his Graduation Party!!!


3. Reinvent my scrapbook style - I am feeling a little stale and very cricut dependent!


4. Seek out DT opportunities that match my talents and goals.


5. Conquer my fear of creating videos and learn how to edit!!


My Personal Goals for 2013 are:


1. Clean and organize my closets.


2. Clean and organize my scrap nook.


3. Worry less.


4. Smile more.

5. Stay healthy.


I did not get to clean out my closets, storage room and scrap room last summer because I broke my wrist.  I got a jump start the few days before Christmas and shredded 3 boxes of old paperwork - which felt GREAT!  I cleaned out the storage room - so I need to KEEP it clean!!!


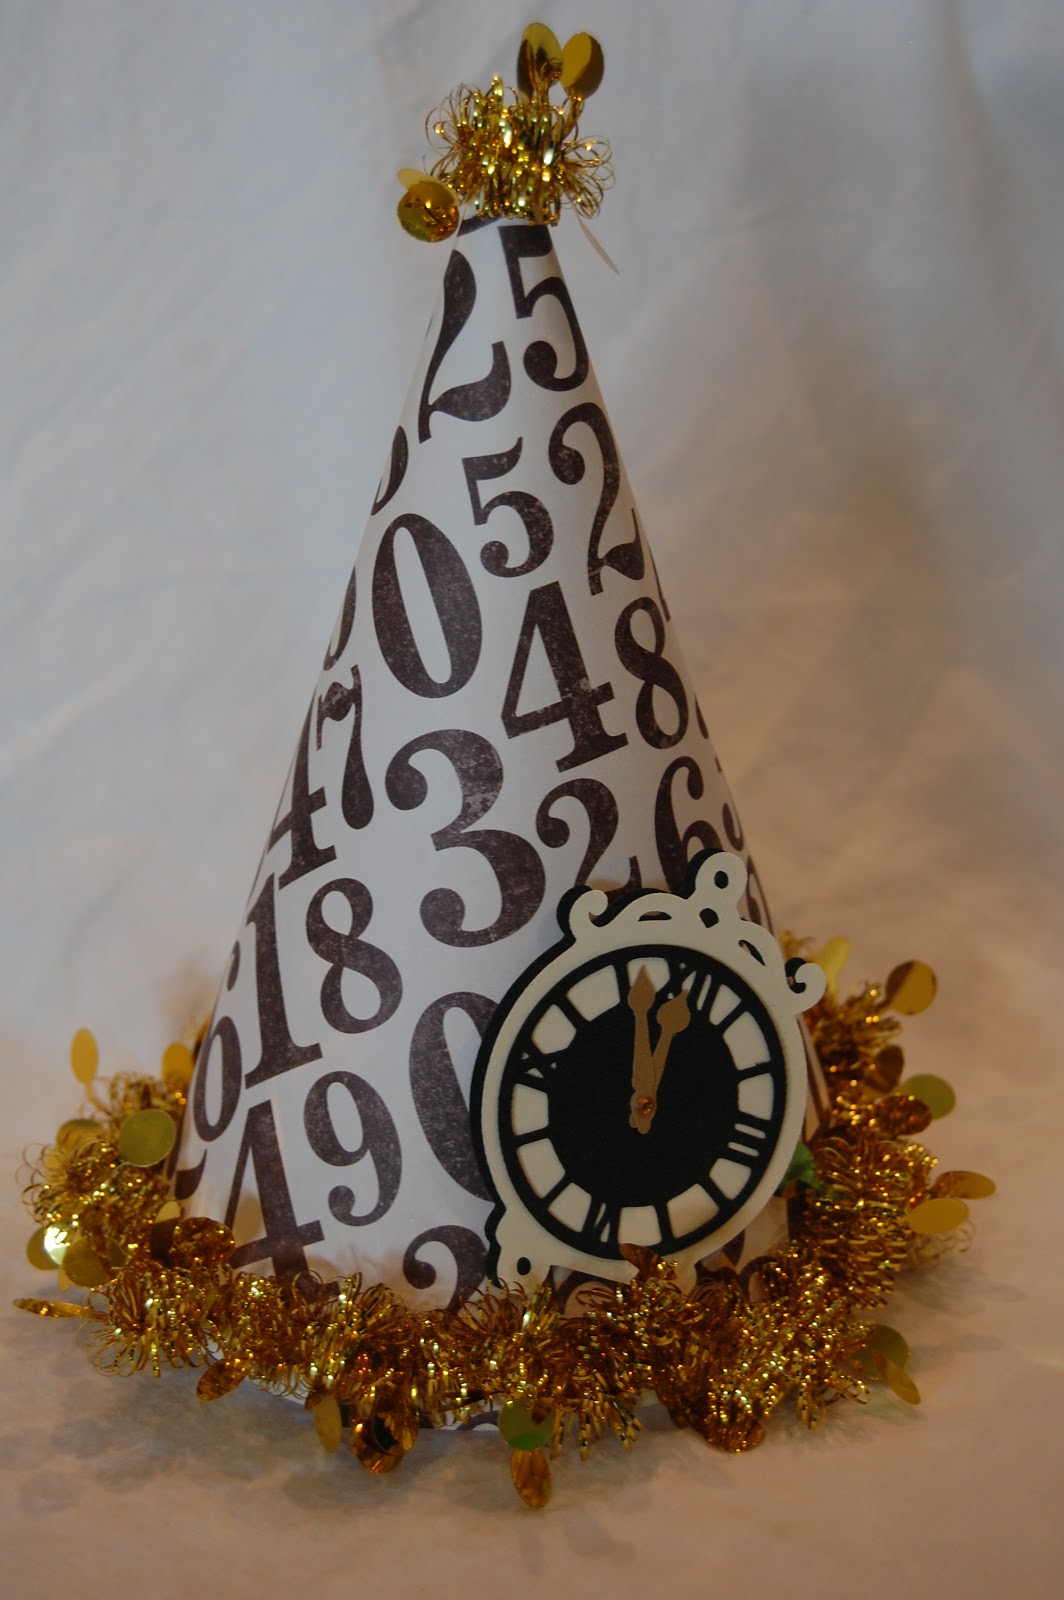
And Finally, I have a New Year's Eve Party Hat to share with you!!


Isn't this a fun hat!!  I found the inspiration for this (and the photo at the top of my post) on Pinterest!


I used this party cone from the DC Comics Batman cartridge.  I sized it to 8.06 inches and rotated it -30 to fit on the 12 x 12 mat.


I used this number paper from Michaels because it reminded me of the countdown to the ball dropping!


I was going to use crinkle ribbon around the edges of the hat, but found this fun gold trim at Michaels and thought it was even better!!


I used Glue Dots to adhere the trim to the top and bottom of my hat.  I kind of gathered it as I glued it down to give a little bit of flair (as opposed to just wrapping it tight around the bottom of the hat).


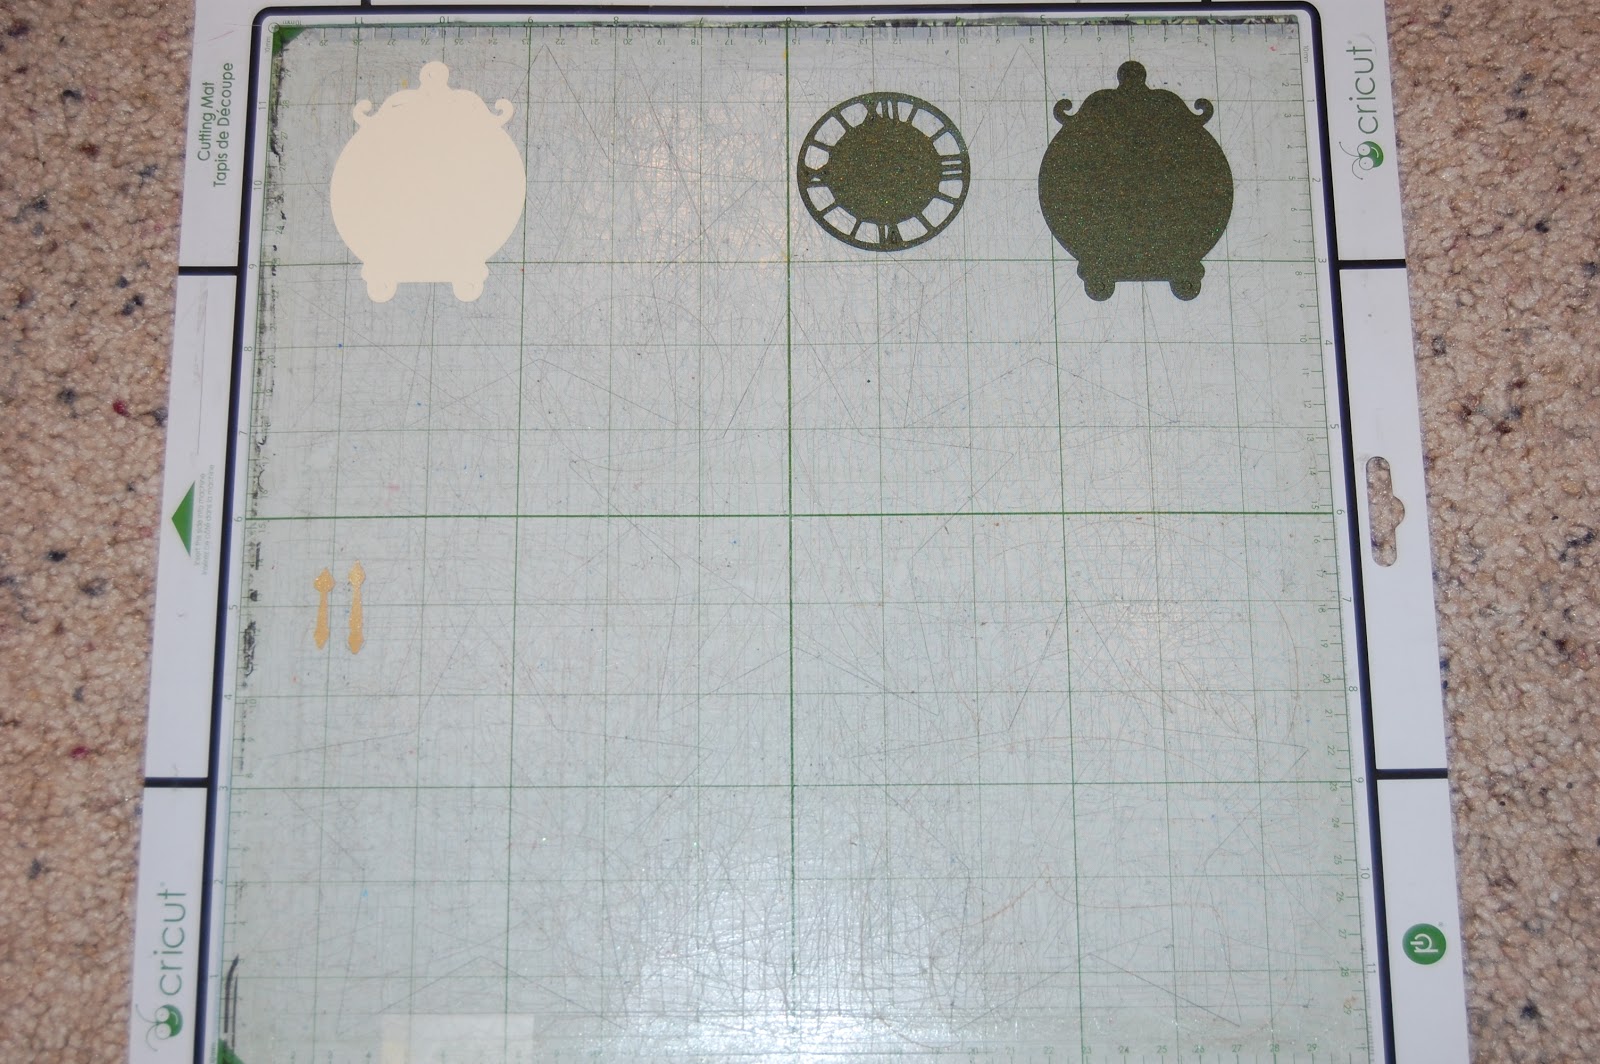
I found the clock parts on Close to My Heart Artiste and sized them to 3 inches.


I cut them out in cream cardstock, black glitter cardstock and gold cardstock.


I cut out the clock shape in black glitter as well as cream.  I offset the cream on top of the black to give a partial shadow.  I stuck a gold gem at the bottom of the hands.  I pop-dotted the clock onto the hat.


Here is my party hat!!


I hope you have a wonderful 2013!!!


~Lori