







June 21, 2013

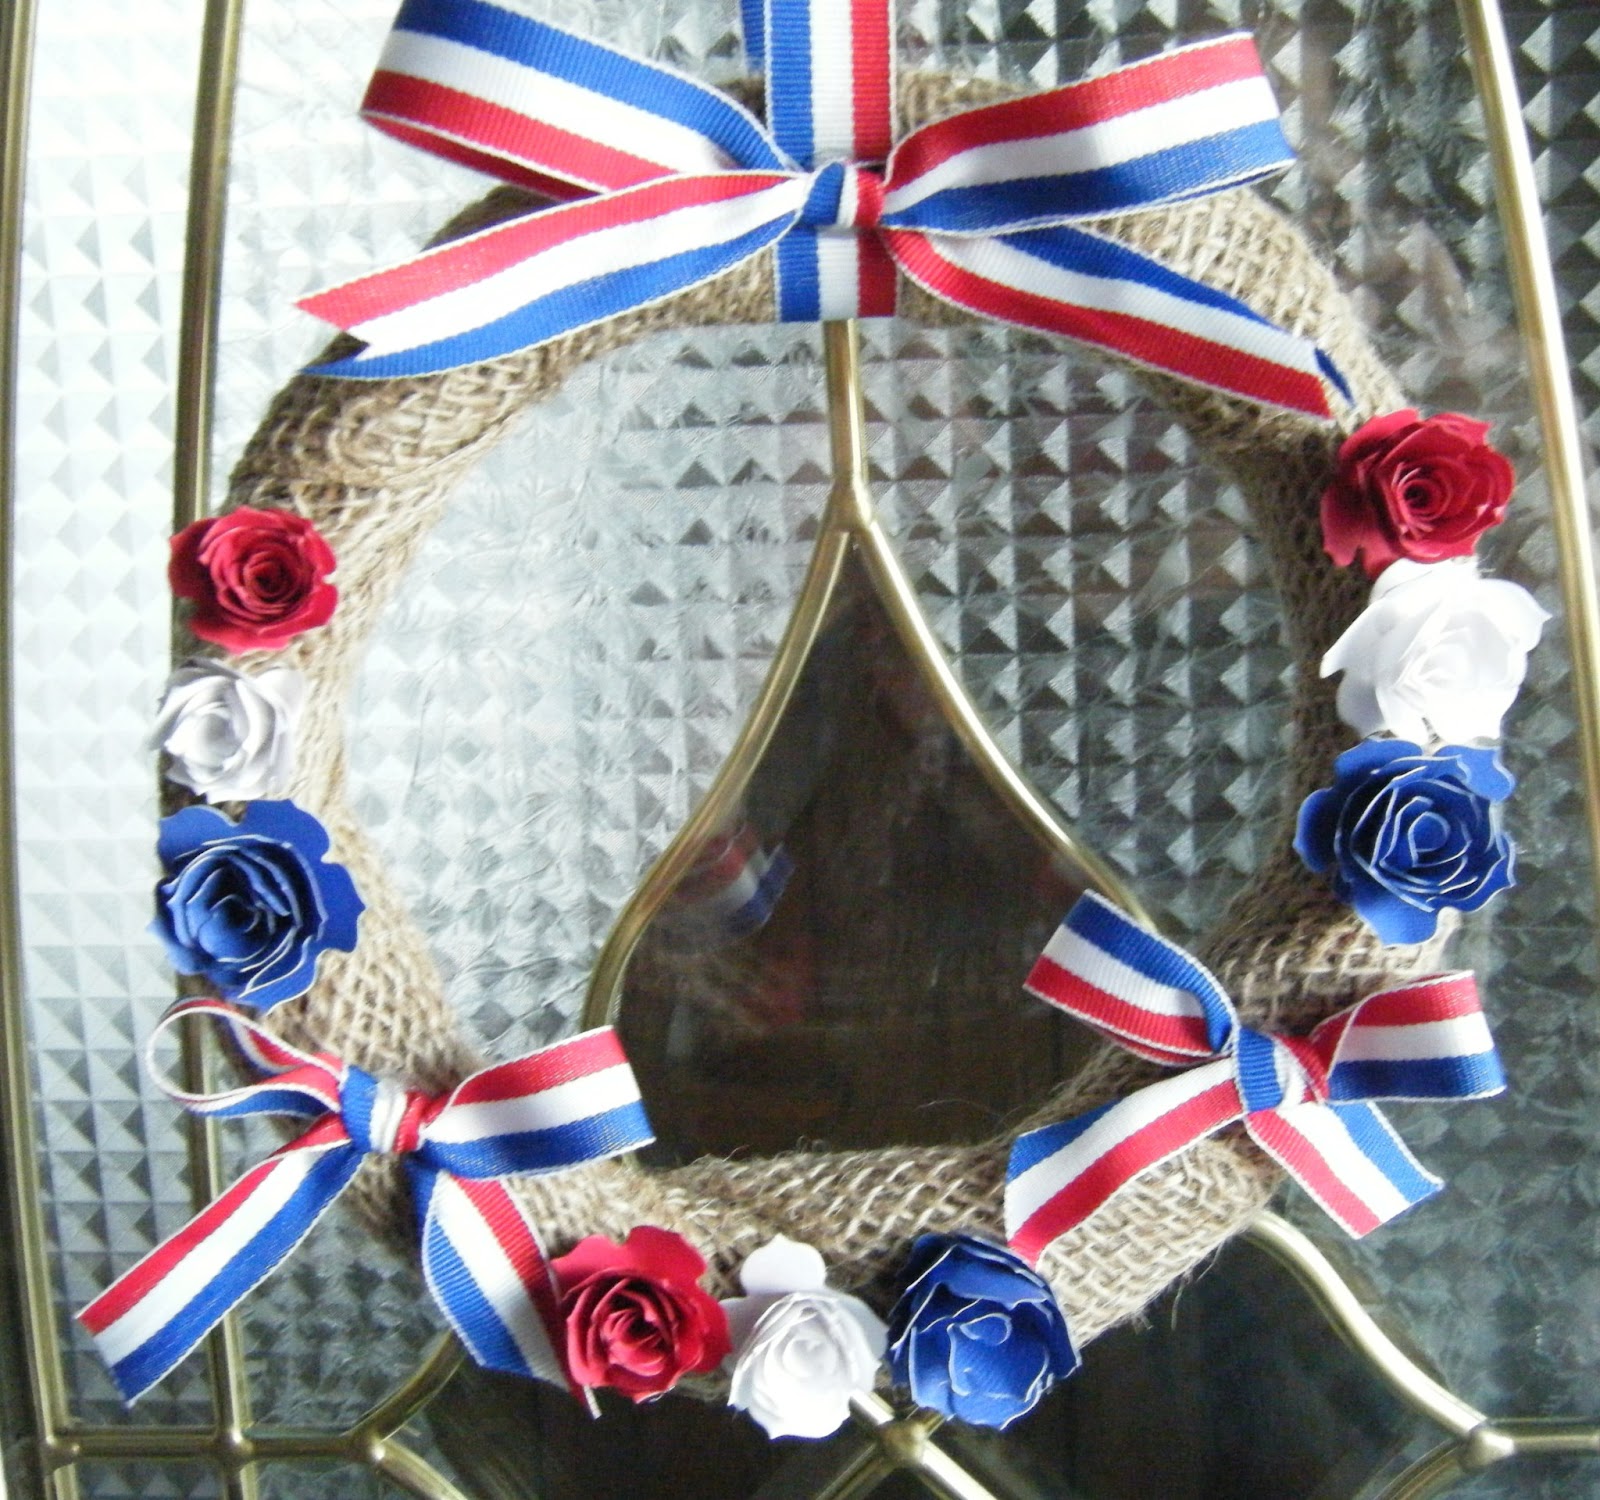
A Fourth of July Wreath


Hi Everyone,

Lisa from Lisa's Craft Room here for my turn to share a project for She's a Sassy Lady. Thanks Sheila for having me each month. I decided to use the last small grapevine wreath I had to make a Fourth of July wreath since I didn't have anything Patriotic to hang on my door. I have a wooden heart and a wooden star that are Patriotic, but not big enough for the door.


I started off with the grapevine wreath and a roll of burlap that I bought a while ago. I ordered it online and when it came in, it wasn't what I expected, but it came in handy to cover the wreath.


This is the wreath all wrapped up.


I used the rolled flower die from Emma http://www.creativetimeforme.com and cut 3 of each red, white and blue from card stock.


Here they are all rolled up. After rolling them up, I added some hot glue to the bottom to hold it together. Then I hot glued them to the wreath.
I added a red, white and blue ribbon that I had in my stash, tied to hang and a couple of bows.


And there you have it, just a little something to hang on my door for the Fourth of July.
Thanks for stopping by. I hope you all have a wonderful weekend.

June 19, 2013

Blueberry Note Cards!

It is my privilege to be able to pick blueberries for a local farm.  During the months of July and August I will pick pounds of these blue beauties!  My payment is in blueberries!  What a delight to open my freezer and have these berries available all year long! 
In appreciation for the berries, I make handmade cards for the owners of the farm.  
I am getting a head start on the cards by using the Cricut Cartridge "Preserves" and two sets of stamps, "Faith Greetings" (TPC Studio) and "All Around Quotes" (Fiskars) to create the first set of cards featuring blueberries.
The blueberry images are on pages 50 and 51 of the handbook.  
I am using the Cricut Gypsy (hand held design studio) and the Cricut Mini to cut the images.
The image layers are cut in two shades of blue card stock and two shades of green card stock.  I am using a plastic drawer divider to keep the pieces separated.  I glued white paper to the bottom of the drawer divider so the pieces can be easily seen.
The first card features the cluster of berries.  The pieces are glued together and then adhered to the  card front.  I adhered one of the clusters with dimensional foam tape to give it depth.
The second card features on cluster of berries.  I used dimensional tape to adhere the image.
These blueberries are single berry/branch images.  I glued three of the branches together to form a cluster.  The top berry/branch is adhered to the card front using foam tape to give depth.
This card features the single berry/branch and the cluster.  The cluster of berries is adhered with foam tape to give depth.
Thank you for visiting "She's a Sassy Lady" Blog today!
Please come visit

June 18, 2013

Rough around the edges!

Hi everyone - it's Karon, from Karon's Krafty Korner, for my monthly visit to you all here at She's A Sassy Lady.  Thanks for putting up with me each month :-)

June seems to be the months for birthdays around here, so I have a birthday card to share with you.


For my card, I decided to have a go at a little shabby chic.  All my layers have been distressed with a Tim Holtz Distressing Tool and then I inked all the edges with Tea Dye distress ink.

The main layers are from a Momenta 6 x 6 pad called Rendezvous.  The rose topper is from Moonlighting Designs by Mary.  It is from a set of 8 called French Flowers.


I decided to add some rolled flowers,  the flowers are from the Cricut Flower Shoppe cartridge, scallop 1 on page 13.  The leaves are from the Art Philosophy cartridge, page 43.

I added a little bit of lace on that second layer to give it a more vintage feel.  The sentiment is from Scrappy Moms called Hooray for Birthdays.


This was really fun to make and once I had decided on the papers, didn't take too long to pull together.

For the inside I used the papers from the front and the little rose stamp is from a See D's stamp set called Springtime Swirls.


Thanks for having me stop by Sheila.

I hope you all have a fabulous week.

Happy crafting.

June 17, 2013

CRI-KITS MARKERS FOR SHADOWING


Hi, everyone, this is Charlotte C.  Thank you, Sheila for another opportunity to share a card with all your followers.  I made this rather simple card for my son-in-law for Father’s Day and thought I’d share how I “shadowed” the lighthouse and seagulls from Life Is A Beach.  I had no luck trying to enlarge the images to create a shadow cut; the proportions didn’t seem to work for me. 

I actually drew the images with a black Cri-Kits marker directly on some designer paper.   First, using my Gypsy, I placed a rectangle, the lighthouse and seagulls on the screen mat to size everything, then put my DP in the exact location on my Cricut mat and had it draw just the lighthouse and seagulls.  


I assembled the lighthouse, but when I placed my lighthouse on the drawing I realized the black border wasn’t showing enough, so before adhering it, I used a ruler and carefully made the black lines thicker. 
 All I did after that was glue the lighthouse and seagulls directly to the DP, pop-dotted the second set of seagulls, stitched that layer onto a second speckled layer which I inked and used pop-dots to adhere it all to the card base.  A little bling for the light.
Here’s the finished card and the inside.  


The finished card is 5 x 7; lighthouse layer is sized at 4 ½ x 6 ½ ; second speckled layer is 4 ¾ x 6 ¾ ; lighthouse drawn and cut at 5.4; seagulls cut at 2.0.  Layering papers are from Close To My Heart and the rest is Stampin Up.  Stamp is Anna Griffin (so not happy with how I did that part, but it is what it is.)

I think this card would be suitable for any “manly” occasion.  Thank you for stopping by today and I wish you a happy week.  

June 15, 2013

My Copic Marker Inventory Book


Pin It
Hi everyone,

I am Carol from happyexpressions.blogspot.ca. This is my first posting for Shelia at She's a Sassy Lady. Most of you know how much I like my copic markers. Its nice to be able to see what I have and what other colours I would like to have.   I made this journal quite a few months ago but couldn't decide what I wanted as my front cover. Well as you can see I finally finished it. Her is my copic Inventory book.

 I downloaded this copic chart from Frillions by Eli at
 http://frillions.wordpress.com/2012/01/02/copic-colors-notebook-tutorial/
There are a lot of different charts made by a lot of talented people. You just need to find one you like and download it.

I printed off the pages and cut them into 4. The front and back covers were made from the inside cardboard of two large chocolate bars. The chocolate was so yummy. They are a beautiful gold and feel as strong as chip board. I used my cinch to bind the book. This book was also the first book I bound on my cinch. How easy it was too. I then took my markers and added the colours to the pages.

To decorate the cover I used SEI winter song DSP stack. Its a Christmas stack but it had the colours I was looking for. The Chocolate brown solid paper was a scrap piece so I am not sure where it came from. I used Cricut Craft Room to cut the letters copic markers. Its from the free font cricut basic. I used a white gel pen on the letters. The flowers were white but I coloured them with E29 and the ribbon is from my stash.    The image is a Saturated Canary Digi called Blanche. I used a  SU die around the image for the shape. I doodled around the shape and then coloured with copic. E00,000,21,29,37,35, R24,27,29, Sukura clear glitter for the earrings.

 Stamp - saturated canary Blanche
Papers - Sei winter song stack, other, neenah white cs,
Ink - printer, copic markers  E00,000,21,29,37,35, R24,27,29, Sukura clear glitter pen, white gel pen
Accessories - SU die shape, big shot, cricut, cricut craft room, free cricut font bacic, sm flowers from stash, brown ribbon, cinch, card board,

Thank you all for stopping by, happy creating!

June 14, 2013

Father's Day Cards with Embossing Paste

Hello, It's me again....Danita, from danitasdesigns.blogspot.com. presenting you my project for this month for She's A Sassy Lady!
 
These are some cards I made for my husband and Father-in-law for Father's Day. It was painstaking hard!!! You have to be careful with "guy" cards not to make them too feminine. No Bling!!! No Ribbon!!!  That's a problem for me!!!  lol
 
I did get to use my new Embossing Paste from Dreamweaver. I love this stuff!!! It's thick and glides over the stencils really well.  Be sure to scroll down and check out the close-up. Did I mention this is my first time using both the Embossing paste and the Stencils?  It's not perfect but hopefully I will get better with practice.
 
Details:  Dreamweaver's Metallic Gold and Silver Embossing paste.
              Dreamweaver's Stencil
              The Paper Company Black Linen Cardstock (really nice and heavy)
              Gold Metallic Paper
              Silver Washi Tape
              EK Success border punch
              Cameo Sketch Pens - Gold & Silver
              DCWV Glitzy Glitter Stack (yucky paper, but I have so much , I have to use it)
A closer look. The initials were done with the Cameo sketch markers. I went over them with an opaque marker from American Crafts.


Here's the inside
I cut a separate piece of cardstock about 4 inches high, rounded the corners, decorated and stamped it. I left a 2.5 inch opening in the middle to slide in a gift card.
 
This is the Embossing paste that I used.  You just tape the stencil down on your cardstock and spread with a craft spatula, lift slowly and let it dry.  It took about 30 minutes t dry.


Close-up shot.  You can see how it raises up off the cardstock.

Thanks for looking and I hope everyone enjoys Father's Day with their loved ones!








