June 12, 2010

Welcome To All Our New Followers! An Thank You To The Old Ones!

Shes A Sassy Lady is so pleased to be serving you and we welcome you to our humble site. We are growing extremely fast and continue to strive to offer projects that you can easily follow and make on your own. Each week presents a Card Kit Drawing on Monday followed by a new project daily. Every once in a while we offer something new on the weekends, but that time is usually reserved for our families.  As a matter of fact stop by later today for an awesome project that I just can't wait to share!
Shes A Sassy Lady boasts 12 Sassy Designers and myself Sheila aka SassyLady all who love to share our passion of paper crafting. We love passing on that passion by helping fellow crafters along the way. Each Sassy Designer is soooo talented and comes with varying degrees of expertise. Some love card making others pages, books and even boxes, but whatever their area is you will learn and enjoy the projects they offer. So please join us each and everyday or better yet just subscribe and you will receive the current post offered. If you ever need additional information or have a suggestion please email me at; shesasassylady@hotmail.com.
Now be sure to leave plenty of Blog Love (comments) as that is the only way we know we are appreciated and that also gives us an idea of what areas you really enjoy so we can continue in the right direction.
Be sure you enter our weekly contests and from time to time we are known to have some pretty nice blog candy just because we love you!
signature

June 11, 2010

Applying Vinyl In A Few Easy Steps

Hey everyone, this is Kimberly and I am so excited that it is my turn to share another project with you!  Be sure to stop by my My Craft Spot, for more fun projects and vidoes!

I love to put vinyl sayings on my walls, especially for holiday decorations!  Today's project is a fun reminder for my kids bathroom.  I actually saw this on the wall at our dentist's office:


Vinyl lettering is so fun and easy to do with the cricut!  The Lyrical Letters cartridge is my favorite for vinyl lettering  (Easy to weed!).  Here is a video showing how I cut and 'weeded the vinyl'.  I also show you how to put it on the wall. :-)


Be sure to check out my blog, My Craft Spot , for more cards, scrapbook layouts and videos! I made these fun cards using the Create a Critter and the Just because Cards Cricut cartridges.


Have a great weekend!

June 10, 2010

Canvas Room Decoration

Good Morning this is Barb from Crafty Girl and I am soooo excited to be making my big debut here at She's a Sassy Lady!! I have learned so many things from all of the other Sassy designers... I just hope I can inspire you a wee bit too!! Normally I am a LO kind of girl!! I love my photos and I love to scrap them. However, I am going to do something completely different today!! I made a canvas wall hanging for my daughters room and I really like the way it turned out... so I thought I would share it with you!! It has become a fun project in our house and we are making them like crazy!!

I started out with a plain white canvas that I picked up at Big Lots for $3!! Gotta love that price!! The canvas I used was a 9 x 12 but they have other sizes. I covered the canvas with a layer of pink acrylic paint. I wasn't real careful with my painting and I shaded in a little white paint too.


While the paint was drying, I cut out several of my daughters favorite fashion words (after all, she IS going to be a fashion designer some day!!) using the Forever Young Cartridge. I used Mod Podge to secure them to the canvas. I applied the words to the outer edges of the canvas because I wanted to keep the middle part open for the monogram letter I would be adding later!


The background for the monogram was cut out using the emblem button on page 71 of the Forever Young cartridge. I added some Glimmer Mist to the black piece of cardstock to give it a little sparkle! After adding the large L and some gems and stickles to the green cardstock it was ready to be assembled. I pop dotted each layer to give it some dimension. (There are pop dots under the green layer and the black layer. The L was glued directly on to the black cardstock.) I then started to lay out some of the shadows that I had cut to see how I wanted to arrange them. I wanted to cover parts of the words but not so much that you couldn't tell what the word said.


One by one I started to layer all the pieces together. My daughter is all about bling and sparkles so I added as much as I could!! The top of the lipstick is covered with pink Stickles and I added Stickles and a gem stone to the flower accent.


Because my daughter really is into fashion, I tried to make the dress as realistic as I could. I added some silver trim to the bottom of the skirt and added more Stickles and gems.


I would love to say that I planned for the purse to have the pattern perfectly centered on it but I have to be honest... I was just plain lucky on that one!! I thought it looked great the way it was, I only added a single flower to it!!


Here is the nail polish bottle. I added stickles first to give it some bling, then I covered the stickles with Clear Accents to give it the look of a nail polish bottle.


And finally.... you have the final product!!


I also made this one with my daughter for her teacher. I let Lauren design it the way she wanted it!! She even chose the bright red background color!! She is so excited to give it to her teacher at the swim party today!!

I hope you enjoyed my projects and maybe even learned a thing or two!! Thanks for stopping by!!

Barb :)


June 9, 2010

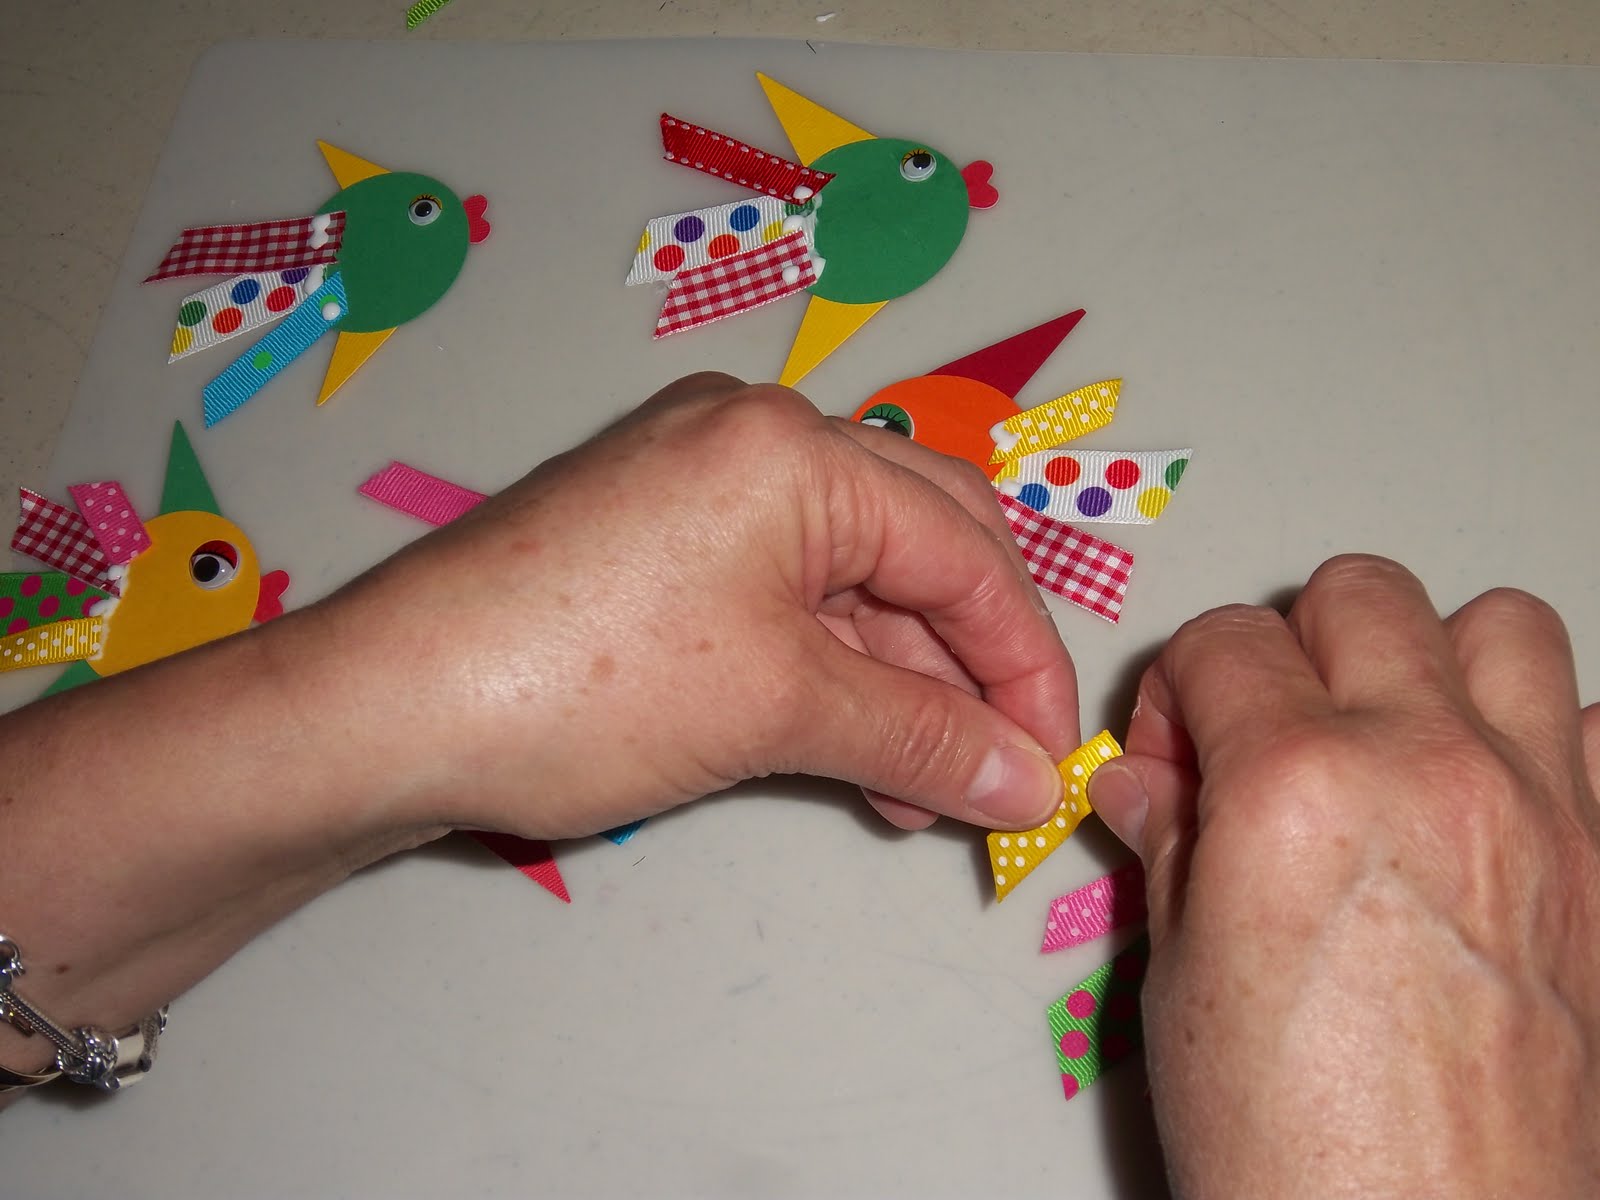
"Ribbon Fish" Tutorial


Hello! I am glad to be back at "She's a Sassy Lady" Blog. Today I am teaching you how to make  this adorable "Ribbon Fish".

Supplies:
Circle Punch
Triangle punch
Small Heart Punch
Cardstock
Ribbons
Googly Eyes
Rhinestones


Directions:
Punch  out some circles in the colors of your choice. I used a 1 3/4 circle punch. They could be larger or smaller.


Punch out some triangles and hearts. Glue to the back of the circle.


Glue ribbons and googly eyes to your fish.


Embellish with flowers and buttons


Add to your summer pages and voila! You have your own "ribbon fish".


 Thank you Sheila for inviting me again and thanks to everyone for stopping by. Have a blessed and fabulous Wednesday!

Beatriz


June 8, 2010

Enter To Win Owl Card Kit Give Away

Yummy paper turns this EASY DESIGN into a winning combination. If you need a quick card this is it! I love how easy this is to cut out and put together and so will you. One cut, a little glue, add some eyes and this card is good to go!
Here is the design.... so easy, and you have scraps when you use 2 - 6x12 sheets of cardstock!
Above is the true colors, some photos were taken in the wrong lite so they looked a little yellowish.
Glue the top on.
And the back... notice I used my hide contour!!! Love that feature!
I added the big round eyes, and all I need to do now is write a little note and address it!
How easy is that! Remember I said the Card Kit Give Away is going to feature ALL types of cards, from super easy like this one to very complex. Some lucky lady is going to get this kit to make a little Sassy Owl sent directly to their home. All you need to do is make a comment by Sunday 8PM on 6/13 and watch for the announcement on Monday morning by 6AM on 6/14/10. It's that easy! But at ShesASassyLady, everyone is a winner because this is the Sassy Owl Gypsy File  for you to download.

So be sure to leave a comment and make sure I know how to reach you. I am always encouraged by your sweet - sweet words, they inspire me to keep scrapping and sharing things with you.
signature

We Have A Winner! Tommy Turtle Card Kit...

This Weeks Winner Goes To:
Gramjak said...

I thought the darling Whale last week was my favorite, but -- Call me fickle! -- I absolutely ADORE Tommy Turtle. This is truly a precious card. I would LOVE to win and make lots of other little turtles for a party we have coming up.
"Hustle on over to the party -- don't be slow!"
Many thanks!

GRAMJAK YOU HAVE UNTIL 10 AM ON 6/15/2010 TO CLAIM THIS CUTIE OR A NEW WINNER WILL BE CLOSEN.

Please email me at shesasassylady@hotmail.com with your name and address so I can get this in the mail to you! Card kit must be claimed within 1 week or it will be forfeited to another entry.
Thank you everyone for joining in on the fun. Come back later today and enter for next weeks contest.
signature