November 6, 2010

Gypsy Made Simple - Shaker Card

This is a MUST HAVE Card for your card stash. I had a hard time deciding what to make this week until I saw my first Shaker card done by Shantaie Fowler of Inking Pink featured on the Circle Blog last week. WOWSERS how fun are they? Well you know I just had to have for my stash, which means you also need it for yours for that SPECIAL person you really want to know just how much you care!
So let's get to work! Get yourself something you enjoy drinking turn on your Gypsy and follow along to learn how to make this AWESOME card! Remember if you do not have the carts I use just use ones that you do own.

This first video is the basic card and the layers build from there.
Here is a close up of my Gypsy screens. I thought you might like to see that. I have so much free space that after this video is over, I will go back and rework the file to have two up so that I can cut 2 cards at once.


The last video finishes up so that you would have one card ready for good cut.
This is a close up of the file after I reworked the file. Notice there is two of everything so that I can have two complete cards.
Here are the pieces for the front of the card and I added an extra square to make the inside of the card more attractive. This is optional.
The third page cut is for the acetate on the left and then an area for the sentiments on the inside of the card. Again this is optional.


This video shows how to assemble your Shaker card, so be sure you take a couple of minutes and look it over so you can assemble your card.
The first thing you do is cut all your pages.
These were all the pieces for both cards.
The solid base I used had a white core so I inked the edges to give it a nicer look.
Then I put the front of the card together reserving the skittles and glossy accents until the card was assembled. I used my ATG all around the back of the front making sure there were no gaps. I then place the acetate on the back.
Then I used this wonderful foam tape and placed it all around the edge making sure there were no gaps that the confetti could escape from. Then I sprinkled confetti in the center of that and carefully centered the backing sheet and pressed down securely creating a sealed area for the confetti to move around in.
Isn't this cool? Shake - Shake - Shake, shake your booty! LOL How fun is this?
As soon as I got done playing I moved on to the base of the card. I thought I was going to put ribbon on an tie a bow, well that didn't look good so I left the ribbon you couldn't see as it was taped on and used my pink ATG to get plenty of adhesive on the back of the shaker. I then centered it on the base of the card.
I put together the inside of the card, I really like the way these optional cuts look. After that was done I added my skittles to the hat and glossy accents to the title to complete my card.
Now doesn't that look awesome? Lots of steps I agree but if you do one step at a time you are bound to get to the finish line and have a beautiful card to give someone special in you life! I sure hope you liked today's project and will make one for yourself as this is a MUST HAVE CARD!

Now I CHALLENGE YOU TO MAKE A CARD AND LINK IT UP TO MY BLOG so we can see what you did and what style you chose. The skills that you are learning will be your stepping stones for everything you design in the future. Remember if you have any questions be sure to email me at ShesASassyLady@hotmail.com or if there is any area that you want me to cover please do the same as I am using your questions and suggestions for future Gypsy Made Simple features.

Thanks for your continued support and sweet words of encouragement. Your comments are what inspire me to share with you.
signature

November 5, 2010

Butter to my toast - KISS

Hello this is your friendly neighborhood Pam from The Bug Bytes Sassily  today :) on Sassy
Oops forgive me . Spiderman has been stuck in my mind seeing all the spiders hanging around after Halloween.

I still have not completely recovered :) but decided to craft anyway. The main culprit which put me here is also helping me out now  - yes - My Imagine.
With limited supplies (same old story as for TuesdayTreats) I decided to make a card for my honey bunches who has been taking such  good care of me. It is not easy doing Indian cooking let me tell you especially vegetarian cooking but hubby is even cooking dinner after a tired day at office. Poor thing. So here is a simple card with my Imagine and my new bounty - Katie's Kitchen.
So from Pam's kitchen using KISS (way to go Nicole - your technique - Keep IT Sweet n' Simple ) here is a card


the inside


Now for the specifics

The pattern paper  is from Katie's Kitchen too. I just took a bonus content image (from pg 29 in the book - middle one for those having imagine) which was square and had some pattern and  flood filled it with another pattern (pg 36 -left one) .Simple ain't it without worrying about adding square and etc etc. I set the size to 10.5 square. Didn't mind the extra paper which I was going to cut out of it as right now I am eyeballing things with the way things are with Imagine
Then I took the toaster image (on pg 13 top) chose to layer. Cool thing I found out  was (well can't blame me if it is already out there but I got my Imagine after all the replacement's just now and have to still do some serious playing . Well.if I choose layer and edit the first image itself (the combined one) and choose to add (if you change patterns come back and select the 1st combined one) - it adds all the layers so that prevents me from going to each layer and setting the size which with this update is cumbersome as it sets the size back to 2.0 and we have to keep changing . Yeah!!
That was it. I decided to add to also use images from pg 26 and 27 (top ones) the list ones. I  used the 1st layer one from page 26 for front of card to add my sentiment (Toast & butter - poor honey he was really toast this week taking care of me and managing kids and going to office)  in my handwriting and the 2nd layer - just inked edges with  red momento markers and added it to the back with the pg 27 list.
Of course what I write in there will be for my honey's eyes only :).
I added a ribbon and stuck it in with fabric glue after tying a knot and then took 2 square green brads (manly - square - get it?  :) ) and distressed it with sandpaper.
Oh I forgot the toaster image does not cut out with white - but since I needed to pop it up I just traced around the completed image on the left over paper and used my handy dandy scissors.Since I had used white paper this time I used distress linen and smudged it around and then popped the toaster image.Also with the same momento red marker which i used to write the sentiment made some f 'aux stitching around the label/list
So hope you enjoyed my simple K.I.S.S card!!

November 4, 2010

"WHAT THE HECK IS UP WITH SANTA'S PANTS"?!!! TREAT BOX

Hello, everyone!  It's Audrey again!  As before, I'm so very happy to be back, and many thanks to Sheila for allowing to come and share another project with you!

I think I was supposed to be doing a Thanksgiving project, but after racking my brains for an idea, this was all I could come up with.  However, this is soooo cute and so easy, I think you'll all forgive me another Christmas project so soon!

I'm calling this a "What the heck is up with Santa's pants?!!!" Treat Box:


Isn't it just sooo cute?  Okay, well let's get ready to put it together?  Let's go!  What you'll need are:

2 - toilet tissue rolls
1 - 8.50' x 11" sheet of red cardstock
1 - 8.50" x 11" sheet of black cardstock
1 - small piece of batting (or white faux fur material)
2 - 3" white cardstock circles

Note:  I used a hot glue gun to glue this project together -- makes it super quick!


Before beginning cut off 1-1/4" from one end of each the toilet tissue (TT) rolls.  Place TT rolls on top of  each of the 3" circles and glue in place.  Next, make slits around the extending edges of the circles all the way to the outer edge of the rolls, as in this example below:


Press the slit edges up around the TT rolls and glue in place.  You will now have this:


Next:
Cut 2, 3.50 x 6.50 squares from the red cardstock.  Wrap and glue a square around each of the TT rolls lining up the cardstock even with the bottom.  The extending top red cardstock squares you will slit around the TT roll, fold down and glue.  The TT roll on the left in the picture below shows the slitted paper and the right TT roll shows it folded and glued to the inside of the roll:


Now cut 2, 1/2" x 6.50" from the batting (or faux fur) and glue one strip around the bottom of each TT roll (cut off any access and discard):


Now you're going to glue, along the paper seams -- with seams facing each other on the inside of the TT rolls; glue the TT rolls together but only about 1/4" of the way down.   It should look like this, with a slight gap between the 2 TT rolls:


And these are Santa's pants legs!  Cool, huh?

Next you're going to cut:

1 - 1/2" x 6.50" strip from the black cardstock (this will be the belt to the pants)
1 - 1/4" x 6.50" from the batting (or faux fur)
2- 1/4" x 8" strips from the red cardstock (the belt loops)

Glue on all the pieces as shown below (cut off and discard any access):


Finally we're going to cut 2, 1/4" x 8" strips for the suspenders.  Attached the front 2 straps to the front of the box, but criss cross, one over the other in the back of the box when gluing.  It will look like this:


I used Stickles to add a belt buckle and now it's done!  Stuff it with Christmas candies and goodies!!!

I hope you like my project and enjoy making your own!!!  And, if you do, I sure would love to see what you did!!!

I'll be seeing you!

November 3, 2010

Fun Fall Layout


Hello my scrappy friends. This is Kate from Sassy and Scrappy and I have a wonderful fall LO to share with you today. I took these pictures last week and was totally inspired to get them scrapped. I love fall, the colors and smells that lead to Thanksgiving and Christmas.

Here is the original layout I designed in my Gypsy. You will notice a scarecrow in this picture that didn't end up on the layout. I kept him though! I also added a lot more leaves.


On this layout I sewed two pieces of paper together. To do this I used tape to attach the cardstock together (see picture). It worked, but it isn't very strong. In the future I think adding a strip of paper to the back of the 2 pieces of cardstock would be a better option.


Here is a picture of the paper in my Janome Sew Mini. I love this little thing.

In this picture you can see the stitching


Here is a close-up of the title and journal tag


And here are the two pages of the layout

Details:
•Mat sizes 4 1/2 x 6 1/2-inches
•Title-"Fall" cut from the Country Life at 3.75-inches
•Title Mat-Lacy Labels 4.08-inches
•Maple leaves-Create A Critter cut at 2, 2 1/4, 2 1/2-inches
•"Other" leaves-Everyday Paper Dolls cut at 3 1/4, 3 1/2, 5-inches
•Journal Envelope-Die Cut from Papertrey Ink
•Journal Tags-Papertrey Ink
•Satin Ribbon from Papertrey Ink
•Tim Holtz Tiny Attacher
•Ink from StampinUp!, Papertrey Ink and Colorbox Chalk
•Brown Cardstock-SEI
•Pattern Paper-MME 'Ooh La La'
•Basic Grey yellow brads

A big thanks to Sheila! I hope you enjoyed this layout and thanks for letting me share it with all of you! Thank you for all your wonder comments as they inspire me.

November 2, 2010

Howdy Pardner - Window Card

Doesn't this look like fun? I just love window cards and this is a great Birtday card for the guy in your life. It is easy to make and I know that you can make one just like it with a little help form your Gypsy and Cricut! If you would like instructions just click on  Gypsy Made Simple - Window Cards for and easy step by step video.
This is a close up of my Gypsy base card screen.
And another of the pieces I used on the card.
Here are the papers I used. The black and wheite is from My Minds Eye Vintage Garden stack. Do click on the photo for a close up and you will see it glitters.
I cut all the pieces and started right in on putting the card together.
First I scored both pieces of the base.
And I placed a nice firm fold on the card and looked at both side by side to make sure I cut the back of the card.
As you can see from this photo all I cut was a sliver off the back of the card, basically just the fold so that it would lay flat and line up when I place it on the back of the card as a liner.
Then I inked the center so it looked as if the stripes continued all the way through and not like I had two indidvidual pieces like I did.
After the back and front were glued together then I proceded to get my parts ready and just attached them where they belonged.
I am finally learning that it is the little details that set apart our designs. I used a white gel pen on the boot to make it look like stitching and the brim and tassle on the hat.
This is the inside of the card. See even it looks like fun!
Here is the completed card standing up.... I don't like a card unless it can stand up and be displayed by the owner.
And her is the close up of the finished card. You can click on the photo to see a close up and you will see the awesome papers that I used.
I am so glad you stopped by today and sure hope you liked todays project I know I had a lot of fun making it. I have so many Birthday cards to make with 5 birthdays in November!!! Yikes I guess I better get back to work!
Thank you for your sweet word or encouragement as they continue to inspire me to keep sharing with you!

November 1, 2010

Sweet Sophie!

Hello again!  This is Lori from ScrappinMyStressaway today to show you how to create your own templates to use with alcohol ink.  I brought along my sweet niece Sophie to assist!   
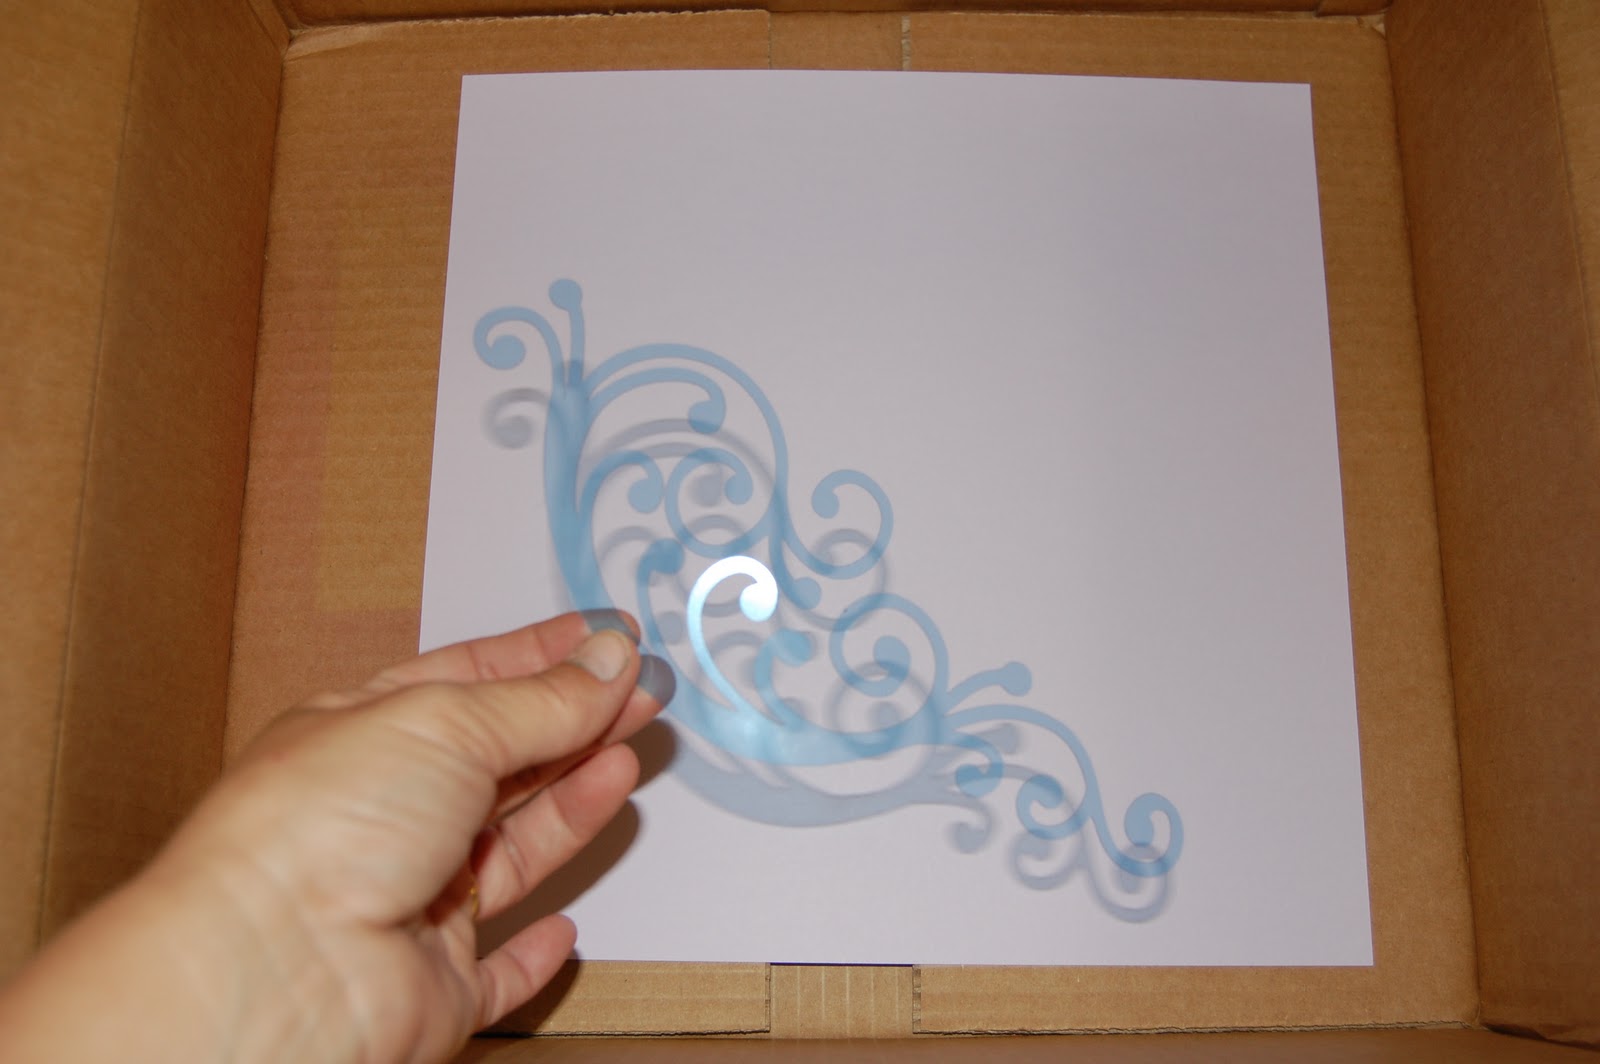
I picked up this pack of Blue Stencil Film at Michaels.  I used my deep cut blade and multicut 2 times.  I kept my settings the same as normal on my cricut.  Be sure to leave the blue film on when cutting.  I also just left the film on as it would be a tedious project (aka waste of time)!!


I found my template on the Creative Memories Reminisce Accents cartridge.  I sized and lined up my template to fit the stencil sheet.


This was the first time I tried this and I was very happy with how it cut!

Thank goodness I have been shopping online as I had several boxes on hand to use for the next part (he he).  I picked out a pale lavendar piece of cardstock and set it in the box.

I used my Purple Twilight alcohol ink mixed with rubbing alcohol (or you can purchase the official alcohol mixing solution at Michaels) in a Mini Mister.  My test spray was too light, so I added more purple. 

Here is the first spray.

And after the template is removed.  Isn't this gorgeous!!

I wanted just a little of the swirls on the opposite corner.

And here is my custom swirly paper!!  I did save the negative template piece to use on a future project (no I am NOT a hoarder ~ craft supplies don't count!!).

I added some ribbon, silver flowers, pearls, purple gems and a silver title.  I cut Sophie out of Songbird.  I really love how the letters weld!  I am going to frame this and give it to my niece for her bedroom.  Sophie is 8 going on 18!!

Sassy, thanks for having me on your blog!  You have been such an inspiration to me!!

Lori