


I love boxes!!! And recently I saw a candy box -- but what I really saw was a card box!!! Huh? Okay what I mean is I didn't want to do another candy box but liked the candy box I saw as a card box, so I did a cutfile for myself to have what I wanted -- a flip top card box! And I'm going to share it with you so you can have one too. This box, depending on the embellishments on your cards, will hold up to twelve 4.50" x 5.50" cards and envelopes. Here's the box:

And here it is flipped open:

Now let's get to the tutorial so you can make one! This box requires you use a 12" x 24" cutting mat, it's a one-piece box and it's rather big, so you'll need:
1 - 12" x 24" sheet of cardstock for the box template
1 - 8.50" sheet of corresponding cardstock for the box panels
Glue of your choice
12" x 24" Cricut cutting mat
To begin constructing this box, I made and cut out the cutfile (the panels are included on the available cutfile):

Here's what the box template shape and panels will look like once they've cut:

As you can see from the picture above, after I cut out my file I included a step which will not be on the cut file. After cutting, I scored and bone-folded the template. It is unnecessary to do if you're familiar with folding cutfile templates; however, it makes it easier for me to fold evenly and makes neater edges on the final box:
:

If you'd like to do the same, the scoring measurements are:
With 15" side across top of scoreboard = 3.50", 5", 9.50", and 11"
With 9.75" across top of scoreboard = 1/2", 2", 7.75", and 9.25"
NOTE: The longest end in width of the template has an added 1/2" added. This will be referred to in this tutorial as the bottom end.
Again another unnecessary step but looks nice, I also clean up the small tabs on my template by cutting a pie wedge shape from each end of the smaller tabs. (This is only necessary on the cutfile from the Plantin StoryBook cartridge; it is already done for you if you can use the George cartridge cutfile):

Next, I emboss my panels and all my pieces are now ready for assembly:
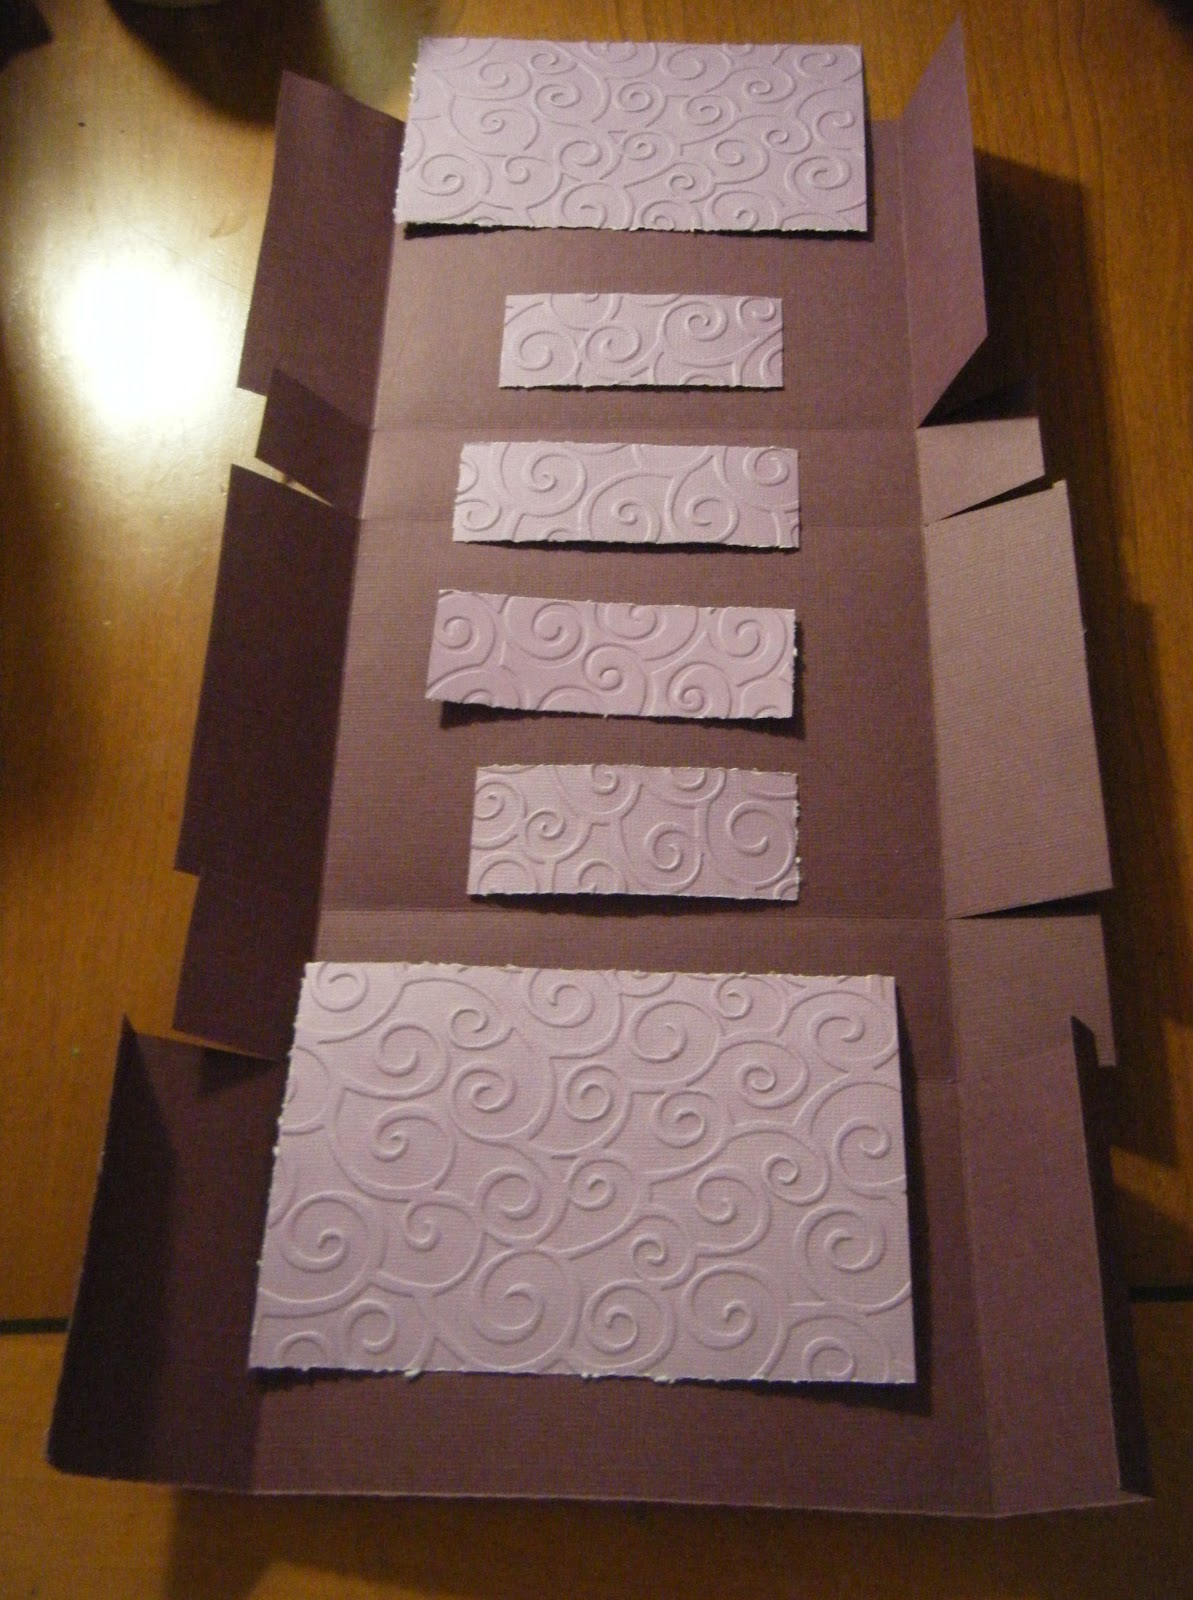
Okay, I'm going to put it all together!!! First, notice the sizes of the panels are different. One set is 1/2" longer than the other, this is important to know because of where they will be placed when glued to the box:

With my pieces ready, I began by gluing the panels to the box template, but I didn't glue on the middle side panels; I'll tell you why later. The bottom of the box, where the 1/2 tabs are, is the longest end; the top is the shortest end The shortest side panels are glued at the top of the template, and the longest panels are glued to the bottom of the box template as shown below:

Again, please note, I did not yet glue the middle panels on the side middel tabs!!!
To begin forming the box bottom, I folded up both score lines on each side as shown below:

Next I glued the top on each of the 1/2" folds:

Then I brought up the whole bottom, carefully aligned it with the score lines on the next largest box square above it (skipping the short sqare), then glued it in place like this:


It is important that the 1/2" tab is aligned along the score lines on each side for the box to be proportionate.
Now I can fold up and glue the small tabs to the side of the box (I'm pointing out one of them to you on the picture):

I do not fold in the extending back side tabs yet! Before I do this, I first turn the box to the other end (the top end) of the box; fold up the small middle tabs and add glue to the top each tab:

As I did with the bottom end, I fold up the side tabs, raise the entire top up to meet the middle tabs and align them with the bottom edge of the top and along the score lines, and glue in place:


Okay, the top of the box is done. Now I turn the box around again and now do you remember those last back side tabs at the bottom I didn't glue earlier? Well, it's time now to glue them in place. Add glue and just fold them in place:


If you look closely at the picture above where the last back side tabs are glued down you'll see I made a mistake. These side tabs extend slightly over the top edge of the bottom box it's adhered to, so I have glue at the top of the tab where it doesn't adhere to anything. Don't make this mistake, glue only up to the point where the sides will adhere. Fortunately, for me, this glue dries clear!
The reason for completing the top of the box before folding in these bottom tabs was just to make it easier to manuever and get my fingers in the top portion when gluing those smaller tabs in place.
Now for those last 2 middle side panels from earlier, let's get them glued on! The reason they were last was because they needed to be aligned with it's companion panel on the front of the box. If you look at where the middle panels are to be placed on the picture above, you'll see that because these panels are not on the same side tabs as the ones on the top of the box you can't judge how to accurately and evenlyalign them with the panel on the front until the box is completely folded:

Well..., the box is now complete!!! Let's have a look at it:

To close the box, simple pull down the top tabs of the box over the bottom box:

Lastly all I had to do was decorate and embellish it!!! You can do yours anyway you like!!! It's ready to flip it up to open and pull down to close!!! LOL!!!
I hope I've made this tutorial clear and understandable; if not, please drop me a comment.. You can find the link to my blog by clicking on my name highlighted at the beginning of this post.
A cutfile for this box is available on my blog at the bottom (the very end) of my post today. Again, use my name above to link to my blog to come over and grab it. The two (2) files using the George cartridge and/or the Plantin Storybook cartridge are both on the available cutfile. If you are interested in my converting either of these to Gypsy cutfiles, please let me know.
The cutfile will also be available on my side bar under the "Cut.Files" drop-down box within the next several days. Please feel free to drop by later to check, if you'd like!
Hope you like the box, and thank you so much for stopping by! Hope to see you next month!!!


9 comments:
Soo pretty! TFS
You do amazing work Audrey!! Love your card box and your instructions!!
Audrey this is just fabulous. Love the card box and the tutorial is so easy to follow that I am sure many ladies will be making his wonderful project! Thanks for sharing with us today.
Audrey! This is so stinkin' cool! I can't wait to try this!!! You are just too clever! I just can't keep up!
This is so pretty!!
Super fun project. Love the bling gem flower too. :)
This card box is just wonderful. I have to try to make this. TFS
Carol
What a dalrling little card box. Handy for keeping note cards it. TFS
This is GREAT !!!!!
I can't wait to try it!!!!
thanks for the great tutorial...
Post a Comment