These would be great for any small bottles such as the large Stickles, Martha Stewart Glitter Glues, or mini ink pens you have in your crafting area and if you are giving someone one of those small of liquor bottles to someone special for Valentine's or any occcasion, this is the perfect size :).
Here's what you need for this project:
1-8" x 4 1/2 piece of cardstock and a
1-small oval punch
1- 1 3/4 x 1 1/4 pattern paper
2- 1 3/4 x 1 pattern paper
1- 4 1/2 x 1 1/4 pattern paper
1- piece or ribbon
Scoring Board
Scissors
Adhesive Tape
Adhesive
Corner Punch
and what ever you want to decorate the oval on front
(this projects is a great way to get rid of your scraps)
I chose not to use the circle and used an oval.
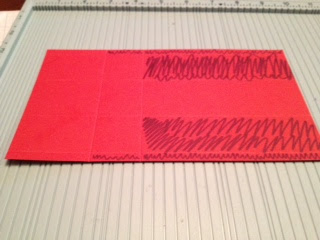
To start:With the short edge across the top of the Scoring Board take the 8 x 4 1/2 inch paper and score at 1/4, 1 1/2, 3 and 4 1/4 inch.
Next:
Turn the paper 90 degrees and so the long end is at the top and score at 2 inch and 3 1/4 inch.
Then:
When all score lines are made you will cut away all the shaded areas.
It will look like this when you finish.
Now:
Take the corner punch and round the left and right corners of the long strip on the cardstock paper.
Now:
Cut slits in sides to look like this.
Then:
Take the 3 small pieces of paper and glue them to the front of the holder.
See Below:
**NOTE** If using pattern paper apply paper upside down.
(Learned that the hard way)
Next:Turn the cardstock paper over and glue the long piece of pattern paper to the cardstock
See Below:
Thet Nest Step is:
Apply your adhesive tape to the edges as shown below.
Lastly:
Once you have applied adhesive tape to the edges you can fold the pieces to put the holder together so that the pattern paper is on the outside.
And here is the completed holder.
Then you can decorate anyway you would like.
And here is a variation of the holder.
I put candy inside and folded down the top and made it into a treat holder, perfect for Valentine's Day.
I hope you enjoyed my post and will take the time to make some for yourself.
Please visit my blog at thecraftypinkbutterfly.blogspot.com and if you like what you see please follow me.


14 comments:
OMG this is such a cute treat holder!!!!
I saw this before and wondered how to make it. Thanks for sharing. Your papers are just perfect.
Hugs,
Larelyn
Such a cute and clever project. Thanks for the tutorial.
Hugs,
Larelyn
I love it, I am going to scraplift for a RAK I am doing:)
cathyplus5.blogspot.com
very cute project :)
Awesome project! I love it!
Love it!!!It is a Great idea for a treat or gift.Awesome!! Will try it out!
http://craftingwithcreativem.blogspot.com
Oh I LOVE this!!!!!
I will be lifting this from you, what a cute idea,
TFS!!!!!
This is just WONDERFUL!!! What a wonderful design!
What a great gift/treat box and thanks for the awesome tutorial!
Shakey what a wonderful project... I was out of town yesterday and was delighted when I got to see this.... AWESOME. Love your tutorial to. Thanks for sharing with us.
super cute
rosiemini@gmail.com
www.scraplovingminis.blogspot.com
Such a clever idea. Love this. :)
Love this..thanks for the tutorial. May have to make one of these:) TFS!
Sherrie K
http://sherriescraps.blogspot.com
Post a Comment